I’m always surprised when I look back on the year and see I achieved more than I thought, even this year when I know I haven’t had the opportunity to make things as often as previous years. I’ve had quite a lot of changes this year, including an additional 2 people in our household, so I’ve had less space, and less time to make things. And, like I mentioned in a blog post not so long ago, production anxiety has made it difficult to just enjoy making things. Luckily, I have the Well Being centre sessions which help with having a nice space to be productive/creative in and the time set aside nearly every week to do it. I liked Ruth’s idea of splitting the year’s creations into two slide shows, so I’ve borrowed it! Here are some things I made in the first half:
This slideshow requires JavaScript.
The plan is for a couple of people at our house to move out before too long, and, I don’t want to count my chickens, but I’ve pretty much redesigned the spare room in my head to be my new studio! It’s a great room too, upstairs and facing South-ish, so it gets more ‘daylight’ than any of the other rooms at this time of year. I started working on a nuno workshop during the Summer, but just haven’t been able to get very far without space or light for taking photos and video, so hopefully, I’ll be able to work on that before too long. As well as liking Ruth’s idea for the slideshows, I like the recommitment to a daily dose of fibre too. I’m sure I must spend at least 5 minutes a day doing something to do with fibre, so I’m going to start keeping a log of what I manage. It might make me feel less like I’ve done nothing! Here’s a slideshow of stuff I made or did during the 2nd half of the year:
Last week in Ruth’s post Batik Post she had a scribble tree. I have always liked them so Ruth suggested I make some. Ok them what to make. then I remembered these felt pieces I made a long time ago, I think, because I do not remember making them or what they were for.
They seem to be white felt with black silk hanky on them that were make to the prefelt stage, then cut out and put on some black prefelt(maybe) and felted again. I had no idea what to do with these but then thought why not just treat them like pieces of tile and just make a picture on them like painters do.
First I needed some tree green yarn so bot out my carders. It is some sort of curly fiber maybe Blue Faced Lester as that is what I have most of and the curls are small.
I made some rolags to spin. It is full of lumps and nepps so it will be a textured yarn.
I spun up a single, then plied it and made it into a center pull ball ready to use.
I used the yarn to needle felt a scribble tree onto one of the bigger pieces.
I decided it needed a star so used some embroidery thread to add one. I would like to add some hanging Christmas balls but there really isn’t room for them. The piece is only about 4 inches square.
I decided to try it on one of the smaller pieces too about 2×3 inches. The picture on the right is the back. I love how all the little stabs of fiber stick out.
So thats been my weeks worth of daily doses of fiber.
As It is so close to new year I am going to Wish you all a Fibrey New Year full of creativity. I am planning to do more hangable art work, work out an online workshop and an intermediate vessel class for my guild. But also to learn how to use my new camera to make and document my work. See you next Year(8 whole days form now).
This is the time of year when I start reflecting on what I have accomplished over the year. I know it is a cliché but time seems to move much faster now that I am a “bit older”. I remember as a child that the summers lasted so long that I got bored and longed to go back to school and Christmas took forever to get here. Now it seems like I turn around, summer is over and Christmas is here and gone. I try not to take any moments of life for granted. There are many reminders that life is short and taking advantage of the time I have is important. One way I try to do that is to take a bit of time every day, even if it is only five minutes, to create something. Whether it be fiber related, art related or just a fun, creative activity, I think it is so important to always take a few minutes in my busy day to be creative.
This slideshow requires JavaScript.
The slideshow is some of the pieces that I created in the first half of 2018. Many times, I might only have time to take a few stitches on a piece or draw a quick sketch for a design idea, but just taking those few moments always makes my day more cheerful. I get a little grumpy if I don’t get to “play” each day. One of the ways I am able to be creative every day is I get up 30 minutes early before I’m off to work and use that time to create in my studio. I almost always have something set up to continue working on so that I can just jump in and start. That time works for me but might not work for someone else. Do you have time to add 5 minutes of creative time to your day? What if you wrote it into your schedule? What if you put down your phone for 5 minutes or got off the internet for 5 minutes? Many times I have heard people complain that they don’t have enough time to do something. I think if you really want to do that activity, you can “make time”. I am busy like everyone else but I do get lots of things done because I take a few “down time” moments throughout my day to create. I have a project in a baggie to take with me in the car for when I’m waiting or I take along a sketchbook to draw or think out new ideas.
This slideshow requires JavaScript.
This slideshow is some of what I created in the last half of the year. When I look back at these photos, I think,”that isn’t much” But a lot of my time this year was for the work I did for my Level 3 Art and Design class that I’m taking. I don’t usually show much of that work here but I do share that over on my personal blog, Permutations in Fiber. If you’re interested, you can click on the link and take a look at my posts over there.
Over on our free forum, we do have a section that is called other challenges and there is a “Daily Dose of Fiber” section each month. Would you like to be more creative in 2019? How about joining our “Daily Dose of Fiber” challenge? What did you do today that was creative? Here is a post that I wrote back in 2013 about Making Space for Creativity. It’s hard for me to believe that I have been doing this for five years. I have missed a few days but not many. And I don’t beat myself up if I do miss a day. I just get back into the groove the next day and carry on.
So I am renewing my commitment to keeping creativity an active part of my life. I want to spend time in my studio, make stuff and share it with all you wonderful readers. What do you want to do in 2019?
Here’s wishing everyone a fiber filled, creative year ahead. And do please share with us what you’re creating, we’d love to see. Just join us over on the forum to share, ask questions and meet other like minded folks! And if you have been lurking over there, please join in the conversations. We don’t bite, we’re actually very friendly.
Creating this post for the forum I’m being very loose with the term fibre – my excuse is that both paper and plants are fibrous.
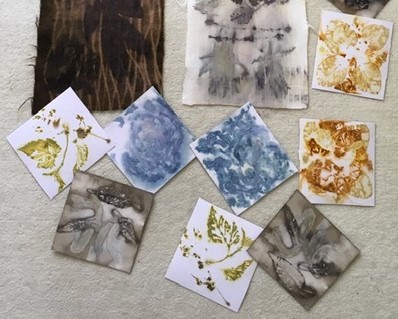
A few months ago I attended a great eco-printing workshop by Jane Hare of Pippin Textiles with fellow members of our local textile group. It was a full day of very organised activity with each person having much to show at the end. In addition to what we ourselves had gathered from our gardens, we were greeted with a large pile of interesting plant material.
We were given clear instructions and then let loose laying out our plant designs on paper, cotton sheeting, wool blanket and Tyvek….even kitchen paper didn’t escape! We tried a vinegar mordant and boiling our rolled papers and fabric, then it was paper, fabric and Tyvek with an iron mordant using the steaming method before steaming our rolls of alum mordanted paper bundles.
Thankfully it was summer and we could open all the doors otherwise pegs might have been required for our delicate noses.
Needless to say most of us were very impatient to open our parcels and see the results of our minimal efforts combined with mother nature’s magic. We were all delighted with our results.
We each had this amount to show at the end of the day. The Tyvek pieces are the 4 light squares on the left hand side in the left photo. The dark long piece is the wool mordanted with iron.
Following any workshop comes the dilemma….What do I do with what I’ve produced? In August our group holds an exhibition of members’ work undertaken throughout the year. This event always galvanises my thoughts and with it fast approaching it prompted me into action.
A while ago I received a bouquet of flowers that came with a large almost cuboid box – far too good to throw out….I’m sure I’m not alone with hoarding potentially useful objects…taa daa! I used the Tyvek pieces which were almost square (13 x 13 cm) and machine embroidered them to some linen fabric, cut to size to wrap around the box.
I used a different embroidery stitch around each square
I then added some gold gutta to provide some highlights.
One of the results of our workshop was a set of ‘book’ printed pieces of thick paper/card stock with the front of the leaves on one piece and the back of the leaves on another. I trimmed these totally square (10 x 10cm) and backed each with very fine/thin fabric dot glued to the surface, just to hold until I had done the stitching. This allowed me to machine stitch onto the paper without ending up with lots of pieces, or holes, all torn at the perforations. I stitched each to highlight the details of the leaf (and even red cabbage) prints.
these are the pieces before stitching
On their own they didn’t look much (or more accurately – ‘what do I do with these!’) so I then decided to book bind them together.
A little blurred but you might just see how I joined the pages together
The front and back of the book
I mentioned kitchen paper above – this was only used to ‘protect’ some of our plant designs but I found it gave quite a delicate appearance, so I acrylic wax varnished it….warning – don’t then let it dry on a hard surface without laying cling film down first, otherwise hours of scraping can be enjoyed! I then used some of this paper to cover a tall Pringles tin (as the kitchen paper was translucent I covered the tin with plain white copy paper first), then added another layer of the varnish. My friend was delighted with her very simple gift.
Very similar to the tin, this is a work in progress on a white lamp shade it looks lovely when the light is on
Whilst at a car boot I purchased some unusual pictures – stitched suedette fabric on panels of wood. Playing with yet more of my stitched squares I added them to the panels.
the small panel is 20 x 20 cm
In the exhibition there were many lovely creations using our eco-printed products including a scarf, a cushion made using the wool and a box made from the Tyvek pieces.
The Tyvek box is on the front right – Oh, I’ve just seen the Pringles tin in the background!
Finally here are some pieces that are a favourite of mine done on wall lining paper, which I have coated with acrylic wax varnish each measuring 100 x 15 cm. They are two sided, the paler reverse side shows delicate squares – where the Tyvek pieces were laid and then all wrapped up tightly together. I like both sides and as yet haven’t come up with a way to show them off to advantage….any ideas much appreciated.
Since this very inspiring workshop and as a result of my book being in the exhibition I have been asked to do a workshop on bookbinding in January. I have a few examples of fun bindings done years ago so I will have to brush up on the techniques. I only hope that I can be as organised as Jane and enable my ‘students’ to produce lots of interesting samples.
Writing this guest post has been quite a feat and I owe a HUGE debt of thanks to the ever-so-patient Ruth who across thousands of miles (and an ocean) has not only held my hand but carried my entire bulk through what we thought would be a relatively easy process. I hope that she will continue to offer me the opportunity to post now that we have solved the problems.
Today is a special day and the bells are ringing out for Christmas so I wish everyone….
Joy and a Happy, Healthy and Creative 2019
….and will leave with a photo of the card I received from Pat Moore from Canada in the holiday card exchange….Thank you Pat it is lovely.
I haven’t done a Giveaway for a long time, so I thought the festive/holiday season is a good time to do another one! So this week, I’m doing a giveaway of my e-book, The Right Fibre.
It isn’t a project based book – I don’t tell you how I think you should use fibres, it’s an objective look at them. I profile 20 different embellishment fibres, and show lots of photos of how they look after felting in various ways, so it’s easy to compare them with each other and see similarities and differences.
There is also a section detailing various things which affect the way a fibre will felt and look after felting, so by the end you have the information you need to choose the right fibre and give you more control over the outcome.
For more information, have a look at the full blurb on my blog. To win a free copy of The Right Fibre, all you have to do is leave a comment on this post. If you’d like to spread the word through your blog or facebook etc, it would be very much appreciated but it isn’t a requirement. I will randomly draw the winner 8 days from now on Monday 31st Dec 2018, so please check back to see if you’ve won. Good Luck!
It’s holiday time again and we ran a holiday card exchange with members from the Felting and Fiber Studio Forum again this year. People signed up a little over a month ago. I ran the names through a random name generator gave everyone their partners name and by now all the card should be mailed. I got Ruth this year. I usually just do one card but I hedged my bets and made 2 this year.
Here is how I made it. I started with 2 layers of white prefelt. I added the sky and then the snow.
Then I used some darkish green prefelt to cut out triangles for the background trees. And some light gray to add some shading so the snow wasn’t flat.
Then I added the foreground trees using some blue faced Lester curls fluffed out. The one on the left is the one that ended up as Ruth’s.
And some silk for the clouds.
This is what they looked like felted but still wet. They are very lightly felted. I had planned on felting them more but I liked them as they were and didn’t want to distort them.
Then I added more curls to fill out the trees and to make them stand out from the background. I tried to make them all a little darker on the right side. Then some snow. The snow did 2 things: first, it added some nice high lights but it also made the branches look like the go side to side and not up and down. I added the locks up and down and it was noticeable.
I decided the silk was too shiny for clouds and covered them in a very thin layer of the light gray wool.
I liked the picture but it was lacking something so I added some French knot sheep. They were tricky to do because the felt was not firm at all. The thread didn’t want to stay where I wanted it but pull over or sink in. If I had been thinking I would have put some stabilizer behind it.
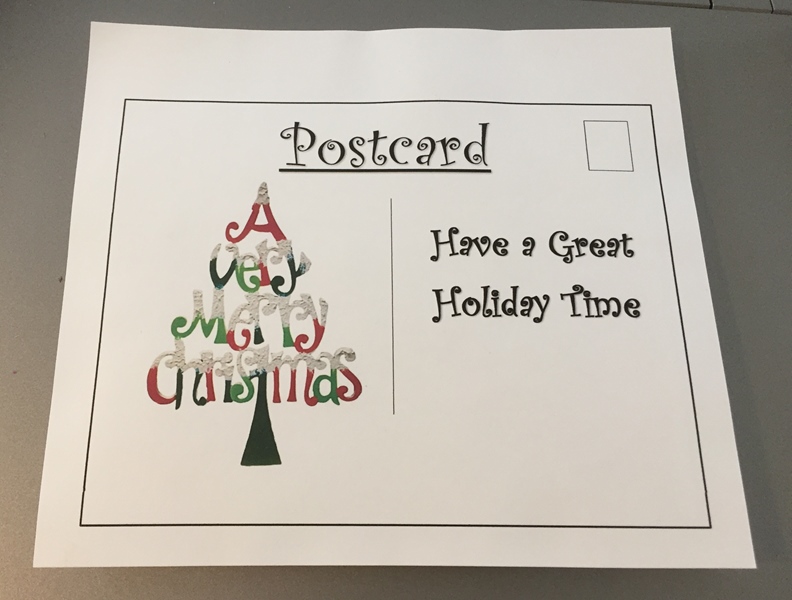
I needed to make it into a card. I chose to do a postcard. I made one up to the right size on my computer following the basic template. I used iron-on facing to glue the card to the back of the felt.
I trimmed it and popped it in an envelope and sent it on its way to Montana. I crossed my fingers it would get there in time. We were having rotating postal strikes in here in Canada. Fortunately, the postal gods were smiling on it and it did make it there in about 2 weeks. I still need to add some sheep or something to the other picture. I do not know what I will do with it. I may just frame it.
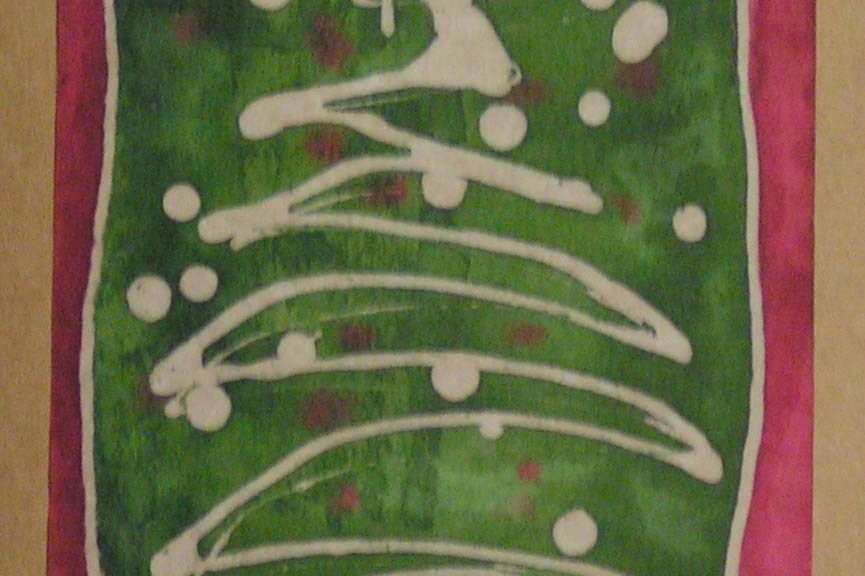
My local art group met in December and we created artwork on paper using batik techniques. Batik uses wax to apply the design and then the piece is dyed in multiple layers. Usually this is done on fabric. We were trying an idea we had seen in Cloth, Paper, Scissors to apply the wax to paper with tjanting tools and then paint with ink.
Here is everyone getting started.
And a little closer look. We all did a variety of designs.
This is where Paula was setting up some ink to paint her designs. I didn’t get any photos after that because I got too involved in the process. I was working on some small Christmas designs so I would have some cards to give people. When I was creating them, I decided they would have to be like ugly Christmas sweaters because they were pretty ugly. The tjanting tool I was using was quite large and the wax came out very quickly so the details were lost. And I was pretty messy with the wax. After the wax dries on the paper, the ink is applied. Once the ink dries, the paper is placed between newsprint and ironed to remove the wax. We used soy wax so it melts easily and at a lower temperature than beeswax.
And here are the results after ironing and cropping. I used the type of cards that the design fits into a small frame except for one tree which I didn’t want to trim down. I actually like the ones that look more abstract where the detail was lost. And they weren’t as ugly as I thought they were going to be. I have used them all up and perhaps, I will try this again to make more cards. It was a fairly quick process.
Do you make your own holiday cards? We’d love to see if you do. You can share them over on our free forum.
There are lots of pretty things you can buy for the kitchen to use at Christmas, but where do you store them for the rest of the year?
So I decided to decorate my felted tea cosy for Christmas in a way that would be temporary, so that as soon as Christmas is over I can remove the embellishments.
I made my felted tea-cosy in 2008 and it’s still in daily use but only one side ever gets seen whether it’s on the tea-pot or hanging on the kitchen wall…
…so I decorated the reverse side and that’s the side that will show during the festive season.
After much pencil-end chewing I drew a rough design then, because I find proper drawing difficult, I searched the internet for a free-to-use outline of a deer.
It’s extremely difficult to draw a complicated shape directly onto felt, and freehand cutting a deer out is beyond me. Luckily there is an easy way using freezer paper.
I reversed the outline then traced it onto the paper side of a piece of freezer paper, then placed it, waxy side down onto a small, thin piece of white fulled felt. I ironed the freezer paper onto the felt (1-2 minutes with a medium dry iron) then let it cool for half an hour.
I won’t lie to you – cutting the white felt to the outline of the deer was very fiddly and I nearly lost some of the antler. Next time I’ll choose something simpler! Holding my breath, I carefully removed the freezer paper.
I put a felting mat inside the tea cosy then I used a felting needle to ‘tack’ the white deer in place. I should mention that my tea cosy is a chunky thing – it’s thick and therefore easy to work on. I didn’t go too near the edges of the silhouette for fear of splitting the white felt – even so the antler still went a bit wonky – so although tacking the deer shape in place would be ok for art work it wouldn’t survive long on a working tea cosy!
The snowflakes are just wisps of white merino wool fibres loosely needle felted in.
The snowy ‘ground’ is fancy yarn. I used white thread to hold it in place – a small stitch every inch.
I liked all the blue and white but a small colour accent was needed so I cut a piece of Christmas ribbon to make a collar and attached it to the white felt with fabric glue.
When I’d finished I could see that I just had to make a new hanging hook the same colour as the tea cosy, so I knitted an i-cord from some sparkly crochet cotton.
All the embellishments are easily removable after Christmas. The deer can be peeled off, the snowflakes popped out, the yarn unstitched and the forgiving felt will smooth itself out with a bit of gentle rubbing.
But I’ll keep the sparkly hanging hook – it looks good with the other side of the tea cosy!
This week, I made a case for my best friend’s birthday. I made it all in one piece using a resist. I laid out a piece of silk on the resist first so that the back inside had a nice pattern, I also thought this would help strengthen the flap so it doesn’t stretch if it’s opened often. This is the front with the flap open:
And the back with the flap open:
This is how it looked with the flap closed:
I used some dyed silk throwster’s waste and dyed soy staple for the embellishments:
The silk has a paisley design on it, which can still be seen, but close up you can’t tell with the texture:
I always have trouble choosing buttons for cases/purses etc. I’m sure I said this last time, but I really need to make some more buttons out of polymer clay. I bought a bag of green buttons at a hobby fair about a year ago, I thought this one was quite nice, but a bit small:
I liked this ‘fancy’ button, but it’s a bit big and too thick:
This was my favourite and what I ended up using:
I blanket stitched around the button hole and around the opening/flap, but didn’t get chance to photograph it finished. My friend loves it and he’s already using it 🙂
I had planed to do a post about The Holiday Card I sent to Ruth but it hasn’t arrived at her house yet so I don’t want to spoil the surprise.
Instead plan B. As promised some pictures of the finished slippers. I made these for a sample for my slipper class a few weeks ago.
I left the one on the right flat so people could see how it was cut. I will steam or wet it and put it into the correct shape. The one on the left is how is should look . I plan to make a leather sole for them.
The other thing I did for the class was leave one as it was when the felting was finished to show how the wool migrates through the decoration.
And the other one I shaved with a regular disposable razor to show how you can bring it back up.
And now for my something new. It is something I have been talking about and thinking about for a while. Can you guess what it is.
How about now
or now
I am sure you know now
A new camera! It was on sale so now was the time. I had to use my phone to take the pictures because it is so new the battery is still charging. Now I need to figure out some good background and lighting I can use for pictures in my windowless studio. I am thinking some sort of shear on a frame to defuse the harsh light and some wight card for bouncing the light. Maybe a big light gray and or white felt sheet for background.