2020 Weather is suspicious! I have a Hypothesis!! lets test it!!!

2020 Weather is suspicious! I have a Hypothesis!! lets test it!!!

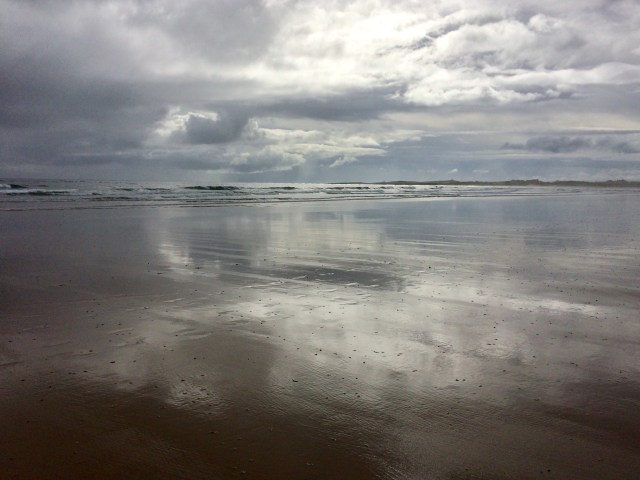
In the summer of 2020, I went into full fleece washing mode. I set up a skirting table, got the RV hand washing machine ready to spin out most of the water and set up the fleece drying racks in front of the garage. You have already seen some of the results. Over the next couple of months, I began to notice an unsettling trend of wetness occurring speciously in conjunction with putting washed fleece on the drying racks. Very Suspicious!!! how can this be a coincidence having happened so many times this summer? I think the weather may be out to wet me! (or maybe it’s just after my fleece)

My hypothesis: 2020 weather is sentient. (And is offended by drying fleece)

Equipment necessary for this experiment:

  • One Icelandic fleece,
  • Many strainer buckets,
  • Three soaking big buckets,
  • A small amount of soap (sunlight dish soap – not detergent),
  • One RV hand spin washer (like a very big salad spinner)
  • Three umbrellas on standby

Test of the hypothesis: Take exquisite Icelandic fleeces that had been put aside to wash later and wash now. (Also this first fleece may be perfect for Mrs. Mer’s Hair.) Watch for a reaction from local weather.

1 Part of Icelandic fleece waiting in the strainer bucket

I divided the first fleece into six small amounts in the fleece washing strainer baskets. Washed out and filled the three fleece washing buckets. Started the soap soak on the first three fleece strainer baskets and got them to the rinse stage. No sign of rain.


Today, a bit overcast with tiny patches of sun, I went out to check on the rinsing. Looked clean, felt clean, OK on to draining, spin-drying then laying the wool out on the drying racks to finish drying.

2-3  Fleece placed on the dryer rack

And it started to drizzle, so I pulled out the umbrella and continued spin-drying as well starting the next three into their soap soak.

 4 next half of fleece in soap and soak stages of washing

Drizzle stopped.


5 Filled one drying rack and pulled out the second.

And it started to drizzle again.


Pulled out the second umbrella, looked at the overhanging and which way the rain would fall. Drat. Need a bigger umbrella, well if I move the spinner over to the skirting table and put the bucket over it

6 two umbrellas up and… it has stopped raining again.

Got all of the first fleece washed and onto two of my three drying racks, and pulled out the third rack (all from Ikea). I did a quick division of the second darker fleece and got the first part of it soaking in soapy water. With a bit of wrangling, I got the three drying rack set up and under the umbrella. As I went to check the soaking fleece and give it a sloosh and it started to Rain! Heavily raining….. I quickly through the fleeces into the strainer buckets and got everything under the tarp end of the dog yard. well now the weather is just laughing at me and I am soaked too.

7-8 wet, very wet

I came in to complain about the unfair and possible vindictiveness of weather to Ann. (Ann is very patent with me.)  I sat down at the computer, ready to type and the sun came out…..

 9 Sun coming out on my Tie basil plants in a broken pot, I will be trying to overwinter.

I waited a bit then went and laid out the fleeces again to dry…..maybe dry.

.


   10-13 all the wetness was worth it, look at that fleece!!

14 The first part of the second Icelandic fleece is trying to dry.

Any bets on where it will rain today? Don’t take that bet…..


15 it rains again


Conclusion; 2020 Weather is sentient and it is offended by fleece drying.


Post Scrips:

The Icelandic fleeces are now well washed, extra rinsed and finally dry. I have washed two more fine fleeces, which I got last year from the Wool Growers Co-op originally from Alberta, again with many extra rinses in the “Drying” stage. They were a lovely dark chocolate colour until I washed them and discovered they were a nice shade of grey (the wash water did remain a very dark brown).

    16 the drying racks

Unfortunately, I have two more large fleeces to wash before the snow arrives!!!! One is the large ram I got at the same time I got the Shropshire and the second is a fleece I just bought from Beth. It is a long black Shetland who was ether hiding from the shearer in the straw or was rolling in it. I have never seen so much vegi-matter embedded in a fleece! As bad as it looks there was only one sheep self-felted section. the rest, if I can get the straw out, will be fabulous. After pulling burrs, straw does not look as daunting!

17-20 Beth’s Black fleece of straw, the top section of the strainer bucket is self felted.

I still need a solution to the continual extra rinse step I don’t think the fleeces really require.  I have bought strapping and ½ inch welded wire fencing to make drying racks I can hang under the tarped area of the side yard. I will get over to Dollerama (what a great source of fibre and felting related equipment) and buy a couple of clear table cloth covers and some extra strong laundry clips to block the wind and rain along the dog fence. Maybe I had better not tempt the weather too much or it may escalate its intensity, we did have a tornado go through Ottawa two years ago! But that may have been to thwart someone else’s fleece drying endeavours.


A New Drop Spindle and the Holiday Card Exchange

A New Drop Spindle and the Holiday Card Exchange

In early September I came across the website John Galon Designs. I think I found the link in a spindle group on Facebook but I don’t remember. https://johngalen.com/  He makes beautiful spindles, many from old, timepieces. I didn’t get a timepiece one but I did get one.

Here is the reveal

Are you ready? here it is:

It is a very pretty and cool spindle. The acrylic in the middle is actually clear but the purple of the spindle radiates out through it. There are about a dozen colours to choose from. I am really pleased with it. Now I need to spin properly with it. I am not used to a spindle with such a small whorl.

The other thing I wanted today is to announce the 2020 holiday card exchange on the Felting and Fiber Studio Forum.  We have been doing a card exchange for several years now. Its a fun and easy way for us to share a little cheer at this time of year.

You can sign up on the forum, here: Holiday Exchange link

the deadline to sign up is Oct 24th, Partners will be assigned ( by random generator) on Oct 25th

You have to make a felt card and send mail it to your partner by Nov 14th

Once you receive your card you post a picture of it on the forum

The cards do not have to be Christmas cards they can be anything. There is a lot going on in late December and there is New Year too.   We are starting a little early this year and on a tighter timeline, having you ship earlier so the cards have a good chance to get there for the holiday season.

Here are a few I have made over the years


Mystery Fiber – Identify It, Felt It, Take it Further

Mystery Fiber – Identify It, Felt It, Take it Further

Hello all.  My name is Arlene Toth and I am a Fiber Artist.  It sounds like I am owning up to an addiction, and I am.  I am addicted to working with wool.  If you don’t know me already, I have a blog called Adventures in Felt.  I took up needle felting in March 2019 where they were giving a demonstration at my local haberdashers.  The first thing I ever made was a bumble bee from a kit.  From then on I was hooked and it just snowballed from there.  As with any addiction, I eventually got hooked on the hard stuff, wet felting.  The first thing I ever wet felted was a very tiny vessel.  I used to paint for 10 years, but painting hasn’t had a look in for over a year.  I wonder at times how I have lived so long and didn’t know about felting until now.  I feel I have a lot of lost time to make up for.  Starting any new hobby is an adventure and I am always up for one of those.  I love this so much that I have immersed myself in it completely.  I have amassed a library of felting books, watched tons of videos (good and bad), and taken online classes.  I am so grateful to those out there that share their knowledge.  So I blog about what I learned.  As far as I’m concerned, it is all an experiment, and like painting, not everything is going to be a masterpiece.

One of the things I have learned is that making samples is important.  Most of the time I just jump right in, but there is value when making small samples especially if you are unfamiliar with the product you are using or the method you will be felting.  For instance, I bought some Botany Lap Waste from World of Wool.  I ended up with a lot of fiber that I thought was merino as it was so soft and felt like superfine merino, but turned out to be alpaca.  How do I know that?  Well, I initially felted with some of it, but it didn’t felt like the merino.  Fortunately, the item I was making was mostly merino, so this mystery fiber did ultimately felt.  I then decided to make some samples as I had a lot of mystery fiber.

Firstly, you need to identify your fiber if it isn’t labelled.  The first way to check if it is animal hair is to burn it.  Yes, burn it.  I used a fire lighter and took a piece of the fiber and it singed and smelled like burnt hair.  If it does that, it comes from an animal.  It doesn’t matter at this point which animal, but an educated guess reckoned that it was alpaca.  Alpaca is a lovely fiber, but some types will felt and some won’t. I have a lovely knitted alpaca hat I bought in Peru which is so soft and warm.  So either way I am going to be a winner here.

Now that you have determined that your fiber comes from an animal and it isn’t synthetic, you will then need to felt a sample, step two.

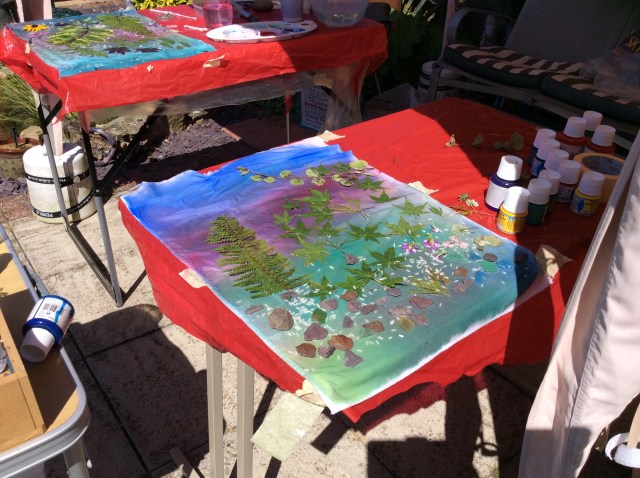
I had three mystery fibers in grey and the black is merino that I used for my control.  I laid them out with two layers.  I wet them out with tepid soapy water and started the felting process by sanding on boths sides, rubbing and rolling.  This is what they looked like.

B was looking as it should for merino, but neither A, C or D passed the pinch test.  I kept working at the samples and I finally got them to do a little something.

I can honestly say that if you want to become a good felter, you need tenacity as this is not a quick craft!  Not only was this fiber slippery and hairy, it was also squeaky!  You can see my lovely control Fiber B doing what merino is supposed to do.  Neither A, C or D is suitable to felt on its own.  D looked like a complete disaster!  Now, some people might think D was superwash, but superwash will not felt, at all, with anything.

So, I completely wasted my money right?  No!  You can stop right here, but if you know how to spin, you can spin with alpaca to make a lovely yarn.  I don’t know how to do that yet!  I was going to give some to a friend, but then we had lockdown, so I just labelled the bags as alpaca and put them away.  However, if you are like me, you will take it further, step 3.

How do you take it further?  You add wool to it.  Something you actually know is wool that will felt. People in the feltosphere suggested that.  So I did.  I got out the blending board and blended the alpaca with merino.  I used the black merino for the dark alpaca and natural grey merino for the other two.  Here they are all laid out as before.

I then wet everything out and felted as before.  As you can see below, adding the wool made a huge difference and made for a better felting experience.

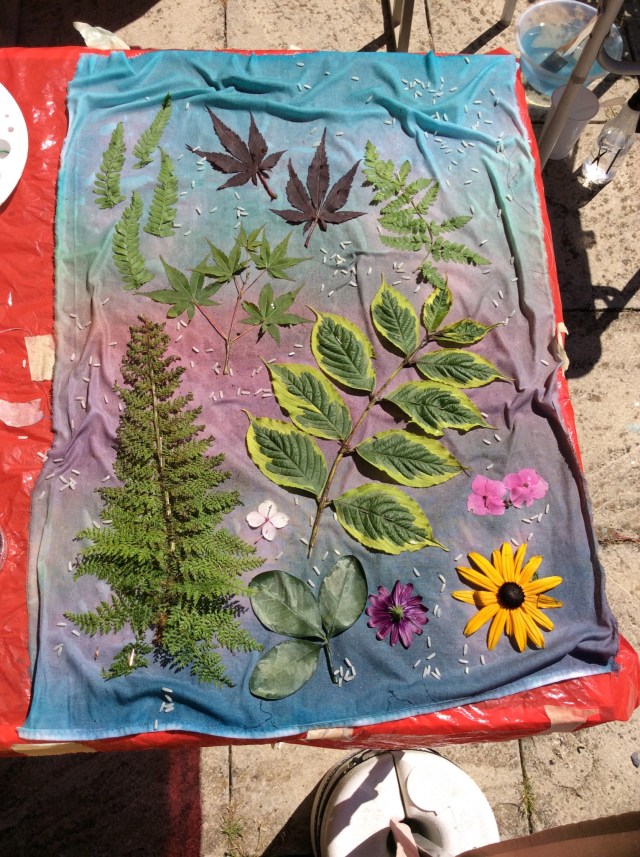
Here we are above drying out in the sun.  They felted better than expected, especially D.  Here is the final outcome below.

Sample A) From 9 squares to 6 squares square, took the longest to felt, hairy, and has some fine holes in it.

Sample B) From 9 squares to 6 squares square, was the quickest to felt.  Sturdiest and best felted of the three.

Sample D) From 9 squares to 7 x 6.5 squares.  I couldn’t get it down any more than that, but considering it was falling apart on its own, this is a good result.  Has some holes, but more like superfine cobweb.

This is the condensed version of 3 blog posts regarding this mystery fiber.  My conclusion is that I shall only keep sample C as it felted the best with the merino.  The other two will be used for spinning, once I learn how to do it!  So, if you get given some fiber that you are unfamiliar with, make a sample and see what happens!

2020 FOURTH QUARTER CHALLENGE

2020 FOURTH QUARTER CHALLENGE


Here’s the final challenge of 2020 for felters, spinners, weavers, stitchers, knitters, crocheters and mixed media fibre artists …

… make an item for your home for the festive season!

It could be anything at all – practical or just decorative.  Here are a few of the things we’ve made over the years.

These felt tree hangers were re-purposed, by adding a wire loop, from a previous decoration.

The star was made origami-style from a piece of fabric and the snowflake was crocheted then stiffened with equal amounts of pva and water.

This bunting was very quick and simple to make. The fabric flags were cut with pinking shears (no hemming) then pegged onto a length of string with mini-pegs.

We used fancy children’s socks, stuffing and oddments to make snowmen.

We’ve made festive felt artwork (some of which was used to print Christmas cards).  ‘Rudolph’, pictured at the top of this post, is made from fabric with free motion stitching.

This ‘Partridge Sitting in his Pear Tree’ was made in the same way.

‘Figgy Pudding’ is wet-felted art embellished with hand stitching and beads.

This wet felted snowman, decorated with hand stitching, was going to be a Christmas card but he looked so good sitting on the hearth that’s where he stayed.

Who doesn’t have sweets around during the festive season?  We thought it would be fun to make ‘Christmas Podding’ and ‘Sid the Snowman’ to keep our favourite chocolates in.

We always decorate the table at Christmas – something different every year – and one year we made placemats…

…and coasters…

A wet-felted tea cosy, that was plain on one side, was decorated for Christmas with yarn, a reindeer cut out of white pre-felt and needle-felting.

These machine embroidered organza crackers were made many, many moons ago.  Apologies for the poor quality photo, but this was back in the day when we didn’t consider photos to be that important.

We hope you have lots of fun with this challenge!

Please post your photos on https://feltandfiberstudio.proboards.com/ in ‘Studio Challenges’.

Shark-Boy! part 2

Shark-Boy! part 2

When last we chatted, i had consulted with Ann while topping up the butter tart supply.  She suggested looking at the integration zone, yes he is a bit skinny and needs to have a stronger transition blending the join between boy and shark.

I have made a stronger integration zone between shark and human by lengthening the abdominals into the under shark and brought the shark flanks up into the lats. i also added a dorsal line in the lumbar spine and the cervical spine. yes that looks better!

then it was time to add hands.

1-3 Floral wire from Dallerama unlabeled but probably 22 gauge

After adding the fingers.  I tried one of Sara’s tools for the first time, I had been using my mettle ruler and one of my weaving stick-shuttles successfully but this gives a lot of length options in one tool. I could do a similar thing with coroplast (a type of plastic cardboard) but I was interested in trying this out.

4 finger making tool, Stick shuttle and ruler

I used the floral wire from Dollerama (I think its 22 gauge since its unlabeled). I used an extra section of wire to reinforce the wrist. Rapping tiny fingers was a bit fiddly but went reasonably well. I switched to finer needles and started to work on the thenar and hypothenar eminences (those two bumps of at the base of the palm). I spent a long time poking both hands to get the shape to a place I was happy.

5-7 I was very pleased with the expressiveness the hands gave. You can also see more of the transition zone from shark to boy.

Yes, that took a week and it was a time to top up the butter tart inspiration!

 8-10 “those hands look creepy”

Success! Except I understand the hands look creepy. That might improve in the next step, On to Colour!!

By the way, it’s still raining.

I started laying in the base mid-tone grey on the hammerhead body then started playing with skin tones in the boy parts. (sorry I got distracted with adding the colour layer and forgot to go grab the camera)

 11-13 base layer, then adding wisps of colour

Just a sec, Ann just messaged me a tornado warning, got to go move hanging plants, drying wool and the 3 umbrellas!

Well, we made it through with odd-coloured sky and layers of clouds moving in different directions then a huge downpour.

The next morning I was a bit hesitant to check out how the side yard was doing. The studio, plants and wool survived so back to work!

14 Here is the wool that keeps getting extra rinses, this is just the first part of one of the two large rams fleeces I bought a couple of weeks ago. There is still a lot of VM  including burrs to clean-out. Now back to Shark-boy!

  15-18  wool and hanging baskets survived adding detail at the intersection and along the spine.

19 This summer Mrs. Crow and her family supervised me, as I have worked on the Mer family.  Today they all dropped by for a visit.

I started to lay in more thin wisps of colour over the base layers. I started with the human skin tones and the integration of the abdominal/underbelly. I also added a bit of the detailing along the colour change.

20-22 Adding more definition between belly and sides of sharks

I think he is enjoying how it is going and took a quick swim around the table.

23-30

Once I can catch him, I will continue adding colour to his hand and the rest of his body.

Have fun Felting!! Maybe it will stop raining at some point so i can get back to washing and drying the last of the fleeces.

Slow progress and a workshop

Slow progress and a workshop

I am writing this Sunday evening. My plan was to work on my cowl this afternoon. But after lunch, I just didn’t have any energy to do it, so after an incredibly busy week of baking, I decided on a nap instead. So at this point, I have nothing to show you about that.

I have booked a little hall for a workshop though. I had a request for a cat cave class. I am not sure I will get enough people to join as we have a short timeline. I have to have 4 people to run the class( 6  is the maximum) and I need them by Oct 9 so we can order the wool and get it here on time. her is the spiel Jan did for me for the class. the one I wrote up was boring. For those who don’t know where I hale from it is just outside Ottawa Ontario Canada. I included that info with all the shared posts on Facebook. it is a personal pet peeve of mine when people don’t post where it is for non-locals. Do you have any idea how many Perths and Cornwalls there are around the world? I have gotten all excited, only to find something is in Perth Australia or Cornwall, California USA?

Cat Cave Workshop

Do you have a present for that hard to shop for Cat on your Christmas list? Have you tried all the toys but are still being snubbed? I may have a solution for you! Have you considered making the perfect cat cave for your perfect cat? Whether you have a big or small cat if they like curling up and sleeping in cozy spaces then a cat cave may be your solution.
There will be a group order of wool (Finn) and consultation in creating your resist. Sign up quickly we have limited space so we can be socially distanced while we are felting together. Properly Fitting masks are required, and we will have our hands in warm soapy water!!

Wool: Finn (Pre-workshop group order) 1-4 KG depending on size and thickness of cat cave shapee.

When: Nov 7-8th 2020

Where: Pierces Corners Hall (Near North Gower, I will supply directions)

Cost: $100 plus costs of wool and a portion of shipping and duties


Suitable for enthusiastic beginners and people that have felted before.

Sign up soon and do not disappoint your cat, no one wants an unhappy cat Christmas morning.

To sign up or if you have any questions, please email me shepherdessann@gmail.com

I added some pictures of course

Slow Stitch Progress – Filling in Negative Space

Slow Stitch Progress – Filling in Negative Space

Here’s the progress on my slow stitch project. I am still stitching away about 15-30 minutes per day on this piece.

The last time I showed you, it looked like this.

First, I added some more darker values with the deep purple thread in the mid ground area. Then because I thought that I needed a little more contrast in that area, I added some deeper red orange to look like more foliage.

Then on to working on the foreground trees. Here, I was looking at negative spaces and giving some darkness and shadow to delineate the tree trunks. I am continuing to use seed stitch and used a neutralized dark green in between the tree trunks. Since the stitches are so small, this definitely is in the slow stitch category. I am still working on the right hand side. Once that’s finished, I have more tree trunks “to pull out” on the left side.

And here’s how the entire piece looks as of now. I may need to darken up the shadows between the foreground trees and I have to decide what to do on the left hand bottom corner. The foreground trees will get some stitched leaf additions too. Plus the foreground will need work in front of the trees. I am definitely enjoying this project more since I’m not trying to force working on it for longer stretches.


Where did the sun go?

Where did the sun go?

By the time you are reading this I will be back home in Lincolnshire but, right now, I’m tucked away in a lovely holiday cottage a few minutes from the beach at Beadnell in Northumberland wondering….. where did the sun go? This is one of my favourite parts of the UK, come rain or shine, and this week has certainly been a mix of both! One day I needed sunscreen and the next it was a full set of waterproofs!

As you can see, social distancing wasn’t a problem walking from Beadnell to Seahouses via the beach.
Got a good drenching walking south towards Dunstanburgh earlier today!

The beaches up here are a mix of fine golden sand, pebbles and wonderful layers of colourful rock – I can see a few of these images coming in useful as inspiration for future textile work.

But I digress……what I was wanting to share with you this time is my first attempt at sun printing. My friend Jacky has been doing a lot of this over the summer inspired by Micky Lawler’s “Skydyes”. A few weeks ago she suggested we get together in her garden, following social distancing guidelines, and she would show me how it’s done.

The first task was to roam around Jacky’s garden selecting leaves and flower heads for our prints. With eco printing certain leaves give better results (due to their chemical make up?) but with sun printing you can get sharpe prints from any leaf as long as you can make a good contact with your fabric. Some of the leaves we picked were hammered a little to flatten them out prior to use.

It was a very windy day so we used masking tape to hold down our cotton fabric before spritzing it with water.

Once we had wetted out we used a wide paintbrush and watered down (1:1) Pebeo Setacolor transparent paint to completely cover the fabric. You can buy paint specifically for sun printing but I’ve also read that any transparent acrylic paint will do the job.

Whilst the paint was still wet leaves and petals were then laid on and pinned, or weighted down using small pebbles, to ensure a good contact. We worked in the shade as fast as possible to avoid the paint drying out. As it was such a hot day the fabric was spritzed occasionally as we worked. Anything placed on the painted fabric acts as a resist for the sun, resulting in bleached out areas.

Small pebbles and rice were used create additional marks

The work was left in the sun for an hour or so while we ate lunch and once it had done its job the fabrics were ironed and this was the result…..

We had a lot of fun and varying degrees of success but it’s surprising how much more interesting certain areas can appear when you use a view finder.

This final image is a beautiful quilt that Jacky went on to make using a piece of her sun printed fabric and silhouette appliqué. The effect is pretty striking!

Shark-Boy! part 1

Shark-Boy! part 1

I started this post a few weeks ago but wanted to tell you about the Flax study group first. so while the Flax is off at the spa having hydrotherapy treatments lets look back a bit.

I hope you haven’t become bored in my fishy endeavors this summer. (I am looking forward to starting a less wet oriented project once I have this one in hand)

I have decided the Mer’s need a son. However, I want to have him more strongly on the shark side of the family, hammerhead shark to be specific. So back to my notes to adjust the armature sizes from the original measurements suggested by Sarra in her you tube felt along Mermaid.  I reduced the proportions for the body and then considered the extended length of the hammerhead shark body.

 1   14 gauge aluminum wire armature.

   2 Using a second piece of wire to Stabilizing the arms and third for the body.

For this Mer I went with a much more fishy lower body, basing it on the hammerhead shark.  I again did a thorough search of images to find reference shots. Referring back to the diagrams,  photos, and a bit of research I found out there is a difference in fin alinement between adolescent and adult hammerhead sharks.  I extended the body armature, adding fins in appropriate places for a youthful shark.

  3-4 adding a fishy long shark body

I have tried various starting points while felting the Mer’s, this time I started with the head and worked down.

  5-9 Starting at the top and working down

I added wool, by rapping and adding layers of wool, continuing down the body to the first pair of (Pectoral) fins. I secured fiber to the lower back then worked out and back building up the fins and upper part of the shark body.

 10-11 Pectoral fins

Now on to the first Dorsal fin. I created a flat rectangle and felted the center line which will become the front edge of large fin.

 12-13 Dorsal Fin.

The fin armature was rapped with the white wool then the fin cover was added and felted in.

  14 -19 the Dorsal fin and blocking out the shark body

When working It is good to take pictures, not just to have a record of what you have done but also to get a different perspective on your work.  (It’s like holding a painting up to a mirror to help your brain see it more clearly) He is still looking a bit too skinny, he needs a bit of weight training. I am sure I can do something about that.

Yes it rained again. another extra rinse for the fleece. I am still dry under here, so let’s keep having fun!

   20 more rain, shark-boy starts weight training

I started to play around with the transition section and adding a bit more width to the body of the shark parts.

  21-23 transition between Boy and Fish ( i have to make the transition look integrated not like a shark is eating someone feet first)

  24 checking both photos and diagrams

Now to add the Caudal fin, which has a subterminal notch! And yes it rained again.

25 this is a cool tool, it unscrews by turning the nob. be careful not to get one that requires a screwdriver  to undo it from below (it can be painful if you slip)

Pause in the rain, time for a Tomato brake!

   26-28  Haratige, Low acid yellow pair, Sweet i millions

Yes I am still trying to wash and dry fleece so yes it rained again. I guess it needs more rinsing? OK, back to work!

 29-31

Time to add the two Pelvic fins,

  32-33 shape both fins at the same time before adding them

It was still raining but not leaking in the covered dog area which is now my studio, Shark boy is keeping an eye on the weather while I make his fins.

34 will it ever stop with the intermittent rain?

  35 before adding the pelvic fins I need to add the Anal fin, but first checking the location on the diagrams and photos.

    36-37 make 2 so they will be balanced

Adding the pelvic fins between the pectoral and anal fin. As you can see, shark boy did not inherit the vestigial knees found in the rest of the Mer family.

 38-39

Its time to pack up for the day. Tomorrow is the day to restock on Ann’s Tarts and get her impute in how this project is  going.

40 OK more rain.. time to pack up. tomorrow is Butter tart day!! (Saturday)

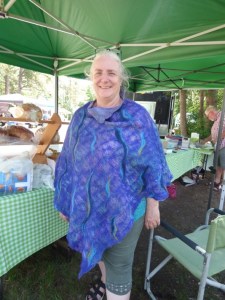
  41-43 Ann had her New poncho to show me! It looks grate!

The decision on shark boy was to keep working on the intersection between shark and boy. That will be next week but for now its time for butter tarts!!

Where has all the time gone?

Where has all the time gone?

I do not know where time has gone. I remember having time but it seems very elusive at the moment. Most of my time is taken up with preparing things for our farmer’s market. Thursday is cookies and Friday with my husband doing as much as me, are all the fresh baked goods like butter tarts and buttermilk tarts. lemon curd for tarts too and bread. all this is fine but now I am spending the rest of the week making meat pies. Tourtiere and Chicken. selling out as fast as I can make them. Don’t get me wrong, this is all good it just doesn’t leave much time for felting.

To that end, I have only a couple of pictures of my current felt cowl project I was telling you about here: felted cowl part 1

This is making the template. I drew around the finished paper one and then sized it up.

And this is the silk wrapped around it. Is anyone surprised I picked purple?  You can see the line across on the other side. I forgot to take a picture of the other side. I took me forever and many tried to get the silk around it. I was just not wrapping my head around how to do it. Looking at it here I would make the template larger top to bottom and tape it across the middle, around, then around back and across the middle again. I think I was trying to do it like the paper one which has the joined area on the diagonal and the back part strait. This is much easier. I will put in some basting stitches to replace the tape and I can move onto the laying out of fibres. At this rate, it will be a Christmas present to myself.

By the time I got to this point, I was ready to say this will be a one-off experiment because I am not struggling like this for everyone I make. But now seeing it in a picture after several days of throwing evil looks at it on the other table I think it won’t be so hard the second time.

How would you set up for this type of scarf?