I started working on this a while ago and have managed to do one. I can hardly wait until school’s done at the end of the month. I don’t seem to have any time to do anything at the moment. Oh well, enough griping.
You may remember that for my Guild’s anniversary exhibition, I made a little flock of sheep. What to do with them now? I could just put them away or make a display, not that I have room for that.
In the past, I made key chains by threading a cord down and back up through the sheep and then adding a split ring. It worked, but the cords wear too quickly. Then I saw some cool headwear for keychains. They seem to just put beads on them, but what do they know? I bought a multi-coloured pack.
Of course, I also had to buy some new beads for this. Really, I did, I didn’t have any large hole beads that would fit on the pole. Sorry about the bad picture, way too much reflection on the left one, and I didn’t want to dump them out. The one on the left is mixed, so there are solids, stripes, crystals and some different textures.
I picked a green keychain to go with the green sheep.
The first thing to do is to make a hole in the sheep. For this, I used a leather awl. It worked quite well; I only had to fiddle a little to get the post through the sheep. You can see that the beads unscrew at both ends. This makes it easier to add the beads on the top and bottom after adding the sheep.
Then add some beads and and screw the ends back on.
I like the way it looks. I need to give him some eyes and probably a nose. None of the sheep or the shepherdess had facial features for the display.
The other thing I want to do is fix some of the ears. I was running out of time, and I knew they wouldn’t be handled, so I didn’t worry about some of the ears not being as sturdy as I would like. Some of them are too fluffy and underfelted, so they will not last as key chains.
The other thing I bought was a little stand and some cards to attach the keychains to. I hope that it makes them look a little more finished and worth what I want for them.
They are too big to fit in the little bags that came with the cards. I will have to look for some different ones.
P.S. I have not picked a name for the little ram lamb yet. Nothing has really jumped out at me as the right one, yet.
Our group did a Christmas card exchange again this year and I was partnered with Antje. (You can see Antje’s post with the card she made for me here.) My first card attempt turned into a disappointing failure. After casting about for more inspiration I decided to try using some of my handspun to make a card.
I cut out some felt the size of a blank card, and sketched out a design using chalk. Then I decided that would be challenging to sew. So I loaded a larger piece of felt into a frame and started over.
Gathering my supplies
Next I did a chalk sketch. I outlined the size of my working area and the tree element I wanted on the card.
Chalk sketch of my tree
The handspun I wanted to use was a very pretty singles. It was quite bulky and not really suitable for traditional sewing as it would fray if tried to sew through the felt with it. As a result I used a needle and thread to tack down the handspun at each edge of the tree. (I actually had 2 working needles going, one for each side of the tree.) The handspun was thick and thin which made the tree somewhat textured. I dug around in my stash and found this very crazy gold fizz yarn that I used to make a bold star.
Sewing down the handspun
Sewing down the handspun
Adding the star
Adding the trunk and garland
At this point I decided my card was a bit too plain. So I bought some beads and then started playing with laying them on the felt. I took my project to one of our guild socials and got some feedback from the ladies there about what beads to use. Once the beads were selected, I started sewing them on. There are dark beads as shimmery snowflakes and some white snow below the tree. When adding the snow at the base of the tree I purposely changed the direction of the beads instead of doing plain rows.
Adding beads
Adding beads
Beading complete
Next I cut out the panel and made sure it was the correct size for my card.
Cut out panel
Cut out panel and card
Ann suggested that I sew the panel onto the card. That way if Antje wanted to repurpose the panel it could be easily removed from the card. (Unlike gluing which would be more permanent and possibly not good for the felt.) I used some clips to hold the panel to the card and sewed it down at each corner. I then decided to add a couple more stitches along the long sides. Sewing the panel to the card was easy to do and the threads don’t show very much on the front of the card against the dark felt. (Thanks Ann for the terrific suggestion.) Success!
Sewing the panel onto the card
Finished card
My next job was to send the card. Unfortunately Canada Post went on strike and so mailing my card was delayed. I did attempt to send the card via courier. After waiting in a long line I was quoted a price of $117, which is crazy. So the card went back home with me to wait till the strike was over.
I was nervous about sending the card since the beads could be damaged by some of the post machines. So I padded out the envelope with a few hand knit dish cloths and hoped for the best. Antje let me know that my packet finally arrived at her place on December 31st. I am resharing the photo Antje took of the card and dish cloths once they arrived in the UK.
Happy Christmas everyone! At the moment you are probably up to your eyes getting ready for the days of festivities which lie ahead. So, I will give you a few options here. Here is a slideshow of my blog which you can go through in a few minutes if you are stuck for time. Alternatively you can read my narrative or if you have a while to spare why not grab a cuppa, pull up a chair, watch the slideshow and read the narrative!
I covered the resist with orange viscose and two layers of red merino
Then I added silk paper I made. I didn’t like it so I pulled it off when it was at prefelt stage
This is the lid of the furniture polish I used to shape my bells
Here they are after drying. I cut them to size as they were rather long
Here is a view of the inside of one of the bells
I rolled the bottom edge to show the orange viscose
I pinned the soluble paper to the bell and drew my pattern
I cut back the excess paper ones I had stitched the pattern
Then I added the beads
Here they are ready for dunking
The paper dissolved once the water hit it!
Then I crocheted the ‘rope’ I painted the silver bells with some bronze nail varnish
Here they are, ready to go!
A detail of the free motion machine embroidery and beading on the tree
Disaster struck using masking tape on the inside of the card. Back to the drawing board
I stippled the card using a stencil brush and red then gold paint
Inside the card (no masking tape this time!)
A selection of handmade Nepalese paper for Karen to play with
All packed in the box
Here’s the finished card which I glued to the lid of the box
All ready for posting
And finally, here they are, on Karen’s beautiful Christmas tree
I was so delighted when I drew Karen in the Christmas card exchange this year. I was also a bit daunted as I have been going through a bit of a dry patch creatively over the past number of months. I knew I wanted to do something that ‘stood out’ (in other words 3D) but this can be a bit of a challenge when it comes to postal systems.
While searching through one of my fibre presses I came across a deep small box that I had used to transfer a porcelain bowl home from my holiday in NZ earlier in the year. We won’t even talk about how my weird creative mind works but seeing the box instantly brought to mind bells so, decision made, I got to work on them.
First I made my resist. I intended making two bells. I covered the resist in an orange viscose fibre and then laid two layers of red merino on top. I added a hanging loop to each bell and some silk paper to each bell which I later pulled off as I didn’t like it. Once prefelted I cut through the resist to make two shapes and then started working on shrinking and shaping. Next, I searched for a suitable bell shape which I could use for the next stage. That’s where the beeswax came in! The lid is shaped like an old fashioned beehive which is an ideal shape to work with. Lots of rubbing and shaping ensued (and I will admit a bit of cutting as the shapes were too long), until I ended up with bell shapes I was happy with. Then I rolled the bases so that the orange showed on the outside.
I decided I wanted a simple embroidered design on each bell. I drew my tiny design on water soluble paper and added my stitches and a few beads to each bell. Then I dissolved the paper and reshaped the bell on the top of my little beehive! Once dry, I got to work on the ‘rope’ and the bell. My little jingle bells were silver and I had been searching, to no avail for gold ones which I thought would look better. Then I thought of using some nail varnish on the outside of the bells. Worked a treat! I then took some cotton embroidery thread and made the ‘rope’ which I attached to the body of the bell and to the inside of the little ‘jingle’. Then I threaded ribbon through the loop at the top of each bell so that Karen could hang them up. They fitted nicely into the box but I felt there was something missing. So I added a few little squares of Nepalese paper which I thought Karen might like to experiment with. Some of these are quite a lot heavier than the usual ones which are used in felting but I have managed to felt them into pieces. I thought she might have fun trying them out.
Next to the card. My cards were the same size as the box so I thought it might be fun to attach it to the box when it was ready. I opted for a monochrome effect to start with; I prefelted a tree which was made from black merino and margillan silk. Then I laid the tree onto a white merino background and felted the lot together. Once fulled, I cut it to size. Then it was decorating time which I did on my sewing machine using free motion embroidery. I added some beads too.
Time to address the card! I stippled the outside of the card with a stencil brush using red and then gold paint. Then I decided to do the same on the inside but got too creative and used masking tape so I could control the area where I was adding the colour. Once happy, I went to remove the masking tape. Disaster! It took away a goodly portion of the card too. I was not a happy bunny! On to the second attempt with the card (without masking tape this time), I was more successful. All done and ready for the post.
Karen has received her card today and I got mine from her yesterday. I love my card. Karen has gone to such detail with it I am going to treasure it. Like Lindsay’s card from a previous swap, it will be putting in an annual appearance at Christmas time.
I love the concept of the card swap. It keeps my felting friends close in my heart, especially at this time of year. Thank you to Ann who organised it and us.
Wishing everyone a merry Christmas and a happy, healthy and peaceful 2025!
My American Aunt, Rose (born in Ireland but she lived her adult life in the US as a religious sister and kids’ teacher) used to have a phrase about nice things. They were ‘for special occasions and bonfire nights’. I suspect it was from a time when folk had one good outfit in their wardrobe but it’s a phrase that has stuck with me and, while the saying sounds fun, it has led to me not letting go of beauty, storing them up in boxes or in the wardrobes for that ‘special occasion’ to come along. As I get older I have come to realise that every day I get to be on this beautiful earth is a special occasion and so it is time to get out the glad rags and let loose! I am finally applying this simple principle to my fibre stash; so in this post I want to talk about some of those gorgeous samples that I made during the various dyeing workshops I have taken over the past nine months. I wrote about them in my last three posts and you can find them all here if you would like to catch up with them. Adventures in colour Part 1; Adventures in colour Part 2; Dyeing to Eat.
I have to confess, it took a while for me to brave using the results of the workshops – the special occasions and bonfire nights phrase was stuck in my head and I was afraid I might ruin the samples (silly!). In the end, I decided to simplify things and just play. I started with a little weaving. Some time ago I bought a small loom, nothing fancy, it cost less than €13.00. It’s from Sostrene Grene, it’s a great shop for reasonably priced bits and pieces and it now is online. Their website is here
Here is a photo of my little loom. It’s great for playing as I watch TV:
Small wooden hobby loom with pen included in the photo for size perspective
As I did not have specialist thread and as this was just a play, I set the warp up using cotton thread. Then I got to work, using some of the fibre and yarn which I dyed during the natural dyeing workshop last November. I also used a cotton yarn for the background of the piece. Here is a photo of some of the hand dyed fibre:
The final result for the fresh nettle dye. I love the variety of tints!
Here is the result of my first play:
Background is cotton yarn and highlights are provided with wool skeins merino and linen fibres.
Next, I decided to use some of the yarn which I dyed during the Procion dye workshop. At this stage I had purchased proper warp thread and I decided to use a metal hoop for my base. I used a small nylon ring within the hoop and I set this off centre when I was setting up the warp. Again here are some photos of the fibre and thread used. I love the vibrancy of these colours!
This slideshow requires JavaScript.
And here is the result. I plan to add nylon fishing line to this and hang it as a mobile.
Hand dyed (procion dyes) fibre woven onto a circular hoop.
Next, it was finally time to be a little brave and use one of my favourite fibre samples. This is merino wool which was randomly dyed in the dye pot. I loved the result as it reminded me of photos taken of deep space by Hubble. Here are two photos of the fibre sample I made.
This slideshow requires JavaScript.
I felt I might ruin the effect if I didn’t felt it carefully. So my layout had to be simple. In the end I decided to make a cowl with it. The sample length was 60cm and it was quite thick so I divided the fibre lengthways into two equal bundles being careful to keep the colours intact. I took the two bundles and stretched both out very thinly width wise, again being careful to maintain the colours. As the fibres were going to run in one direction I decided to use the nuno technique to stabilise the piece. I used margillan silk for this purpose (measurement length of sample x 2 by the width of the stretched fibre).
Then I cut a resist which was the same length as the sample. I wrapped the silk around the resist as it was to form the base of the cowl. I wet this to keep it in place (margillan is so light it has a habit of wandering!). Then I carefully laid the fibre on top of the silk. (Tip: the start and end of each of the two lengths of fibre were not placed at the edge of the resist to avoid any possibility of creating a ridge). I wet the piece down, rubbed and started rolling. (lots of rolls to encourage the fibre to go through the silk). Once this was done I started fulling the piece. Here are some photos of the process:
This slideshow requires JavaScript.
And here are photos of the finished piece. I am pleased with how the colours have kept their integrity and it has not become a muddy mess! All set for the cooler weather.
This slideshow requires JavaScript.
Next, I took some silk fibre which has been dyed in the same pot. Here is a photo of the fibre:
Front view: Silk fibre. I can’t help thinking about Hubble when I see this photo!
This time I set it onto a black background. I was so pleased that it adhered well to the fibre but the black did not destroy the colours. This was probably helped by the fact that I did not fully felt the piece as I intended to frame it so I knew I could stop my process whenever I found it aesthetically pleasing. There’s lots of texture in it which I am pleased about. The black background definitely reminded me of deep space! Once rinsed and dry, I set to work doing some free motion embroidery. Lots of little stars. I then added some silver seed beads for a little starry sparkle. What do you think?
Mixed media: procion dyes were used on silk fibre which was then felted onto merino. Machine embroidery and hand beading introduced stars to the piece
Next, a quick update on my more recent dyeing exploits. I attended wedding recently and I needed a cover up which would tie in with my dress. I did not have time to felt a piece but I knew that I had some light wool fabric which would be perfect if dyed. Previous samples from the Mexican dyeing course I attended confirmed that I could achieve the colour I wanted from avocados. I prepared my fabric (scoured and used an alum mordant) ate the avocados and then I dyed the fabric. I threw in a little prepared merino and silk fibres too to see what might happen. Once dyed, I hemmed the wool shawl. I am delighted with the result. This is one piece that will not be kept for ‘special occasions and bonfire nights’. Here is the result:
Handmade wool fabric wrap (dyed with avocado skins and stones) natural dyeing
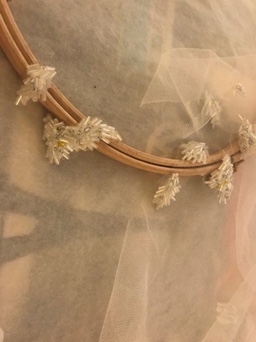
Then I decided to use the merino and the silks which were dyed in the same pot to make a flower. The colour achieved was a lot lighter but I am pleased with the result of the experiment:
hand felted and beaded flower (dyed with avocado skin and stone) Merino and silk fibres used Natural dyeing
Finally, every year, there is a local collaboration between two of our neighbours a farmer and a food producer (we live in a rural area). They grow a field of sunflowers which members of the public are invited to pick and make a donation either online or through their honesty box to the local hospice charity. It is always a popular event. I picked some sunflowers this week and they are now looking gorgeous in my sun room. I took off the bottom leaves from the plants before placing them in water. I decided it might be fun to see if I could extract dye from them. I also made a little pigment. Unfortunately, the photos do not fully do justice to the beautiful green tones I achieved from the dye, but I thought I would share them anyway:
This slideshow requires JavaScript.
I know I am not alone in my need to behave like a squirrel and hoard my treasured items. I am so pleased that I have taken a tiny percentage of my mine and transformed them into something else which in my view are aesthetically more pleasing.
Now it’s time for you to share. Are you a hoarder too? If so, what do you hoard and do you ever think about transforming some of your stash?
Having just read Kiki’s tutorial https://feltingandfiberstudio.com/2023/11/19/left-overs-yessss/ on using up prefelt scraps, it occurs to me that I may not have mentioned something we used to do at our Guild (Dorset Guild of Weavers Spinners & Dyers) mainly to raise funds for the Guild but also for fun.
When I attended the Stitch and Creative Crafts Show at the Bath and West Showground in Shepton Mallet (Somerset, UK) back in 2010 – I saw a stand selling (for £8.00 each) bags containing 35gr of silk fibres, yarns, fabrics scraps, carrier rods and cocoons in various colours, left over from old projects which, when put together, made a fascinating collection for future projects. So fascinating that I bought three of them.
They must have made quite a bit of profit on them because they appeared mainly to be the “waste” from artwork.
At that time (when I was part of the sub-committee organising the Guild’s Exhibition and Sale of Work) we were looking for a Guild Project which could be part of the exhibition or something hopefully to help raise some funds. Well, I thought, our weavers must have lots of off-cuts of hand woven fabric, not to mention warp ends. Then there were the spinners who would have odd bits of spun and unspun fibres of all types and colours. We also had members who were dressmakers, beaders and embroiderers, and a soft furnisher, who were bound to have the odd bits and pieces that they didn’t really need. So, with the blessing of the committee, I put it to the members in the next newsletter that if they would donate to the Guild any odd bits of fibres, yarns, threads, warp ends, bits of fabric, beads, button, feathers, felt, cords, braids, tassels, sequins, sequin waste, ribbons, silk flowers and any other bits and pieces they could think of, we could make up some “Bags of Inspiration” and sell them to members of the public at our open days and outside demonstrations. (I don’t know about in the rest of the world, but in the UK the word “bags” means “lots of” as well as “containers”, so the punning name “Bags of Inspiration” seemed apt.)
We used A4 sized polythene bags (which I was able to buy quite cheaply from our local green grocer) with an A4 sheet of card inside for stiffening, and I made up some stickers with the Guild’s logo on and a brief description of the contents, and posters also giving details of the contents.
Bag of Inspiration Poster
We arranged a few bag making days at a pub in the village where our then President lived. She had persuaded them to let us use their skittle alley at no charge, and we had a great deal of fun making up the bags and tucking in to “refreshments” from the bar and kitchen.
The members who came to these, brought with them all sorts of goodies which we spread out on tables, so that we could make collections of pieces which seemed to go with each other. Those who didn’t think that their colour theory was good enough, could pick out a picture from a selection of magazines and have a go at matching colours from this It was amazing how compulsive making the bags became. You could pick up a piece of fabric that looked so dull and dreary and be amazed how it perked up and positively shone with life when paired with different fabrics, yarns, trimmings etc. You just couldn’t stop picking up likely bits. The difficulty was keeping the weight of each bag between 80gr and 100gr, so we quite often ended up making up at least 2 bags with similar contents.
Equipment & Extra “Bits” for making up Bags
Prospective contents of at least one Bag of Inspiration
We put a price of £3.50 on each bag and they went like hot cakes – we sold out on their first appearance at our exhibition and sale of work. Embroiderers and mixed media artists in particular liked them.
After a couple of years, we didn’t get so many volunteers to make up bags but we still had mountains of “stuff”. So we added another string for our open days – Pick and Mix Your Own. I had remembered that Woolworths (now there’s a blast from the past) used to have a counter full of different sweets and you could take a bowl and pick and mix what you wanted, and in the process buying a lot more than you would have if just buying a ready filled bag.
Pick and Mix Sweets.
It worked with our stuff too. We gave the visitors the polythene bags and they could wade through all the bits and pieces picking what they needed, and we weighed them when they’d finished, charging £3.50 for 100gr.
We had had a lot of fibres donated so we started making up what are now called Art Batts and selling them as “Batts of Inspirations”, but because we were mainly selling these to Guild spinners and felt makers, they didn’t do quite so well as they were mainly able to make their own.
In all we made around £1000.00 for the Guild in the four years we were doing this. Eventually though the members got fed up with spending time on making up the bags and the whole thing was shelved, as the Guild seemed to be relatively well off at the time.
Some time after that I took the idea back to myself and I was making up Batts to sell at Guild meetings, using luxury fibres as well as merino and synthetic fibres. I made up some bands to fix around the Batts detailing the various fibres included in each.
This slideshow requires JavaScript.
I was also making up and selling Bags, mainly at a Needlework Festival in Dorset where most of the vendors were selling materials and equipment for crafters, as well as various craft fairs and so on.
This slideshow requires JavaScript.
I was getting the odd question like “they’re lovely but what do you do with them?” and “can you make a bag out of what’s in here?” So I made a sign from images of items that I’d made myself over the years and that helped.
Some of the things I’ve made with the contents of BoI over the years
However, once Covid started causing problems, my selling opportunities dried up. I had been intending to try selling Bags and Batts via my website, but it was very difficult and too time consuming to photograph the Bags so that the contents were visible, because of reflections on the polythene bags. So that sort of died a death too and I’ve now shelved that project, and am using the bits and pieces I’ve collected over the years on theatrical costumes and props.
Perhaps some of our readers’ organisations, like Ann & Jan’s OVWSG, might use this idea to raise funds?
I declare throwback Tuesday. I seem to have run out of time this week so I thought you might like to see this post from 2017. Jan posted some pictures in our guild group and it reminded me and I thought it was worth another look. I hope it and the links to the other 2 posts about it will give you lots of inspiration for your own work.
Imagine this: you’ve planned that project in your head. You’ve gone through all the steps and know what needs doing. You have all the materials, and you’re getting ready to work on it. It’s going to be epic!
Except… something goes terribly wrong and the end result is nothing like what you expected.
Sound familiar?
This hand dyed yarn looks great at first glance, but in reality it’s “muddy” – the colours have somehow blended into each other in a not-so flattering way.
I’m sure we’ve all been there. Craft long enough and, be it due to bad luck or simple statistics, something will go wrong.
The problem: The yarn above is a colourway of mine called Love Heart Meow. At first glance, it looks exactly as it should, except something went wrong during the dyeing process and the end result is “muddy.” You can’t really tell in the photo, but in real life I can definitely see it and it’s driving me mad.
The solution: I’m going to overdye it. I find that when things don’t go as planned, a blue overdye can save things around. Who knows, maybe I’ll create a new colourway?
(Shameless plugin moment: I’m getting back to blogging in my own website and I’ll be sharing the over dyeing process over there very soon! I’ll of course still be working on new content for our lovely blog here.)
A while back I was doing an exchange with a dyer friend of mine and decided to send her some hand dyed silk cocoons. Silk comes at a price for the poor silk worm, so I was very keen to “make it count” (yes, I’m the soppy type).
I carefully dyed each cocoon, making it so that the exterior and the interior were slightly different and adding variation in shade/colour. I was rather chuffed with the result.
Of course, I then proceeded to ruin things beautifully. I don’t know what happened in my brain but I decided to set the colours with more acid… by dunking the cocoons in hot water.
If you’ve ever dyed these precious things, you’ll know they need to be steam set if you want them to retain their shape. Hot water is most emphatically not the right thing to do, as I remembered even as I was dunking them in the H2O.
The problem: I had a hot mess in my hands, the cocoons all melted into each other, were soft and (to me, at the time) completely useless.
The temporary solution: Remove from water and back away from the project! Make some tea. Curse out loud. Come back later.
The real solution: After keeping whole thing away from sight a while, I looked at it again. It was a mess, but I could make it into something different. The colours were pretty. Then it hit me…
Tah-dah, wall art to the rescue. The colours are actually brighter in real life.
I sewed the Cocoon Combo to some black felt, added some beads and shiny embroidered stars in gold and silver. The shape of the thing was asking for an oval embroidery hoop, so I bought one in a suitable size and Bob’s your uncle.
It looks like something done on purpose, doesn’t it? It’ll be our secret.
Now, this wouldn’t be a post by yours truly if I didn’t add a little sewing, would it?
While perusing one of my usual fabric supply sites I stumbled upon the most fun cat fabric. As with most things in the crafty brain, I had the “button” sorted but not the “suit,” so to speak. I had to come up with something to create with that fabric!
I decided on the Metamorphic Dress by Sew Liberated because it looked comfy and, best of all, asked for two complementary fabrics (the cat fabric had a “friend” that I thought made the cats look even cuter. Aaand, I’ll stop using metaphors now.)
I love this dress. It works great on its own or as a top layer, making it good for more seasons. It’s meant to be reversible, but this one isn’t (there are reasons but I shan’t go into them).
One great thing about being short is, I never need as much fabric to make something as the pattern says I do. After careful calculations, I knew exactly how much to buy and order it I did.
The bad thing is, if you don’t have extra and make a mistake… well.
I was on the phone with my other half and got distracted. Instead of cutting the top layer a specific way, I did it wrongly. I immediately noticed the disaster, but it was too late. My soul hurt. I didn’t want to order more fabric because of this!
The problem: No extra fabric and the huge unwillingness to buy more. I was doomed.
The temporary solution: The same as with the cocoons! Back away from the project. Make some tea. Curse out loud. Come back later.
The real solution: I had a little extra of the gingham fabric. Patchwork to the saving.
I had only made a mistake with one half of the fabric, so that became the back. I cut that piece in two and added a strip of the under layer fabric to the middle. It almost looks like it’s a proper feature, at least to my eyes.
I’ll have to confess I felt rather smug after this. My solution worked, I didn’t have to buy extra fabric and my dress is perfectly wearable.
My smugness was somewhat abated after my mum saw the dress and said it looked like a maid’s apron, but that’s another story…
That’s it, three examples of things that didn’t go as planned but had a solution. If you let your brain think about it for a while in the background, I bet you’ll come up with alternative endings for your “mistakes.” Like the cliché goes, mistakes can be opportunities to do better later. Beats giving up, right?
Finally, the random photo of the day:
My lovely osteopath Jane went on holiday to the Shetland Islands and I asked her to send me some sheep pics. She obliged and I thought I’d share them with you.
It’s been another busy week heading into the September long weekend. We are back again in Oakville which should have been about 5.5 hours drive from Ottawa. Instead, the traffic was heavy and slow. (we saw unsuccessful car sex in three locations, once involving multiple vehicles! I told my car not to look as we drove past “avert your headlights!!” I was driving so I didn’t get any naughty car pictures to show you.) we are traveling because two of my brothers-in-law will be there. One departing and another arriving.
This past week I have been continuing the fleece washing. I had a strainer basket of wool ready to put out on the drying rack on Friday morning but restrained myself (since the weather is sentient and has a poor sense of humour, it would rain if I left it out to dry. It’s the long weekend. We don’t want it to rain!
1) the last of ram #2 soaking.
2) don’t tempt the weather by putting out fleece to dry.
we also cleared the path to the back of the garage from errantly growing raspberry canes. this will make it a bit easier to finish raccoon-proofing the garage.
3) the extracted errant raspberry
My other quest for the week was to make presents for my brothers-in-law. There Are 5 brothers, and I have made one for brother number 4 and one for Glenn’s Mom last trip. So four more to go! I have tried variations on the theme and so far I am pleased with them.
The reason i am making a small invasion or maybe an infestation, of chickadees is they remind me both of my parents cottage and also of my in-laws home in Oakville. His brothers have been taking turns staying with his mom and i had hoped the chickadees would bring them good thoughts of Oakville and watching the birds and squirrel fight over the bird feeders (they are not squirrel feeders so we know is in the wrong in that war!) We were down this time as brother #3 was leaving and brother # 2 was arriving. We hope to see brother #1 before we leave.
4 & 4.1) Mega-Chickadee (Arnold) with his in-progress smaller cousin (for brother #4)
I had wanted to tell you about the first two I made. I had brought the wrong thread with me, pant mending thread not eye attaching thread (really they’re totally different thread!), when I was making the first two guys so devised a way to attach eye without the thread. This would not be strong enough if your creature was to be played with but if it’s just sitting around the eyes are secure and won’t fall off. (how embarrassing to have eye drop sounds terrible)
Without appropriate thread, I needed a way to get the bead (I had brought small black glass seed beads) to sit in the location I had wanted and to stay in place.
I used the felting needle to work some of the wool through the bead, arranging it so that there were wisps on both sides of the bead.
5) bead and a bit of fibre
5.1) Bead with a small amount of fibre through the centre
6) both eyes ready to attach
I chose the spot and used the awl and felting needle to make a dent in the felt head. good thing the little guys seem a bit soft in the brain, more room to inset half an eye bead.
7) using the awl
8) marking the other side and checking it’s in the correct location.
9) making the hole a bit deeper with the felting needle
First try; I found it was not as secure with a finer amount of fibre and need to have more added to it. With a bit more added lateral to each eye, the attachment was a success.
10) first one done, on to the next armature.
Second try; This time I tried using more fibre. (as much as would fit through the opening in the bead seemed the correct amount.)
I continued to work with wisps of colour to give a chickadee a bit of suggestion of feathers.
Once I had the little guy to my liking it was time to trim off some of the fuzzy halo. As I mentioned in a previous post the core wool from World of Wool has a bit of kemp which occasionally sticks out at an odd spot. The Corriedale is also showing a bit of halo which is more noticeable where the black is adjacent to the white. I used the scissors carefully removing the fuzzy bits of wool.
11) Hair cutting started.
12) a good trim
13) Two handsome chickadees ready for their new homes.
the Chickadees were given to their new owners before we departed back to Ottawa. Both were surprised and seemed happy with their new pets.
The next step is to make a few more. Unfortunately, I was working in front of the computer and had been distracted from my audiobooks by impending Hurricane Ida. I got so distracted with the Horrors of the storm I lost track of the number of armatures I was making, 4 or was it 5 more. Looking away from the nightmare water and wind event on the computer I realized I am overrun by chickadee armatures. There seem to be 6 of them now staring at me! I have a production line of leg wrapping ahead of me! That’s 36 toes to practice on! I seem to be making a small flock of chickadees!
14) 26ga steel toes wrapped around 20ga steel floral wire armature (both wires are coated so the steel is not exposed)
15) all lined up with legs and beaks done, still have to try toes with wax. (the fleece i chose has some lanolin left in it after washing and has a lot of very fine crimp)
16) now with a bit more body
the eyes for the last two worked well out so well I used the same technique again.
17) supervision!!!
17.1) time to add the second eye
18) one of the two I have finished and brought with us to give to brothers #2 and #3 this weekend.
19) here he is in a jaunty pose before retiring to his travel facility complete with bagged lunch for his travel pleasure.
20) upon our arrival here in Oakville, we found that Glenn’s mom’s bird had discovered the bole of nuts on the coffee table!! He seems to be very happy in his new home but is reluctant to let the rest of us nibble on the nuts. I may have to leave some sunflower seeds for him too!!
I have been doing variations on wing attachments, separate wings, wings constructed on the body, separate wired wings, wing tips added to built-in wings….. who know what else I will try?
I promise I will do something other than chickadees in the near future! Have fun and keep felting
This exercise started with me wanting to make some felt cubes and triangular prisms to make a more 3D version of a sky view landscape. the first thing I thought of doing to get the shapes was to felt around some small wooden blocks. I spit some into roof shapes and some in half for shorter cubes. Although this seemed like a good idea it was not very successful. the pointy corners proved to be a problem and adding more wool would just start rounding them too much.
Then I was talking to the group and Lyn said to try squishing them into squares when you making them. Well of course why didn’t I think of that. Now I need to make balls and I had been thinking I should try making a bunch of them, why make 4 if you can make more. I had seen a video of them making large numbers all at once in Nepal. So off to google how to do that. There are several videos on how to do this. Living felt has the best one.
Step one roll up some wool for the beads. I wrapped the wool around a chopstick and poked it a few times with a felting needle to hold it while I make more.
Once I had a bunch ready I added some soapy water. Just ad a little then roll them around the container to absorb it. Then add a
little more until they are wet but not soggy.
Then I popped the lid on and started rolling them around and shaking them until they were felted. This works really well and doesn’t take long at all. I rinsed them and couldn’t believe how dirty the water was.
Now I need to full them, I put them on a towel and used the starburst lid of my container to roll them around. adding pressure as I went.
On to a drying wrack.
I squished a few into the right shapes for my picture
I haven’t started the picture yet. I did make a sheep glasses holder for my granddaughter who just got glasses. I flattened the bottom so it wouldn’t roll. You rest the glasses on the lamb’s nose. His nose I a bit piggish but he was gone to her bedroom to find the best place for him before I could fix it.
And just to throw another spanner( or 2 ) in the works we started having lambs ( early, rams are very sneaky and quick when they want to be) got our new puppy. not sure how much felting will be going on but I usually do best when I have no time. Always seems to motivate me and create ideas.
I simply had to develop one of the pieces from my play with multiple resist further. This particular piece intrigued me, and after we spent time together ie me staring at it for a considerable time, I knew where we were going. The centre felt like something had fractured, a cell broken apart. Having recently lost both my parents it felt like a metaphor for my grief and the feeling I was going through, emotions of pain and detachment. These became the red, pain, anger, hurt. The white, detachment, cold, an emptiness. And do our journey began.
To the original felted piece, I added some shaped prefelt which I added with a couching stitch. This gave me the raised effect. I then added beading from the centre of the “cell” out to either side. Throughout the whole piece, I chose a palette of white red black and grey ( there is a little exception to that but I will go further later ).
I wanted to use a material other than felt for the background of the piece and decided on mixed media. As a base, I used calico which I coloured with acrylic paint. As I turned out I needn’t of done this as I covered the whole piece in materials. I knew from the very beginning how the piece was going to turn out but wasn’t sure of the materials I was going to use to achieve the textures I wanted. So I had a play. I got several different materials and heat treated and used my embellishing machine to see the effects I could achieve.
For the red area, I decided upon prefelt with red satin added with the embellisher, heat treated tulle, crocheted wire and beads.
Arranging composition
In the white area, I decided upon prefelt embellished with satin I also heat treated a mixture of materials lutrador, plaid plastic bags and plastic netting (from a cheese sac) doing this gave the texture of ice which is what I wanted to achieve.
Developing the white area
For the other surrounding area, I cut up an old silk dress that had wonderful shades of grey. These were added with the embellisher around the edges. It had many shades of grey going to black so I could shade the composition. It did take the whole dress to complete it.
The base layer was now laid down so next I added the beading As part of the white area I wanted some raised beading so I beaded small clusters of beading on the net and glued the back. When dry I cut them out and arranged them on the piece.
In these little parts, I added only a couple of golden seed beads. My little sign of hope I suppose.
In the red area, I added beading in shades of deep red and dark green also many sequins which reflect light wonderfully. wire crocheted flame-shaped pieces were added radiating out into the grey area. I also embroidered with daisy chain stitch.
And so our journey ended. I have never worked on a piece that felt like a part of me more than this. Because of the lockdown here I am unable to get it framed but it will be. Then it will go on my wall


 1) the last of ram #2 soaking.
 2) don’t tempt the weather by putting out fleece to dry.
 3) the extracted errant raspberry
 4 & 4.1) Mega-Chickadee (Arnold) with his in-progress smaller cousin (for brother #4)
 5) bead and a bit of fibre
 5.1) Bead with a small amount of fibre through the centre
 6) both eyes ready to attach
 7) using the awl
 8) marking the other side and checking it’s in the correct location.
 9) making the hole a bit deeper with the felting needle
 10) first one done, on to the next armature.
 11) Hair cutting started.
 12) a good trim
 13) Two handsome chickadees ready for their new homes.
 14) 26ga steel toes wrapped around 20ga steel floral wire armature (both wires are coated so the steel is not exposed)
 15) all lined up with legs and beaks done, still have to try toes with wax. (the fleece i chose has some lanolin left in it after washing and has a lot of very fine crimp)
 16) now with a bit more body
 17) supervision!!!
 17.1) time to add the second eye
 18) one of the two I have finished and brought with us to give to brothers #2 and #3 this weekend.
 19) here he is in a jaunty pose before retiring to his travel facility complete with bagged lunch for his travel pleasure.
 20) upon our arrival here in Oakville, we found that Glenn’s mom’s bird had discovered the bole of nuts on the coffee table!! He seems to be very happy in his new home but is reluctant to let the rest of us nibble on the nuts. I may have to leave some sunflower seeds for him too!!