The third corner. Autumn
Autumn has arrived. Time for celebrating harvests, and gathering the fruits of the hedgerow. There are many apples, plums, damsons, bullace, greengages, and pear trees all laden with fruit, a little dexterity is needed to get a tasty snack, or to collect for pies, crumbles and jams. Many a blackberry has been collected and eaten, or frozen, made into jam, or used to make a tasty liqueur by soaking in vodka, or whiskey along with a little sugar, and left to mature in readiness for adding to a glass or two of bubbly at Christmas. Yum. Not the whiskey obviously! Not forgetting the profusion of hazelnuts, walnuts and glorious conkers, and sweet chestnuts that are such a treat to find.

Each year from early August, I go searching for some hop vines that may have escaped from cultivation, and moved into the hedgerow at some point. I am not sure if there is an actual wild hop though. From mid August to early September I am on the lookout for the tell tale leaf shape and colour, and lime green shade of the hop flower, as the vine clambers over nearby trees and shrubs, and hoping that I can remember the spot that I collected them from the previous year.

So, for the third corner of my blanket I have decided to needle felt an impression of a small portion of the hop vine that I collected early September.
I love finding these vines. I use the dried hops along with some lavender to make little pillows to slip inside a larger pillow to encourage a restful sleep. I also hang a hop vine in my kitchen, such a lovely decorative addition, and I change it each year.


Hop growing is plentiful in Herefordshire where I live, and also in Kent, but alas they are not as widely grown as in years gone by – but I am hoping that I am mistaken in this belief. It is lovely driving along and spotting a field with the hops stretching up the tall poles and wires. I’m not sure where else in the UK they are grown other than already mentioned, but with so many craft beer makers in this country the growing of hops is unlikely to die out any time soon.
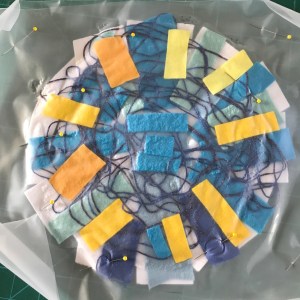
I have needle felted my hops and used some yarn to illustrate the vine. A photo shows the size of the vine I am using. I have removed all the leaves – as I usually do – but some are present for size.


I have machine stitched over the ‘hops’ to secure, and also added stitching to the vine. The hop flowers are a lovely shade of green, with a touch of yellow when fresh, and gradually the colour fades as the flowers dry.


I have stitched the leaves using my machine too, and I have left them bare, so to speak. I was planning on adding some colour to the leaves, but I think they look better without.