This is a throwback post. We had a very busy first day at the farmers market. The busiest day we have ever had. We had what we thought was a 3-week supply of Pasties and sold all but 2 of them. So there will be no felting this week while I restock 4 flavours of pasties for next week and hopefully enough to last more than one week. So, I hope you enjoy this post from a few years ago.
The museum store wanted some shawls that are more “springy”. This is the first one.
It is a pastel pink and blue silk with pale pink wool on 2/3 of it. I then added some silk hanky flowers and leaves at each end and in the middle. It was to plane so I added some more leaves down the length. At this point, I remembered to take some pictures.
The pink wool is in a very thin layer so it will be very lightweight for spring. The finished piece is about 15 inches wide so it can be a small shawl or a wide scarf.
I like doing shawls with a silk section left to float as you walk.
The pictures are in my studio, taken hastily as my turn to blog snuck up on me. Everyone seems to be complaining about it being too dull outside to take pictures. I have the opposite problem. The sky is blue, the sun is shining and the ground is covered in white highly reflective snow. It is blinding out there.
Are you thinking about spring things with soft colours or are you still in hibernation with warms cozy colours?
Ta-Dah! I finally finished my parasol. If you haven’t a clue what I’m talking about, please see this blog post
I made a paper pattern of the segments of the umbrella then I cut out the felt panels.
I stitched the panels together using the wide zigzag stitch that worked so well on my sample. The thread I used (top and bobbin) was ‘The Bottom Line’ by Libby Lehman – it’s almost ‘invisible’ and the colour of the felt showed through the stitches.
I was worried about how I could ‘pin’ the panels together for stitching, but as the felt is thin and firm thanks to the fabric between the fine layers of wool, it was easy to sew by just butting the edges together just before the pieces went under the needle. The parasol shape became obvious after only stitching 2 panels together.
I cut a hole in the centre so that the cover would slide over the central pole. To reinforce the hole, I found an old metal key ring that was the exact size. I glued it in place, then stitched it with perle embroidery thread.
I trimmed the bottom edge, then using the same red thread that formed the flowers, I secured the cut edge with blanket stitch. It’s a very bright red – I’d describe it as neon because it almost glows!
Compare the zigzag stitching in the photos above and below – one looks blue the other looks yellow, but it’s the same pale grey thread described above.
The ends of the spokes of the umbrella have plastic caps with large holes at the back so I secured the cover to the end of each spoke with thread bows.
Ann (Shepherdessann) expressed an interest in what the parasol would look like inside, so here it is on its back (the under layers of wool were plain colours – baby blue and canary yellow.
The summer cover is quick to fix in place and just as quick to remove, and fold away, for the winter.
Apologies to those who follow my blog and have already seen this post but it has had such a good reception, with many people commenting on how useful they have found it I thought it would be good to share it here and to be honest, I have been so busy making masks for the last few weeks that I haven’t had any time to make felt (and I miss it so much!).
There has been an overwhelming deluge of information and some confusion around the use of face masks to limit the spread of coronavirus in recent weeks. I thought I would put my science background (I studied coronaviruses for my PhD) to good use and try to summarise the deluge of new information into something more digestible to the lay-person, in particular those looking to make or buy a handmade face mask.
Please, if you take nothing else from this post, remember this….
Wearing a homemade mask alone will not prevent you from catching Coronavirus, hand-washing and social distancing are still needed but wearing a mask is widely accepted to help keep us from unwittingly spreading the virus.
What masks do most effectively is limit the spread of virus from people who are not yet showing symptoms to other people. While they make it more difficult for you to touch your nose and mouth they will not stop you touching a contaminated handle and then rubbing your eyes. Social distancing (keeping 2 m / 6 feet away from anyone you do not live with), avoiding touching your face while out of your home and scrupulous hand hygiene are still your best bet for avoiding this nasty infection.
Think of mask-wearing as an act of altruism, you are protecting everyone else from the virus that you might be breathing out without even knowing that you have the infection. Between 20 and 50% of people infected with coronavirus do not know they have it and there have been documented instances of asymptomatic carriers infecting other people (Mizumoto, Nishiura). Masks are most effective in limiting viral infections if everyone wears them in places where social distancing is difficult.
Most of the world has now adopted a policy of wearing masks in enclosed public spaces (public transport and shops are key hot spots where you might have close encounters with people you do not live with), so it looks like face masks are here to stay.
Please don’t rush out to buy an N95 mask or surgical face mask, our healthcare workers (from doctors to nursing home assistants) need these much more than we do. Another issue with the general public using disposable, medical-grade face masks is the environmental impact, they contain synthetic materials that will take centuries to degrade, piling up in land-fill sites for generations to come. Unfortunately, washing and reusing them is not an option for most of these masks, they disintegrate and lose their filtering integrity if you put them in the washing machine. Making or buying a reusable face mask is far more eco-friendly and sustainable for the planet.
Which materials make the best face masks?
There have been several papers submitted or published on this topic recently, some with very exciting results but I think we need to consider the data regarding particle size penetration of different materials with a healthy dose of scepticism. These data are generated in a lab with specialist equipment and as such are a useful starting point but do not take into account human behaviour or the “sticky-ness” of virus particles and the liquid droplets they are invariably carried in when a person talks, coughs or sneezes. The laboratory studies reported in the scientific literature are conducted by blowing particles of a known size through samples of fabric and then measuring how many particles reach the other side.
This area is a rapidly evolving topic of research, I fully expect mask material recommendations will be updated multiple times in the coming weeks and months.
What do N95 N99, FFP-2 and FFP-3 mean?
These masks are seen as the gold standard and are currently in short supply as they are are single-use items, desperately needed by front-line medical staff.
FFP-2* (Filtering Facepiece against Particles) and N95 meet equivalent standards, the materials of both masks will trap at least 95% of 0.3 micrometer (um) diameter particles.
FFP-3 and N99 are broadly equivalent to each other too, trapping at least 99% of particles.
As with all masks, how well they fit an individual will impact their effectiveness, this is particularly true in children (van der Sande).
While coronaviruses, measuring 0.1-0.2um, are smaller than the 3um particles used to test commercial dust masks and respirators they are expelled from the body (through talking / coughing / sneezing) in fluid droplets, and these droplets are typically 0.1-10um in diameter (Zayas), making these studies relevant to viruses as well as dust particles.
*FFP is most commonly used in Europe and sometimes you will see FFP2 / FFP3 abbreviated to P2 / P3.
Breathability
When selecting a mask material there has to be a trade-off between breathability and particle filtration (how many particles will be let through). At its extreme, plastic sheet may give 100% protection against virus particle transmission but it does not allow the wearer to breath so is useless as a mask material. At the other end of the spectrum, cotton scrim has large open holes between the threads, it is very easy to breathe through but also allows even large particles to pass through unhindered.
Recommendations for mask material selection
Up until last week, I was making masks with good quality quilter’s cotton fabric (at least 80 threads per inch), which had been recommended by several research groups, and a layer of flannel (I suspected that the fluffy surface of flannel would capture more particles but at that stage had not read any papers that had tested it as a material).
Then, last week I stumbled across a very exciting paper. It was submitted on 24th April to the American Chemistry Society Nano (I know, not looking very exciting so far but bear with me…). This team reported on the effect of combining different materials to improve small particle filtration without sacrificing breathability (Konda). Some of the combinations they tested performed better than the surgical masks and were on a par with the N95 masks under laboratory conditions. This table summarises their most promising materials:
Clicking on the table will make it larger.
As mask makers, we are most interested in the left hand column, the less than 300 nm column. 300 nm = 0.3 um and if your recall, coronaviruses are roughly 0.1-0.2 um in size, so in aerosol form they will come under that column but in droplet from they would most likely be in the middle column for particle size, however, these larger droplets tend to fall to the ground quickly so you are less likely to be breathing them. The higher the number in these 2 columns the better, this reflects the percentage of particles that the material has trapped.
The column on the right is a reflection of how breathable the fabric combinations are, i.e. how hard you have to breathe to move air through the layers of fabric. Although slightly increased in comparison to the N95 and surgical masks the researches indicated mask wearers would be unlikely to tell the difference in practice.
I was disappointed that the researches did not share which type of “natural silk” they used, they do not appear to be aware that silk fabric is available in a very wide range of weights and unlike some of the other fabrics tested, they did not provide a supplier either. I am going to assume they used a medium weight (5-8 MM) as 4 layers of heavy-weight (12MM) silk would be quite difficult to breathe through.
The results for silk fabric are most exciting if you are thinking of folding a cotton bandana looped over 2 elastic bands to create a makeshift face covering, you might want to reach for a silk scarf instead!
Which shape mask should I make?
The Konda et al group were keen to point out that a poorly fitting mask significantly reduces its ability to filter particles, even the much coveted N95 mask only managed to filter 34% of particles if the mask did not form a tight seal. This seems rather obvious, if there is a gap between your skin and the mask, air is going to take the route of least resistance and flow through the gap rather than the material. Therefore, finding a mask shape that fits snugly is at least as important as choosing the right materials.
A poorly fitting mask, best leave your bras in your underwear drawer
Thousands of different face mask designs / templates have been shared online in recent weeks, many with accompanying instructions on how to assemble your mask. I won’t list them here but if you Google “free face mask pattern” you will have hundreds to choose from.
The first design I tried did not fit at all well, it did not include a nose clip so gaped either side of my nose, and when I talked it rode down, almost exposing my nostrils. I had a play with a few different templates in an attempt to find one that fitted well and this is what I found:
Include a nose clip, this could be made from any bendable metal but aluminium or plastic coated metals are preferred since it will be washed and you don’t want the metal to rust, twisty ties are recommended by several makers.
I found the pleated designs offered enough length to wrap under your chin and not move around when you talk.
Make sure it is wide enough, the outer edges of your mask should extend beyond the outer corners of your eyes but not reach your hairline.
Elastic or adjustable straps will help to accommodate different head sizes.
Washability
Another important consideration is washability. Coronaviruses, are an enveloped virus (this means they have a lipid [fatty] outer layer) this layer breaks down when exposed to detergents (just like washing up liquid cleaning greasy dishes), without its lipid envelope the virus is inactivated. This is why hand-washing with soap and water is so effective. Washing your face mask with detergent will also destroy virus particles trapped within its fibres. Making your masks machine washable makes it easy to ensure you never need to reuse a dirty mask, you just pop them in the machine with the rest of your washing.
I make my masks from machine washable materials. If you want to use paper towel or coffee filter papers in your mask, I would choose one of the mask designs with a filter pocket.
Are some materials toxic?
Yes, you do need to be careful, especially with HEPA filters, some of which contain fibreglass, you really don’t want to be inhaling microscopic fragments of that!
I also strongly recommend machine washing any fabrics you plan to use, partly because they sometimes shrink the first time they are washed but mainly to remove any size and other treatments left on the cloth during manufacturing.
Using masks while caring for someone with Covid-19 symptoms
I am surprised by how little this is discussed in the press, while various governments request or instruct us to wear masks when in potentially crowded public spaces and that healthcare professionals should were them as PPE when treating patients there is rarely any mention of using them in the home if you are isolating with someone with Covid-19 symptoms.
Wherever possible, the sick person should isolate themselves in one room as much as possible, if they need to leave that room (to got to the bathroom for example) I recommend they should wear a mask. Similarly, if anyone needs to enter their room, I think it is a wise precaution for both parties to wear a mask, with the obvious exception of the sick person struggling to breathe, in which case you probably should be calling for an ambulance.
In summary
Homemade face masks worn in public spaces, where social distancing is difficult, will help limit the spread of coronavirus but they are no replacement for good hand hygiene and social distancing.
Include a nose clip in your masks to achieve a good fit.
The best materials for constructing your masks include, quilter’s cotton, polyester chiffon, flannel and natural silk. Layering a combination of different materials in the same mask is likely to produce the best filtration and may be on a par with N95 masks.
At least 2 layers of fabric is advisable but be wary of using too many layers, you still need to be able breath through your mask (not around it!)
Always wash and dry your mask after each use.
Please leave the medical grade masks for the medics and give yourself a pat on the back for not only helping them but investing in a reusable face mask that is better for the environment too 🙂
Stay safe
References
Abhiteja Konda, Abhinav Prakash, Gregory A. Moss, Michael Schmoldt, Gregory D. Grant, Supratik Guha. Aerosol Filtration Efficiency of Common Fabrics Used in Respiratory Cloth Masks. ACS Nano, 2020
Mizumoto K and Chowell G. Transmission potential of the novel coronavirus (COVID-19) onboard the diamond Princess Cruises Ship 2020. Infectious Disease Modelling 2020. 5: 264-270
Nishiura H et al. Estimation of the asymptomatic ratio of novel coronavirus infections (COVID-19). Int J Infect Dis doi: 10.1016/j.ijid.2020.03.020
van der Sande – Professional and Home-Made Face Masks Reduce Exposure to Respiratory Infections among the General Population, 2008
Zayas G et al. Cough aerosol in healthy participants: fundamental knowledge to optimize droplet-spread infectious respiratory disease management. BMC Pulmonary Medicine 2012, 12:11
Last fall we harvested and processed the flax grown over the summer. As part of the process, we removed the seeds from the stocks. We got quite a bit of seed. Some of which will be used to make flax-dressing (also known as elephant snot). It is a truly disgusting mucus looking substance that makes spinning flax much easier. But you don’t need very much to make a reasonable quantity so we ended up with more seed than we started with. Since everyone wanted to have a second year of the project, we put aside most of the three harvestings of seeds.
Technical details
– First, and largest harvest, was expected to yield the finer flax but less ripe seeds (500g)
– Second and third harvest were a smaller patch we had kept in reserve to check the increase in coarseness of the fibre and to obtain fully mature seeds. (550g)
At the density planted last year this would allow us two rows and some left over for flax dressing.
April 25th 2020 – a beautiful day at Cathy Louise and Henry’s Farm
1 Henry with the two flax plots
The ground is free of snow, has been tilled and Cathy Louise and her husband Henry plant the seeds in two 4′ X 50′ plots. The east plot is on the left and has the second and third harvests seeds (550g), the west plot on the right has the first harvest seed (500g).
By May 8th 2020 , undaunted by late snow flurries, the seeds are sprouting and looking like a green mist on the ground!
2 East plot – second and third harvests seeds
3 West plot – First harvest seeds
4-5 Close ups of seeds
May 18th 2020 (the long weekend for those of us who are getting lost in as to the date), Cathy Louise checks the progress of the flax.
6 East plot – second and third harvests seeds
7 West plot – First harvest seeds
At this point, it looks like the first harvest seeds may be a little slower or have a slightly lower germination rate but they are pretty close.
May 28th 2020, Next growth check. The flax is 4 inches tall and filling in
8 East plot – second and third harvests seeds (some of Cathy Louise’s Market garden is visible to the left of the plot.)
9 West plot – First harvest seeds
The weeds are starting to show and are about the same height as the flax. It is time to call in the weeding crew. We have a quick email chat about weeding dates at first booking the weekend so everyone can help out, possibly in shifts. It was quickly realized quite a few of us did not have plans for Monday! This time the ill fortune for many of us on reduced hours or off work completely is to our advantage! (Finally a good thing has arisen from all the bad.)
So adding masks to gardening equipment we will be heading out to see Cathy Louise and Henry on June 1st!
June 1st 2020, Weeding part 1 (we saw people we don’t live with!! it was wonderful!)
10
We arrived at 10am and were impressed with the amount of growth from the flax. We quickly got to work.
This slideshow requires JavaScript.
11-14
Looking at the flax we suspect we will increase the seed density next planting. At this point both plots look quite healthy. Here are a few close ups.
15-16 East plot – second and third harvests seeds
17-18 West plot – First harvest seeds
As you can see we had a number of different weeding techniques today. Glenn used his now traditional horizontal weeding position and Bernadette preferred the milk crate over the kneeling stool we had brought. We also had examples of kneeling and standing, with back supported by resting one arm on the upper leg (Quads). All techniques worked since you can see the carcasses of the extracted weed army littered about the valiant and triumphant weeders!!
This slideshow requires JavaScript.
19-26 different weeding techniques
The rows, being quite long, we all were able to keep socially distanced while still being able to chat. It was wonderful to see everyone. We got a good amount done but we wore out, let us say we made a strategic withdrawal from the field before getting both rows fully free from the weeds. We hope to finish up the first batch of weeding on Saturday.
Here is today’s work crew. As we wearily wandered from the field leaving the flax, a few remaining weeds and the silent member of the group to watch over the flax, so no one nibbles on it before it’s ready for harvest.
So we are just starting the 3rd month of the second quarter challenge and I have a finished piece. Everyone, please clap because I actually finished it in May, very early for me who usually finishes the challenge after the next one has started. Here’s the challenge if you need a refresher. 2020-second-quarter-challenge
Last time I teased you with the beginnings. No one could guess what it was. Grey didn’t seem to be a very summery colour. Well, I made a basket. I had seen a few online and thought that’s a good idea. I liked that they looked rustic and functional rather than pretty. Best laid plans of mice and men as they say.
I started with a pattern. I wanted it to be big enough and I thought an oval would be the best shape to start with.
I wanted a sturdy basket so I used 160 grams of Finnish wool. In retrospect, I think another 40 grams would have been better. I thought the handle and where it attaches will take the most strain so I added 5 strands of Briggs and Little sport singles between the second and 3rd of the 4 layers. This sort of thing is always much fiddler than I think it will be.
I added 3 lines of the Briggs and Little to the outside.
After rubbing and rolling and for a while it was time to cut the handles.
I measured to get the handle in the center and made a template but then not thinking I cut the whole piece out. I had intended to only make the horizontal cut. I cut both before remembering that was not what I had intended. Oh well, I can fix that later.
The shrinking went very well. At first, I thought the ends dipping down would be a problem and I tried to stretch them up but after shaping it I realized it was a good thing as the middle shortens as you open it up. I already knew that I just wasn’t thinking it through, probably because I was still mad I cut he 2 side tops off.
When it was dry I pinned the two cut off peices back onto the handled.
And used the machine to sew them back on.
Next, I wasn’t fussy about the edge of the basket so I used some fleece, double-fold bias tape around the edge. I had some grey in my stash so that worked out.
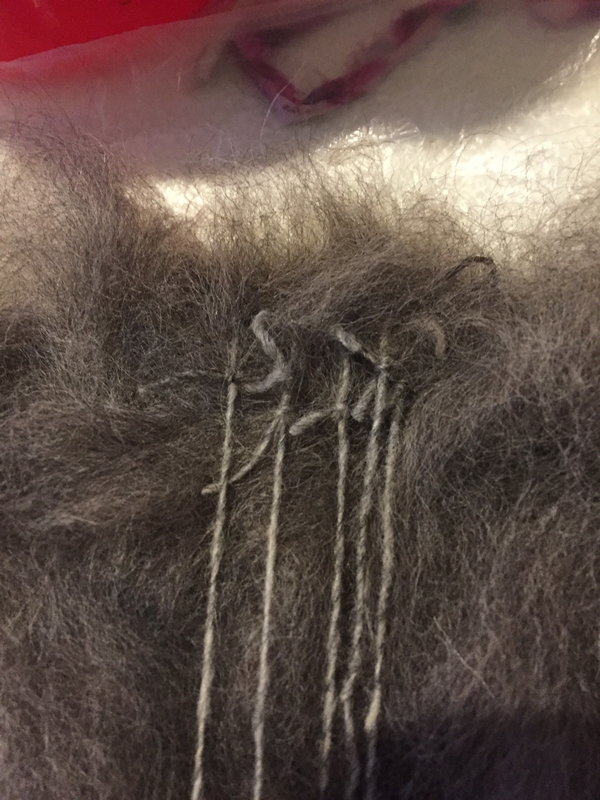
As I feared the red stripes all but disappeared. This is the best place they showed, not very impressive.
So, I went and got some of the yarn, the red and some yellow and stitched on 3 stripes. You can see the old red stripes more in the picture than you can in real life. I think I would just do the stitching next time. It is much easier really.
For the handle, I rolled up one side flap, then wrapped the other side around it and stitched it in place. It feels sturdy and comfortable in your hand. I used the red and yellow yarn around the handle to make it more visually appealing. If you wanted the stipes to say exactly in place you could catch the underside of the handle as they go round.
Here it is in its entirety. I am still not thrilled with it but my daughter really likes it so it is probably just me. It is growing on me. I know what I will do with the next one to make it better, besides paying attention and not cutting off parts that I want to stay on.


 1 Henry with the two flax plots
 2 East plot – second and third harvests seeds
 3 West plot – First harvest seeds

 6 East plot – second and third harvests seeds
 7 West plot – First harvest seeds
 8 East plot – second and third harvests seeds (some of Cathy Louise’s Market garden is visible to the left of the plot.)
 9 West plot – First harvest seeds
 10
10