Last week end I went to Twist. It is a fibre festival in Quebec. It is about 1.5 hours away from where I live. I shared a double booth with 2 friends.
we had lots of stuff. Elizabeth had some yarn and spindle kits and lots of cool roving she had died in a special way to create really cool yarn. I only got a blurry picture of it close up I am sorry to say. This is some of Judy’s wonderful hand spun yarn.
Next to us we had a sweet lady who was displaying some fabulous dolls and selling some books. This Traveling yarn store was the other way.
The lace makers were there they had a big display celebrating the Rideau canal in winter. it is the worlds longest skating rink. Everything on the board is hand made lace.
Of course there was a lot of fibre for sale there was a whole booth for qiviut from raw to finished product. Qiviut is musk ox fibre. and some beautifully dyed mohair.
and of course Ashford was there. I imagine they are on tour. I can’t imagine they cam just for Twist. They where very nice and had lots of equipment there for people to try. My big purchase was a new e clip for my spinning wheel.
we stayed at a very nice bead and breakfast in the tow where twist was held, Saint-André-Avellin I didn’t get a picture of that either but I did get a picture of the great “club” sandwich we had at a local restaurant. On the bottom was duck confit and bacon, on top was green apple onion and celery, the bread was apricot, rain and hazelnut bread. It was so good we eat it both nights.
This is a guest post by Frances T. Frances is a member of the forum and wanted to share her method of felting a vessel to cover potted plants.
Since I love gardening and floral design I have been thinking of ways to use felted pieces in those hobbies. Right after I made my first Vessel I needed a container for a floral design and used it over an ugly pot to rave reviews. So I thought why not dress up potted plants that come in boring green plastic pots.
And then the list for uses started to grow – bread baskets, to hold fruit, utensils, mail, toiletries, etc. The fact that Pot Covers can be washed in mild soap and water and air-dried is a plus as well as being inexpensive to make. Plastic pots were a $1.00 each, roving and embellishments not more than $4.00 and if an electric polisher/buffer is used can be made quickly and easily.
After trying several ways to shape them that were difficult and cumbersome for me a tutorial was completed on constructing them using a flat resist and a form (Plastic Flower Pot). This Tutorial is intended for use by persons who have a basic knowledge of wet felting. Before starting, please review the following definitions as these terms are used throughout the instructions.
Layer of Roving – Wool roving that has been laid vertically and then horizontally constitutes one layer.
Template or Resist – Guide for laying out the roving in the desired shape and used to felt over. It keeps the two sides of the piece from felting together except for the edges.
Electric Polisher Buffer – Manufactured for polishing and buffing vehicle exteriors but works well as a felting tool. Always use with an electrical outlet with GFI Protection.
Lingerie Bag – A mesh bag used to place lingerie in when using a washing machine.
Produce Bag – a mesh bag, sometimes stretchy, that onions, potatoes or other produce is sold in.
Plastic Canvas – Plastic molded into a grid used in cross-stitch or needlepoint.
Shelf Liner – Use the type that is a mesh consistency not smooth.
Plastic Sheeting – Plastic that is sturdy enough to hold up to vigorous rubbing but also flexible enough to be rolled.
Materials List
• 6 inch Plastic Pot without drain holes & no rolled top edge
• 2 to 3 oz. wool roving
• Plastic canvas
• Bubble Wrap
• Spray Bottle
• Dish Soap
• Scissors
• Shelf Liner
• Plastic Sheeting
• Yarn, Silk Hankies, Embroidery Floss etc. for embellishing
• Lingerie or Produce Bag
• Clothes Pins
• Electric Buffer
Note: These instructions are for using a buffer but the cover can be made by hand rubbing & rolling as is done in traditional wet felting. The buffer significantly speeds up the process.
Supplies
Let’s get started –
1. Make Template – Plastic sheeting cut to 10 1⁄2 inches vertically by 8 1⁄2 inches horizontally with one vertical end curved. Use a round dish as a guide to make curves. (This is for a 6” Pot as pictured )
2. Set up – On work surface place shelf liner, then bubble wrap and then template. The shelf liner is to keep bubble wrap from sliding when working.
3. Felting Process
a. Place rows of roving vertically and horizontally on the template. Let some wisps of fiber lay over the edges of the template on the sides and bottom.
Laying out the roving
b. Place plastic canvas on roving
c. Wet with soapy water
d. Rub gently with hands except for the wisps laying over the edge of the template until roving just holds together.
Hand rubbing
e. Carefully lift plastic canvas pulling roving gently from canvas as necessary
f. Turn template and roving over and gently pull the wisps of fiber that were left over the edge onto this side of the template – to avoid the look of a seam keep the fibers to a minimum and smooth out completely.
Folding over wisps of fiber
g. Repeat steps a. through e. on this side of the template.
h. Add another layer of roving by completing steps a. through f. again so that there are 2 layers roving on each side.
4. Adding design
a. Put down another layer of roving (pale green in this example) and then add design or embellishments on top of the roving. Embellishments are bamboo fiber (green) and tussah silk (pale yellow).
Adding design
b. Place the plastic canvas on design, wet and rub gently to set the design and then run the electric buffer over the piece for a couple of minutes.
c. Carefully lift plastic canvas pulling roving gently from canvas as necessary
d. Turn template and roving over and complete steps 4. a. and b. again.
e. Alternate between bubble wrap and the plastic canvas buff on both sides until the roving and embellishments are felted together.
Using the buffer
f. Remove bubble wrap and plastic canvas and buff both sides directly on the roving. Caution: Make sure the design is set before completing this step. The cover should be completely felted now.
5. Forming the pot cover
a. Rinse the cover using warm water until the soap is removed.
Rinsed and ready to finish
b. Cut a narrow strip off the top (straight) edge.
c. Open the cover and remove the plastic template.
Removing the template
d. Pull the cover over the outside of the plastic pot. This may take some pulling and stretching depending on the wool blend used as different wool shrinks and felts differently. The key is to pull the cover up as tightly as possible over the top edge of the plastic pot smoothing out any loose spots and wrinkles. It should be smooth on the bottom with no wrinkles on the sides.
e. There will be excess felt at the top. Turn the cover over the inside edge of the pot. If the cover is loose in spots the hot water bath and dryer in the next steps should shrink it to fit.
f. Using clothes pins secure the top edge of the cover to the pot. This is very important as the pins hold the felt in place.
Securing the cover to the pot
g. Place the pot in a mesh bag. Not fine mesh netting!! Make sure the bag is securely closed.
h. Run very hot water over the pot for about 2 minutes.
i. Place in dryer for about 15 minutes on heat setting.
Mesh bag in place and ready for the dryer
j. Remove from dryer, take out of bag and let it finish drying on a cake cooling rack.
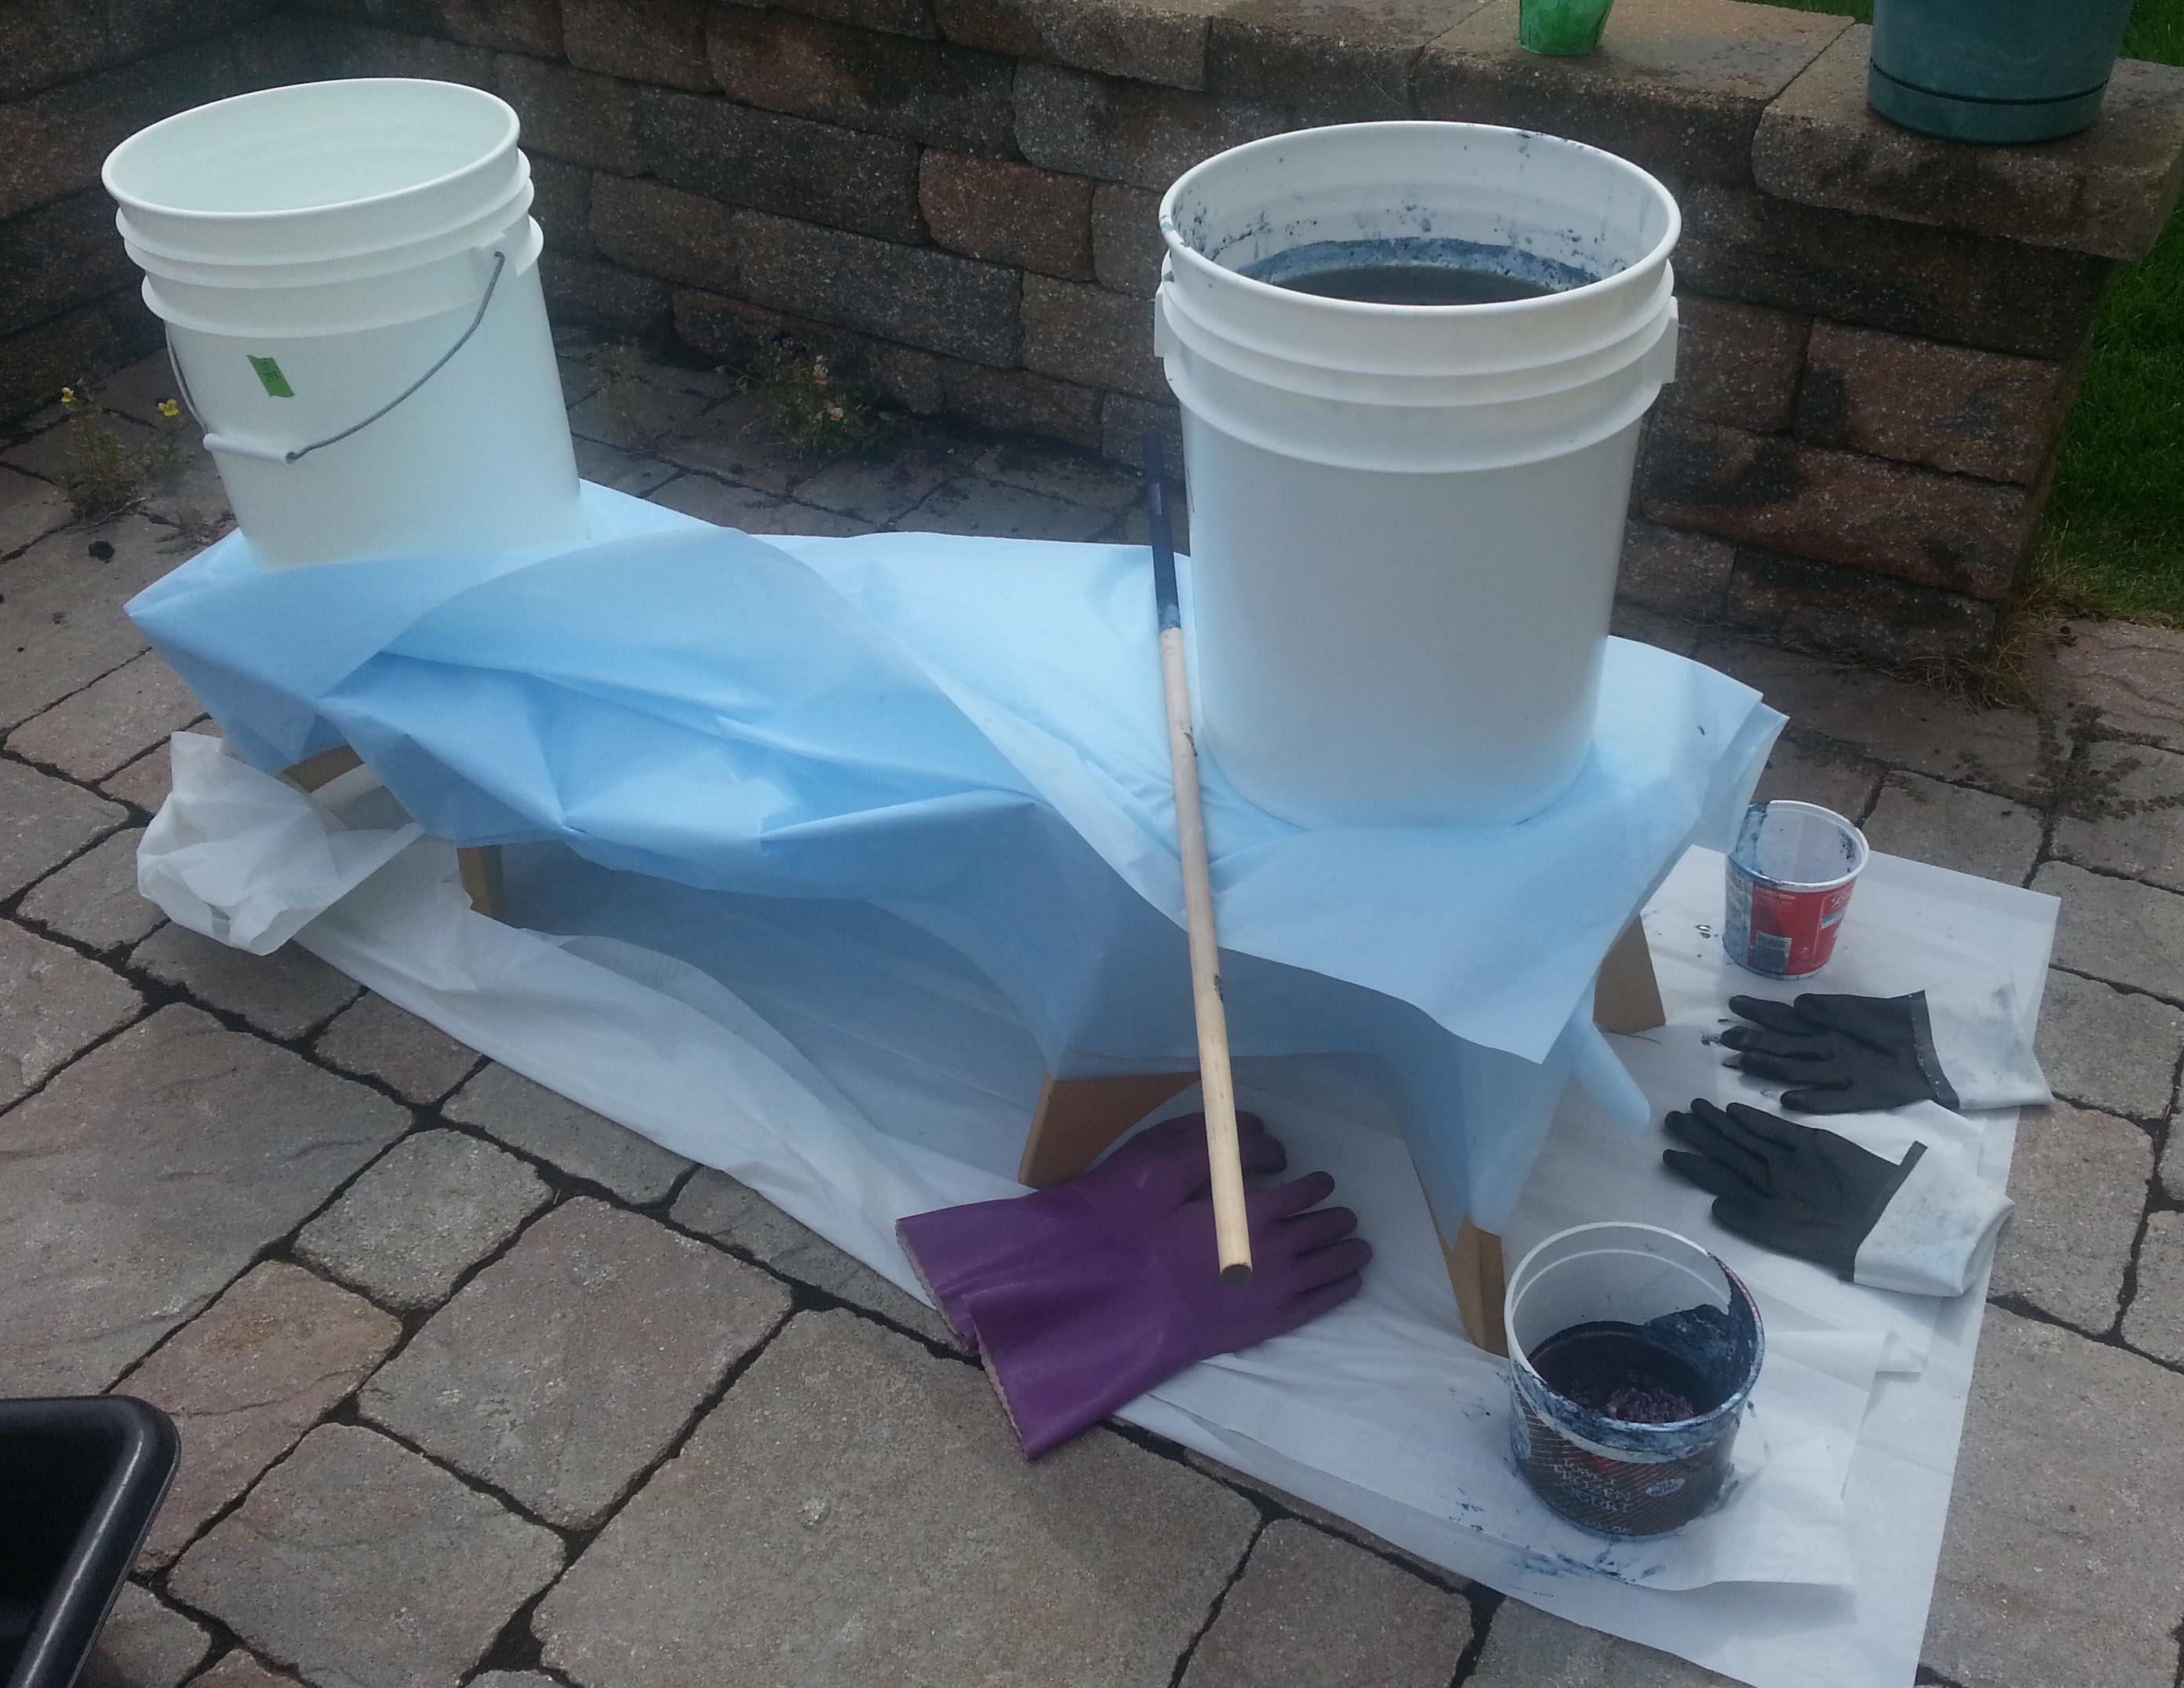
When Cathy (Luvswool) and I went to the Midwest Fiber Fair a couple of weeks ago, in our conversations I mentioned I had an indigo dyeing kit I’d like to try. With some discussion on the forum about the smell indigo produced, I wanted to try to do it while the weather was still nice outside. Neither of us had used indigo before, so, I invited Cathy to join me in a day of dyeing.
I didn’t have a plan for what I wanted to dye or any specific projects in mind to use the dyed materials. But Cathy came well prepared with plenty of roving and fabrics to dye.
To save some time, I had set up the buckets for wetting and indigo along with the plastic coverings before she came. It was an overcast day to begin with with a nice breeze across the yard.
We followed the instructions, mixing the indigo, then the chemicals and stirred it in then let it sit for an hour. But there was no bloom as described. We reread the instructions and stirred again; then decided to skim the top and begin.
After the first batch, we returned the runny bloom back to the bucket and let our fabric oxide. It all looked fine, so we continued the process with the rest. Once the first batch was fully oxidized we tag teamed and I washed and rinsed while she dipped the next batch. Strangely enough after the first batch the bloom began to grow.
With a brief break for lunch, we managed to get everything into the pot we both had to dye along with the breaks for letting the pot sit after stirring. It was a busy day with the dyeing, rinsing and washing. And the day got hotter and sunnier as we worked.
Cathy had spent the evening before rubber banding a large piece of cotton gauze.
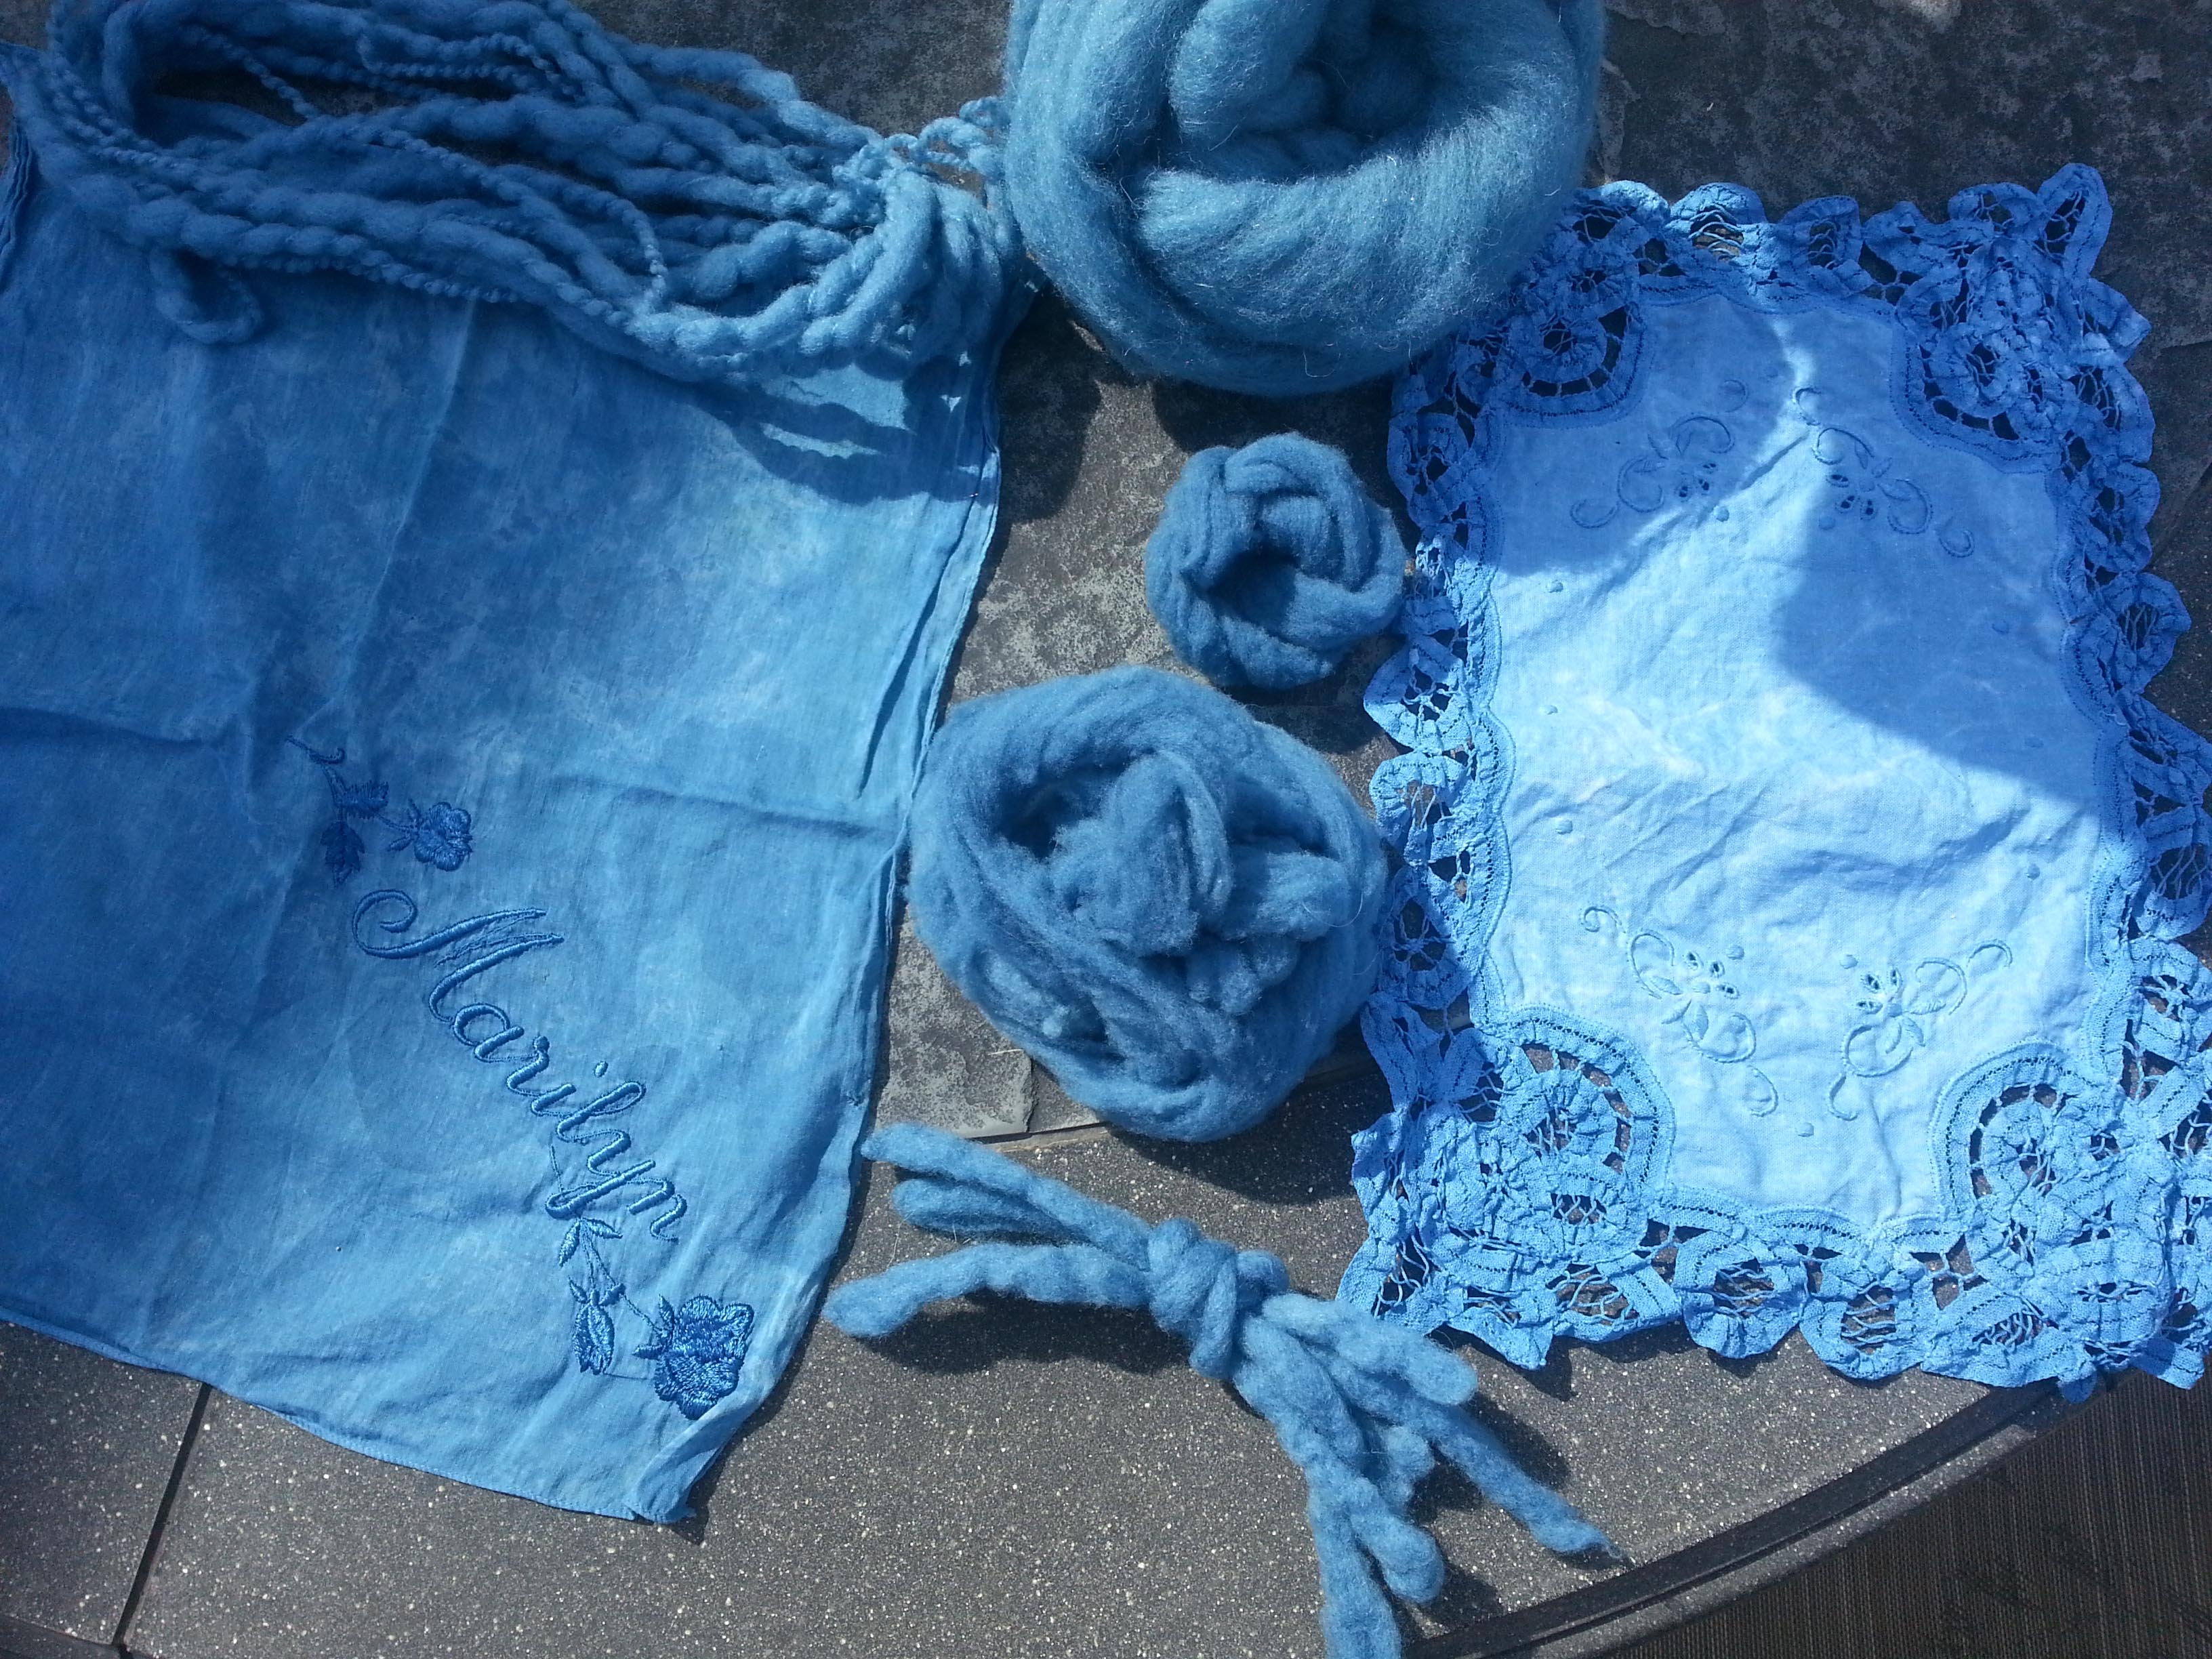
She also brought along a big pile of Domestic 56s roving, some kid mohair yarn, nettle and lace table cloth, miscellaneous bits and pieces of fabric.
I dyed two blouses that were old, but stained, a very old handkerchief with my name on it, yarn, mulberry silk, pencil roving, thick and thin yarn, a linen doily, some merino and cheviot roving.
I had wadded up some cotton voile and rubber banded it all around. The end result is the piece draped on the chair. I like the random patterns it produced.
Cathy brought some corks with her, so I used the corks on a piece of silk gauze.
She also dyed some old thrift store “lace” bedspread pieces, an old linen pillow case, a piece of muslin and a cat mat.
Since it was getting late in the afternoon and Cathy had a long drive home, we packed up her goodies and she finished rinsing and drying some of her items at home the next day.
We were pleased with the outcome of our “Summer Blues” and the opportunity to give some old items new life and others some pretty blue color.
I was going to do a post about Yak fibre and Bluefaced Leicester today, but I messed up the photos, so I’ll do that next time. This first piece is grey Norwegian wool tops with Egyptian Cotton. For the top two thirds, I used Egyptian cotton tops. The staple length is very short, so I started pulling off short wispy bits from the end as you would wool tops, and laid those on the right hand side. I also pulled off a longer length, then carefully teased it out and laid parts of it down the left. The bottom is Egyptian cotton fibre, it comes as thicker, shorter lengths. I teased some out, fluffed some up a little, then laid them on the wool.
This is a close up of some of the wispy parts:
This is an area of denser wispy cotton:
This is a close up of the longer lengths of cotton:
Close up of the cotton fibre:
I’ve probably mentioned more than once or twice how much I love curly wools 🙂 For this next piece I used Devon Wool tops and Black Bamboo tops. The top part has the bamboo laid on the surface, the bottom is a blend of Devon and Bamboo.
The black bamboo is more of a matte charcoal grey than black, and seems to be ‘fluffier’ than white bamboo tops:
Close up:
It looks a lot paler when blended with the wool tops:
It doesn’t completely disappear when blended in, though:
My guild exhibition opened on Wednesday. we had a vernissage Thursday evening.
I can now show you the hat I have been working on for ages. First I had to make a prototype, modeled her by my son. It was how to make, attach and manage the horns that I needed to work out.
Very Monty Python to me.
The finished hat looks like this
I will do a post about making it in the near future.
I also have some pictures in the exhibition.
I think they look great hanging. You can get an idea of how big the Cityscape is in the hat picture, it is in the back ground .
Here are some of the other things in the exhibition.
Collapsible weave scarf and a lace shawl hand spun and knit.
Hand woven shawl and close up of the pattern.
Hand dyed, hand spun and hand knit. hand spun and hand knit art yarns.
Pillows from handwoven fabric. Hand woven metal wall hanging.
I finished the lamp shade this week. The process of putting the shade base together wasn’t to difficult. The directions wanted me to sew the fabric together, add a piece of Velcro and then cover the entire shade at once. But I wanted to show the organic edges of the felt. So I had to improvise a bit.
Once I got the frame together, I wanted to apply each piece of felt so that at least a portion of the edges would show along the wooden frame. The four pieces of wood still on the floor are the pieces that go on the outside of the felt to hold it down.
Those pieces of wood are held by a screw at the top and
at the bottom. These screws fit into a corresponding hole in the outer frame piece.
So I decided to use those screws through the felt to hold the panels in place. I didn’t make a hole, I just worked the screw through the felt.
And then I stretched the felt panel taut and put the bottom screw through to hold the bottom edge.
I put a panel on opposite sides and then added the other two opposite sides. I used blue tape to hold the pieces in place and keep them tight while putting it all together.
Here is a top view with three felt panels in place.
Then I added the outer wooden pieces and screwed those down tight.
I removed the blue tape as I went along.
And here’s a top view with all the outer wooden pieces in place and tightened down.
And here it is on a lamp that is lit. It is a pretty big shade and would probably work best with a floor lamp.
Here you can see how the organic edges show.
And here’s a texture shot of how the felt looks when the lamp is lit.
And a final shot of how it looks with the light off. I don’t think I would go out and pay full price for this type of lamp shade frame but since I got it at the thrift store, it worked out well. I have another frame just like this one but I’m not sure I will do another one of these. I don’t have a lamp to put it on at the moment and I’m not sure it is well enough put together to sell it. But it’s finished!
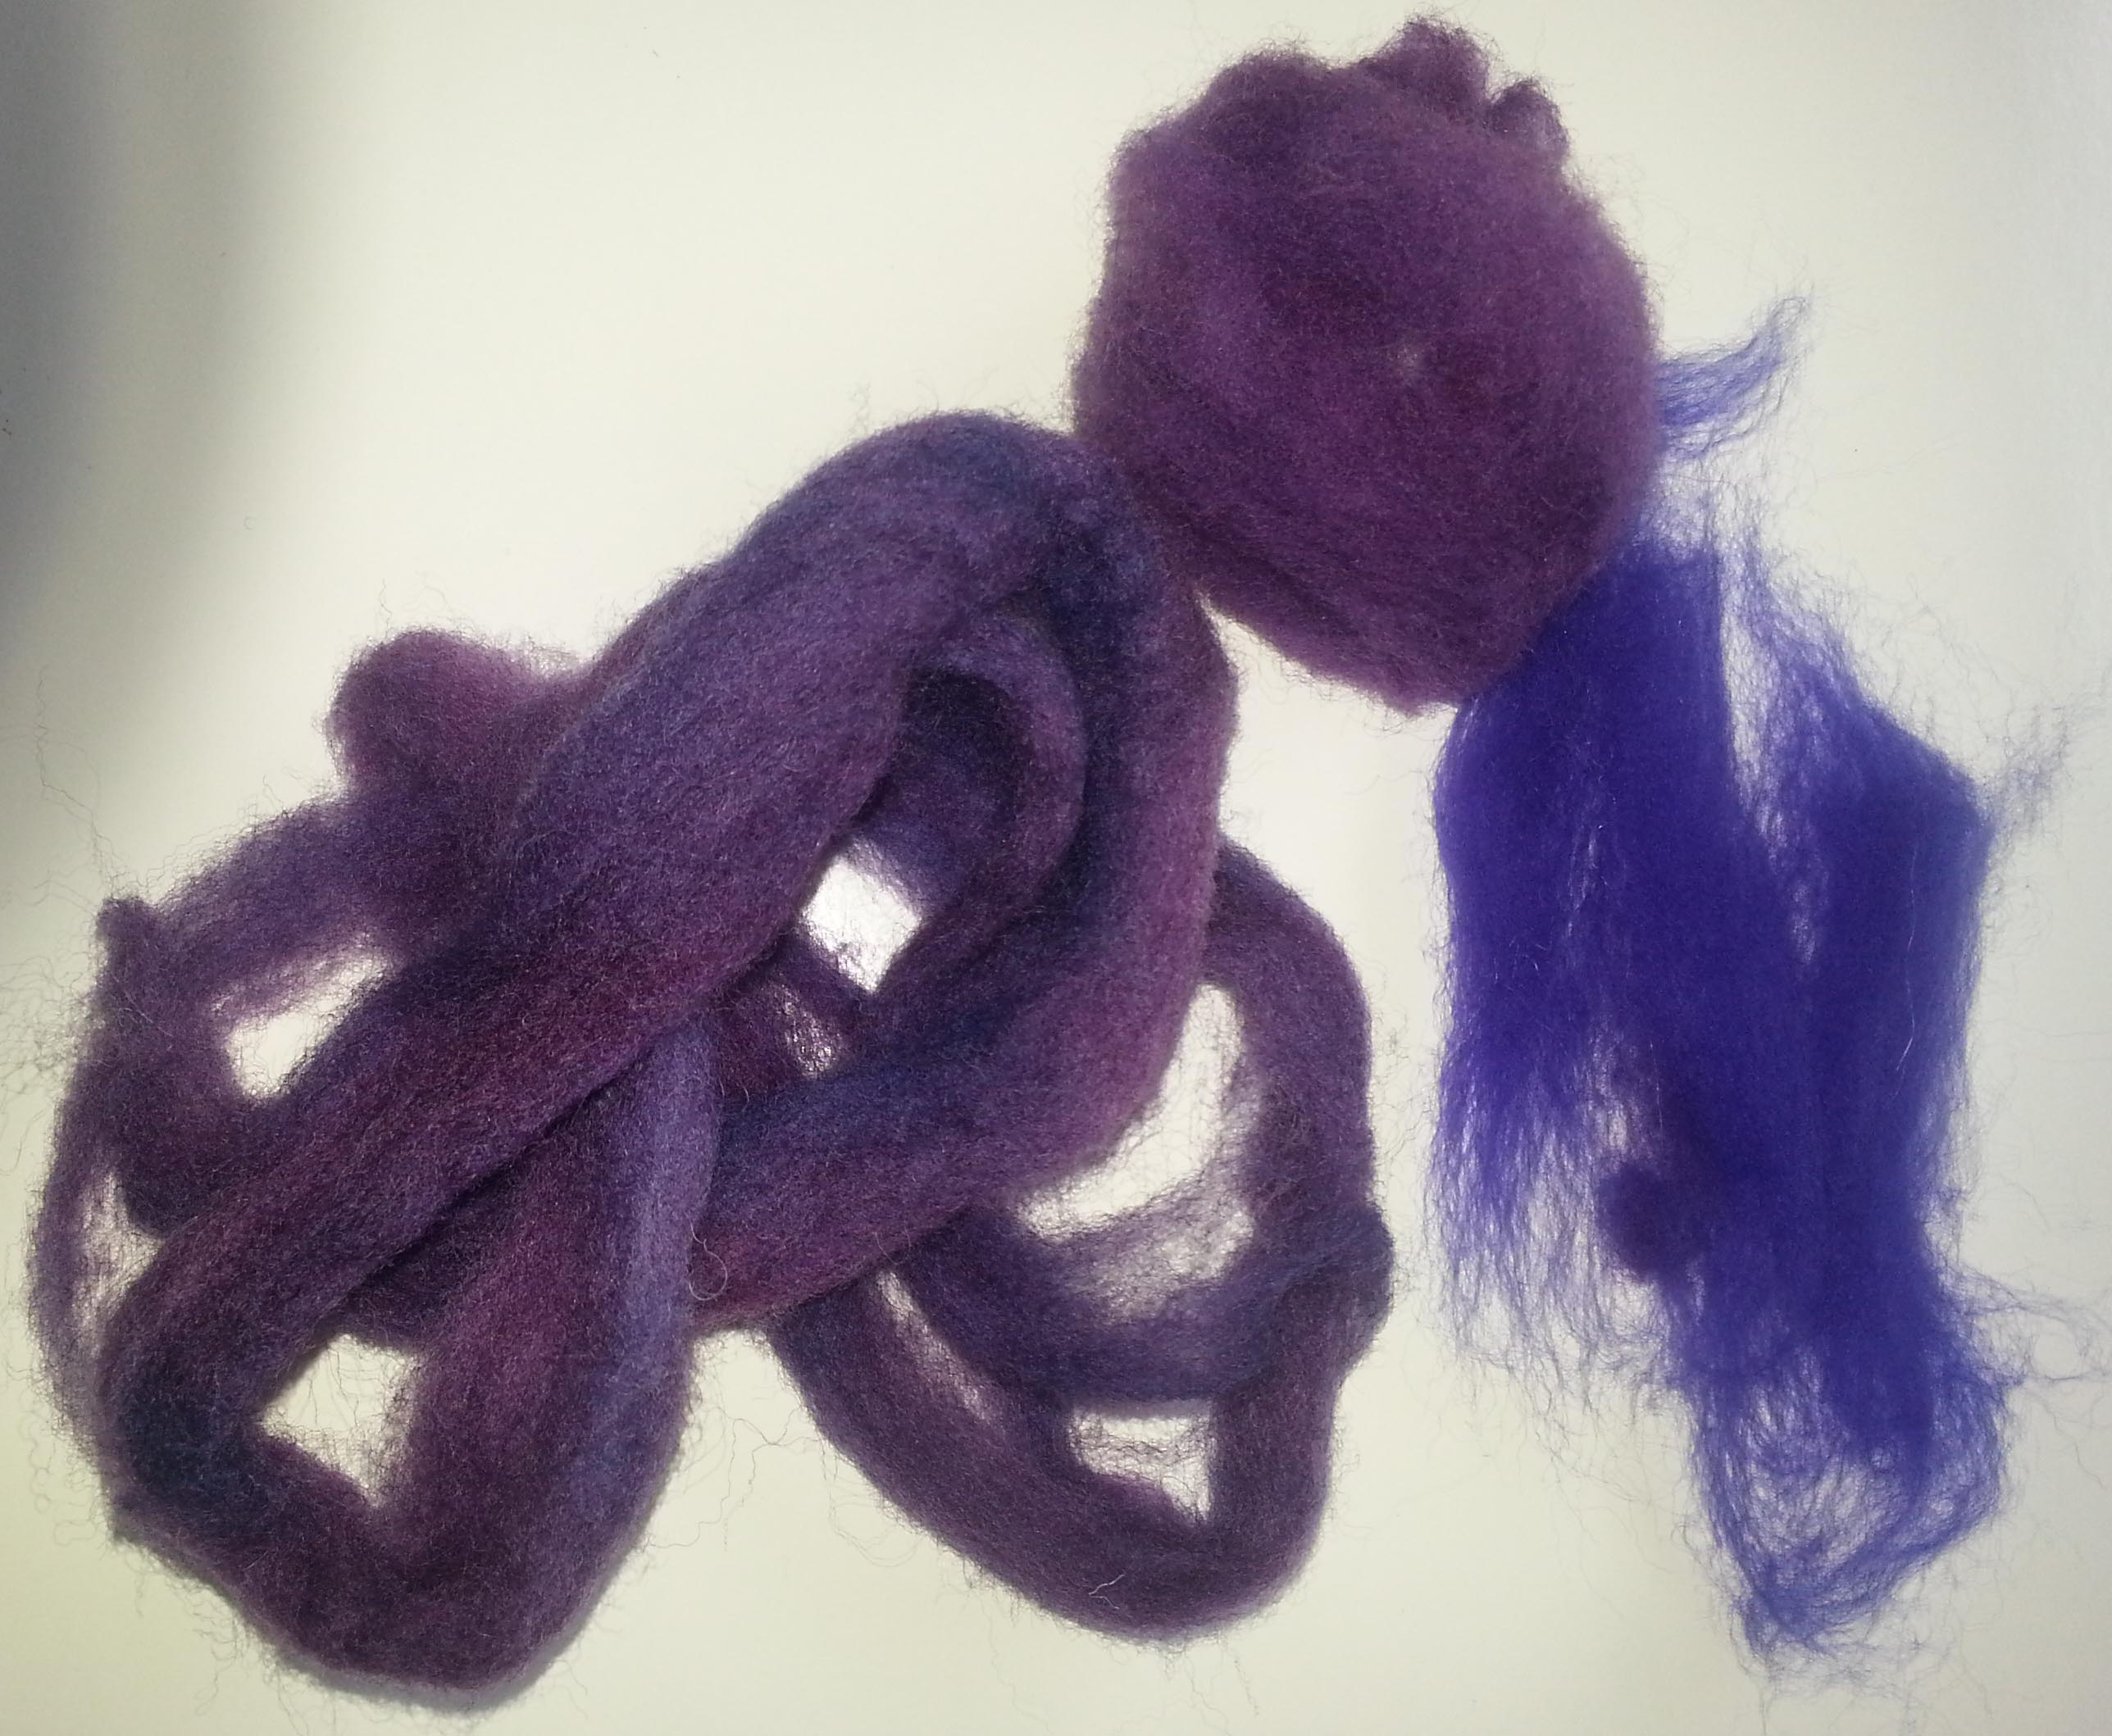
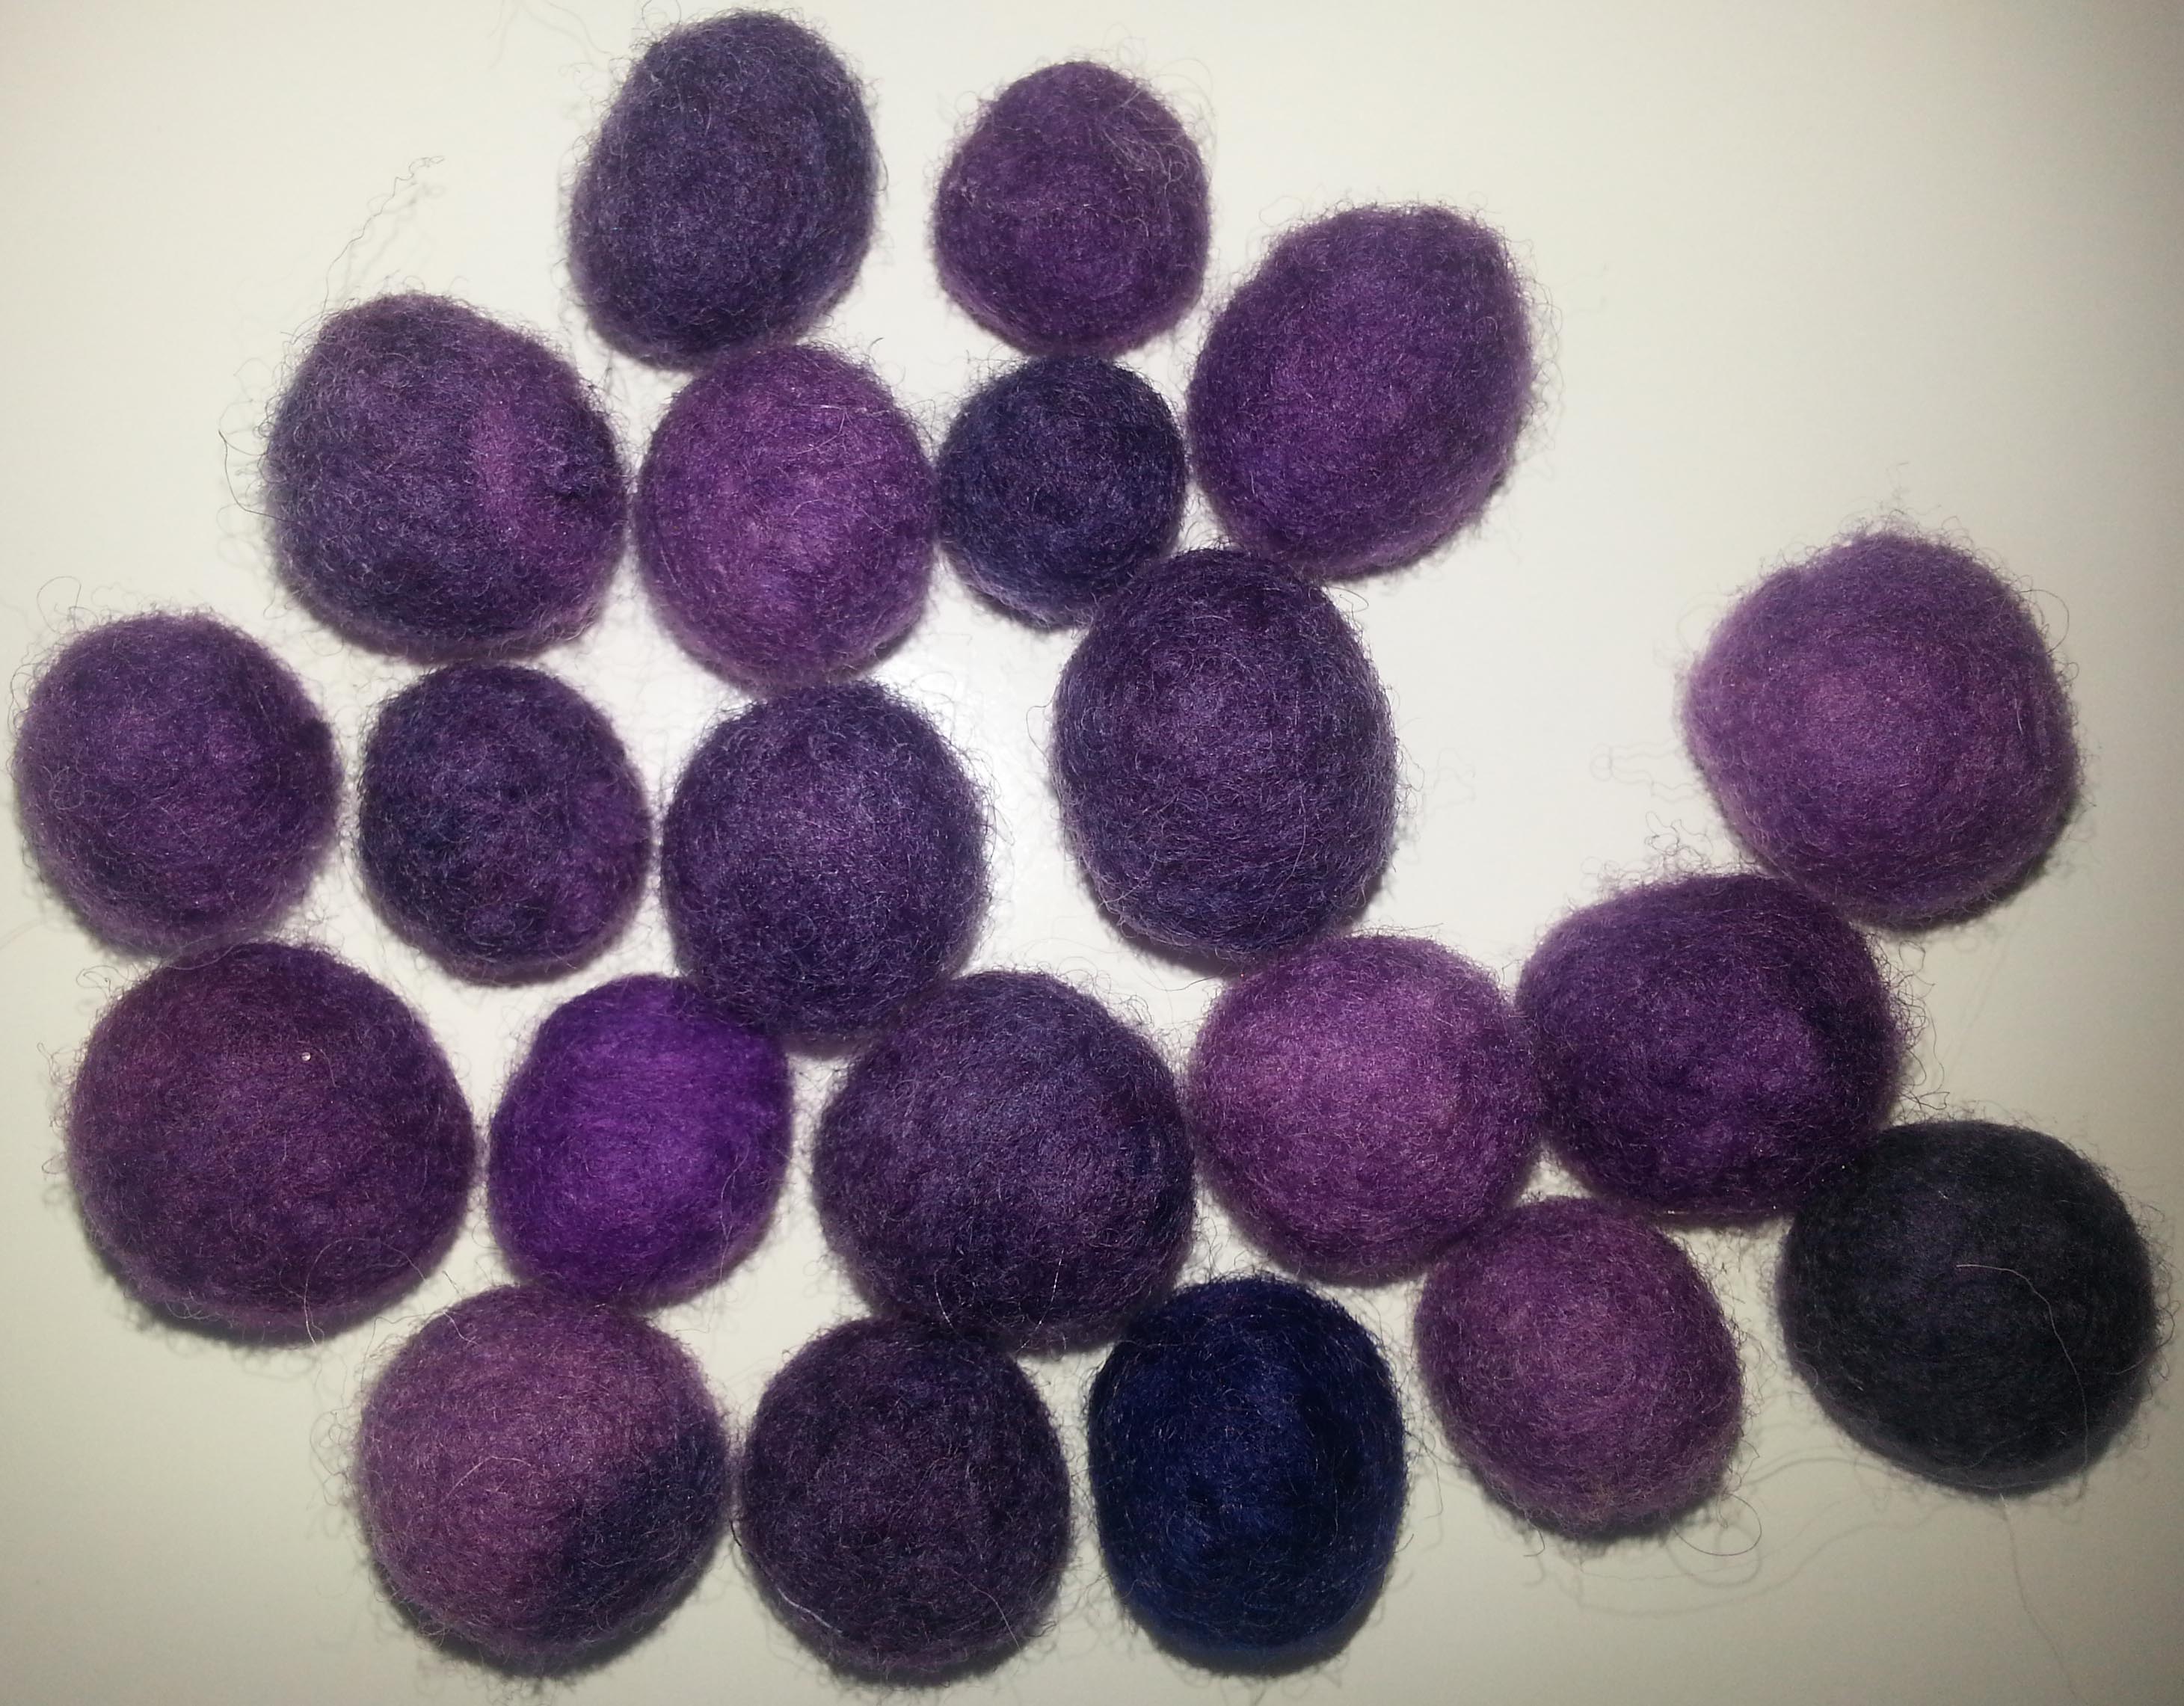
When I first started dyeing roving, I had a few “oops” results. However, since I’ve acquired a drum carder, I’ve learned I can revive the partially felted roving with careful carding and patience.
I’ve had this purple roving sitting around for a couple of years. I really enjoy making three dimensional objects so it seemed natural to make some grapes with my previously felted roving. Not only did I feel good about being able to use the roving, but it brought back happy memories of my childhood when we had grape vines in our yard.
It was a tradition to pick the grapes, then my mother would make jelly and grape juice.
The roving already had various shades of purple so after running the partially felted roving through the carder, I added some other shades of purple merino. The addition of unfelted roving give it a shiner and softer appearance and texture.
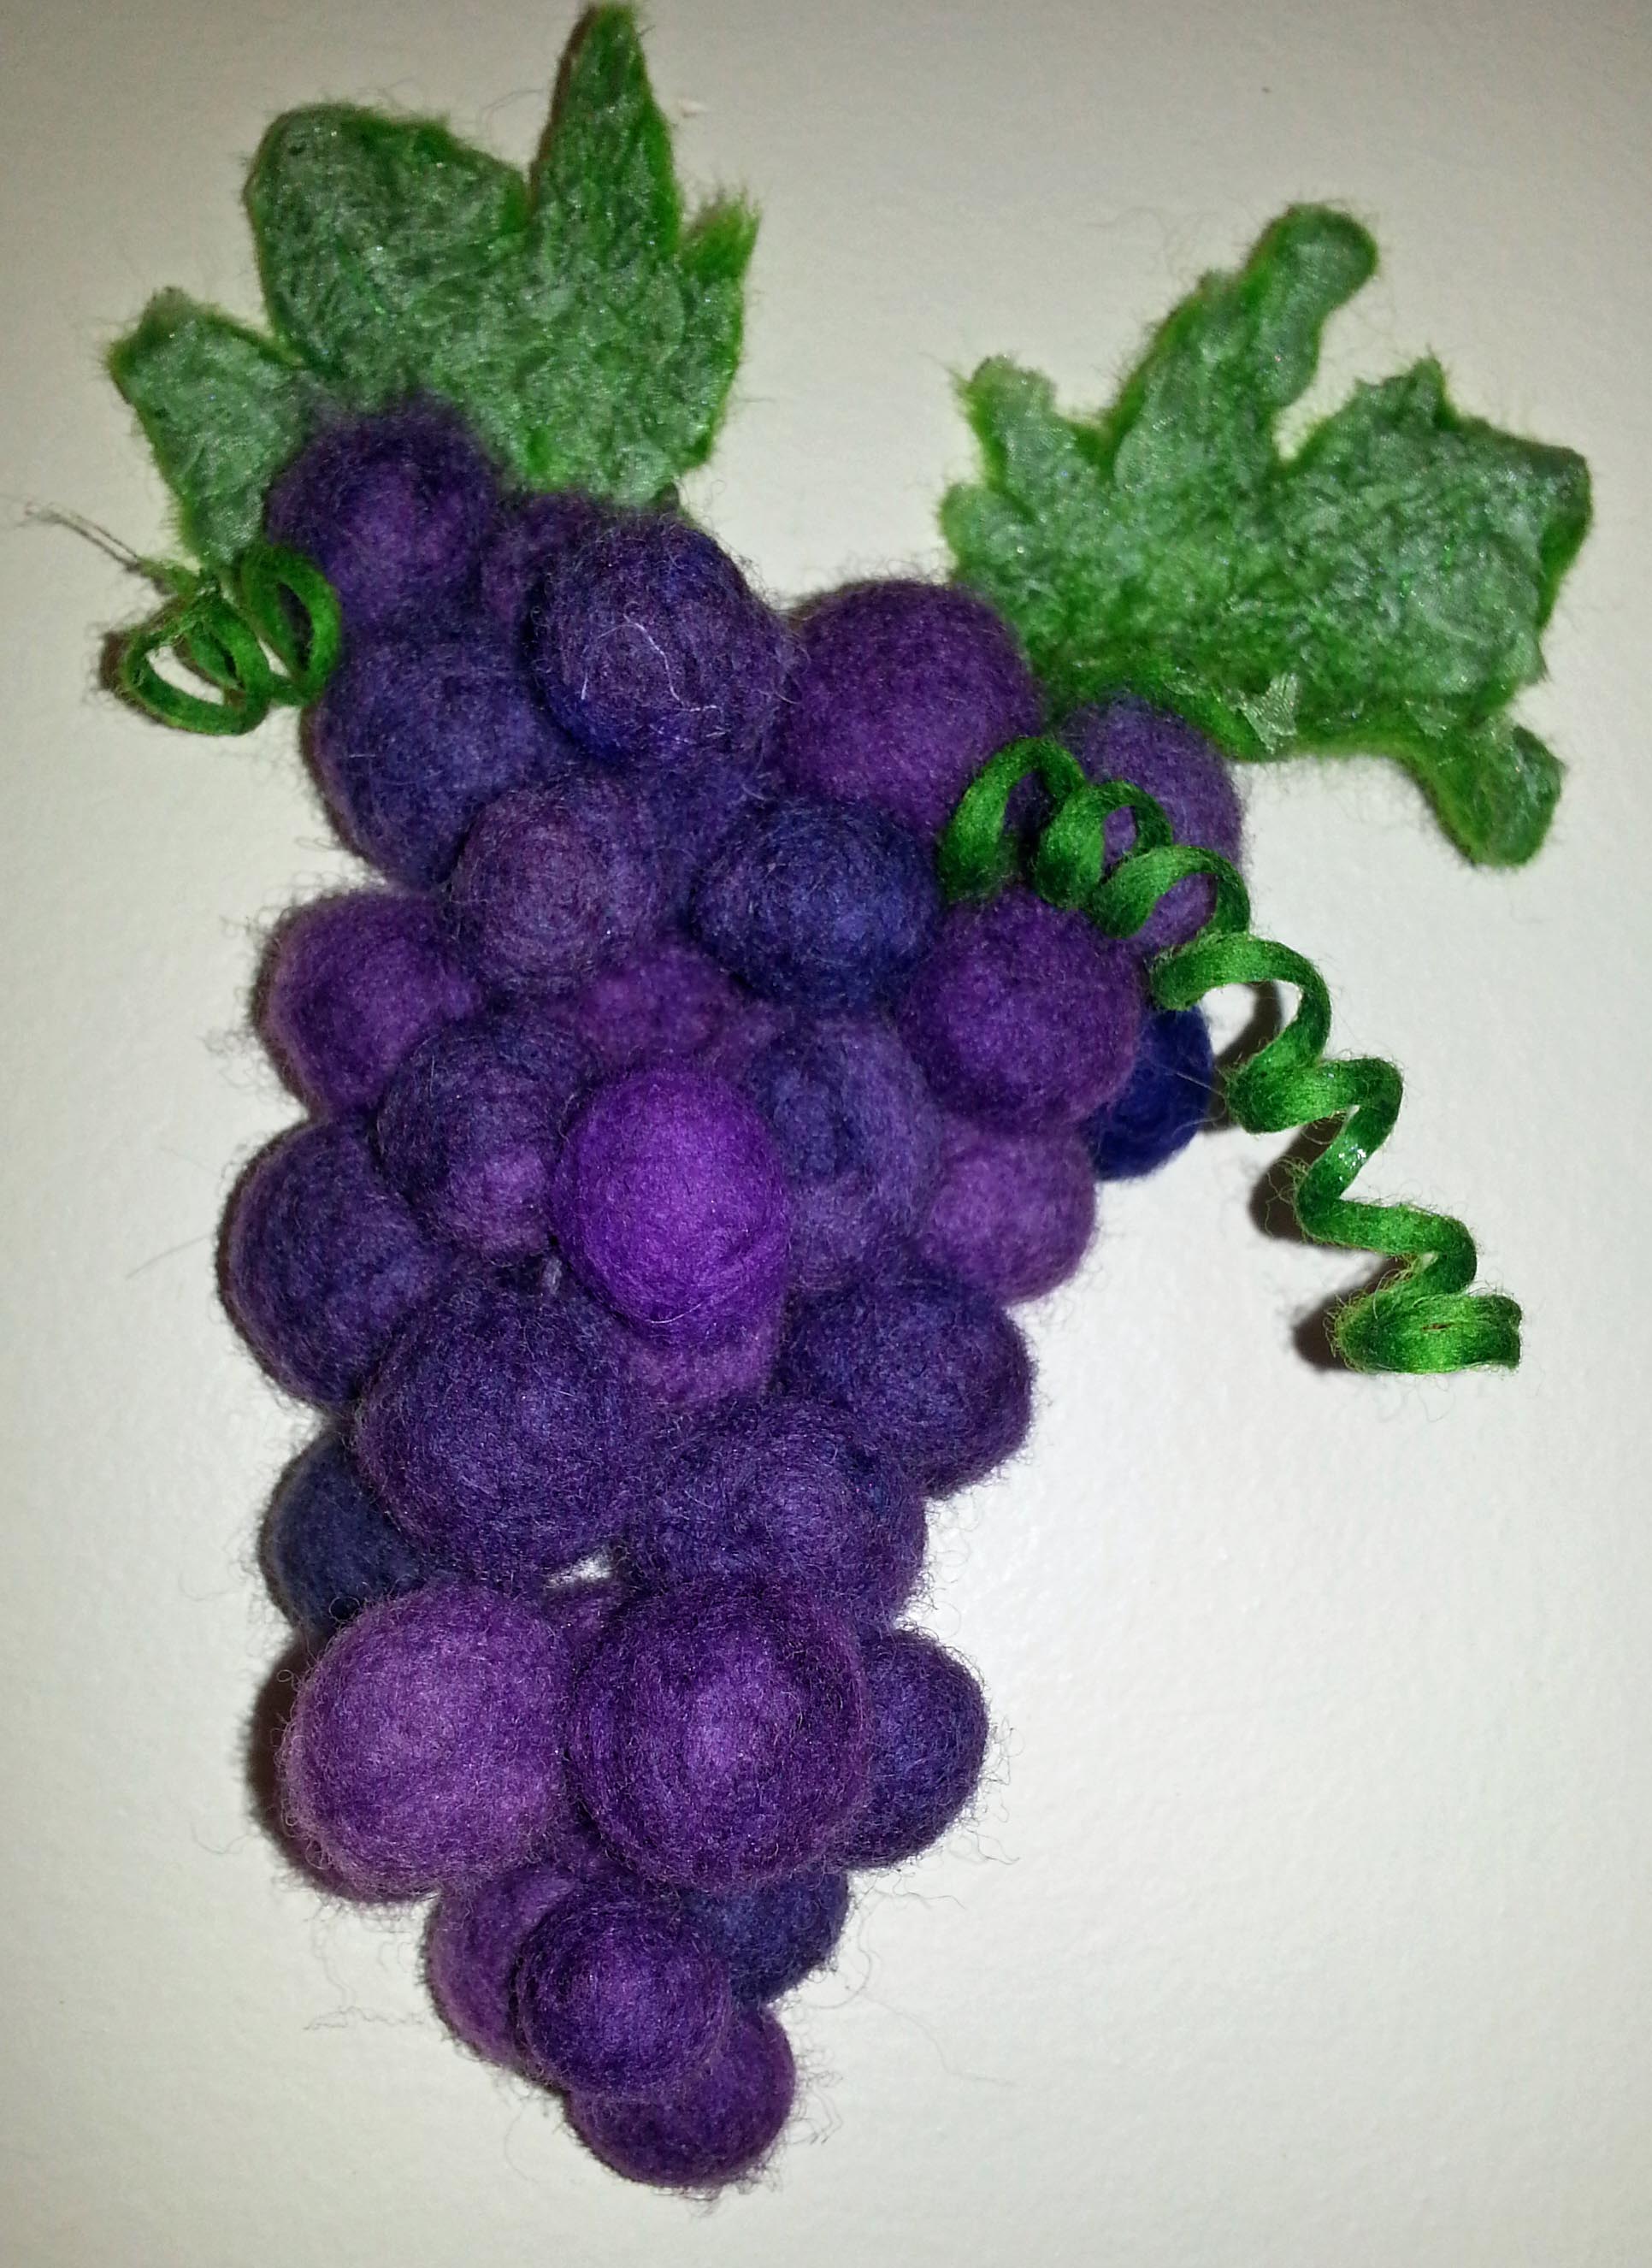
Since grape leaves are very textured, I decided to make a prefelt with a silk top for the leaves. It gave it some texture and sheen.
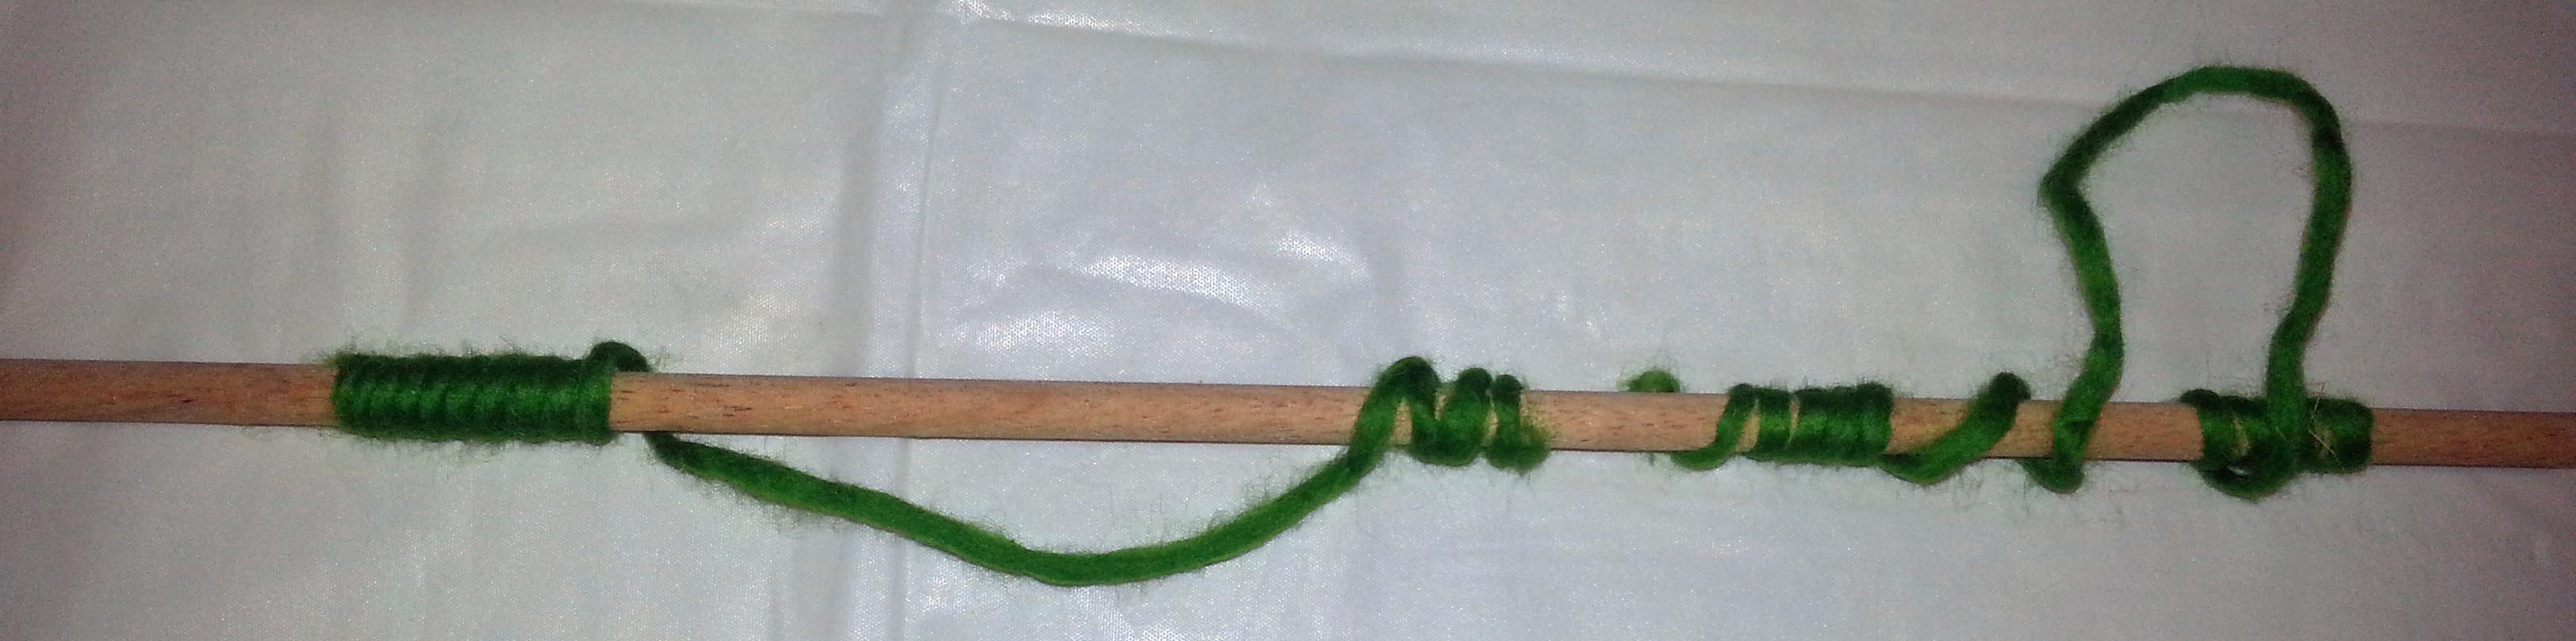
For the vines, I used roving rolled into a cord, then wrapped it around a small dowel to dry then cut it to the length I wanted.
Then I spent a few hours rolling little grapes. I wasn’t sure how many I needed so I piled them up and added more grapes until I was satisfied it resembled a bunch of grapes.
With a sharp needle and some purple sock weight yarn I built my bunch of grapes, then attached the leaves and vines. It now hangs on a narrow wall between the kitchen and family room where we occasionally enjoy a glass of wine and I reminisce about picking grapes and my mother’s fabulous jelly.
What projects have you worked on lately that recall fond memories?
I mentioned in my last post that I’d wet felted 3 pieces for making needle felted pictures inspired by Marilyn’s Monet Challenge. The second one I made was based on a photo I took a few years ago along the River Alt on the Sefton coast. I posted more about it on my feltbyzed blog a few days ago if you want to see more, but here is the finished needle felt piece:
The last piece I made was based on a photo I took at Sefton Park in Aigburth, Liverpool. It’s such a great park and has a really famous Palm House, and a gorgeous lake. I simplified the photo:
I wet felted a simple piece for the background:
I used a mixture of texturey and curly wools like Icelandic, Devon, Bluefaced Leicester, mixed with softer wool and animal fibres like Merino, Alpaca and Angora rabbit, to get the different textures.
On the forum recently Judy was asking about Milk Protein Fibre. I’d recently made a felted piece with Milk protein fibre and also Ingeo, so I thought I’d share a few photos of the milk part. The wool I used is a dark grey Icelandic, I laid a strip of milk top across the wool.
I like using milk it responds well to the characteristics of the wool it’s used with and looks good whether it is used with a soft wool or a more coarser one:
This is a close up of one of the thicker areas:
We’ve been updating the 2014 Challenge Gallery, if you’d like a look at all the contributions. If you made a piece for any of the challenges and you’d like yours added to the gallery, let one of us know. You can use the Contact Us form if you like.
I have not done much felting lately. Instead I have been working on a Nuno Felt Bracelet Kit. Sounds simple enough. I wrote up the instructions over a few days, going back over everything and adding in more and more detail, making thing more clear. That was the easy part. Next I had to take pictures. I don’t have any way of taking pictures of myself felting by myself so I enlisted my son to do the picture taking. He was very patient as I made a bracelet and took notes on my instructions of things I needed to change and add. It this point I am thinking well that was not so bad.
Next was picking out and editing the pictures. I do not know how people do photo editing for a living. It takes for ever and it is booooring. I did eventually get that all done so it was time to send it off to the spelling and grammar police. Now normally I am not a big fan of the spelling and grammar police as I am on of the top ten worst spellers in the world. However when you want to sell something to the public it really should be spelled correctly so you don’t look too bad. Than another friend locked my instructions and took all the meta data off my pictures. I had no idea how to do that. Thank heavens for friends.
Next I think I would like to get the instructions printed. I nearly fainted when I saw the price of colour copies. It was decided that a CD would work very well and cost much less. So next was learning how to burn CDs. It’s not hard but it was time consuming. Good thing there was some good TV to watch while I did that.
Yesterday I spent the day assembling kits. That took way longer than I thought. I will never do well in a sweatshop, I am much to slow. In the end I have lots of kits ready for my next show (Twist http://www.festivaltwist.org/en/ ) I am sure I will not sell them all as I made up 50 but they will be ready for other shows later in the year.
I had hoped to have a completed lampshade to show you today. But the frame is still in pieces and I haven’t figured out exactly how the cobweb felt is going on to the frame.
But I do have four pieces of cobweb felt to go over the frame. One piece is a bit thicker than the others but I don’t think most people would notice.
The textures from the Wensleydale are wonderful.
Here’s the frame. Hmmm… place part A on part B and attach with screw Q…
But I thought a preview was in order. Here is one of the pieces of felt over an existing lamp.