A Little Stich Practice
I finally put the free motion embroidery foot on my Sewing Machine. I did a small sample to see what different movements did. I used contrasting thread so I could see what I had done better. As you can see I did a few things. I tried to sew down some loopy yarn. this was hard. The yarn moves and you can’t really pin it very well. Its to easy to run the machine over the pins.
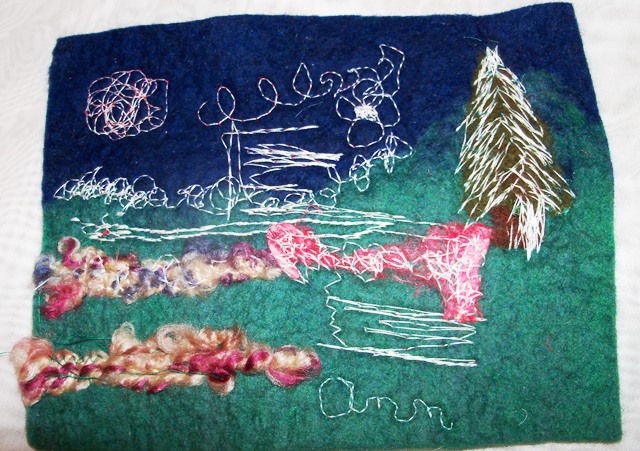
The solid red, with lots of stitching is a piece of silk carrier rod. I tried moving the felt at different speeds and having the machine sew at different speeds. Fast machine and slow hands seemed to work best so far. You can see near the end I was getting better at controlling what I was doing and managed to write my name. I like the way the stitching looks on the tree best, well the green part anyway.
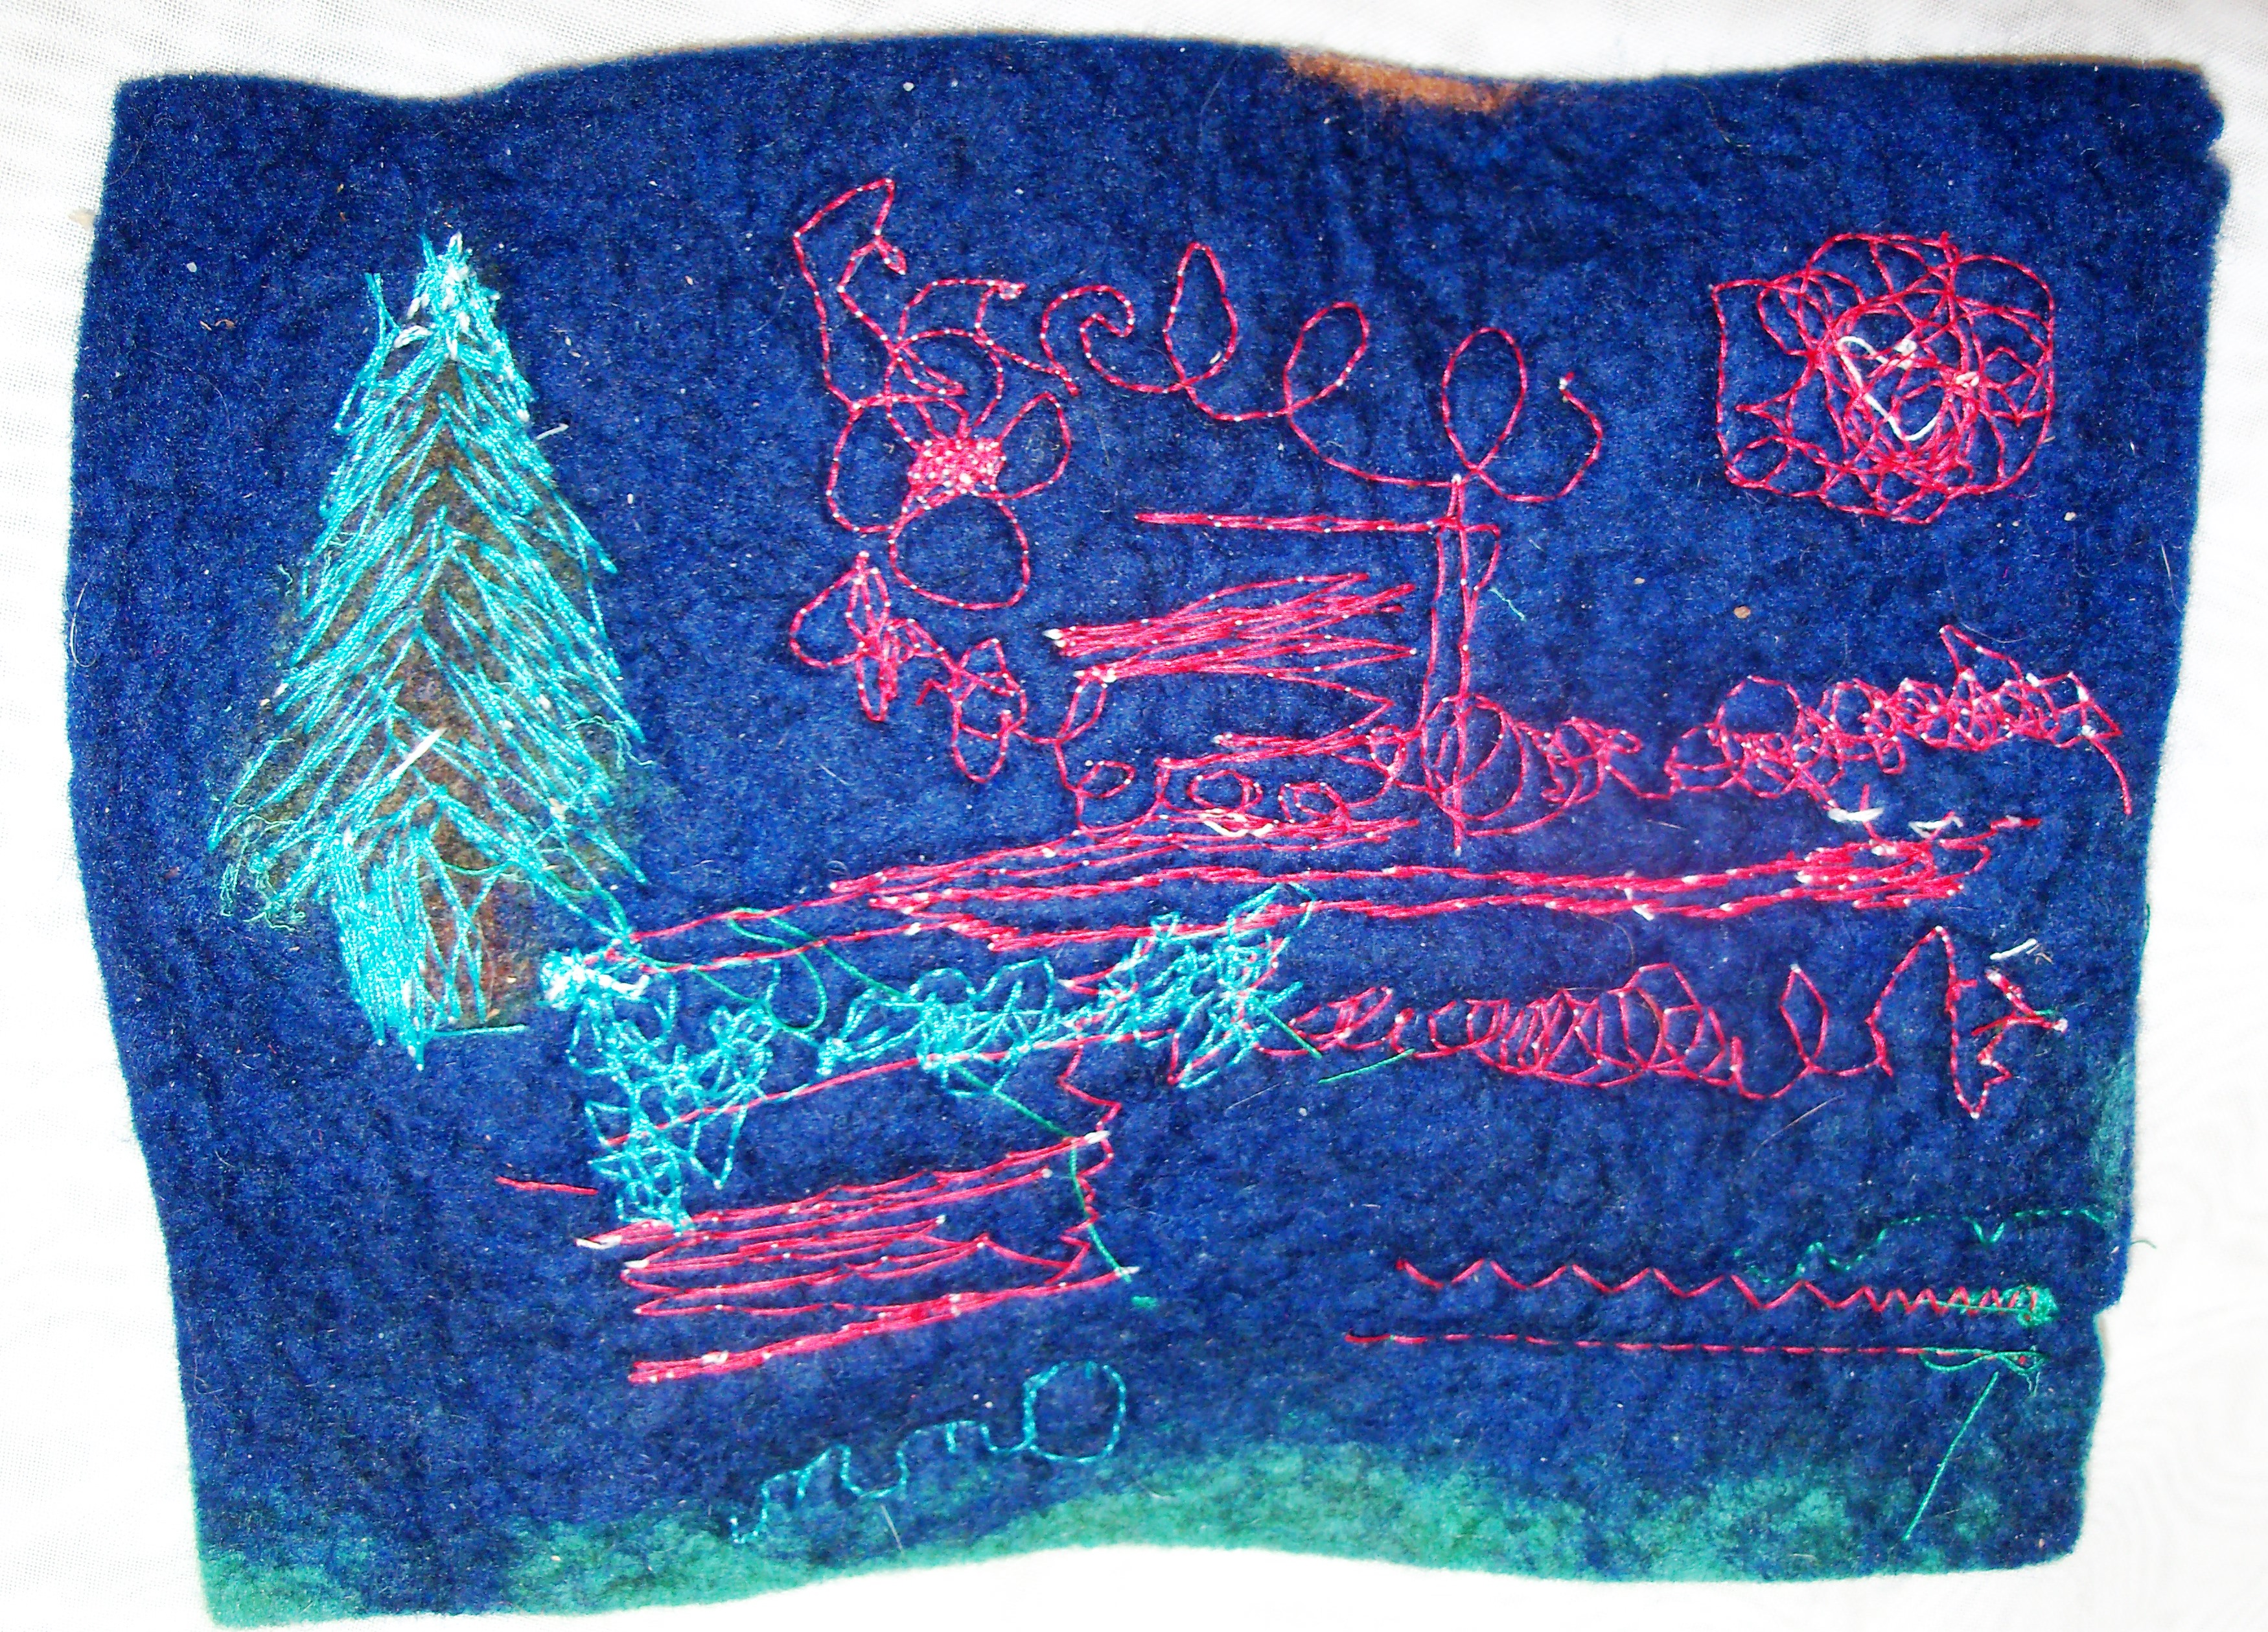
Here is a shot at the back side.
The machine stitching looks so different than hand stitching. I think the combination of the two will be great. But for now I need to practice my machine stitching. Anyone have any tips or suggestions about machine stitching?
16 thoughts on “A Little Stich Practice”
Ask Ruth to do it? 😉
It looks like you had fun and got petty good at it. The bit on the green part of the tree does look good 🙂
I don’t think Ruth would want me to send her all my stitching. The stitching really does suite the tree doesn’t it. It was fun.
It’s good to see your experimentations. I too bought a sewing machine recently to try some stitching on my felt and I guess it is going to be a case of lots of practice before you achieve the effect you want which complements your own felt. Have you see dog-daisy chains blog? She is very clever with her use of stitching on felt and definitely worth a visit if you aren’t familiar with her work.
Becky x
Yes practice is needed. I looked for classes near me but didn’t see any. You tube will have to do. I d follow her blog she makes great leaves.
Free motion stitching takes a lot of practice. Hands slow with smooth curves. Keep a practice square by your machine and practice every day, You will be a pro in no time.
That would take care of my five min of fiber a day.
The best bit of help I had when I started was this:
Ask someone to hold a sharp pencil upright and still, with the point of the pencil just touching a piece of paper. You put both hands flat on the paper and move it around slowly and smoothly so that the pencil point makes a pattern.
Now transfer that to machine embroidery – your felt is your paper and your needle is your pencil.
I like the reverse of the piece!
Don’t try to be too neat – just go for it, in a relaxed way, and enjoy the results.
That’s a good idea. Boring for the person holding the pencil but that’s what family is for. 🙂 I am going to have to dig out some failed projects to practice on and keep telling myself that practicing is not a waste of felt.
Get some cheap acrylic felt or heavy stabilizer to practice on. And the practice is the main thing that improves your work. Just fly me in and I will stitch for you. 🙂
Good idea Ruth. i will do that right after I win the lottery.
Free motion stitching is fun isn’t it?
Yes it’s fun but a little frustrating too as I am not very good yet.
Practice Practice Practice!!!! Start stitching on plain cottons and you want to keep the pedal pushed down and move your hands slowly- that way you will get small and more even stitches!!!
Needle fast, Hands slow!!
Thank you, I thought that was probably the way to do it. When you use cotton do you put it in a frame or use a stabiliser?
It looks great Ann and if your having fun thats the main thing, I’ve never attempted machine embroidery yet either, thats probably because my machine blew up and i’ve never gotten around to replacing it, one day i will 🙂
It was fun. See if you can get a free one or cheap one and give it a try.