Browsed by
Tag: wool

Supermacro

Supermacro

My camera started to die a few weeks ago, I could hear the focusing mechanism straining and the majority of photos were blurred, even more than I usually get trying to focus on soft fibres 🙂  So, a lot of my time has been taken up with a photography backlog, taking photos, retaking them as I work out my new camera settings, checking and editing photos, and getting distracted a lot with the Supermacro setting! It is so cool, it can see things I can’t see with the naked eye, tiny fibres on fingerprints, tiny cobwebs in the holes of volcanic rock, eyelash roots…. Oh, and the weave of fabrics or a dark guard hair on a piece of white felt, even tiny strands of fibre on the individual threads of a fabric 🙂

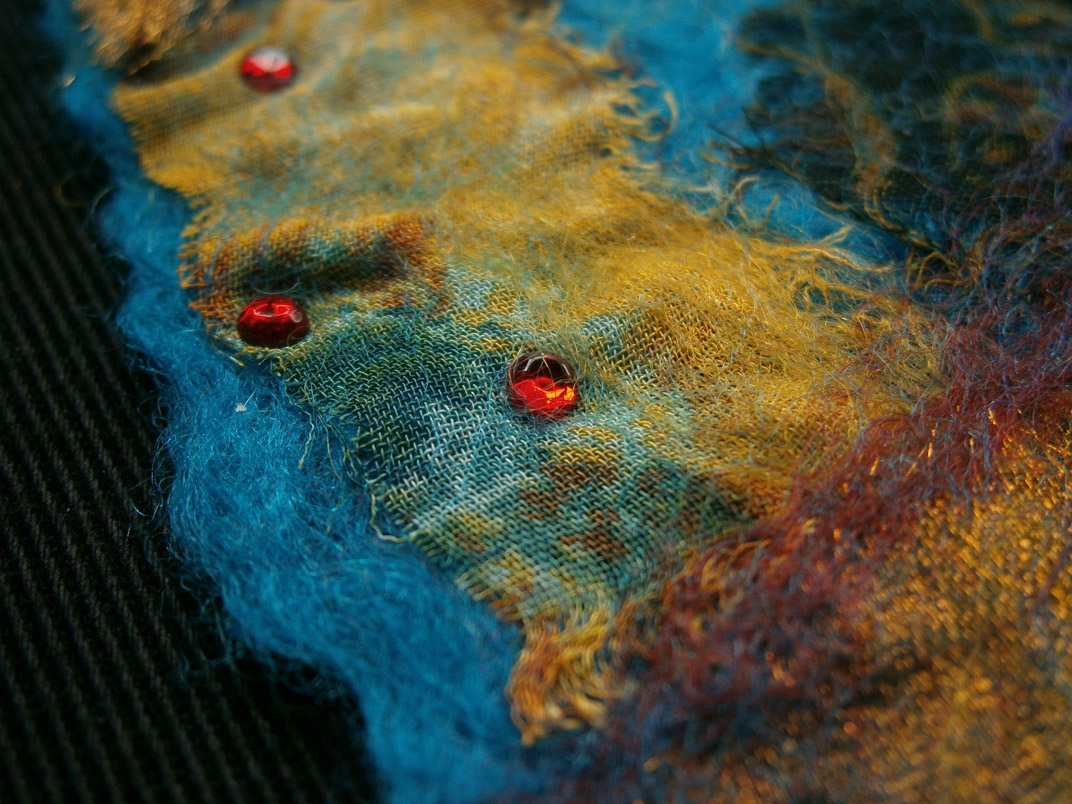
I thought I’d share a few of the fabric and fibre photos I’ve taken recently, I’ll upload them to flickr aswell in case you’d like to click on the full size images to see in even more detail. This first photo is cotton gauze and a chiffon scarf felted with merino prefelt.

This is a photo of just the cotton gauze and blue chiffon.

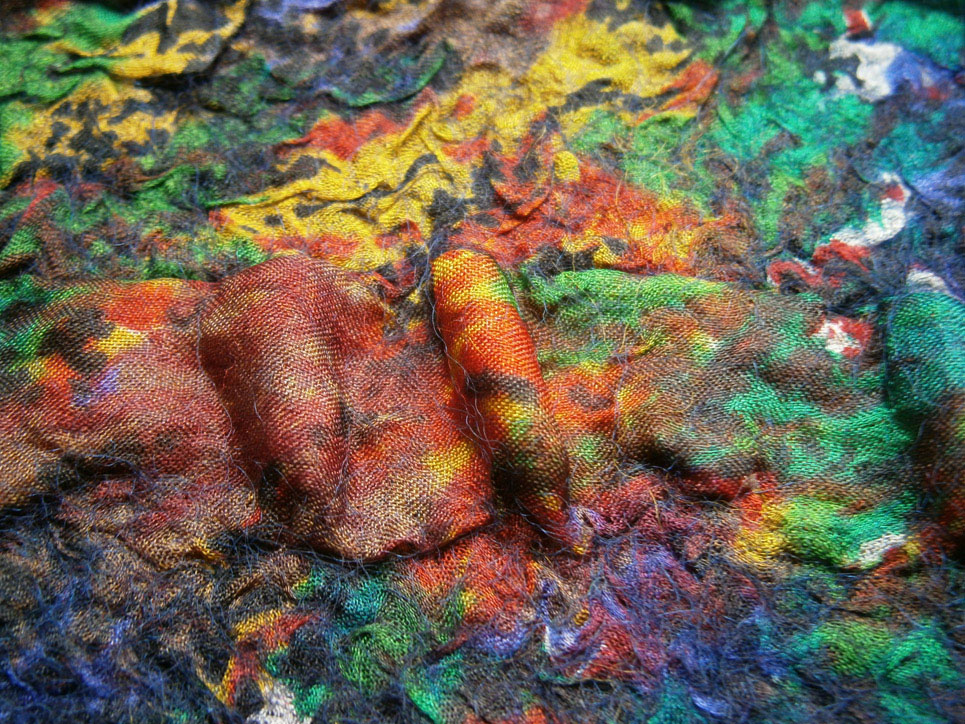
This is part of a pattern on printed cotton, it is about 55mm wide.

This is a synthetic fabric nuno felted, and some organza at the bottom of the photo.

This is one small piece of organza, aproximately 25 mm top to bottom.

 This is one piece of silk paper aproximately 25mm wide. It is taken from this piece of felt, I’ve added a note to show which square it is.

This is nuno felted silk.

This is Bamboo and Teeswater.

This last piece is blue nuno felted fabric.

I hope you enjoyed the photos, I love seeing the detail and texture of fibres, so I’d love to see your photos if you have any to share.

Guest Artist

Guest Artist

Our Second Guest Artist to be featured on the Studio site is Rachelle Gardner, a mixed media artist originally from Kansas City, Missouri, now living in Mission, Kansas, USA

Felting 3, 2, 1
Q-3 Three types of fibre you can’t live without?

Thread, of any kind, which I don’t know counts as a “fiber,” but it’s hard to make lace without it! I also keep a stash of dyed and natural Shetland wool around at all times, as I never know when I’ll need it. The third is admittedly, a toss-up between angora or silk fiber for use in detailing and accents.

Q-2 Two tools you use all the time?

My sewing machine, a new one that was partially funded by the Arts Council in my area, and water soluble stabilizer. I still feel like I’m just scratching the surface of possibilities with this material. 

Q-1 One fibre art technique you love the most? 

I am amazed at what water does to these materials. Both in wet felting and in working with the water soluble stabilizer, the utter transformation that occurs is symbolic to me. It impresses on me vital nature of water; it’s power to sustain us, it’s power to cleanse. It also reminds me of the concept that individual consciousness is like a drop of water in the ocean of universal consciousness. So, in short, I love working with water!

How did you get into fiber arts?

My path to the fibers arts was long, slow, but I think inevitable. When I was in high school, my parents adopted three Shetland sheep, which I, as a teenager, thought was most “uncool.” Eventually, I recognized my mother’s talents as she picked up every bit of the process of raising the animals, shearing, cleaning, dying, spinning, knitting, designing the patterns, over and over again, until it was finally time to say goodbye to the dear creature that provided so much over the years. And I can’t tell you how much time my father spent on fencing! So I eventually began picking up things here and there, and felting was my first interest and attempt at the fiber arts. While I consider myself a mixed media artist, I often work with felt or wool fiber in some way. 

Did you study art at college?

No! My degree is in interior architecture and my first job out of college was working as an apprentice at a small mom-and-pop wood shop building and designing custom furniture. But soon enough, the call of the fine arts drew me back. 

What you working on at the moment?

Right now I am preparing lace samples in preparation for studying at The Anderson Ranch Arts Center in Colorado. There I will learn how to cast large scale fabric sculpture. I’m interested in creating large scale lace sculpture exhibitions in art centers in my city and cities around me. This has been a project long in the making with support from the Anderson Ranch Arts Center, The Arts Council of Metro Kansas City, and hopefully people who love lace as I’m in the last few days of crowd-sourcing project funds through an online fundraising platform. I’d have to say it’s the most involved project I’ve yet to embark on.

What do you like to do when you aren’t creating art?

Yoga is my other main passion and I am a certified and registered yoga teacher. Between my day job, making art, and teaching yoga, whatever time is left is spent with my boyfriend and our 14-year old rescue kitty, Ellie.

Many thanks to Rachelle for taking the time to answer our questions, and share her work and enthusiasm with us 🙂  If you’d like to see more of Rachelle’s work, please visit her website www.rmgardner.com and her blog http://rmgardner.wordpress.com/ .

If you’d like to find out more about Rachelle’s adventurous project turning 2-D lace work into large 3-D sculpture,  visit her Aspen Project website, there’s even the opportunity for you to be involved and help with the costs of the project. Everyone who helps out receives a credit and also a reward of beautiful unique artwork, made individually for each person. But hurry, there’s less than a day left for that.

My Studio Challenge Contribution and Excuse

My Studio Challenge Contribution and Excuse

The second quarter is almost done and I finally have one of my planned pieces done. It is the simpler of the two but I  know I will not get the more complicated one done. This one was done like a line drawing with just a few bits of colour. It didn’t turn out as nice as I would have liked.

I make myself a piece of prefelt. Prefelt is just barely felted wool. You stop the process when everything is just holding together. I used Briggs and Little country roving. It comes as 5 strands of very thin roving ready to be put through a spinning machine. The only colour I had was red. It bleeds. I thought it might give the piece an interesting look. Here is the first strand on the prefelt.

roving on prefelt

Next I drew the picture and added some coloured felt from my left overs bin. Before cutting out the shapes and placing it, I brushed the back side with a dog brush to make it fuzzy.

all the elements added

I covered it with netting and rolled it up in a straw mat and rolled in all directions. I didn’t do any heavy fulling to shrink it because it does not need to be really strong.

I did start my second piece. I made the felt for the base. I used some cotton gauze for strength so I wouldn’t have to use much wool. I plan to cover the whole base with more wool  in several layers using my embellisher so wanted to start out fairly thin.

wool folded over to make neat edges
second base ready

While we are talking a little about technique people ask me why I use a star burst Tupperware lit to do my rubbing. I do it because when I rub directly on the sheer no mater how lightly I rub the I pull would right through the sheer and out. I’ve found about 1/3 of the people who come for classes have the same problem. I don’t know if our hands are just to rough or what.  Here are 2 pictures of what happens.

wool pulled through

And lastly my excuse. Besides waiting to long to start I have been getting ready to sell at our local medieval fair. One of the things that has taken time is my costume. Here is the under dress drying on the line after tea dying so it is not bright white.  There is a lot of material in it and I haven’t hemmed it yet. I have a little over a week to go and I have to make the top dress yet. I have a busy week ahead.

underdress dyed with tea
Tutorial – Using a Handheld Sander for Wet Felting

Tutorial – Using a Handheld Sander for Wet Felting

This is a tutorial that I did for my personal blog and because it is so popular, I thought I would re-post it here in case some of you don’t follow my blog. If you already know how to wet felt and would like to speed up the process, you should try out the sander method. If you are just learning to wet felt, I would suggest holding off using the sander until you have practiced felting by hand. It’s better to learn the basics first before you try to go faster. If you don’t like loud noise, this method won’t be for you. But you can use ear plugs and it really does speed up the felting. (Warning – This is a very long post with lots of photos.)

I have had numerous requests to make a tutorial for using a hand-held palm sander to wet felt. This is the way that I do it. There are many ways to felt and I’m sure there are many ways to use a sander while felting. I will give some other options as I go along. You should try following the tutorial and see how you like using the sander. If you don’t have the specific type of plastic or equipment that I use, don’t let that stop you. Use what you have and give it a go. This is the equipment that I use. I will talk about each piece of equipment as it comes into use in the tutorial.

 This is the sander that I use. Any palm type sander will work or you can use a bigger sander as long as it doesn’t have rotating or spinning parts that do the sanding.

You don’t need to use any sandpaper. I have heard that some people have a plastic piece that they put on the bottom of their sander. I haven’t tried that. I have tried using a plastic bag wrapped around the sander but the bag keeps moving and has a tendency to rip. Also, it covers the exhaust on the sander and the sander then gets too hot if you’re not careful.

 Just a word about water and electricity. You need to be careful. Plug into a grounded plug when you’re using your sander. This is what ours look like. They are usually found in the kitchen and the bathroom in the USA. My sander never touches water but you should still be careful.

I work on the kitchen table usually. I put down a piece of plastic just to keep any water off the table. You can see that I have painted etc. on this plastic. But it never touches the wool so it doesn’t matter.

I then put down this small braided rug. It is made with a natural fiber but I don’t remember exactly what it was called. Anything with some texture would do. I haven’t tried bubble wrap but it might work if it is the really stiff kind with thick plastic.

This is the foam layer that I use. It is a type of packing foam and I recycle it from my store as some things I receive are packed in it. It is very thin. You could use any kind of plastic that you wanted to use. (This was written several years ago, I now just use a thin layer of painter’s plastic.)

o I put down a layer of foam on the rug. Today I am making a flat piece of felt that I will use to make some book covers. I will be cutting the felt out of the flat piece but I still need to make sure that I make enough felt to be the right size for two book covers. I need at least 6 inches wide by 18″ long. I usually  make much more than I need and I can always use the leftovers for something else. I am planning on making a piece almost as big as my foam so the layout will be 19″ wide by 26″ long. This will assure that I have plenty of felt with a shrinkage rate of about 40% with the Falkland wool I am using. I tested a sample of my wool before to figure out the shrinkage rate.

 This is how you pull pieces of wool off for layout. Make sure that you have your hands far enough apart so that you’re not trying to pull on the same fibers. Notice how I have my right hand? That is the easiest way to hold the wool you are pulling away from the roving. If you use prefelt or batting, you would just lay out the wool as usually do.

 Here is a piece of wool pulled off. You then lay the wool down on the foam. You can see a row I’ve already laid out. To get an even piece of felt, you need to be careful with your layout and take time to place your wool evenly. Try to pull off about the same amount each time.

 Here is my first layer of wool laid out. I am using natural wool but will dye this later for my book covers. Notice how all the fibers are going in the same direction?

 Now, take your hand and put it down on the wool. Move your hand from place to place. Close your eyes and feel the thickness. If you feel thin spots, put a little more wool on that area.

 Next, layout another layer of wool going in the opposite direction as your first layer. Here, I have laid about half of the second layer.

Keep in mind the size you need for layout. I just keep my yardstick handy so I know what size I am laying out.

 Here’s the two layers. If you were doing a thicker piece you may need to add more layers. Most people do three layers of wool at least. I am only doing two layers as I need it to be thin enough to put under the sewing machine and to add a backing for stiffness. So I am only doing two layers. But you can do as many layers as you would like. The more layers, the stiffer and thicker your finished felt will be.

Again, take your hand and feel for the thin spots. This is the easiest way to prevent holes and thin spots. Check all over your wool and add where it feels thin. I also like to get a little bit of air out at this point. I take both hands and gently press down on the wool to try to flatten it a bit and get rid of some of the air. This helps later when you’re adding water.Just press down all over the laid out wool.

I am adding silk noil to the top of my felt. It is to give more texture for my book cover. If you were adding a design or extra embellishments to your felt, this is the step that you would add those.

This silk noil has a lot of vegetable matter (VM) in it. I am going to leave it in. Normally I would take it out but these book covers are supposed to resemble bark so I don’t think it will matter if the VM stays. It will just add more texture. I split apart the silk noil like the photo above shows.

 Then I lay it out over the top of the laid out wool.

Here I am finished laying out the silk noil. If you use a lot of silk or any other embellishment that doesn’t felt, you’ll need to add another very thin layer of wool over top.

Just little wisps of wool is all it takes.

This is about how much I put down in one spot. I spread it very thin and just lay it on the silk noil all over the piece. I then press out the air again.

 When I finished laying out, I noticed that my wool was going over the edge of the bottom layer of foam, so I added a bit more to prevent my felt touching the rug directly.

Fill a spray bottle or ball brauser sprayer with cool water and soap. I usually use dish soap but you can use any kind of soap. Olive oil soap is good as it isn’t so hard on your hands. Now, take your spray bottle and spray down the wool. I actually no longer use this kind of sprayer as it tends to shift the wool layout. An empty vitamin bottle with holes cut in the lid works really well.

Here is the wool after being sprayed. See the soap bubbles?

 I then spray a little soapy water on my hand and then start pressing down. Many people use a baggy over their hand or netting over the wool to do this part. It just bugs me so I just use my hand. If you press with one hand and spray water with the other, I find that works well. Just keep moving along your wool, spraying and pressing to get all the air out and get the wool wet.

If water is starting to run off the edge, just use a towel to mop it up. You really don’t need a whole lot of water when you felt. You can lift the edge of the foam/plastic to let the water drain on down further into the wool. You can keep doing this as you move along wetting down your felt.

 I also take my hands and work from the wetted down side towards the dry to force water over to the dry side.

Sometimes, if you move your hands into different directions when pressing down the wool, you’ll get a wrinkle. Just use your fingers to smooth it out. If you go in one direction, this isn’t as much of an issue.

Here is the wool after is has been wet down completely.

 At this point, you need to assess your edges. If you want a smooth edge, this is the time to work on that.  You can fold under a tiny bit to get a straight edge.  Since I will be cutting out my book covers, the edges don’t matter. I also like the look of a natural edge so you can make a straight edge or not, it’s your choice.

At this point, I try to soak up a bit of the water in the felt. You will find that it is already starting to felt. Carefully place your towel on the felt and push down to soak up some water. Move over the felt soaking up water, just lift your towel and place down carefully each time you move it. If the upper layer starts pulling up then stop.

Now put another piece of foam on top of the felt. Or if you’re using plastic, put another piece of plastic on top. You should have a sandwich of foam/plastic, felt and foam/plastic.

Now plug your sander into a grounded plug, turn it on and place it gently on one corner of your sandwich over the felt. You don’t need to push down to start. Just move the sander from place to place by picking it up each time.

 See? I have it picked all the way up off the foam. You don’t have to lift this high but don’t drag it across the foam.

Then put it back down and hold it there for a few seconds. I usually work in rows starting from one end of the felt and moving to the other end systematically so that I don’t miss “sanding” any portion. Keep lifting and placing it down each time. This keeps your design from moving and migrating. Once you’ve finished the bottom row, move the sander up a bit but overlap the row you were one and do the same along the next row. Keep doing each row, overlapping the last row so you cover all your felt. I usually do this several times over the whole felt.

Here it is after I’ve sanded over it several passes. you can see the grooves from the foam.  When you pull back the foam/plastic, use your towel to get excess water off the foam/plastic.

Now grip all layers of the sandwich with both hands (one at each end) and turn your sandwich over.
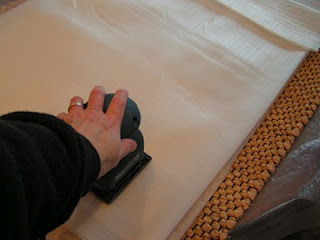
Now sand the other side just as you did the first. Remember to pick up and move the sander, placing it back down each time. After you have sanded this side going over it at least twice, you can start moving your sander over the foam/plastic as you would if you were sanding wood. I usually turn the piece two more times and sand for a total of about 15-20 minutes. Or until I get tired.

Then you need to do the pinch test. Pinch your felt and see if the fibers pull apart. If they hold together, you are finished sanding. If they pull apart, sand some more.

Here is the felt after sanding. This is pre-felt. Now you can full the felt however you would like. I will show you how I full mine.

The first thing I do is get more dish soap and get the felt a bit wetter with warm water. Your felt is fragile at this stage so don’t be too rough with it. Then I do what is called palming. I put the felt between my hands and vibrate and push my hands together. I do this over the entire surface of the felt.

After I finished palming, I put it under very hot water and “knead” it in my hands. I keep going with the hot water until it is too hot on my hands and then I switch to cold water. This shocks the wool and causes it to really start shrinking down. You can feel it happening. I keep switching between the cold and hot water. If you have water conservation issues, use two buckets to hold your hot and cold water.

 Then I throw the felt into the sink. You’ll want to get a little of the water out first unless you like a face full of water.

Here it is after I’ve thrown it. Just pick it back up and throw it again. Throw it hard! Get out all your frustrations. You can also keep putting it in cold and hot water as you’d like.

Another way to full is to use a washboard. This is an old glass one that I have. I don’t usually use it for flat pieces of felt. Usually I use it for slippers, bags or vases. It helps with the shaping process. If you have embellishments, be careful that you don’t catch an edge and pull anything off.  You just push it back and forth across the ridges. If you want to shrink it one way more than the other, than rub in the direction you want to shrink.

Your felt is finished when it starts to get nubby looking on the surface. You don’t have to felt it this hard but pieces that will be used such as bags or shoes should be fulled to a very hard felt. So how did I do on my shrinkage? The piece now measures 13″ x 19″ (if you’ve already forgotten, it started out as 19″ x 26″

Next you need to get some white vinegar.  Put some water in the sink or a bucket. Add some vinegar. I don’t measure, I just pour some in. Put in your felt and let it soak for about 5 minutes. This is bringing the wool back to a more natural acidic pH. The soap changed the pH of the wool so this returns it to normal. Then rinse it out. Wring out the water or roll it in a dry towel.

 I pop mine into a lingerie bag. Throw it in the washing machine. Put the washer on Drain/Spin. This takes nearly all the water out of the felt and it dries much more quickly. If it’s a small piece you can use a salad spinner for the same effect.

Here’s the finished piece of felt. If you wanted it completely flat and even, you could block it. That means to stretch it and pin it into place in the shape that you want. If you try using your sander, let me know how it goes. I’d love to hear how you did and see your felt. You can use a sander for almost any type of wet felting. I have used it with nuno felting, using a resist, thicker felt etc. When you nuno felt with a sander, sand first from the silk side as opposed to the wool side. That helps the wool to migrate through the silk instead of felting to itself. Once the wool starts to migrate through, then you can turn over and sand the wool side. Any questions, please feel free to leave a comment and I’ll answer your question.

What Happened to the Orange Batt

What Happened to the Orange Batt

This is just a quick post to show you what I have been up to this week. I am selling at The New Art Festival in Ottawa June 2 and 3 . http://www.newartfestival.ca/ I am trying to get everything I want made, made by then. This week I have been working on I pad bags and  E-reader bags. I am sewing these as a better way to make sure I end up with the right sized every time. I am a slow sewer. I have my machine set to turtle. I decided this was a good thing to make with the art batts I carded up a while ago. http://wp.me/p1WEqk-AX


iPad bags in progress

The bags turned out nice but boring I thought. I am couching down some yarn I have to make them more interesting. The one the right everything is pinned but not sewn yet.I did two sizes one to put the iPad in short side first and the other to go in long side first. When I asked people what they prefered, it was a pretty even split.

All the bags are lined. Here you can see the yarn and thread I am going to decorate this one with.

iPad bags

Two almost finished ones. They have their decorations but I am not sure about how to close them. I was thinking a ribbon or piece or yarn and a button to wrap it around. I am not a fan of velcro. I never seen to have much luck sewing or gluing it on. Anyone else have a good idea?

Felting Class

Felting Class

To start I apologise for the formatting but no matter how many times I fix it, it changes when I save It. I hope you can read it alright.

Last weekend I taught needle felting to a group of ladies at Just Knitting in Carleton Place Ontario. They were learning the basics by making Easter eggs.

Here they are starting with their core wool. That’s me on the left, in the orange.

Beginning to Felt


Here they’ve covered the eggs in a base colour and they are adding decorations.


Adding Colour


Here are four completed eggs


Easter Eggs


One of the ladies wanted to do a matryoshka doll. She didn’t have time to finish during class so she took some wool home.


Matryoshka doll
matryoshka finished


Another decided hers looked more like a chick and added a beak and wings.


Blue Chic


Two weeks ago I did a wet felted bird house class. I forgot to take pictures during class but did get one at the end of the class. The lady on the right has felted before and brought wool from her flock. It was Rideau Arcott wool. It is a down breed. She knew it might not work the way she wanted but wanted to give it a try.  Her bird house didn’t shrink very much and it needs a lot more work to sturdy it up. She ended up putting them through the washer twice and they still haven’t shrunk much or hardened up. It is the nature of this wool. It was an interesting experiment.


Bird House Class
2012 Second Quarter Studio Challenge

2012 Second Quarter Studio Challenge

For the second quarter challenge I thought abstract representation would be a good one. Take a picture, landscape or portrait and do it over as an abstract. There are many kinds of abstract design. Here are 3 pictures to give you some style ideas.

I like to do abstracts. Trying to make something that is life like is just an exercise in frustration for me.  Abstracts give my artistic side a chance to express itself.

If you’d like to join in, please join our Flickr group and post your photos there with a tag of “Abstract challenge”. Or if you have your own blog, post about the challenge and then come back here and leave us a comment with a link so we can go check out your abstract piece or process. We’ll put all the links into one of our Felting Around the Web posts so that everyone can see.

What I am working on.

What I am working on.

A while back I showed you some multi coloured batts I made from all my leftover bits.  I felted 2 of them with the intent of making some tablet and ereader covers. I haven’t made the covers yet but I have felted them. I only have a picture of one.

blue/green batt before felting
Blue green batt felted up.

I also made this nuno piece. I didn’t like the blue wool much and its been hanging around a while. It was wool dyed to exhaust a dye bath. so I put this nice piece of  to colour silk on top and nuno felted it. I think it will make a nice bag.

Before felting
After Felting
Close up of texture.

I will be going to a medieval fair later this summer. one thing they need is a way to hide their modern electronics but stay in costume. one traditional piece that they can ware is a belt pouch. I am working on making them. I sewed them with my machine but to make them look period correct I need to add stitching to cover that up the machine stitches and I want them to be strong and not stretch out of shape if people over fill them.

Group of belt pouches.
This is the back where you can see the slits for your belt and the stitching to hide the modern sewing machine stitches.
Experiment in Dryer Felting

Experiment in Dryer Felting

I have been hearing about felting in your dryer all over the place.  I wouldn’t mind less time rolling my felt so I thought I better give it a try. I wanted to try some of the felt batts I made last week and wanted to try some designs for belt pouches. None of these have been ironed or blocked yet

I used batts for all of these. The orange(supposed to look like leather and does in person) one is merino I dyed and carded into a batt.  The pink is from last weeks carding of left overs. It is mostly merino with a little corriedale in it. The brown striped pouch and flat piece of felt are from last weeks left over carding as well but has a lot of different fibers with different micron counts, some dyed and some natural.

This one came out the best. It felted the most in the dryer.  It didn’t shrink much. It didn’t buckle it’s resist.

This one did the next best. The ropes attached well and it was felted but not as much as I would like.

These two were felted but not much.

For this experiment I decided to treat them all the same. I laid  the wool out around the resists, covered them with netting and rubbed them all the same. I then wrapped them around a damp towel then wrapped that in another towel and tied the bundle. I let it bump around in my dryer with no heat for 20 min then unrolled it, made sure the net wasn’t stuck and rolled them up from the other end.  I let it do another 20 min in the dryer. I took it back to my work table unwrapped them, cut out the resists and then rolled all of them 50 times  in both directions in my reed mat with a pool noodle in the middle. This was  to set the cut edge and felt them a little more.

I then fulled them as I  normally would, rinsed out all the soap and blocked them a little. I would say that over all it worked.  They are not felted enough for my liking and need more work.   The felt was not far enough along when it came out of the dryer. I normally wouldn’t has started fulling them when I did for this experiment but the idea was to eliminate the manual rolling.  I am not to happy with the pink pouch or the brown pieces. I am going to wet them again and roll them in my stick blind. Next week I will let you know how that went.

I think it definitely has potential. There are things that would make it better.  I think if the dryer didn’t have the fins in it that would be better. It would roll it more and thump(drop) it less. I see that some of the modern dryers don’t have fins.  I have plans for a roller that uses a big tube. Right now I am looking for a suitable tube. If I ever find one and get my hubby to make it I will definitely let you know.

What I’ve been up to lately

What I’ve been up to lately

This week I started thinking about spring. It is coming, so to help throw off the February blahs I made some felt bird houses.

They are made form Romney wool. the original wool is a mix or white and brown that I dyed. you get a really nice variation in colour that way.  These still need their strings to hand them up and I think the big one might end up as a squirrel house.

The other thing I did this week was get 2 new book cases to store wool on. I wanted to get all the dyed wool out so I could see it and get all the breed specific wool out so I could see what I have. I thought it would be lots of room but I still have a bin of mixed colours( not in the picture),   I have my white and black wool in a bin each and that works fine and the Romney batts that are at least in a cupboard.  I also  have 8 or so bags of raw wool to be washed.  I need to find a way to store the bin plus of yarn so I can see what I have. It’s just not working to have it all in bags inside a bin. I would like to get the over the door hangers that have all the little clear pockets for the yarn. I haven’t found them anywhere yet. Oh well it is better than it was so I will just have to be satisfied for the moment.

Before
After