We’ve had some new members join our wet felting group at the Well Being centre this year, so I’ve been making ‘beginners’ pieces with them the past few weeks. One I always enjoy doing is a Nuno strip sample piece. I try to pick some fabrics I’ve not used before and like to pick an unusual one which looks like it’d never work, but I know from previous samples that it does. It’s usually one of the weird scarves I’ve picked up at a charity shop, and I chose my favourite ruffled loopy one this time.
 The fabric I hadn’t used before was a piece of lacy fabric which I think was previously a blouse. It’s not that obvious it was lacy, but you can tell a bit better from this close up:
 I usually start off absolute beginners with a soft wispy piece because it helps to learn to control pulling off the wool tops, but one of our new members joined while I was sorting out supplies so didn’t have them all at the centre. We had a practice run of pulling off the tops, and she did it well so we made a simple landscape which we usually do on week 2. I usually stick to a simple design for this to make sure it gets done, has a good outcome, and I don’t have to answer a million different questions: 2 layers, green for grass, blue for sky, add some embellishments for clouds and flowers, then felt. But there were only a few of us, and I could work 1 on 1, so I went with her ideas and just showed her how to realise the ideas, so we each made a kind of farmer’s field picture:

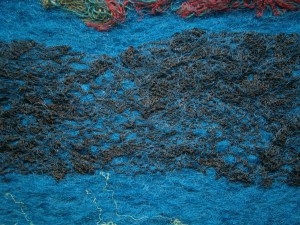
I usually end up with odd random things on mine, because I use it as a demo piece if someone isn’t sure, which is why it looks like I have discarded kids’ toys lying about (viscose nepps) and some half dug out potatoes (cotton nepps)! We used some pencil roving waste too, we both used a length of natural brown to make a ‘wall’, and I added some variegated green to see how it’d work for a hedge. I’m not sure it looks very hedge-like, but it did get a nice ripple to it, you can see the brown piece a bit clearer on the close up and see that the blend we used just above is actually made up of yellow and purple:
 Our new member’s landscape piece turned out so well that we moved onto using resists the next week, some other members mentioned before New Year that it’d be good to do vessels again and maybe more resist work, so for new members to build up to and give a refresher to others, we made a simple piece with resist strips. Some of us put fibres or fabrics under or on top of our resists for extra effect, and embellishments on the top. I used the lacy fabric from the nuno sample piece, and a nice pink wool lock:
 You can see more of the laciness on this piece:
 Some of the fibres from under one of my strips:
 Those nuno sample pieces always come in handy for when I’m planning a collaged felt project:
 Because we all know the first rule of tidying up has to be getting everything out to make a mess again!


 And the back with the flap open:
 This is how it looked with the flap closed:
 I used some dyed silk throwster’s waste and dyed soy staple for the embellishments:
 The silk has a paisley design on it, which can still be seen, but close up you can’t tell with the texture:
 I always have trouble choosing buttons for cases/purses etc. I’m sure I said this last time, but I really need to make some more buttons out of polymer clay. I bought a bag of green buttons at a hobby fair about a year ago, I thought this one was quite nice, but a bit small:
 I liked this ‘fancy’ button, but it’s a bit big and too thick:
 This was my favourite and what I ended up using:
 I blanket stitched around the button hole and around the opening/flap, but didn’t get chance to photograph it finished. My friend loves it and he’s already using it 🙂


