Browsed by
Tag: natural fibres

FLEA THE PANDEMIC

FLEA THE PANDEMIC

Back in September 2020 I was asked if I would make a prop for a play which Taboo Theatre Company, a locally based actors’ collective, was to perform in November of that year, at The Exchange in Sturminster Newton, Dorset.  The play had been written especially for them by professional playwright Sue Ashby.  Sue has written, among other TV and theatre scripts,  episodes of Coronation Street (a very popular, long-running soap in the UK).  More details of Sue’s career can be found here  https://news.dorsetcouncil.gov.uk/dorset-history-centre-blog/2023/07/24/historical-plays-set-in-north-dorset/

You will no doubt guess from the dates that we were out of the first Covid19 lockdown, but still under strict mask wearing, social distancing and other rules and regulations. The play, “Flea the Pandemic Dorset 1348”, tells the story of the first Bubonic Plague to hit the UK; so, given that it was rat fleas that carried the Black Death, the prop obviously had to be a flea.

Bearing in mind that the stage at The Exchange is 23 feet (7m) deep and its proscenium arch is 40 feet (12m) wide, and that the hall it serves is 118 feet (36m) deep and normally capable of seating 301 audience members, making a flea that a full audience could see was going to be a problem.  This was to be a play not a pantomime, so having an actor play the flea was not going to happen. (I don’t think that it had been decided, at this stage in the proceedings, that most of the action would take place on a much smaller podium constructed on the floor of the hall.)

After some (socially distanced) discussion with Craig White (director) and Robert Cowley (actor/producer), it was decided that the flea should be about the size of a cat, and be fixed on the end of a long enough pole to allow the cast member, who had to control its movements between the (socially distanced) actors, to do so without getting closer than 6 feet to any of them.

If I remember rightly, it was at this stage that my husband Graham became involved, not only to provide the pole, but also to work out how to enable the flea’s head to move and for its eyes to light up bright red.

With the help of Mr Google, I found some reference images of fleas (cat fleas in the end because the oriental rat flea which carried the bubonic plague was not that different in appearance but seemed not so photogenic).  I enlarged a side view of a flea to fit on A3 paper, and having found a “full face” view of the head, I also enlarged that to a similar size.  Quite fascinating really in a revolting way.

coloured drawing of flea with body parts named
Reference Image, drawing of flea with body parts named
flea's full face head
Reference image – Cat flea head. Not “just a pretty face”.

I had initially thought to make the whole flea from felt, but, because there had to be batteries, wires and an electrical switch concealed somewhere about its person, I had to change my ideas somewhat.  I’m afraid that I do not have any progress photos, nor do I have any notes of how we proceeded.  This was before I joined the Studio and it didn’t occur to me that anyone else might be interested in how we did it.  Luckily The Flea  was not disposed of after the performances so I have been able to examine it to jog my memory of the steps we took to produce it.

The body of the flea was made from three pieces of dyed and stiffened calico – two sides and a belly gusset – with its segments and spiracles painted on.  This was stretched over carved lumps of polystyrene.  The switch and wiring for the eyes and the battery pack were attached to a 6 foot long metal pipe, where it passed through the inside of the body from the neck to the “tail” end.

image of inside of flea's body with battery box, batteries and on/off switch
Flea “innards” showing the battery box, batteries and on/off switch.

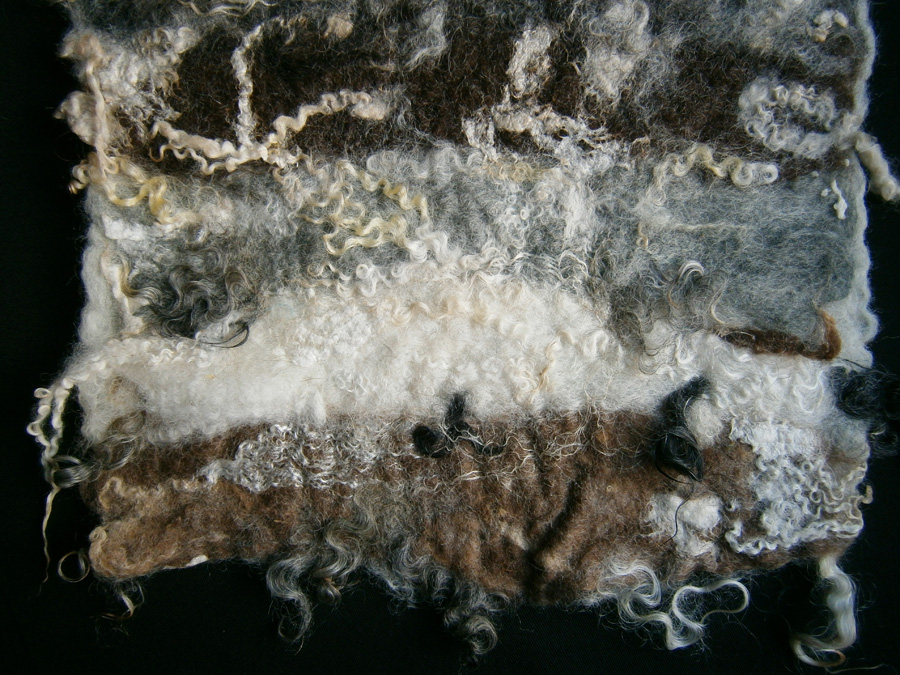
The head, which was separate from the body so that it could be moved, was needle felted from brown wool (I can’t remember the breed) with mouthparts made from painted foam, plastic wire insulation coating and more painted and stiffened calico.

image of flea's face again with beside it a drawing of the face and mouth parts
That “pretty” face again and the drawing of face with mouth parts.
image of felted flea head, with mouth parts and glowing red eye
The Flea’s head – I’m really glad that fleas aren’t the size of this one.

Graham had to come up with a method of allowing the head to move and the eyes to keep glowing red, all without breaking the connection between the eyes and the wires running from the battery pack or those wires being tied in knots.

The method he came up with sounded extremely complicated to me, but then I’ve never had to put lights in a miniature building or lamp post.  A circular piece of PCB (Printed Circuit Board) with a hole cut into the centre was attached to the flea’s “neck” at the top of the body, where the pipe was also firmly fixed.  The PCB had the ends of the battery pack wires, through which the current would pass, soldered to it.

The wires from the red LED eyes in the head were soldered to another circular piece of PCB  and the head was sewn to this (Graham having pierced suitable holes in it for the purpose).

The head was attached to a piece of wooden dowelling long enough to pass right through the neck piece of PCB and on through the pipe inside the body and protrude from the pipe’s “handle” end.  This ensured that, so long as the two pieces of PCB were in contact, once the eyes were “switched on” they stayed on until switched off again, even when the flea was “looking around for it’s next meal” as the actor twisted the end of the dowel.

image showing PCB pieces, with soldered wires on neck end of head and neck end of body with dowel protruding from it.
Graham’s solution to the problem of the glowing eyes.
image of dowel protruding from handle end of pipe
This is the handle end of the pipe with the dowel protruding from it with the “bits” stopping it pushing through and decapitating The Flea.

The belly gusset on the underside of the body, which allowed the switch to be reached and the batteries changed as necessary, was closed with extra large snap fasteners for convenience (in case the manipulating actor was male!)

image of snap fasteners used to close the belly gusset
The “man-sized” snap fasteners used to close the belly gusset.

The Flea’s leg segments were needle felted in the same wool as the head and wired, with the claw ends just being fabric covered and painted for colour and stiffness.  These were affixed to the flea’s thorax with wire and thread.

image of underside of the flea with closed belly placket and legs.
Closed belly placket and The Flea’s legs.
image showing front view of the completed Flea
The completed Flea – in mid jump?
side view of completed flea
Side view of The Flea – definitely in mid jump.

After we had handed The Flea over to Taboo, but before the play could be performed in November 2020, Covid raised it’s ugly head again and we went into the second lockdown.  As a result the performances were re-scheduled to the end of January 2021.  Unfortunately because of the post-lockdown rules and regulations, which effectively prevented The Exchange from re-opening in time, the play had to be postponed – again.

It was eventually performed on the 19th & 20th June 2021.

If you would like to see a critique of the play, try this link: https://www.theftr.co.uk/flea-the-pandemic-taboo-theatre-the-exchange-sturminster-newton/ It will tell you more about the plot, as well as the action.  Unfortunately the images which were originally posted with the review have had to be removed, but the reviewer, Gay Pirrie-Weir very kindly provided the four images of “The Flea Acting” which you see below.  I must say that it appears that the lighting techie has turned the actors and The Flea, as well as the set, purple.  I’m forever having this problem with costumes and props changing colour on stage – grrrr!

image of two actors one with The Flea landing on his shoulder
The Flea Acting – just coming into land.
image of two actors, one manipulating the flea and the other shaking hands with an unseen actor
The Flea still acting – hanging on to it’s victim’s shoulder – just!
Image of 3 actors, 1 manipulating the flea, 1 "driving a cart" and the narrator reading from a book
The Flea being “carted” inland, while the narrator continues the story.
Image of 2 actors - the narrator and the carter with the flea at one side
The Flea “resting” while the story continues.

Oh, and we mustn’t forget The Mayor – you will need to read the Gay’s review mentioned above to learn about him.

an actor wearing a brimmed hat and standing at a lectern
The Mayor (Boris?)
FANTASTIC FUNGI

FANTASTIC FUNGI

I don’t know if any of you are fantasy fiction fiends.  Some years ago now I read the first of a trilogy by Alan Dean Foster, called Spell Singer.  It was about a man in the 1960/70s who managed to slip through time/space to a different dimension of our world in which animals wore clothes and talked (including Mudge, the man-sized otter with a foul mouth!)  So why am I mentioning this?  Well part of the story took place in a marshy area inhabited by a lot of very depressed mushrooms and toadstools with faces, which moaned and groaned and exuded misery, which was catching!

My mind immediately trotted down the rabbit hole of needle felting mushrooms – with faces.  Mushrooms and toadstools of different varieties would have different temperaments and expressions.  I thought of the white spotted red capped Fly Agaric; plain red capped Gomphidus Roseus (with a name like that they would definitely look odd); white button mushrooms; brown chestnut mushrooms; large flat horse mushrooms; fairy ring toadstools and, eventually, bracket fungi.

So I was off.

I decided that the bases of the fungi with stalks would represent a piece of turf, probably woodland or scrub.  I had purchased, a few years earlier, some fibres sold for lining hanging flower baskets.  It never got used for that because the bulk of it consisted of sheep’s wool, and I considered that it would be wasted if used for it’s original purpose.  From the look of it, and of the quantity of “foreign matter” caught up in it, it was the sweepings from a mill floor or even a shearing shed.  (I think that this was a good way of using up what would otherwise be wasted.  Unfortunately I don’t think it’s available now.)

All the material was roughly dyed green but luckily so patchy was the dyeing that it was not a flat uniform colour.  The different thicknesses of the fibres, the kemp  and the vegetable matter all seem to have picked up different shades and tints of green.  Just what I needed.

To save on this precious material, I used some scrappy scoured merino bits as a base for the underside of the grassy humps I was making, and then topped them with the basket fibres, and needled the lot together.  I was delighted to find that, even close up, the result did look like a bit of scrubland grass.

In each case my fungi were to have faces and, hopefully, characters.  I thought that as they were all wearing hats/caps, I’d place the faces at the join of the gills and the top of the stalk.  I also decided that, rather than just a single lonely fungus,  I’d make families.

4 felted Gomphidus Roseus mushrooms with bright red caps and daft faces
Gormless Gomphidus Roseus mushrooms
3 Fly Agaric mushrooms. Red caps with white spots and faces with blue eyes
Fly Agaric Mushroom family – Granddad, Mum and Dad with baby
4 felted large flat mushrooms with hairy brown caps and black gills, with faces
Hairy Horse Mushrooms

The horse mushrooms are hairy, not because they were horse mushrooms but because I used some Herdwick fleece for the caps and didn’t know about shaving in those days.

In the end, the button mushrooms and the chestnut mushrooms not actually having any gills on view, I placed their faces on the top of their caps.  I also gave the chestnut mushrooms Fymo eyes – little painted and varnished balls on each end of a piece of wire.

3 large button mushrooms and one small mushroom with bright blue eyes
Buttons family
3 Chestnut Button Mushrooms with surprised blue eyes in the top of their caps with 2 baby buttons
Chestnuts. Looks like the Dad on the left has 2 wives and children – naughty!

The fragile, skinny fairy ring toadstools were to sit together in a circle, as they do, on a larger piece of grass with so much magic erupting from it that it became visible.  This was represented by whisps of iridescent trilobal fibre (of which I have lots.)  There was also magic appearing on the tops of their caps.  These were made from scraps left over from a large piece of white merino felt in which a large quantity of the iridescent trilobal was embedded.  (More about this felt at some time in a future post.)

Ring of tall thin white and iridescent toadstools facing inwards, with iridescent fibres in the centre of the ring
Magic Fairy Ring Toadstools – chatting. What about I wonder?

These were the main families I made, but in the end I did make quite a few solitary mushrooms and toadstools (perhaps that’s why they were so melancholy?)

It was while I was making the Horse Mushrooms, which have black gills and therefore black faces, that I started to think about bracket fungi and Welsh male voice choirs.  I can hear you saying “why?”  It was the black faces.  I am half Welsh. My mother’s family come from a South Wales mining valley, Ogmore Vale, and all my Welsh uncles were miners (hence the black faces), and they were all singers.  (I even got to go down a pit on a rare holiday to stay with the family when I was about 7 or 8 – and I cried for the poor ponies down there even though they were well looked after).  Anyway Welsh miners were magic to me, and having been thinking about magic since I made the fairy ring toadstools, I wanted to create a magical tree stump on which to grow a male voice choir of bracket fungi.

The inside of the tree stump was made up of part of a Jacob fleece which had absolutely refused to felt, and subsequently ended up in the cats’ bed – disappearing over time bit by bit into the middle of other needle felted items.  I covered the stump in more of the basket fibres to represent a rotting, moss covered piece of wood. Thanks to the unevenness of the core Jacob I was able to easily create a surface with the ridges and dips usually found on oak trunks.  There were also what looked like various entrances to the hollow centre of the stump.  I lined these with black or dark grey fibres to give them depth and added some mixed brown and iridescent fibres to represent magic escaping from the stump.  In two of these I also added a pair of (Fymo) eyes peering out at the world.

close up of tree trunk showing bracket fungi on left and 2 holes with eyes peering out
All that can be seen of the internal inhabitants

I added a sort of representation of tree age rings on the top of the stump, but also allowed the hole in the middle of it to remain and added a lot more escaping magic fibres.

Close up of felted tree stump showing top - tree rings and "overflowing magic".
Overflowing Magic

I made a lot of bracket fungi, both representing individual singers (baritones and basses – big and bigger ones)

close up of several bracket fungi with faces, large ones to the front, smaller towards the back
The basses and the baritones
close up of one large bracket fungus with face, blue eyes, large nose and open mouth showing toungue
Big Bass himself

And Tenors, since they were smaller, in groups of three.

close up of tree trunk showing 4 bracket fungi each with 3 faces
Some of the tenors

I know I researched a type of bracket fungus and was able to give them black “faces” on the undersides and brown tops with pale margins.  However I cannot remember what they were, nor can I find my reference pictures.  They may have been polypores of some sort.

Having made a batch of the “choir members” I needled them on to the stump, adding faces  with  singing mouths.  I attached the stump to an artist’s canvas board, 20” x 16”, which I had covered with a piece of cotton patchwork fabric, coloured in various greens, to represent the surrounding trees.  Originally I wanted to add a “dead man’s fingers” fungus, which could be conducting the choir, but at that time I had not heard of using an armature and it wouldn’t stand up on its own, so I gave up that idea.

A felted tree stump with bracket fungi with faces on a green background
The finished Tree Stump

My husband thought that the mushrooms would sell like hot cakes, but unfortunately I think I only sold one family.  I ended up giving the rest away, apart from the tree stump which I have retrieved from the attic.  I’d like to hang it on a wall in my workshop – if I can ever find a space large enough for it – if I can I might have another go at the dead man’s fingers.

Bags of Inspiration

Bags of Inspiration

Having just read Kiki’s tutorial  https://feltingandfiberstudio.com/2023/11/19/left-overs-yessss/ on using up prefelt scraps, it occurs to me that I may not have mentioned something we used to do at our Guild (Dorset Guild of Weavers Spinners & Dyers) mainly to raise funds for the Guild but also for fun.

When I attended the Stitch and Creative Crafts Show at the Bath and West Showground in Shepton Mallet (Somerset, UK) back in 2010  – I saw a stand selling (for £8.00 each) bags containing 35gr of silk fibres, yarns, fabrics scraps, carrier rods and cocoons in various colours, left over from old projects which, when put together, made a fascinating collection for future projects.  So fascinating that I bought three of them.

They must have made quite a bit of profit on them because they appeared mainly to be the “waste” from artwork.

At that time (when I was part of the sub-committee organising the Guild’s Exhibition and Sale of Work) we were looking for a Guild Project which could be part of the exhibition or something hopefully to help raise some funds.  Well, I thought, our weavers must have lots of off-cuts of hand woven fabric, not to mention warp ends.  Then there were the spinners who would have odd bits of spun and unspun fibres of all types and colours.  We also had members who were dressmakers, beaders and embroiderers, and a soft furnisher, who were bound to have the odd bits and pieces that they didn’t really need.  So, with the blessing of the committee,  I put it to the members in the next newsletter that if they would donate to the Guild any odd bits of fibres, yarns, threads, warp ends, bits of fabric, beads, button, feathers, felt, cords, braids, tassels, sequins, sequin waste, ribbons, silk flowers and any other bits and pieces they could think of, we could make up some “Bags of Inspiration” and sell them to members of the public at our open days and outside demonstrations.  (I don’t know about in the rest of the world, but in the UK the word “bags” means “lots of” as well as “containers”, so the punning name “Bags of Inspiration” seemed apt.)

We used A4 sized polythene bags (which I was able to buy quite cheaply from our local green grocer) with an A4 sheet of card inside for stiffening, and I made up some stickers with the Guild’s logo on and a brief description of the contents, and posters also giving details of the contents.

Image of a poster detailing contents of a Bag of Inspiration
Bag of Inspiration Poster

We arranged a few bag making days at a pub in the village where our then President lived.  She had persuaded them to let us use their skittle alley at no charge, and we had a great deal of fun making up the bags and tucking in to “refreshments” from the bar and kitchen.

The members who came to these, brought with them all sorts of goodies which we spread out on tables, so that we could make collections of pieces which seemed to go with each other.  Those who didn’t think that their colour theory was good enough, could pick out a picture from a selection of magazines and have a go at matching colours from this  It was amazing how compulsive making the bags became.  You could pick up a piece of fabric that looked so dull and dreary and be amazed how it perked up and positively shone with life when paired with different fabrics, yarns, trimmings etc.  You just couldn’t stop picking up likely bits.  The difficulty was keeping the weight of each bag between 80gr and 100gr, so we quite often ended up making up at least 2 bags with similar contents.

image of tools and accessories for making up Bags
Equipment & Extra “Bits” for making up Bags
Prospective contents of a Bag of Inspiration - fabrics, yarns, fibres etc.
Prospective contents of at least one Bag of Inspiration

We put a price of £3.50 on each bag and they went like hot cakes – we sold out on their first appearance at our exhibition and sale of work.  Embroiderers and mixed media artists in particular liked them.

After a couple of years, we didn’t get so many volunteers to make up bags but we still had mountains of “stuff”.  So we added another string for our open days – Pick and Mix Your Own.  I had remembered that Woolworths (now there’s a blast from the past) used to have a counter full of different sweets and you could take a bowl and pick and mix what you wanted, and in the process buying a lot more than you would have if just buying a ready filled bag.

Boxes of different sweets to be picked and mixed
Pick and Mix Sweets.

It worked with our stuff too.  We gave the visitors the polythene bags and they could wade through all the bits and pieces picking what they needed, and we weighed them when they’d finished, charging £3.50 for 100gr.

We had had a lot of fibres donated so we started making up what are now called Art Batts and selling them as “Batts of Inspirations”, but because we were mainly selling these to Guild spinners and felt makers, they didn’t do quite so well as they were mainly able to make their own.

In all we made around £1000.00 for the Guild in the four years we were doing this.  Eventually though the members got fed up with spending time on making up the bags and the whole thing was shelved, as the Guild seemed to be relatively well off at the time.

Some time after that I took the idea back to myself and I was making up Batts to sell at Guild meetings, using luxury fibres as well as merino and synthetic fibres.  I made up some bands to fix around the Batts detailing the various fibres included in each.

This slideshow requires JavaScript.

I was also making up and selling Bags, mainly at a Needlework Festival in Dorset where most of the vendors were selling materials and equipment for crafters, as well as various craft fairs and so on.

This slideshow requires JavaScript.

I was getting the odd question like “they’re lovely but what do you do with them?” and  “can you make a bag out of what’s in here?”  So I made a sign from images of items that I’d made myself over the years and that helped.

Image of items made with contents of Bags of Inspiration
Some of the things I’ve made with the contents of BoI over the years

However, once Covid started causing problems, my selling opportunities dried up.  I had been intending to try selling Bags and Batts via my website, but it was very difficult and too time consuming to photograph the Bags so that the contents were visible, because of reflections on the polythene bags.  So that sort of died a death too and I’ve now shelved that project, and am using the bits and pieces I’ve collected over the years on theatrical costumes and props.

Perhaps some of our readers’ organisations, like Ann & Jan’s OVWSG, might use this idea to raise funds?

Fleece Preparation System

Fleece Preparation System

Many moons ago, when I was an avid spinner (before I had properly discovered felt) I had read various articles in magazines and journals about the preparation of raw fleece for spinning. I had obtained a very fine fleece (I can’t now remember what it was though) and wanted to be careful how it was readied for spinning so that I didn’t mange to felt the fibres in the process. So I set about making myself a system for the preparation of locks of fibre ready to spin. Unfortunately, the photographs I took of the system were actually of a later episode of washing a lousy Jacob fleece, so they may not look quite as you’d expect them to, but they will show you the process. Though I did manage to find a a few of the original locks so I can show you those. They are not quite as pristine as when they were first processed however so they aren’t as nice as they used to be. In addition, the light must have been wrong, because the background card on which they are displayed was a dark green, not the blue appearing in the photo!)

Locks

I obtained three large plastic crates and one smaller one which would fit inside any of these.  I made holes in the bottom and around the sides of the smaller crate with (so far as I can remember) a soldering iron, so that water would drain out of it easily.   Then I cut up an old net curtain into pieces the size of the base of the small crate.

Crates

I persuaded my husband to make me a couple of drying frames.  These were  wooden frames covered in chicken wire, and with removable legs long enough to keep the frame above the grass on our lawn.

On a fine day I assembled the “kit” on our patio ready to start.  This comprised the drying frames and a couple of old complete net curtains (which would stop the washed fibres falling through the netting); two buckets; a bottle of Fairy washing up liquid; rubber gloves; the three crates and bits of net curtain and my fleece (in the picture my pillowcase full of the Jacob fleece and the audio book I’d listen to while working).

The kit

I started with the “religious” (holey) crate, putting a piece of net in the bottom to stop fibres following the water out, then I pulled locks off the fleece.  I teased each of them out gently, (though in the pictures it’s just handfuls of Jacob locks) laid them out on the net, making sure that they did not cover each other.  When the bottom piece of net was covered, I laid another piece of net on top and carried on making layers of net and locks until the crate was full, finishing with a layer of net.

Layering the Locks

Next I filled one of the larger crates with rain water and dunked the religious crate inside it.  All the fibres wanted to float until I had managed to get them wet but I managed to get them to stay in the crate.

Religious Crate Full and in First Soak

I left them there for a couple of hours, then I gently lifted the inner crate out of the water and stood it on top of one of the larger crates so that the water would drain into it.  When most of the rainwater had drained away, I put the small crate with the wet locks into another of the larger crates, filled with clean water and Fairy Liquid – of a similar temperature to avoid shocking the locks. 

Soapy Wash Water

Once again I left it to soak and then lifted it out and drained it of soapy water as before (having emptied out the dirty rain water into watering cans to use on the garden.) Then put it into the other large crate, which had been filled with clean water.  I gently lifted the inner crate up and down a couple of times to rinse the locks, and then I took it right out and left it on top of an empty crate to drain. 

Once a good deal of the water had drained out of the locks, they needed to be fully dried.  I covered one of the drying racks with a fresh net curtain and laid out the locks on top of this.  A second layer of net curtain was added and the second drying rack was laid on top and secured with G cramps.  If I remember rightly it was actually a fairly breezy day so I stood the frames up rather than laying them down on the lawn so that the air could penetrate more easily. 

Washed Locks Being Laid Out to Dry
9 All Laid Out and Drying

The final result was lots of small fine locks all of which retained their lovely crimp.  They looked so scrumptious that I couldn’t bear the thought of spinning them up and loosing that, so I laid them out in lines across a piece of fabric and stitched them down at the cut end so that they showed all their glory.  I used this to make a padded waistcoat, they were the top of the sandwich of some cotton curtain lining (washed to remove the dressing) and some white wool fibres (I’m not sure what really, but possibly merino) nuno felted to some cotton scrim (thereby hangs another tale!)

Unfortunately it looked awful when I tried it on so it never got worn.  In the end I put the lot in the washing machine to felt and it will finally be worn as a bustle in this year’s panto – yet another tale! (tail?)

Why did I call the Jacob fleece lousy?  Have a look at this picture of the washed fleece – or at least some of it.  It must have been a really course fleece, possibly a ram’s. Whoever off loaded it on me really saw me coming!

10 Washed and Dried Jacob

I came home early from a very ­unenjoyable Guild  meeting in a filthy mood and decided I would make a large piece of Jacob felt so I could take my temper out on the fulling. Ha!  It. Would. Not. Felt – no matter how much “welly” I gave it. A lot of stamping on it and cursing later, it had just begun to felt but I could not get it any further (it’s a wonder it didn’t turn blue!)   I was exhausted and in no better mood when I gave it up.  The resulting heap of joined up fibres ended up in the cat’s bed – she loved it – and bits of it have been stolen back and used as the core of various needle felted things.  I’ve just about used it all up now – getting on for 10 years later.

Here’s a final picture of the Jacob fleece drying after it’s tour through the washing system, and you can see that my trusty assistant at least thought it was worth it.

11 Drying Fleece with Assistant
Naturals For A Nature Lover

Naturals For A Nature Lover

I wanted to make a piece of felt for one of my friends as a thank you for helping us out recently, he’s into the environment and nature, so I thought a piece using all natural wools and undyed fibres would be something he’d like. I really enjoyed not having to put too much thought into it apart from trying to use as many different fibres as possible. I can’t remember all the wools and fibres, but I definitely used: English 56s; Gotland tops, scoured fleece and raw locks (from Zara-thank you, again!); Brown Finnish, Grey, Brown and White Merino; scoured Shetland; Bluefaced Leicester locks; hemp; flax; soy tops; cotton nepps; silk noil; silk coccon strippings; Tencel; viscose fibre; bamboo fibre and ramie. Here’s the finished piece:

Close up of the top:

Close up of the bottom:

It’s not as textured as some pieces I make, but you can see how it is looking at it from an angle:

This is a close up of some of the flax:

A really nice, shiny Gotland lock with a gingery tip:

Another Gotland lock with some Soy top above and BFL locks at the bottom.

This is the BFL, I bought a bag of washed locks ages ago and forgot all about them until I went looking for something else!

The Tencel looked really shiny against the darker wools:

This is one of my favourite parts, because it has lots of texture, there are Gotland and Bluefaced Leicester locks, flax and hemp, Tencel, and cotton nepps:

Do you  have a favourite combination of wools and fibres? I didn’t get a photo from this piece, but I really like the silk noils and cocoon stripings on the dark brown wools, you often get little holes which look like a tiny bug made them, and the brown shows through the thin parts giving a ‘rusty’ look to it!

Recent Pieces:

Recent Pieces:

I finally got photos of the piece I showed being laid out a couple of weeks ago. It was dark purple in the middle with black at each end, and I used lots of different natural fibres on it:

I like these photos on an angle:

I think this was tussah silk:

And this is soy fibre:

My friend had some hair ‘decoration’ things that she was throwing away after using, so I thought I would see how they felted 🙂 She had plaited (braided) them into her hair, I forgot to ask if they came wavy or not. I used some wool tops I got in a bag of Botany Lap waste. It’s a natural grey colour, but has the odd bit of Angelina fibre blended in. I couldn’t see any, though:

You can see better from this angle how they attached:

Where it was thinner/spread out it really blended in:

I liked how it looked where it was thicker:

I don’t know what the wool is, it’s really soft, and the colours look like a blend of grey and oatmeal Bluefaced Leicester. This is the back:

But the edges are like a breed with curlier locks:

Have you tried any new or unusual fibres or embellishments lately?

More Natural Wools and Fibres

More Natural Wools and Fibres

I was looking through my flickr account recently for some photos to use on a flyer for the well being centre, and I came across some felt pieces I made with natural fibres and natural wool combinations. I haven’t done a post about ‘naturals’ for a while so I thought you might enjoy this old post from 2012:

Another couple of natural wool and natural fibre combinations I’ve used recently are Oatmeal Bluefaced Leicester with Ingeo top, and Humbug Jacob Tops with black and white Bamboo tops.

Humbug Jacob tops are a stripey blend of black and white Jacob wool tops. Just on its own it produces a nice result, but I thought I’d try using strips of black and white bamboo tops for effect. Both bamboos are really soft, white bamboo looks silky, but black bamboo is fluffy and more like fluffy cat fur. They felt quite differently too, the white keeps its silkiness and shines really nicely, and the black almost fades into the background, staying very matt.

Ingeo is made from corn, it is soft and shiny and smells faintly of caramel 🙂 I decided to cover the whole piece with Ingeo as it has such a lovely sheen. This was another fibre which shone even in dim light. The effect after drying is gorgeous, Ingeo is such a nice silky fibre and went really well with the Oatmeal Bluefaced Leicester. I think this combination would make a lovely soft and shiny scarf.

*The previous post I’d made was also about natural wools and fibres, if you’re interested, you can find it here

Shibori Shrug Jacket

Shibori Shrug Jacket

Heres another throw back post. I thought if I do not remember doing this maybe you won’t either. I hope you like it.

After seeing Ruth’s jacket it reminded me I had made a small one for one of my daughter’s dolls years ago. I thought I should give it another try but life size this time. I thought about doing it seamless but decided that it would make something that is a simple design into something complicated. Although I am not a great sewer I was sure sewing 2 straight seems on my machine should not be beyond me.

There are quite a few pictures so I have put them in a gallery for ease of viewing. If I could figure out how to post pictures side by side or in groups I would but that is beyond my skill level.

First I made a large piece of nuno felt. I used silk gauze and merino wool. After it was finished I put it in a red dye bath. It came out quite nice. It’s hard to tell from the picture because my camera did not like the red at all. The one you see was the best of a bad lot.

The next thing to do was the shibori. I finger pleated the middle of the piece starting at one short end. I very carefully held it flat and tight while I tied it. The first tie is the hardest one. After that you just pleat it up tying every couple of inches. You don’t want to be too neat about it. If the pleats are to perfect you get straight lines. You want your pleats to be tight so some of the material will resist the dye in the second bath. This type of shibori is supposed to make a bark like pattern. I put the tied up piece in a purple dye bath hopping for a nice red purple to appear on my cloth. It came out black. After it was dry the gauze side had more of a purple look but still very dark.

I sewed up my jacket. I made the material far too wide so the jacket ends up long. The short sides overlapped a lot when folded up. I had to have long “lapels” to make it work. It is not a mistake it’s a design feature, just ask me :O) It is still to long for me. I think it may look good one someone who is tall and thin. Two things I am not.

All in all not a bad try. I’ve made another piece of nuno felt to try again, I made it narrower this time. Now I have to find the time to sew it up.

Naturals and Needlefelting

Naturals and Needlefelting

I mentioned that we have tried out lots of different fibres at the well being centre lately, and the other week we tried out lots of different wool breeds too. We’ve used naturals before, but mostly for pods/vessels and lots together for hangings etc, but we made samples to get a better idea of what we could use each type for. Since I have more experience, I thought I’d use Herdwick and Lincoln tops. I used some flax and help tops with the Herdwick sample:

OLYMPUS DIGITAL CAMERAWith the Lincoln I used Soy tops and Black viscose tops:

OLYMPUS DIGITAL CAMERAThis is a close up of the Soy:

OLYMPUS DIGITAL CAMERAAnd a close up of the Viscose:

OLYMPUS DIGITAL CAMERAAnd this is what the back looked like:

OLYMPUS DIGITAL CAMERASome of the others tried Texel, and had a hard time getting it felted. After the Botany laps unfeltable tops I had, I was a bit concerned. I’ve taken some wools from ‘Goody Bags’ and Botany lap waste in before now, so worried there might have been other unfeltables that got mixed up. My sample turned out alright though. I used some Viscose and Bamboo staple fibre on it:

OLYMPUS DIGITAL CAMERAIt did get me wondering how much we automatically alter our techniques when using different wool breeds or mixes etc. I always think I felt the same no matter what I use or make, but maybe there’s a slight difference in pressure, or maybe it’s a matter of just felting longer, I honestly don’t know, but I’m going to be more conscious of what I do from now on!
We thought we’d have a go at needle felting before the holidays, so I made a little sample while testing out some fibres:

OLYMPUS DIGITAL CAMERAI didn’t get a photo of anyone else’s, and I don’t often do ‘figurative’ needle felting, it’s usually very abstract, which is why my sheep needs a bit more work! The body is alright though, I used some locks Zara sent me 🙂

OLYMPUS DIGITAL CAMERAAnd that light green bit is a bush, not a weird tail!

Texture With Natural Wools

Texture With Natural Wools

It was interesting to see Marilyn’s 3rd Quarter Challenge last week about creating/adding dimension to our felt projects, we’d just started exploring dimension and texture at the well being centre’s wet felting and fibre group. The piece I made last week doesn’t really qualify as it’s something I’ve done before, but I thought I’d show it in case it gives a bit of inspiration for someone else.

We started with a couple of ‘regular’ thickness layers of medium coarse wools, like English 56 or Texel. I used a blend I’d made from some Botany lap waste and donated wools. We then added some ‘filling’ to help bulk our pieces out, mostly some scoured Norwegian lambswool and some unravelled aran knitting yarn (80% wool, I think). Then we added a couple of thinner layers of Merino, roughly the equivalent thickness of one coarse layer, we did two finer ones to keep even shrinkage. We topped them off with different silk embellishments like hankies, silk noil, cocoon strippings and ‘schappe silk‘ which I got from wollknoll. We started felting as usual, and once it was felted, we sewed running stitch across in different places, then pushed the felt together to ‘ruche’ it and form ridges. Then we finished felting a bit more and fulled it until it was as firm as we liked. Then we removed the sewing thread. This is how the back of mine looked:

OLYMPUS DIGITAL CAMERAThis is the front:

OLYMPUS DIGITAL CAMERAThis is it the other way around:

OLYMPUS DIGITAL CAMERAI had to take some photos along the surface of course, this is from one end:

OLYMPUS DIGITAL CAMERAAnd this is from the other end, it’s funny how it looks different rotated:

OLYMPUS DIGITAL CAMERAYesterday we had a bit of a play-day using the different natural wools and fibres. It’s not the best place for photos, in the basement with unusual lights, and these are all still wet. This is Louise’s piece:

OLYMPUS DIGITAL CAMERAThis is Ruth’s, she was pointing out the cotton nepps while we were talking about them:

OLYMPUS DIGITAL CAMERALyn has made a design on her piece so was still working on it, but it’s rude to leave her out!:

OLYMPUS DIGITAL CAMERAAnd mine, I used some Ryeland which I think Leonor sent, so it’ll be interesting to see how that dries:

OLYMPUS DIGITAL CAMERAOne of the other art/craft groups at the centre is doing something about nature with a local school, and we might join in with that, so our dimension and texture exploration might have a bit of a nature theme over the next few weeks.