Browsed by
Tag: fiber art

Adding Lichen to the Mossy Driftwood

Adding Lichen to the Mossy Driftwood

My next step in finishing the driftwood piece was to create lichen. I had made lichen before from Tyvek but alas, I had none in my stash. So I looked for other materials that could be shaped with a wood burning tool and that would shrink and make interesting shapes with a heat gun.

What I found was a fusible lightweight Pellon interfacing and nylon organza. The interfacing does not need to be fusible to work, it’s just what I had on hand. I can’t remember why I bought it but hopefully, it would work so I wouldn’t have to buy anything else.

Painted pastel blue green interfacing and nylon organza on white background

I painted the small pieces of interfacing and organza with a light layer of acrylic paint. As you can see here, the paint was not heavy and the shade of blue green was very light in value.

wood burning tool burning lichen shapes into painted interfacing

Next, I got out my wood burning tool and a piece of glass to burn on. I made random lichen shapes in the interfacing. I also did the same with the nylon organza. Once they were cut out, I held the small pieces with a pair of tweezers and used the heat gun to make them shrink up and get curly. I also added a bit of brown marker to the edges of the lichen as there are definitely brown bits on the real stuff.

Here’s the result. Yay, it looks like I wanted it to. Success. Now to add it and the dead teabag leaves to the mossy driftwood. I glued the lichen in place as it was mainly on the wood itself. I stitched the leaves down to the felt in a couple of places.

Textile Art Piece - driftwood covered with felt, stitched moss, stitched tea bag leaves and lichen from interfacing and organza

Here’s the result. You can click on the photo to enlarge it.

And the close up views. I’m happy with how it turned out and it was a really fun project.

Mossy Driftwood Continued

Mossy Driftwood Continued

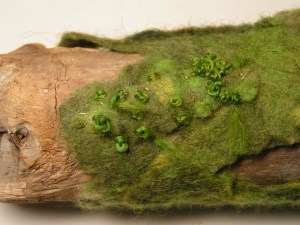
Last time I posted, I showed you a piece of driftwood that I had covered in green felt to represent moss. It definitely needed more work to achieve the natural look that I desired.

I took a small pair of sharp scissors and cut out some holes as well as making the ends not so uniform and straight. I then decided to use the left over cut out pieces as padding for stitching. I added the left over pieces in a couple of places and hand stitched them down.

I then decided to try adding more texture with needle felting. I had a pile of little wet felted scraps which you can see on the left and I needle felted those down. Then I added some wool from my carded batts that I had left over after wet felting. I needled those down but not too firmly. I still wanted the texture of moss, which you can see in the right photo.

Driftwood covered with green felt, stitched layers of felt added, needle felted layers added

Here’s what it looked like after I finished the lower layered bits. I left hanging threads as this will be the “grassy” looking bits sticking up between the moss.

Work bench covered with variety of green thread and driftwood covered with felt.

Next was looking for different green threads. Here’s what I came up with. You can also just see on the left side that I found some of my photos of moss and printed those out for reference.

Close up of French Knots stitched on green felt covering driftwood.

I then started adding some hand stitching. These are “wonky” French knots with hand dyed lace weight wool thread. This is going to take a while. I have another “slow” stitch project on my hands.

Next up was to try some machine stitching. I made a sandwich of the threads on the left between two layers of water soluble fabric. I then machine stitched a random branching pattern. The photo on the right shows the result after washing out the soluble fabric.

Close up of machine stitched threads on top of felted driftwood.

Here’s a small piece of the machine stitched moss by the French knot section. I haven’t stitched it in place as I think I will do more of the hand stitching first. I’m loving all the different greens as that is definitely what you find in nature. I will keep you updated on my progress.

Annual Art Retreat

Annual Art Retreat

In my last post, I showed you how I was creating some mark making tools for our annual art retreat. We had the retreat and had so much fun creating abstract artworks. I apologize for the poor quality of the photos as the light is very bad at the lodge where we stay and I was in a bit of a hurry.

The process involved each of us starting with the same size piece of painter’s canvas and then ‘changing’ the canvas with a variety of media and techniques. Some of the steps were timed and some not. It took us nearly a full day to ‘complete’ our pieces. Some of us are still working on them, some may tear them up to use in a different way and other’s may keep the end result as is.

Here are some of the supplies that we used and you can see the piece of folded canvas at the front of the table.

We did construct a few more mark making tools, mine are on the left, Paula’s in the middle and Louise’s gelli printed feather brush is on the right.

I thought it would be interesting to see the pieces as they progressed so I will show each person’s piece separately.

This is Deb’s piece from start to finish.

Here is Louise’s piece. I think she is still working on it.

Here is Paula’s piece. You can see the light shining through the picnic table in these photos. We usually forget that the picnic tables have spaces in between and this always causes issues with such things as printing or marking over the surface. I think Paula is planning on cutting/tearing this into smaller pieces to use in some manner.

And here’s Sally’s. You can’t see this in the last photo but she has added hand stitching and beading. She was not sure if she is finished with it or not.

And lastly, this one is mine. I think I am finished with it and actually happy with the result. Usually, I don’t tend to like my attempts at abstraction. I didn’t add much color so maybe that’s why I like this one better.

We had a great time and I am always amazed at the different styles that come from each person. We know each other well enough that it would be easy to recognize who’s piece is whose.

Back to some winter sheep

Back to some winter sheep

I have been felting and stitching a little picture again. And of course, my favourite sheep will make an appearance.

I did a sketch of the idea I wanted, I don’t think I have the patience for proper drawing. I do a quick general idea. I used a thick piece of “almost felt” and made the blue sky and snow base, wet felting them together. Next, I used Blue Faced Lester lock to make some evergreen trees.


I added some paths for the sheep. Sheep like to walk the same path other and over, one after the other, even in a green pasture. Once they are where they generally want to go, they wander off. I have no idea why they like to stand out in a snow covered field, but they do.

I added all my trees and tucked the edges around to make it neater. I added some blobs for the sheep so when I add the stitching they will stand out a little more. I also lightened up the paths a bit.


I used french knots to make the woolly coats and some embroidery for the heads and legs.


I fiddled with trees a bit and added trails into where the sheep are standing. I tried t add some shadow under the trees but it didn’t look right so I pulled it off. The trees still need some snow. I usually do that last, I am not sure why.

My problem is the bottom right. It seems very bare. I don’t know if I want another sheep or something else. I thought of some little birds on the snow but think as this is a small picture (about 5″x6″, 12×15 cm) they might end up looking like sheep droppings. I don’t want a fence. Does anyone have any ideas? It may end up being another sheep.