Browsed by
Tag: dimension

Relearning to Crochet

Relearning to Crochet

I’ve been trying to think of projects that weren’t labor intensive since I’m having back problems again.  My son and his family gave me a set of ergonomic crochet hooks for my birthday.  Then for some reason I started getting crochet posts in my Facebook news feed. I’ve been intrigued with some more complicated textures and dimensional stitches.  But I haven’t crocheted in years and figured I’d start with the basics.

I do have a book on crochet, but the Internet is loaded with tons of videos that keep calling me.

I’ve been practicing, but not have gotten my tension mojo just right.  So, bear with me. For these samples I used a medium weight (worsted) acrylic yarn I had on hand with a 5 mm, (UK 6, US H8 hook.)

Next to making the chain (ch) for a sample, the Single Crochet (sc) is one of most basic stitches.

20170301_115738

Next I tried the Double Crochet (dc).

20170301_115804-1

Then I made a sample with the Half Double Crochet (hdc) which I don’t remember ever seeing. A little more intricate and I liked the added texture.

20170301_115832

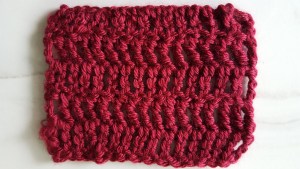
The Triple Crochet (tc) is more open and less dimensional.

20170301_115915

Then finally, the Double Triple Crochet (dtc.)  Very open and airy.

20170301_120009

While they aren’t perfect and I’m getting the tension a little more consistent with daily practice, I’m far from making a project.  I try a new stitch everyday to keep my hands on fiber and learn something new.  Which I’ve learned helps spark creativity when you learn a new skill.

Have you tried something new lately?

A Halloween Surprise

A Halloween Surprise

Here in the United States October 31 is Halloween.  A big holiday for dressing up and collecting treats for kids and some adults.  I’m not sure if the rest of the world has this tradition, but it’s a favorite here.

Four years ago I made my grandsons very basic pumpkin wall hangings.

SAMSUNG
SAMSUNG

Last year my granddaughter Lisa was too young although her parents took her out trick or treating around the neighborhood.  So this year I made Lisa her wall hanging.

I found some unknown orange fiber that was too bright, so I made some batts adding some white merino.  I wanted something  feminine and decided to add a button nose (wooden ball),  prefelt eyes, mouth, stem and bow for some dimension.

20161015_153100

After I wet it out, I felt it was too thin so I added some corriedale leftover batt that I did for the color challenge last year to the back.

Once it was felted and shaved, I thought it needed something else.  so, I began trying to stitch on eyelashes.  This turned out to be a nightmare.  I tried hand and machine stitching.  I did more ripping out and filling the swear jar.  I finally let it sit for a few days and found some thick cotton embroidery thread Cathy had brought me from Japan a few years ago.  Thanks Cathy!

20161020_135705

While the stitching isn’t the best, it worked.

20161023_164834

Here are some closeups.  The pumpkin was very hairy and bumpy (thanks unknown fiber) and had to be shaved a couple of times, but I doubt a 19 month old will care.

20161023_164844 20161023_164908 20161023_164923

Have you done anything special for Halloween?


Texture With Natural Wools

Texture With Natural Wools

It was interesting to see Marilyn’s 3rd Quarter Challenge last week about creating/adding dimension to our felt projects, we’d just started exploring dimension and texture at the well being centre’s wet felting and fibre group. The piece I made last week doesn’t really qualify as it’s something I’ve done before, but I thought I’d show it in case it gives a bit of inspiration for someone else.

We started with a couple of ‘regular’ thickness layers of medium coarse wools, like English 56 or Texel. I used a blend I’d made from some Botany lap waste and donated wools. We then added some ‘filling’ to help bulk our pieces out, mostly some scoured Norwegian lambswool and some unravelled aran knitting yarn (80% wool, I think). Then we added a couple of thinner layers of Merino, roughly the equivalent thickness of one coarse layer, we did two finer ones to keep even shrinkage. We topped them off with different silk embellishments like hankies, silk noil, cocoon strippings and ‘schappe silk‘ which I got from wollknoll. We started felting as usual, and once it was felted, we sewed running stitch across in different places, then pushed the felt together to ‘ruche’ it and form ridges. Then we finished felting a bit more and fulled it until it was as firm as we liked. Then we removed the sewing thread. This is how the back of mine looked:

OLYMPUS DIGITAL CAMERAThis is the front:

OLYMPUS DIGITAL CAMERAThis is it the other way around:

OLYMPUS DIGITAL CAMERAI had to take some photos along the surface of course, this is from one end:

OLYMPUS DIGITAL CAMERAAnd this is from the other end, it’s funny how it looks different rotated:

OLYMPUS DIGITAL CAMERAYesterday we had a bit of a play-day using the different natural wools and fibres. It’s not the best place for photos, in the basement with unusual lights, and these are all still wet. This is Louise’s piece:

OLYMPUS DIGITAL CAMERAThis is Ruth’s, she was pointing out the cotton nepps while we were talking about them:

OLYMPUS DIGITAL CAMERALyn has made a design on her piece so was still working on it, but it’s rude to leave her out!:

OLYMPUS DIGITAL CAMERAAnd mine, I used some Ryeland which I think Leonor sent, so it’ll be interesting to see how that dries:

OLYMPUS DIGITAL CAMERAOne of the other art/craft groups at the centre is doing something about nature with a local school, and we might join in with that, so our dimension and texture exploration might have a bit of a nature theme over the next few weeks.

2016 Third Quarter Challenge

2016 Third Quarter Challenge

Well, it may be hard to beat the first two quarter challenges.  But it will also be possible to combine those two processes to help create this one.  Adding dimension to our projects.  This is something I’ve been working on since I began learning to create texture in flat pieces.

I became totally intrigued with this in the first challenge I participated in which was mixed media using clay, curing clay, felt, fabric, metal and paint.

https://i0.wp.com/feltingandfiberstudio.com/wp-content/uploads/2013/09/mnelsonchallengeoverview.jpg?resize=499%2C432&ssl=1

More about it here:  https://feltingandfiberstudio.com/2013/09/30/third-quarter-challenge-marilyns-entry/

I was hooked.  The challenge became to create dimension in felt alone.

Its what I like to call it having the picture jump off the page.  Being able to touch and interact with the story.  And there are many ways to do it.  Using resists, carving, fiber sculpting and forming, cracked mud:

2014-10-29 11.4720151007_161152

SDO 4 spikes flower sdo 5 anemones


Marilyn's Carvings
Marilyn’s Carvings
Marilyn's Tiles
Marilyn’s Tiles
Stewart Stephenson - Marilyn
Stewart Stephenson – Marilyn


Building up with needle felting:20151014_152228

Needle felting and wet felting:

20160421_140923a

20151020_135607 20151024_160640


Adding dimension thru layering and fabric manipulation:

20160523_142107

Inclusions:

2014-04-30 12.00.28


Combining techniques:

2014-05-24 16.18

It doesn’t mean having to make a 3D object, but you can also add dimension to one.

closeup front

A  recent example for the resist challenge came from Ann.  Plenty of dimension here.

ann vessel

Or Teri Berry’s flame hat with foil. Teri I can’t imagine how you’ll top your recent work, but I hope you’ll try.

teri flame hat with foil

Of course, there are many more examples we’ve seen here on the Studio and the forum. While many of you do this routinely, please challenge yourself to take it to the next level!  And if it’s the first time, take baby steps.  I look forward to seeing how you create dimension.

4th Quarter Challenge – Monochrome

4th Quarter Challenge – Monochrome

No one will be surprised at my choice of subjects, a panda.

I had some maori batts in a  gray color so it seemed an easy choice as a base.

I’ve been trying to add more dimension into my work as I mentioned in last week’s blog post.  So, this was one of my goals with this project.

I layed out the batt then made the head of the panda in prefelt, then added the shapes for the ears, and eyes.  Since the nose would be the center of the picture, I used a needle felted nose shape in a heavier fiber then covered it with another nose shaped prefelt and needle felted it onto the batt. I don’t know why it looks pink.

20151017_154435

20151017_160637

I continued to build up the shape, added gems for eyes and covered them with another layer of prefelt and more fiber. I wanted to give the fur a fuzzy effect so I carefully cut and put fibers along the edges and a little shading around the eye.  For the body, I blended some gray into the black for contrast. Since the arm blended in with the body I just used a shaded area to give it a little dimension. And of course, the panda is eating her bamboo.  Her nose is actually bamboo fiber. Here is a side view.

20151020_135607

After securing everything with more needle felting, I wet felted it.  The maori didn’t shrink much which was fine  because I intended to wrap it around a canvas frame.

20151024_160628A close up.

20151024_160640Well I changed my mind and hung it without wrapping it on a frame.

20151030_132929I may put it on a darker background to make it stand out from the gray wall.  What do you think?

Have you done the challenge yet?

I want to let you all know I will be taking a leave of absence.  I’m having surgery November 3 and don’t know how long it will be before I can resume felting.  In the mean time, several forum friends have offered to help fill in my blog spots.  If you have something you’d like to blog about to help out, please contact Ruth, Zed or Ann.  I hope to see you all back here soon!  Thanks for your support!