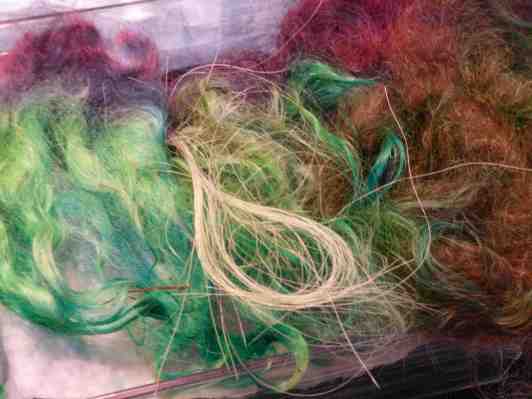
Hair to dye for the Mer’s.
After a long pause from felting to work on the Guild Library survey (why did no one tell me data analysis was so much fun?) with interruptions to torture incent unsuspecting flax plants, I am now back to working on the Mer’s. Shark Boy is coming along nicely but seems to be missing something… hair!! They will all need hair, but I want it to work with their tail colours too.
Well, I should have some locks or at least some bits of fleece that might work for long hair, because what Mer would not want long hair? All that floating along behind them in the water, looking flowy, and lustrous. Gorgeous tresses, getting in their eyes when they are hunting. ok maybe a braid might be better or another somewhat controlled hairstyle but long, defiantly.
I am imagining picking up bits of colour from the body may be a base of black or dark gray with streaks and accents of some of the body tones. Since Hair should be different than skin, I want to use a different fibre than the Corriedale I have used for the body. Something with a bit more body, (without the use of styling products or heavy conditioners).
In 2019 I picked up a couple of “Coarse” fleeces from the Wool Growers Co-op. Both are quite soft but are more towards a wavy hair than a fluffy crimpy type of sheep. Both are off white to light gray. I also have a reddish-brown Shetland fleece that might be interesting overdyed. I collected a sandwich zip lock bag of each from my stash and turned to the problem of changing their colour.
I need hair dye! Well, I have threatened my hair with that if it didn’t do something interesting as it’s progressing back to the “blond” I was born with. (Ann says it’s a shade of light gray, I claimed it’s just transforming to blond a very light shade of blond that I hope one day will be white) so I don’t have any hair die and none in greens and blues. Humm.
 1 I don’t have any hair die
I do have some old Ritz dies in the basement but they are for dyeing medieval gowns so a bit too much for small samples of fleece. I have heard rumours that you can use food colouring to dye with. Yep, checked youtube, they seem to show only dyeing yarn but it should work with what you make yarn with! Ok, check the kitchen, no food colouring. I have a plan! Ask Glenn to pick some up on his way back from work! Thanks, Glenn.
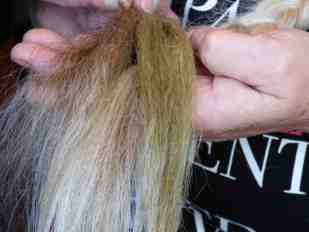
So I had collected samples of the two coarse fleeces and a bit from one of the Icelandic. My final fibre to add was horsehair to give a bit more body. I have some dark and light tail hair but unfortunately, it was clumped together and tangled. I was able to extract some and got them laying parallel, held together with a bulldog clip.
Now what do I cook all this in. it’s a bit small for even my smallest pot. Hummm. I am not using the plastic organizer trays I was using for saucers on some of the outdoor plants. I wonder if they would go in the microwave? They don’t say that they don’t go in the microwave!

 2-3 Plan B
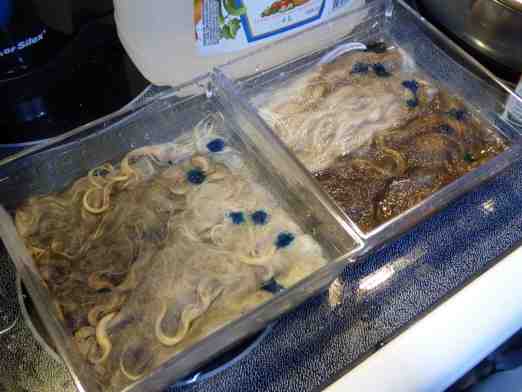
I am likely too impatient but I soaked the fibres in warm water and vinegar to prep them for dying. I realized I could fit most of my samples in one organizer and left one sample in the other. I let it soak until the fibre seemed quite saturated and removed some of the excess water.


 4-6 Soaking in water and vinegar
When I could not stand the wait any longer, I dripped in drops of strait blue die on one end of the containers.
 7 Dye just sitting there
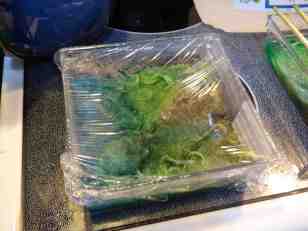
Well, that was disappointing. They just sat there, maybe I took out too much water. I think it needs a poke to inspire the die to migrate a bit. (One of the YouTube videos poked at their skeins in the dye bath) where did I put the spare take out wooden chopsticks? Found them! Why are they with the plastic straws? (maybe filed by the similarity of shape?) Poke, poke, stab, poke and the die is migrating along the top. Ok, let’s add some green and see if we can get a bit of migration and mingling. This is starting to sound quite social. I should put out cookies and make drinks! Again, green drips just sat there. Maybe a bit more water, AH! Yes, now it’s mingling better. More poking but not stirring and I have a nice blue-green, not the Prussian blue I was hoping for but it’s not the right base blue I suspect.


8-9 Poked with chopsticks then tipped the container to migrate the dye
Next, I dripped in some yellow to both samples and worked that in with more poking. Finally, I tipped the containers and got the unattached die to migrate towards the undyed parts. I assessed how it looked and deemed the blue was not quite what I wanted. Maybe a bit of red to get the blue a bit more towards purple would be better? Let’s try that on the samples with the darker one. A few drops! Oh, my! Red is an aggressive colour! Well, I’m not sure you would call that blue but it is investing. Let’s see what it looks like when it’s dry.
 10 3 drops of red

 11-13 Heating it up, then letting it cool
Now on to the microwave, let’s guess a minute at a time. Two minutes total gave a nice hot dyebath but still a lot of suspended die. I cooked both for 2 minutes covered with cling wrap and remembered to take the mettle bulldog clip off the horsehair before I stuck it in the microwave. Now let it sit covered until it cools down on the stove and see if I have suspended dye left in the wool.
 14 one leaked but it did seem to have survived the microwave
Usually, I am much better at this patents thing, maybe I will go make some oolong tea. In addition, one of the last of the season’s butter tarts made by Ann. She is amazing and her butter tarts are Really good!

 15-16 Oolong with one of the last tarts of 2020.
 17 Cooling fibre on the stove
Enjoyed the Butter tart, drank most of the tea and worked on the computer….. Then went to drain and rinse the wool samples. Looking good!! I added some soap and re-rinsed, seems to have mostly stopped leaking blue.


18-19 Rinsing in the sink
So a light squeeze and draped over a chopstick and paper towel to dry.

 20-21 set out to dry
Went back to the computer (played Rune scape) then back to the kitchen to check on the wool and start dinner (miso and ginger soup with shitake mushrooms, onion and noodles). The wool seems to have left a few spots on the paper towel but is looking very colourful.
 22 a bit of staining on the underside of the paper towel

 23-24 dyeing made me hunger for dinner
 25-26 Dry and ready to use
It was interesting to see how little die the white horse tail hairs picked up. I may get better results by letting them simmer overnight in a die bath but there is a bit of colour and they may still work.
It has been years since I got a chance to dye anything and this was a lot of fun. I will have to keep an eye out for variegated grey fleeces in 2021 and consider doing some dyeing outdoors next spring. (Glenn does have that second forge but it might make the dye bath a bit too hot. So maybe I can use the barbeque.) Have fun and happy felting!
 27 now on to more butter tarts!
Like this:
Like Loading...


 1 all 3 drum carders to finish the tow
 2 all the hackles


 31-34 Line bagged and ready to go