A FELTED SKETCH BOOK BAG FOR SUMMER … AND HALF A PARASOL

A FELTED SKETCH BOOK BAG FOR SUMMER … AND HALF A PARASOL

Annie

I decided to make a small bag from handmade felt to carry a sketchbook and a few pens out and about with me.

a. Finished_Bag_Side_1

I didn’t make a plan or measure anything. To start with I just laid out a piece of felt with some randomly placed small pieces of bubble wrap to make pockets then I figured I’d work with what I ended up with to cobble a bag together!
I thought it would keep it more spontaneous (and be less effort if I’m honest!)

b. Laying_Out

c. Wet_Down

d. Felted_Close_Up

In one way it was easier because the layout was carefree, then in another it was hard work because I realised I put the initial attempt at “lining” fabric (some scrim) on the wrong side and also the spacing of the pockets was completely wrong for utilising all the felt fabric I had made.

e. Testing_The_Pockets

However, it means I’ve got a piece of felt leftover for a future project and also the bag miraculously ended up OK!  I cut 2 pieces out incorporating 2 pockets then ironed some interfacing on to each piece to make them more sturdy.  I reinforced each pocket with a line of machine stitch.
Then I decided to neaten the top edges by folding over and machine stitching then trimming away the excess.
I sewed round the edges of the two pieces with right sides together then turned it out to make the basic bag shape.  I realised at this stage I was not going to get away with not lining it as it looked a bit shabby inside with the interfacing on show.
So I cut some thin cotton navy fabric and made a pocket lining to sew inside.  That was a palaver!  But I got there in the end and it looked surprisingly neat!

f. Making_The_Lining

Lastly, I just needed to figure out a handle.
I found some yellow webbing and sewed that on before realising I had forgotten to topstitch round the outside of the bag so I did it afterwards.  I think it worked out OK.

g. Finished_Bag_Side_2

h. Detail_Of_Stitching

I mostly like to make felted artwork so this was a nice change to make, and definitely a challenge! 🙂

Lyn

I have a plastic umbrella that I intended to cannabalize to make a felt parasol, but I wondered how I would control the spokes once the plastic had been removed.

1. Umbrella

So I decided to take the easy way out and leave the plastic in place.  Originally I planned to make a felt cover then stitch it to the plastic, but after a bit of thought I decided that if I made a detachable felt cover, I could have an umbrella AND a parasol.

I would need to make some felt that would be fine enough to be lightweight yet strong enough to cut and stitch, and it would need to be firm, not stretchy.

I had an idea that nuno felt, with the fabric sandwiched between layers of wool, would work.  I needed to make a sample!

I used some very fine net, plain yellow merino wool, a mini-batt leftover from another project and some 2 ply wool.

2. items used in sample

The sample is a ‘sandwich’ made of two fine layers of yellow merino wool, a piece of net, one fine layer of yellow merino wool topped with one fine layer of blended yellow/orange merino wool.  I added a 6″ (15.25cm) square made from 4 lengths of 2-ply wool to make the shrinkage estimate easier.

3. Sample with shrinkage square - pre felting

I used tepid water and gentle rubbing then rolling to felt the sample. Here it is after drip-drying.  You can see that although the net has gone frilly around the edge, it didn’t buckle the felt at all – the felt is flat.  The shrinkage was 17%.

4. Sample post felting

The felt was thin, lightweight and strong.

My plan was to sew panels of felt together to make the removable cover, so I experimented on the sample.

The felt cut beautifully – the cut edges were firm.

5. Experimental cut of sample

First I tried a plain seam.  The felt travelled under the needle effortlessly and smoothly.

6. Sewing the sample

The plain seam looked good but was too bulky, so I cut the sample again, butted the cut edges together and joined them with a wide zig-zag stitch.  Perfect!  It made a strong, flat seam.

7. Seams

I thought a test was needed on the zigzag seam so I gripped it firmly between both hands and gave it several sharp tugs.  It held fast – probably thanks mainly to the layer of net.

Sorry the photo below is a tiny bit blurry – I put the camera on a tripod then set the shutter timer for 10 seconds.  I yanked and yanked on the felt until the photo was taken so it’s an action shot!

8. Testing the zigzag seam

I would need 8 triangles of felt to make the removable cover, so allowing for shrinkage each triangle would have to be laid out 45cm (18″) wide at the base and 65cm (26″) high.

I decided it would be daft to lay out a triangle exactly – it could mis-shape during felting – so I made a paper template to the correct size, to use as a guide during layout, then ‘squared off’ the point of the triangle.  After felting, the triangle could then be cut accurately from the larger piece.

10. layout

My colours and pattern for the parasol would be an hommage to Annie’s ‘Flowers on Coverack Beach’ but in a very, very minimalist style using just 3 colours.

9. pattern inspiration

I carded a batt of blue blend merino wool and a batt of yellow blend merino wool…

11. yellow and blue blends

…and found some spools of bright red thread in my stash.  I don’t know what it is but it looks like there’s some wool fibres in it.

12. unknown red thread

I expect you’re wondering why I’ve only got half a parasol?

Well … things happened. My time-plan collapsed so I’ve only made 6 panels so far!

13. six panels

I need to make 2 more panels, cut all 8 to shape, then stitch them together.  I’ll post a photo of the finished parasol on the forum soon!


Fun on-line, Creating the Under-Mer

Fun on-line, Creating the Under-Mer

With stay at home, I have been on line a lot more than I use to be. I have had fun playing Runescape, listening to music, (this week’s felting was assisted mainly by Blue Oyster Cult), audio books and I have had a lovely time watching videos on felting. I have watched both wet and dry and some that were even in English!  There have been a few free workshops and even some felt-alongs on YouTube.  I have watched hats, scarves and flowers being made. It is exceedingly strange with my aversion to unnecessary wetness that the felt along that got my attention was Sara Renzulli’s (Sarafina Fiber Art) felted Mermaid.  She has done a lot of 3-D sculpture, I particularly like her armature work and her felted horses. She has the felt along mermaid and other felt along projects posted on YouTube if you would like to check it out; https://www.youtube.com/watch?v=hljS4YRmz9w&list=RDCMUCQOKYjvA0xYeHXAnQCmTlIQ&index=1

By now you likely know me well enough to expect enthusiasm and probably not doing what the instructor was expecting (ether from miss reading the instructions or going off on a tangent). I suspect that too. Her Mer-Exampel is pink so I can see design changes ahead. I had originally intended to behave and adhere to the instructions, except for the pink body of course which was to be our own colour selection.

This being the week before the long weekend and our government here being very kind, has allowed some stores to partly re-open (garden centers and hardware stores were the two I needed to visit). So, at 6:30am, armed with gloves and one of my clinic masks, I was off on my quest for the side yard plants and 14 gauge aluminum wire. Wire first at Home Depot since they opened at 6am.  I found steel wire at 14 gauge and a few lighter steel ones but no aluminum… Oh well, maybe I will do better with flowers? Sort of,  I found most of the herb and some very short cherry tomatoes. Well since I’m out and across the street from the Dollarama, I should stop in there for a big shallow bucket to put the plants in until I can plant them out next weekend (I will use it as a plant saucer once I have the plants planted). Why look! Dollarama has aluminum wire the same diameter as the 14 gauge steel. I should have just gone here first! I picked up black and silver. (This could be a very sinister Mer-Person in that colour scheme.)

1 
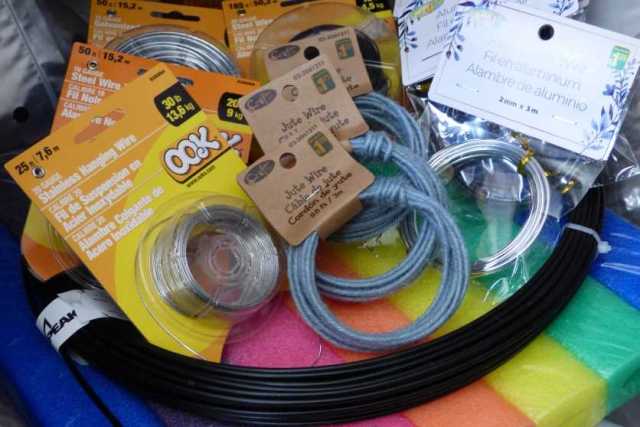
1 the hall of wire acquisition

I had wanted to make a Mer-Man, which just sounded much more fun but also wanted to understand the process before I messed with it too much.  Thus Mer-Woman it was and I followed along with the correct proportions but used the 20 gauge floral wire instead of the lighter aluminum wire I couldn’t find.


2 2 Mer-Woman

By this point, I was having quite a bit of fun and wanted to make a Mer-Man too.  So I upped the proportions making him 2 heads taller than the first.  I also added a sternoclavicular section so I didn’t wind the wires more than twice at the shoulders.  I used 20 gauge for everything but the hands since I found the tail wires a bit floppy in the Mer-Woman and wanted stronger in the Mer-Man. We will see if I overcompensated!


3

3 Mer-Woman and handsome Mer-Man

I was still having fun and started thinking about my niece who is a competitive swimmer, so on to Mer-teen, (pre-growth spurt) at least a head shorter than a Mer-woman. So subtracting 2 to 2.75 inches should work. Success I have a Mer-Family!

4 4 Mer-Man, Mer-Woman and Mer-teen


Now that I have 3 skeletal fish people it had better get stated on adding a bit of flesh to their bones!

I was being good and followed Sara’s instructions. She seems to work in a more additive way, like sculpting with clay. Make a shape and add it. While my inclination is to block in basic shapes then refine them by subtractive sculpting (lots of poking); adding in sections of wool then felting till it’s the required shape and reasonably firm. The way I have been leaning towards is a lot slower but I have good control over the felting. I wanted to try her method so I wrapped the wire then added the filler piece. i used parts of an alpaca batt from Ann, in blends and layers of light creams, browns and reddish browns. Not having the correct tool to do Sara’s rapping technique, I substituted one of my stick shuttles for weaving. It worked reasonably well.  I do like the idea of having a gradation of sizes that can be used to make a shape. This makes the shape size repeatable.

5        5 Creative use of a stick shuttle

I inserted the carrot shape into the leg space which created the filler for the tail.  Then I got engrossed in adding quads, creating an illiac crest at the hips.

 6-7 Filling the tail

As I started adding the body, arms and head, I got distracted…..(no photos sorry!) I had a blast adding latts, anterior delts and the serratus ant.  You can see cute little clavicles but I didn’t add more than a suggestion there might be a manubrium! I even had a sternum that was more visible before she acquired breasts. (I felt very guilty sculpting them, that needle did look vary sharp!) I got busy sculpting and firming up the fin section and discovered I liked the suggestion that there were knees in that tail, and the hint of the remains of legs within her tail.

8 8 Discovering (my) fish woman has knees (but no hands yet)

As I started to add the hands I realized I should have had hands on all my felting projects (whether or not they originally had hands). Look, she is self-felting!!

   9-11 Hands can be very useful in a sculpture

Saturday Sara had her wet felted tail section of this project. She showed laying out layers of wool then adding embellishments to it. Then wetting and rolling the tail cover. Her colours looked like they will work grate on her finished Mer-maid.  I particularly like the silk inclusions at the tail, it looks vary beta fish fin-like.

Since I am still having fun sculpting and I don’t have a spot to wet felt set up I am going to finish the under structure and then decide on the top layer to blend over it. I will treat this like a 3-D grisaille underpainting. I will lay washes of colour over top. The mottling reminds me of sand on a creek bottom. Since she does not have any obvious defensive or offensive weaponry (unless she keeps my pen tool), I think she will have to go with camouflage to be safe.

As I watched the instructions about wet felting the tail cover, I kept sculpting and finished out the structure of the tail. I added what in the base of the hand would be the thenar and hypothenar eminences at the base of the tail.  Muscles here would allow it articulation of the membrane between the outside edges of the fin and give more control when moving through the water. I gave her a single gastrocs (calf muscle) but kept the suggestion of two quads (thighs) and the hint of knees.

After the YouTube, instructions were over and I had most of the understructure in hand. I took a short break to plant a few of the plants I had purchased then gathered my camera for her in-progress photo shoot

1213

12-13 a quick touch up before her photo shoot

It had been very overcast when I took the first set of photos. I went inside to check them …. and the sun came out.  I grabbed the camera and my model and off we went to the front garden hopeful the brake in the clouds would last! It was a tiny bit brighter but the lighting was not the raking Caravaggio like light I would have enjoyed.

   14-16 photo shoot for Under-Mer-Woman.

(yes she is naked waving at strangers walking past on the side walk!)

   17-20 Luckily she became distracted and stopped shocking the neighbors

The Mer-Woman seemed most interested in the Daffodils once she stopped touching up the felting on her tail.


   21-23 Mer-Woman admiring Lungwort while sitting on rocks beside crashing waves of violets


I want to add SCM (Sternocleidomastoid) muscle in the neck and I have still more work to do on the face particularly the eyes but I am very pleased with how she is coming. I will put her aside and do the under structure for the Mer-Man and possibly the Mer-teen before I decide exactly what over layers of colour I will add. It should continue to be fun and He will get a trident I think!


I have not forgotten about my Pictish shepherd or the mysterious creature. Thanks to Ann M. and Carlene P. I have fibre to soon get back to them. I do tend to like to sit and think about a project partway through, so I can reassess it (see it through fresh eyes). I may come up with tweak in the design or I may finish it as I had originally intended.


I hope you are also enjoying all the tutorials, blogs, and other inspirational felting ideas out on the internet at the moment.   If you are not jumping into a project immediately, then  hopefully putting inspirations in notes or sketches to enjoy doing them later. Have fun inside and now also in your gardens!

24 
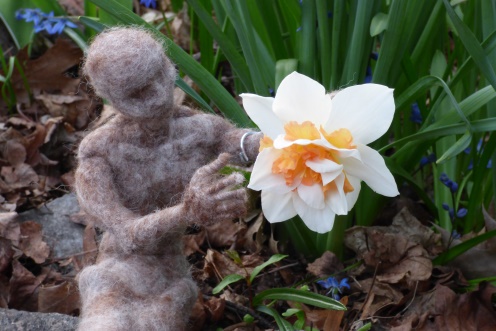
24 to inspire you one of my fancy daffodils

Needle Books Next Steps

Needle Books Next Steps

Continuing on from my last post about making felt for needle books, Felt for Needle Books  I started sewing them together. Well,  first I had to iron them all which always takes much longer than you think it will. Everyone forgets to mention this step or they just say iron your pieces like it’s nothing at all. There are no pictures of ironing, as fascinating as that might have been, I didn’t take any pictures.

I also only took one picture when I was sewing them together. There was much swearing, and unpicking that you didn’t need to see.

After sewing them together I had to think about how to decorate them. I went online and looked for line drawings.  You can find them in any theme you like. I looked for sewing. I also used some I had saved from other projects. I traced them onto a nonwoven dissolvable stabilizer.  This is great stuff and it doesn’t take much to dissolve it. You can’t use a marker for tracing, it dissolves the stabilizer. I used a thick pencil to trace my designs.

On to the stitching. The first one is a snail. I picked a variegated embroidery floss. I used all 6 threads because I wanted a heavy line.

You will notice that in the first of the snail pictures the book is sewn together but in the other 2 pictures, it is pinned together. After stitching the snail I realized I stitched it so the inside is upside down and so I have unpicked the thread holding it all together and will sew the inside in the right way.

This one I really didn’t know how to embellish, I have another one almost the same. I decided on a backstitched chain stitch using 2 similar colours. I didn’t need the dissolvable stabilizer for this one. It’s a bit wonky, but there you go.

I also did the smallest book.

Closed the little book is only 2.25  inches (5.7cm) square. That is big enough to hold some needles and a thread saver. This book only has one double, needle page. All the others have two, and they all have 2 pockets. I have one more smallish one and the rest are all bigger. The biggest ones are 4.5 inches (11.3 cm) square so big enough for a small pair of scissors. After I get all of the embroidered I will have to add some buttons and ties or elastics to them. Elastics can look messy if you don’t have layers to hide the ends between. How do you deal with cut ends when adding them to a project?

This is what’s new on the farm this week. These are baby chicks.

And these are baby turkeys. There is not much difference between them as day olds. But only a few days on and the turkeys have grown necks.

Five of them got stepped on by there friends and had isolated themselves away from the heat so they had to come inside and live in a box with a heat lamp, in my sewing room for a few days.

Here they are all better, in a bucket for their trip back to the group. this is the safest way for them to traves without getting hurt or too scared.  You can see how they have grown in just a few days. Not sure why the look so grubby in the picture because they weren’t, just the light I guess.


Embellishing Felt with Surface Design Online Class Registration

Embellishing Felt with Surface Design Online Class Registration

The registration for the four modules of Embellishing Felt with Surface Design Techniques – A Mixed Media Approach is now open. Classes will begin on May 29, 2020. Each class is $45.00 US and can be taken from anywhere. Click on any of the links about the courses to learn more and to register.


The first module is Nuno Felting with Paper Fabric Lamination. Paper fabric lamination is a technique of essentially gluing paper to sheer fabric in a specific design. Learn this technique and how to add paper to felt with nuno felting.

The second module is Experimental Screen Printing on Felt. Screen printing is loads of fun and you can obtain a huge variety of results with the techniques you will learn in this class.

Or you might want to try the third module which is Printing, Stenciling and Playing with Thickened Dye on Felt. You will learn how to make stencils and stamps as well as the use of thickened dye to decorate the surface of your felt and make your own unique designs.

The fourth module is Free Motion Machine Stitching on Felt. Have you always wanted to add machine stitching to your felt but didn’t know how? This course takes you through the basics of machine stitching on felt and works through to more complex techniques of using your sewing machine to embellish felt.

If you are interested in any of these online classes, please click on the links above for further information about the classes. You will also find the supply lists of what you will need for each class on the linked pages.


And last, but not least, our Wet Felting for Beginners online class is available any time. You will have unlimited access with this class. So if you’d like to know more about the basics of felting including laying out the wool, embellishments, shrinkage and a variety of felting methods this is the class for you. You can sign up any time at the link above.

A yarn and preparation experiments

A yarn and preparation experiments

I must really be dedicated to TFFS, ‘why?’ I can hear you ask from here.

Firstly, I need to explain that, in these difficult times with many additional challenges to ensure my elderly mother remains safe, well and fed, my creative mojo ‘up and went’, I don’t know where, I didn’t see it go – leaving me in a ‘creative paralysis’. It has been quite reassuring, reading in the previous posts and comments, that so many of you are sharing the same mind space. So, with this post due, I had to come up with ‘something’.

Secondly, my Windows 10 has been updated since my last post. Fine, no problem. Until I came to process my original photos to the size required for this post – the long-winded method I used before now doesn’t work. Aaaargh! Nearly 3 hours later I have been through the wringer, but come out the other side with the photos done, a new app loaded, the satisfaction that I have learnt something new and an easier way to do it….woohoo!

So on to my ‘something’….

Back in February on a trip up to Scotland I had a brainwave. To explain – a long time before, I had seen a dress by a Russian felter who had used a specialist yarn as decorative embellishment.  I was hooked and researched where I could buy this yarn. Finally, I found it on an auction site except both the quantity and cost were too much (500g £30). The image however never left the recesses of my mind.

00

Then Taadaa!

Exploring the charity shops (I know I’m not alone here) I found a silver/grey cardigan then in another, a caramel/gold jumper which each had a double (actually one had a triple) thread that if I was careful could be unpicked to provide the very yarn.

01

I hope you will be amazed, and give me lots of kudos for my next actions. I spent weeks very carefully unpicking the commercially sewn hems (yes, you’ve read that right. Cutting the hems would simply have given me hundreds of short lengths of yarn!), then unravelling the fluffy, fiddly, snaggy, matted, non-cooperative yarns. The final result of which was balls of both the silver and gold sequin yarn, complete with crimp.

02

By then we went into total lockdown.

What to do with the fluffy yarn – surely it must have a use other than feeding the bin?

About this time, I saw another felt sample that had used a piece of loose knitting to create some texture. Lyn then posted the second quarter challenge. You can see where I’m going here….combine felt and leftovers….I could make a cushion to use outside.

However I totally dislike knitting, but can crochet anything (including years ago, crocheting a very masculine, outdoor man’s jacket with no pattern). Being in lockdown I didn’t have the extremely large size of needle that would have been ideal but went ahead with a very simple circle. It took much patience as in the unravelling process I had had to cut the fluffy, snagging yarn very regularly in order to keep the sequin yarn continuous. So, my lengths for crocheting were about 60 cm (2ft).

03

I made 2 large circles and a sampler. Attempting to ‘open’ the crochet up I wet each piece and stretched it with pins on the carpet. In hindsight not 100% successful.

At this point I decided to use the sampler and undertake a few experiments in one go –

  1. Felting crochet and wool,
  2. Use quilt batting complete with its backing,
  3. Try some hair from Raffles (lockdown has meant we’ve had to clip him),
  4. Layering of the wool shingles herringbone style as one layer,
  5. Trying some manufacture’s waste (I don’t know what it is),
  6. No rolling to felt the piece (yet more online info watching Russian felters).

In a previous post I talked about felting onto pure wool quilt batting that I had stripped, painstakingly (literally and definitely not to be repeated), of its backing.

06a

Using the microwave turntable I cut out a 34cm circle of the wadding and layered home-carded Shetland wool in a circular herringbone pattern onto it. Onto this I layered some manufacturing waste of shiny synthetic material, some other wool fibres, the crochet piece, more wool, Raffles fur, a silk mix yarn, viscose fibres and finally wisps of Merino wool.

I followed the felting technique seen online – gentle rubbing followed by scrunching the piece together and apart in all directions, then flapping it on the table and palming followed eventually by scrunching in the hands. Part way through EPH suggest I quit as I was quite exasperated that it wasn’t working, particularly when it didn’t seem that the wool had adhered to the quilt batting – but I’m stubborn!

In attempting to peel the entire quilt batting off I realised it had only missed by 7 cm. So using a suede wire brush I fluffed-up the batting and the underside of all the top layers….success. I then remembered my previous lesson/note to myself from using the batting before – FLUFF IT UP FIRST!

It was obvious at the felting stage that some elements hadn’t adhered.

After felting I did full it by rolling, although it had already shrunk significantly.

As an experiment it has been very informative.

  • I hadn’t caught the yarn down fully
  • The fluffy synthetic yarn hadn’t merged with the wool fibres in some places
  • I’d forgotten to put some intermediary wool fibres between the viscose and crochet.
  • The ‘fluffed-up’ manufacture’s waste provided no useful gain. However, the waste used ‘as is’ retained its sheen very well, I just need to use more wool fibres to lock into it.
  • Raffles fur also mostly ‘disappeared’…if only that happened on him!
  • From the point of view of the batting it was, finally, very successful.
  • In all, I liked the new method as it was more relaxing and as I could sit down – much less pressure on my delicate back.
23
The beautiful sheen from the viscose and waste

Armed with this knowledge, and the shrinkage rate of 20%, I can now continue with planning my cushion….watch this space.


A Bouquet for Mothers Day

A Bouquet for Mothers Day

A Bouquet for Mothers Day. (not the same as the one I got a few years ago)

With stay at home, the days seem a bit harder to identify. Is this Wednesday and we have forgotten to put the garbage out or is this Tuesday and I’m panicking early? Can you imagine my surprise and horror to discover Mother’s day is Sunday? Sneaky Calendar!!

I use to get Mother’s day presents even though my kids were shorter and furrier than I had anticipated having when I was younger.  We had two cats and when they were five we got them a dog (they didn’t like their present either.) but that eventually worked out with the cats teaching the large breed dog he was actually just an inferior sort of cat.  If he worked hard enough at it he might upgrade to a full cat. They did do great mother’s day presents, Hackles and Bouquets (stacks) of Cinder blocks were some of the best! The cinder blocks were to rebuild and raise the garden. Kids can be so thoughtful.

 1.1-1.2

Unfortunately, I am not as good at gifting as my kids were. My Mom is hard to find presents for. She would not have enjoyed cinderblocks or fibre prep equipment. I spent most of my childhood trying to find the perfect frog to gift her with. No matter the size, type or shade of greenness I had no success. (Was that one too green or not green enough?)  I even caught a soft-shelled mud turtle (you do know how hard those are to catch by hand right?) always with the same result. “It’s an outside creature take it outside right now!” Mom is very hard to find the right present for!

So, no Frogs but she does like spring flowers especially tulips.  I only have one tulip up in the garden yesterday but there were tulip leaves and daffodil buds showing. One clump of crocus has just finished and some cilia are starting to flower in and out of the garden. If this year’s tulips are not cooperating, I had best look at previous years in my garden.

1-15

16

16

With general tulip-ness in mind, I grabbed a piece of felt that was helpfully sitting on my desk. Unfortunately its 5.75in x 6in. I would like 5 x 7in to fit in the precut mat and frame. This is inexpensive commercial felt but does have a bit of wool content so let’s see if I can persuade it to stretch.

17 17 stretching the felt to make a 5×7 shape.

The stretching worked. I gently tugged on opposite sides then worked on diagonals then back to opposite sides. As you would expect this increase in size was accompanied by a decrease in thickness. So a bit of the batt of alpaca Ann had dropped off was put to use to stabilize the ground felt and start to build up the base colour. I added a non-descript blue-ish sky (it’s been pretty cloudy lately so I was trying to feel optimistic. I checked to make sure I still had the 5x7inch over all shape.

     18-21

As you can see, I was using the multi-tool (it’s the fake clover tool) with needles that look like 40t- x3barbs per side.

I pulled out one of my more dangerous looking X-mass presents and loaded some of the needles.

222324   22-23

I found the placement too tight since it was very resistant trying to pierce the felt. To fix that I spread the needles farther apart.

25 24

This dispersement worked much better. The needles are again fine probably a 40t (they came with the handle and were not labelled).

I went digging for greens, blues, yellows oranges and reds. I found that the locks I had been spinning in the garden had some of the leaf colours I wanted but were quite strong in intensity. I had some tiny pompoms from Dollartree (like the Dollarama but cheaper). I considered using them but did not. I did have a variegated cream/orange/red ball of super wash merino that was the exact colour I wanted. There was also some bright yellow Claudia had traded me for a yellow that worked better on the duckling she had been making.


    25-27

Once I was happy with the tullipy-ness of the flowers, I got out the frame and mat to do a final layout check. Normally I would have checked earlier in the picture but I didn’t want to get the mat dirty.

2829   28-29

The mat is getting thinner than the ones I had purchased before so I will have to keep an eye on that.

30  30

I was curious how heavily felted I had made the piece so peeked on the back. You can see it has some firm attachments but it’s not as heavily felted as the fox painting.

I decided I wanted to break the frame (visually not physically) and add fibre that would extend past the matt’s confinement. As the glass was added quite a bit of the fine detail of shading in the flowers disappears from the photo but was still present in the felt.

31 31

After I had tucked the felt into its comfy new frame and mat home I added a happy mother’s day card with a photo from my own garden (from a previous year).

32 32

We will drop off the picture before I post this so Mom won’t see what she is getting!! (she phoned the package has arrived but she will wait till tomorrow to open it on mother’s day)
33

33

Oh, I wanted to let you know what inspirational music I was using to felt this. They are called the Hu, pronounced “Who”, a light Metal Mongolian band who plays traditional instruments and does throat singing.  If you are now curious you can listen to some of their songs on YouTube. https://www.youtube.com/watch?v=hElhDzFnnCM

3434

I hope you are having fun felting in two or three-D and with wetness or dryness. Have fun and if we have no more snow flurries we might all be out in our gardens enjoying spring shortly!


Felt for Needle Books

Felt for Needle Books

Not too long ago I saw some nice needle books for sale and thought I would like to make some too. It seemed to be in my and my machine’s sewing ability. They will be fun adding stitching later too.  First I had to make some nice felt for the covers.

I started with two layers of white.

and added some colour and pattern

I found an old piece of prefelt

It wasn’t as thick as I wanted so I added a layer of fibres to one side.

and some other bits that were thicker.

Then, because I must be able to embroider sheep, I made a meadow.

Next, I had to cut them to size. I went looking and couldn’t find anything that looked like a standard size, so I cut them to what I thought would be usable sizes. Some larger and some smaller, depending on the piece of felt and what I thought would work.

I cut some middles. Each piece of felt has a needle and pin piece and a pouch piece. When they are sewn in there will be 2 pouches (front and back) and 2 pin pieces ( in the middle). I am wondering If I should add another needle and pin page or something else. What do you wish your needle case had in it?


Shades of Green – Nuno Felt with Applique

Shades of Green – Nuno Felt with Applique

In my Level 3 Stitch class, we are working on applique this session. After creating an applique using silk organza, I decided I wanted to see if I could combine a nuno felted background with silk organza applique. I thought the texture of the nuno would contrast well with the smoothness of the silk organza.

I created the nuno background with some deconstructed screen printed silk and a piece of white prefelt. I stitched the edges of silk that didn’t adhere down completely on to the back of the felt to give a neater edge (right hand photo). I also shaved and removed any large white pieces of wool on the surface of the silk. This piece immediately made me think of the woods, now on to the applique.

I used the background to help figure out the tree shapes and placement. Here is the silk organza trees laid over the background.

I basted the trees in place and stitched with tiny stitches trying to avoid fraying the silk organza as I went. The photo on the left shows the piece partially stitched with the basting lines still in place on the right side. The right photo is when the trees were completely stitched down. I used a stab stitch and machine weight thread.

Here’s a close up of the tiny stitches. (Click on any photo to see a larger version.)

Next, I started working on the path. I wanted to have a vague path but not something that overpowered the rest of the composition. So I used a variety of green threads with running stitch to create the path. But in the midst of stitching, I kept finding my eye drawn to the black dots over the bottom portion and then in a straight line up into the sky. What to do?

I considered adding stitching to diffuse the black dots but decided in the end to cover them with a paint pen and markers. I have no problem mixing my media, so I used a white paint pen and then covered the white with green marker. I definitely think that helped to take that line of dots away and emphasize the path more. I also added a bit more darkness with black marker so that there wouldn’t be such a straight line of “ground” at the base of the trees.

Next was the decision, leaves or no leaves? I tried a bunch of different types of fabric and ended up using black and green tulle cut into pieces with a layer of green sheer pieces over that. In this photo, the leaves haven’t been stitched down.

Here is the completed piece. It is hard to see the subtleties in a photo but I am pleased with the result. It reminds me of walking in the woods at dusk as the shadows deepen and perhaps you can hear the owls saying good evening.


Learning from Samples

Learning from Samples

I’ve learnt many things since joining this forum but one of the most useful is the importance of making samples when trying something new. It saves so much time and lets me develop an idea quickly without wasting materials. Sometimes I’m trying to achieve a specific effect and sometimes I just want to see what happens if…..

As I can’t go to my studio at the moment because of the pandemic lockdown, I’m working small on the dining table at home so samples are a good option.

I’ve been thinking about trees and bark recently, including looking at the different lichens on trees and investigating how to represent them in felt.

I’m an avid charity shop moocher: always on the look out for second-hand yarns and fabrics I may be able to use in felt-making. I bought a charity shop scarf that included some pretty flowery mesh and decided to make a sample to see how it felted (or not) and whether I could use it for lichen.

flower fabric
a rectangle of the flowery mesh fabric

I started with a square of the fabric and felted it onto some white Finnish wool batt.

flower fabric white sample
a square of the fabric when felted

I like how the flowers crowd together and how the mesh disappears so I decide to try another piece on a darker background. This time I cut more random shapes of fabric, leaving space in between.

flower fabric grey sample
Pieces of the fabric felted onto grey

I really like this effect too but, looking at it critically, I realise it looks much more like barnacles than lichen (shells being another of my felting passions). So, off I go on a little diversion to wet felt a mussel shell with barnacles.

Returning to the lichen theme, I absolutely love the tiny worlds that grow on trees.  Here’s an example from a small twig from a pear tree in my garden (about the size of my little finger).

lichen photo close up
Pear tree lichen close-up

How gorgeous is that?!

I’d nuno felted silk when making lichen on the tree stump I showed in my last blog. I decided this time to make a piece of greenish prefelt with Perendale batt and Merino tops to see what effects I could create. I stitched, added small resists and tied in marbles in a random way to the prefelt then felted the sample to see what would happen.

This has some potential but I didn’t work on the finished felt for too long as I think it’s too thick & hairy for the delicate world of lichen.  I can still learn a lot from the shapes and effects. Next time I will start with a thinner merino prefelt and work on organising the composition. Or maybe I’ll make another sample. I love the discs on the lichen so will certainly try using a different resist technique next to work on these.

Finally, I’ve made a couple of samples this week to see how to resolve a problem I’ve created. I wanted to see if I could make a chinese lantern fruit with its beautiful lacy dried husk skeleton. (I don’t have my own photo but if you put chinese lantern plant in your search engine you will see them.) I jumped straight in and made the berry & stem without deciding how I’d make the husk skeleton & how I’d fit the two parts together. Clearly I don’t always take my own sampling advice!

chinese lantern berry
Chinese lantern berry and stem

My first question is ‘what’s the best felting technique for representing the appearance of a dried husk?’ It needs to be very lacy but very firm to hold its shape. I think I will have to use strips of prefelt for the 8 main veins but I’m not sure what to do about all the small ones.

I start with one sample laying out cobweb felt and trying different things on top: a loosely spun 100% wool yarn, some prefelt and some wisps of merino wool.  In the final stages of fulling I cut out a few sections to emphasise the shapes.

I decide to develop the yarn idea and this time lay out the yarn first then some merino and silk batt along the lines of the yarn.

I like the effect in itself but I don’t think it will allow me to make a felt that’s firm enough to hold its shape, which needs to be large and strong. Also, it’s not really delicate enough and I’m doing so much cutting out that I may as well make a solid strong 3D shape, possibly with yarn on top to guide the pattern and create texture, and then cut out rather than trying to follow the lines of yarn. That’s parked for now in the ‘needs more thought’ box!

I hope I’ve shown how useful samples can be, if you need convincing – as I did.

Do you make samples? What do you do use them for?


Sudden Change of Plans

Sudden Change of Plans

I have come to the conclusion that until I can acquire the appropriate topcoat for both the Pictish Shepherd and the mysterious creature I am temporarily stuck. (Oh if only I could go shopping!! <note wringing hands and serious whining!!> ) I could keep working on the understructures but the day is grey and raining, and I need to do something that is a bit more productive feeling (I already did the dishes.  That’s why I’m stuck sitting down again).

I should start thinking about what I want to do next as a picture. There were two shots that I looked at recently that caught my eye. One was a yak, but he has an odd feeling compositionally. On the other hand, the fur is so shaggy and has some interesting colouring to it that it would be fun to work on.

1 1

I could crop the shot.  I really do like that shaggy fringe. Let’s check out the 5×7 ratio and see what I can get.

23 4 2-4

It’s ok but doesn’t grab me as much as I thought it would. (It’s likely the rain) the other option is to just pick him up and move him to the left it would also get rid of that annoying tree in the centre of his head. That would likely work better as it would let me play with more shagginess. If I work from the original composition, I think I would like to erase some of the background trees, especially the one growing out of his head (as you can tell it’s really bugging me).  Let’s see if Photo pad, (that’s a free photo editing program) can do for a bit of deforestation.

5 5

I like the diagonals now and the weight of the composition feels better. I think it was the tree on the top of his head that was really bothering me but this looks much more comfortable and I added a bit of blue to the sky (we could use some of that blue sky here today.)


Oh No, as I was getting the second shot for you I just spotted another I had found earlier that could be cropped to be really fun too.

6 6 the original.

7 7

To get the composition I’m seeing in my head I have lost the 5×7 ratio. That would mean having a special mat cut which has gotten very expensive and isn’t easily available at the moment. (It’s much more frugal to work to a ratio that will fit in a mat and frame I already have so it’s 8×10 or 5×7 or one 4×6.) If you have an image, you can scale it up or down with a photocopier or use your computer and printer. With framing so expensive, if you can arrange to fit into a standard size it will help your costs if you are planning to sell your pictures. (I have not finished Xmass presents so I’m not selling yet! – it’s almost the end of APRIL!! I had better get working on those!)

8 8 this is 5×7 it’s not quite as intense but it still is very piercing. Yes, this would be fun.

Now let’s look at the other picture I was thinking about.

9 9

One of her relatives is a local resident. I’m not sure which neighbour has her as a non-paying renter that I have smelt but not seen yet this year. I particularly like this image but not, the cat food. So let’s see if I can get rid of that first.

10 10

not a great job but the offending cat food is gone. Yes, that’s better. Should it be a tighter focus?  That usually appeals to me. Better check.

11 11

I think I’m losing some of the small, fragile, youthfulness of the face when I get too close to her. It works compositionally but I don’t think it captures the hesitation and age of the upper one.

Now, which one should I choose? Let’s print out 5×7 versions of each and see what they look like. Which would you choose?

Have fun and keep felting!