The Eyes Have It – Part 2
A couple of months ago I did a blog about drawing eyes. I mentioned that someday I would like to rework the eyes on a quilt I had made of my rescue dog, Koko. A Zoom class became available in September from Lorraine Turner (https://calicohorses.com/) called “All About Eyes”. Lorraine sometimes uses Derwent Inktense pencil to make eyes for her animal quilts. I haven’t played much with my Inktense pencils so thought this would be a good opportunity to learn more about them and maybe find a fix for Koko’s eyes on her quilt.
Here is a close up photo of the quilt I call Saint Koko. The original eyes were plain fabric with a small bead sewn on.

Using an actual photo of Koko’s eyes, I tried to enlarge it enough to match the exact placement of her eyes on the quilt. Lorraine suggested making numerous sets of eyes to practice using the Inktense pencils on. I used a light box to trace the basic shapes of her eyes from the photo onto some plain white fabric.

What a FUN exercise! I went with the last set of eyes I had made. I then fused some Wonder Under to them and cut them out and lightly fused them to the quilt.

Right now, I am trying to decide if I like them or not. They almost look too real for my whimsical little quilt, don’t they? They definitely change things up, I think! They give her a totally different expression. I think more work will need to be done before I am satisfied. Perhaps more Inktense pencil work or thread painting. And I still may do some additional work on her face and body to lighten it up. Progress is being made though! Lorraine will be teaching more about Inktense pencils in November. I’m looking forward to playing with them and learning more about them.
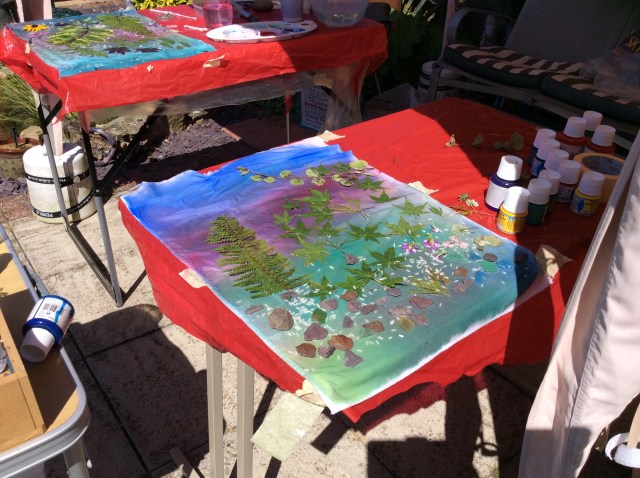
Meanwhile, I’ve also been doing some dyeing with Procion Dyes. Jane Dunnewold (https://janedunnewold.com/ ) has had some great Zoom lectures lately. She is an awesome instructor and person! I mixed up 12 of the pure colors to play with, scrunched up fat quarters and then rubber banded them before dropping them into the dye bath for 24 hours.

I have been wanting to play with dyeing my own silk/cotton fabric (Robert Kaufman PFD Radiance) that I use as the background for my tile quilts. Robert Kaufman quit manufacturing Radiance for a time and I was so sad as I love it’s sheen. When I discovered he had the PFD available, I bought a whole bolt of it!
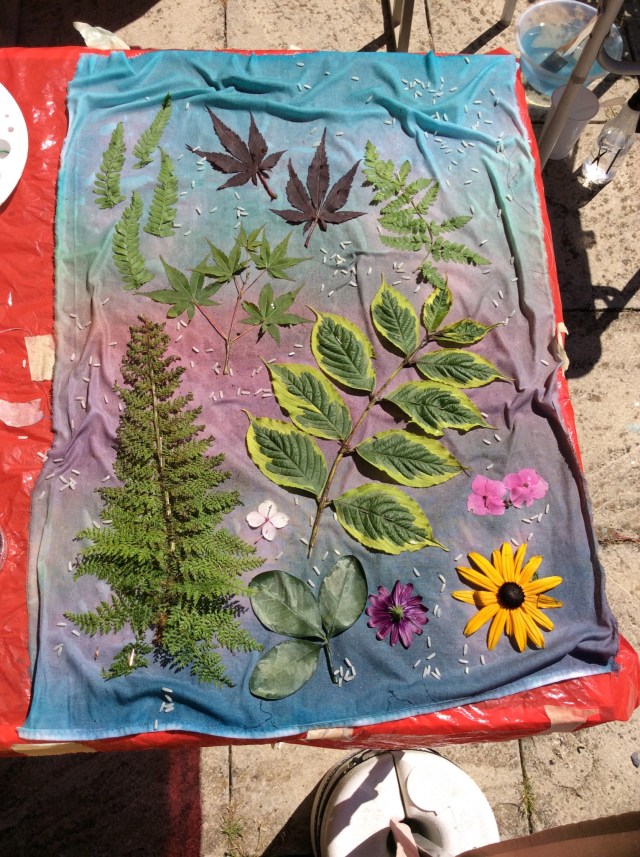
Aren’t these such beautiful colors!

Next I will cut each fat quarter into 4 equal pieces. One will be left alone, the other three will be overdyed using a complimentary color, an analogous color to the right, and then an analogous color to the left. I may use a different fabric manipulation prior to their second dye bath or I may just scrunch them up the same way. They almost look oversaturated to me already, so I’m really curious how the second batch will look. Dyeing is a lot of work! But what fun!
Thanks for reading! Happy creating!
Tesi Vaara


 2-3 Fleece placed on the dryer rack
 4 next half of fleece in soap and soak stages of washing
 5 Filled one drying rack and pulled out the second.
 6 two umbrellas up and… it has stopped raining again.
 7-8 wet, very wet
 9 Sun coming out on my Tie basil plants in a broken pot, I will be trying to overwinter.


 10-13 all the wetness was worth it, look at that fleece!!
 14 The first part of the second Icelandic fleece is trying to dry.
 15 it rains again
 16 the drying racks


 17-20 Beth’s Black fleece of straw, the top section of the strainer bucket is self felted.


 I had three mystery fibers in grey and the black is merino that I used for my control. I laid them out with two layers. I wet them out with tepid soapy water and started the felting process by sanding on boths sides, rubbing and rolling. This is what they looked like.
 B was looking as it should for merino, but neither A, C or D passed the pinch test. I kept working at the samples and I finally got them to do a little something.


 Here we are above drying out in the sun. They felted better than expected, especially D. Here is the final outcome below.


 1-3 Floral wire from Dallerama unlabeled but probably 22 gauge
 4 finger making tool, Stick shuttle and ruler

 5-7 I was very pleased with the expressiveness the hands gave. You can also see more of the transition zone from shark to boy.

 8-10 “those hands look creepy”

 11-13 base layer, then adding wisps of colour
 14 Here is the wool that keeps getting extra rinses, this is just the first part of one of the two large rams fleeces I bought a couple of weeks ago. There is still a lot of VM including burrs to clean-out. Now back to Shark-boy!


 15-18 wool and hanging baskets survived adding detail at the intersection and along the spine.
 19 This summer Mrs. Crow and her family supervised me, as I have worked on the Mer family. Today they all dropped by for a visit.

 20-22 Adding more definition between belly and sides of sharks


 23-30
23-30


 1 14 gauge aluminum wire armature.
 2 Using a second piece of wire to Stabilizing the arms and third for the body.
 3-4 adding a fishy long shark body


 5-9 Starting at the top and working down
 10-11 Pectoral fins
 12-13 Dorsal Fin.


 14 -19 the Dorsal fin and blocking out the shark body
 20 more rain, shark-boy starts weight training

 21-23 transition between Boy and Fish ( i have to make the transition look integrated not like a shark is eating someone feet first)
 24 checking both photos and diagrams
 25 this is a cool tool, it unscrews by turning the nob. be careful not to get one that requires a screwdriver to undo it from below (it can be painful if you slip)

 26-28 Haratige, Low acid yellow pair, Sweet i millions

 29-31
29-31
 32-33 shape both fins at the same time before adding them
 34 will it ever stop with the intermittent rain?
 35 before adding the pelvic fins I need to add the Anal fin, but first checking the location on the diagrams and photos.
 36-37 make 2 so they will be balanced
 38-39
38-39 40 OK more rain.. time to pack up. tomorrow is Butter tart day!! (Saturday)
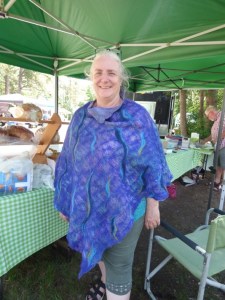

 41-43 Ann had her New poncho to show me! It looks grate!