Browsed by
Category: Other Fibers

Experimenting With Fibres

Experimenting With Fibres

I posted a couple of months ago about using some of my friend’s hair decoration as an embellishment. She recently had some more in really nice colours, and saved them for me when she took them out. They look something like this. I took them with me to the well being centre a couple of weeks ago, and it tured out there was just me there that day. So I kind of spread out a little bit!:

These are the fibres/hair extensions, they start out straight, but end up wavy or crimped depending on how they’re used:

I blended some Merino to match:

I started with matching the fibres to the blends:

I used the same wool blends twice:

But used different coloured fibres on top at the other end (not great photos)

As soon as I started to wet it down it felt like there were far too many fibres on top. They kind of look/feel like trilobal nylon, but not quite as fine.

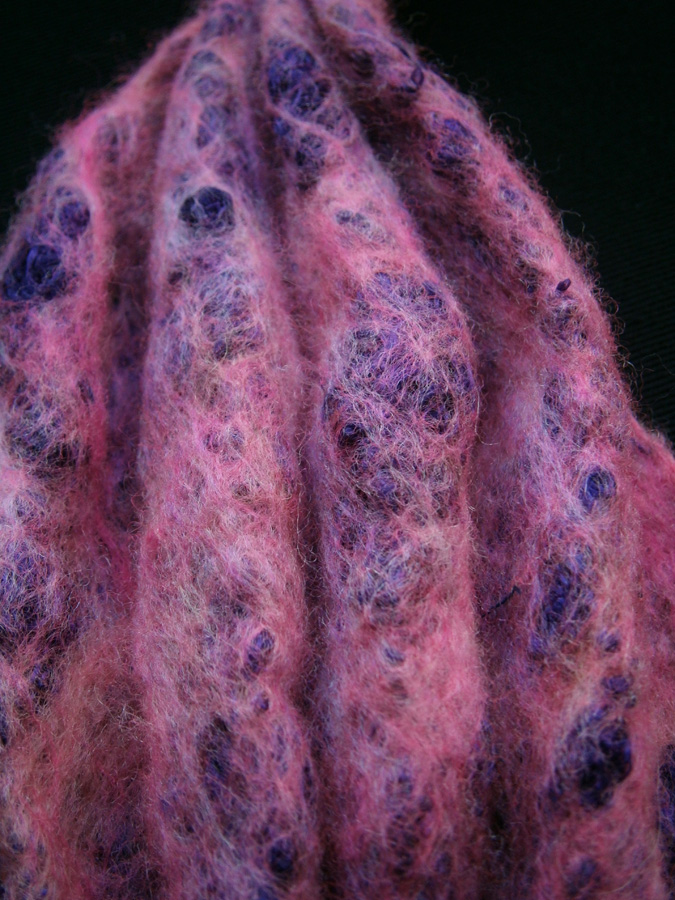
It took a lot to get it felted, the fibres acted like a barrier between my hands and the wool, I had to rub mostly from the back. I even resorted to rolling the felt in a bamboo mat. This is how it looked when it was dry:

You can see how much of the fibre is loose:

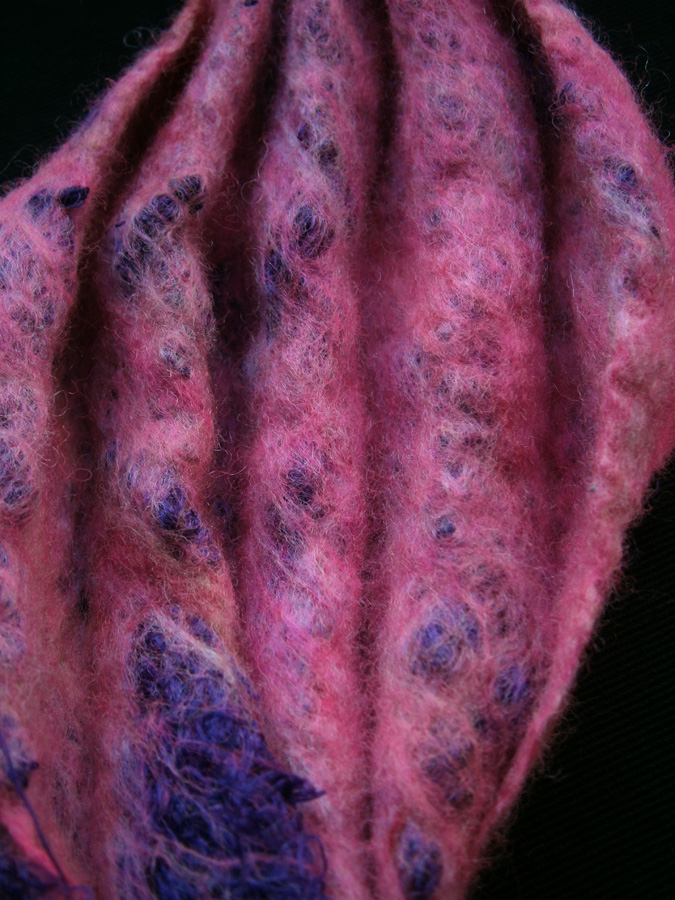
Not quite as much at this end:

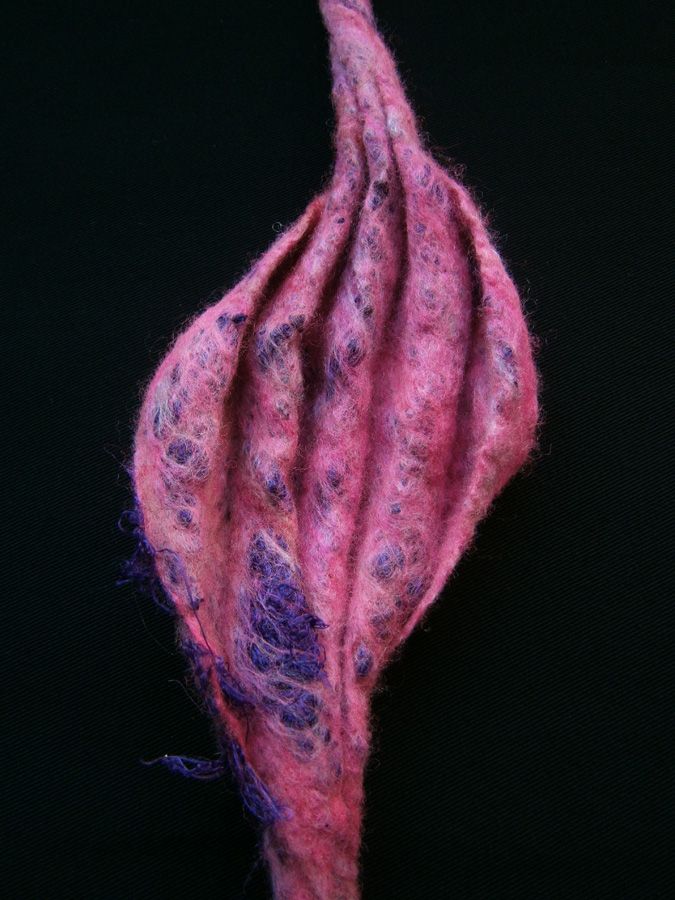
I tugged off lots of loose fibre and this is how it looked afterwards:

It looked like I pulled it all off, but it was more obvious looking on an angle:

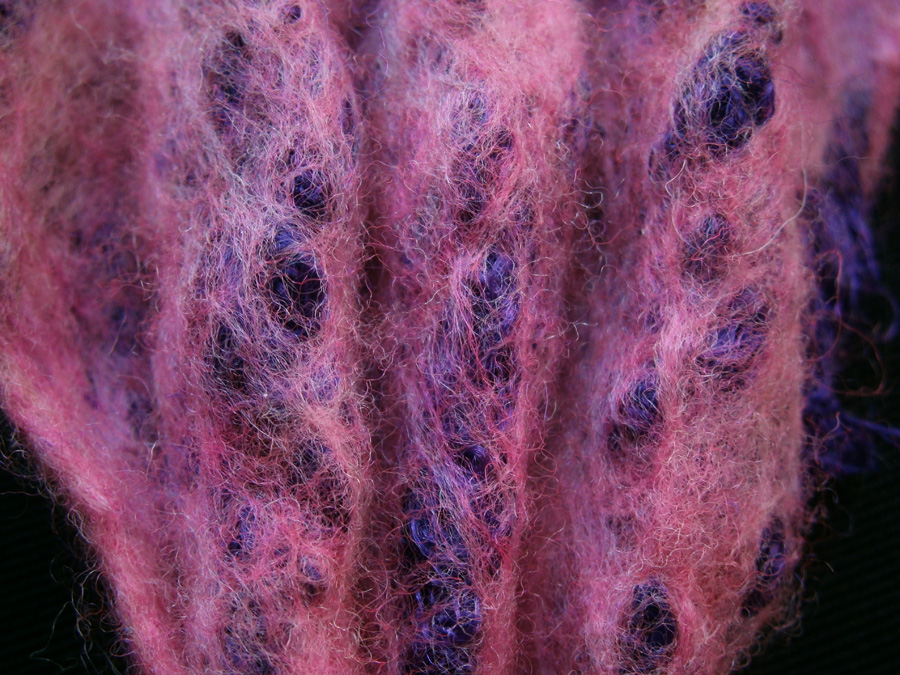
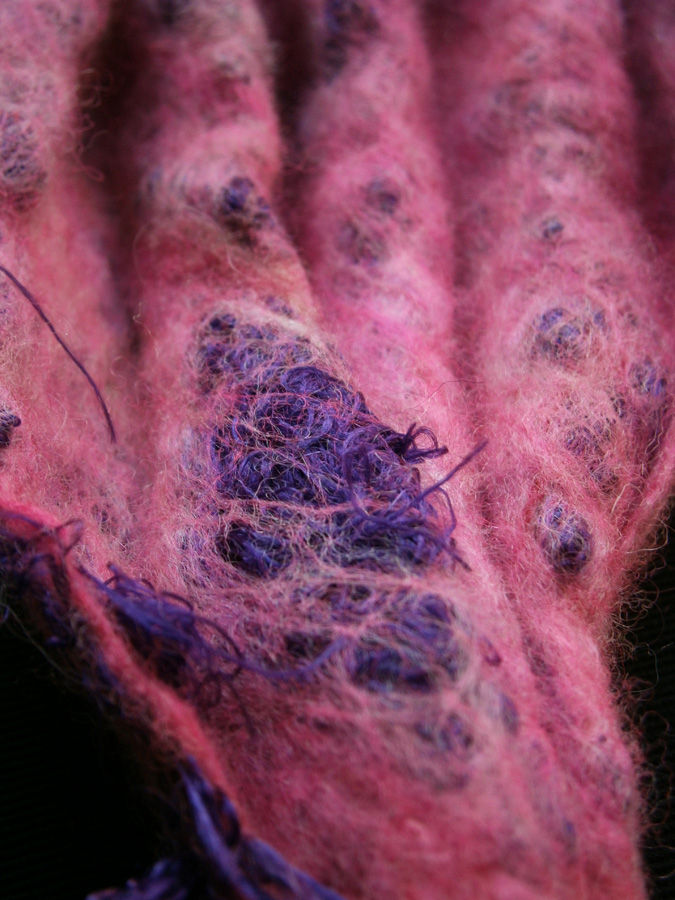
And I had to get a supermacro close up!

I did have another play around with the hair extensions, I’ll show that piece next time 🙂

More Natural Wools and Fibres

More Natural Wools and Fibres

I was looking through my flickr account recently for some photos to use on a flyer for the well being centre, and I came across some felt pieces I made with natural fibres and natural wool combinations. I haven’t done a post about ‘naturals’ for a while so I thought you might enjoy this old post from 2012:

Another couple of natural wool and natural fibre combinations I’ve used recently are Oatmeal Bluefaced Leicester with Ingeo top, and Humbug Jacob Tops with black and white Bamboo tops.

Humbug Jacob tops are a stripey blend of black and white Jacob wool tops. Just on its own it produces a nice result, but I thought I’d try using strips of black and white bamboo tops for effect. Both bamboos are really soft, white bamboo looks silky, but black bamboo is fluffy and more like fluffy cat fur. They felt quite differently too, the white keeps its silkiness and shines really nicely, and the black almost fades into the background, staying very matt.

Ingeo is made from corn, it is soft and shiny and smells faintly of caramel 🙂 I decided to cover the whole piece with Ingeo as it has such a lovely sheen. This was another fibre which shone even in dim light. The effect after drying is gorgeous, Ingeo is such a nice silky fibre and went really well with the Oatmeal Bluefaced Leicester. I think this combination would make a lovely soft and shiny scarf.

*The previous post I’d made was also about natural wools and fibres, if you’re interested, you can find it here

A brief glimpse into the Knitting & Stitching Show in London

A brief glimpse into the Knitting & Stitching Show in London

This weekend the biggest fibre and fabric-related event in Europe happened right here in London. Every year I volunteer for my spinning guild and, in return, I get a free pass for all days.

Although the Knitting & Stitching Show is mostly about the sales, there’s always a section dedicated to textile arts. Established artists as well as art school finalists exhibit their work every year, so that’s what I’m sharing with you today.

IMG_3593

Let’s admire this larger-than-life crocheted cow by TOFT. They also had a giant lobster and other animals. How many hours went into each?

IMG_3603

The artist Jenni Dutton had an exhibit about her Mother, called Dementia Darnings. You can imagine by the title how poignant each portrait was – we see this woman depicted from a young age to her final, frail days. I was very moved by it.
Look closely – can you tell how each work was created?

IMG_3602

It’s yarn. You can see it hanging down on the portrait above. Isn’t it wonderful? All this hard work, you can tell the artist loved her mother very much. I felt like hugging her for this dedication.

Next, quilts. I’m not a particular fan of the “traditional” ones but when this technique is applied to create something unusual, you have my full attention.

I’m afraid the pictures don’t do these works justice. Both artists are American I think you can feel a lovely sort of vintage US vibe to these images.

Finally, something that made me smile, by Libby Vale.

IMG_3564

Ironing is definitely not on my list of priorities, so I connected perfectly with the sentiments depicted in this board!

There was a lot more to show, but I’ll leave that to my next blog post. I hope you enjoyed my choice of art. Have you ever been to the Knitting & Stitching Show, or a similar event where textile art is shown? Let me know all about it in the comments section.

Playing Around

Playing Around

I’ve had a note on my kitchen white board for months which just says “unravelled knitting and plastic fibre.” I was stirring a pan of instant noodles one day and thought how much they looked like unravelled knitting and how much the frothy, boiling water reminded me of plastic fibre. I intended to make it in felt, but only got around to it yesterday. I picked Charolais wool, I thought this would make a spongy felt and help create the right effect. I think I would have been better off with something like Cheviot. This is the full piece:

Close up of the plastic fibre as frothy, boiling water:

Close up of unravelled knitting (which I think was mostly wool) as instant noodles:

While I had my White Wools tub out, I thought I’m make another couple of pieces to try combining different wools with fibres. This one was made with English 56s. It was a bit different to previous packs I’ve had, the fibres were much longer, almost like there was a high Devon content. I used some hand dyed Nylon Fibres. I love the colours you get with Nylon, especially the blues, which is why there are so many shades on this:

I don’t know if it’s obvious to you, but it definitely has a different look this Eng 56s, more ‘wavy’:

Here’s a close up of some green (the blue was impossible to capture)

For my last piece I used my new favourite wool, Rambouillet. And some fibres I have a ton of, crimped polyester lap-type things, (or as the shops call it ‘Hallowe’en cobwebs’!). I’ve tried this before with various results. It really attached well into the Rambouillet:

It looked to me like wet paper, the way it will form to whatever it dries on top of.

It kept a lot of its crimpy character while still forming a mat of fibres:

It was quite hard to get close ups, the green and orange are both fluorescent. Green:

Orange:

I don’t have any plans for them, I just needed a ‘play day’ 🙂

Felted Cat Cave, A Quick How To

Felted Cat Cave, A Quick How To

Another old post from me. This is one of the most visited posts we have, so thought everyone might like to see it again.

I have been wanted to make a cat cave for sometime now. I decided it needed to be bright. I picked some Blue Faced Leicester  wool so it would be strong and dyed it chartreuse. Then I picked some purple and magenta for the spikes.

Spikes and Wool

I wanted an oval cat cave. I used my oval hat form to get the shape and gradually sized it up.

Drawing the Resist

I laid out 4 layers of wool for strength and even shrinkage. I put the first side aside and after laying out the second side I poked holes to put the spikes through.

Spikes in the Wool

After wetting it all down I wrapped each spike in plastic wrap so it would not get felted down flat.

Spikes all Wrapped Up

I covered it with a sheer curtain and rubbed both sides for a while and rolled it for a while and then wrapped it up and put it in the dryer twice, changing the position of the felt each time.  It was starting to shrink so I cut out the resist and switched to rolling it in a stick blind. I find the stick blinds to be very aggressive and shrinks felt quickly.  I did do some throwing too. Finally I rinsed the cave out in a bucket of alternately hot and cold water being quite aggressive with it. I then had to stretch the top so it would be domed up. I steamed it to heat it up and make it easier to stretch. Mostly I used a wooden spoon to push in a sliding motion to get the shape. Here it is on top of the resist so you can see how much it shrank.

Finished Cave on top of the Resist

Here it is in use, it didn’t take long for one of my cats, Wu, to take up residence.


Cat in Cave

As a foot note Wu ( queen of all things) is no longer with us. This is one of my favourite pictures of her. She really like the cave and we buried her in it, here on the farm.

Throwback Post – Texture

Throwback Post – Texture

We were talking about doing some ‘throwback’ posts this year, and while I was giving the site a bit of a tidy-up and adding a new 3D page over the New Year, I came across this one of mine from September 2014, and thought it’d be a good one to start with. Do you ever revisit your old work and get inspired with new ideas?

A while ago I bought a weird fluffy, knitted, tubular scarf from Poundland to try felting with. If you ever buy one, make sure you cut it over a bucket or newspaper or something to catch all the bits! I laid out a couple of layers of very wispy pink Merino tops left over from a book cover I made last year, then I added the piece of scarf, and 2 more wispy layers of wool tops. It didn’t take long to felt. This is one side of it:

OLYMPUS DIGITAL CAMERAThis is the other side:

OLYMPUS DIGITAL CAMERAAnd this is what it looked like holding it up to the sky:

OLYMPUS DIGITAL CAMERAI don’t remember how long after, but I decided the scarf sampler might make a nice sculptural piece similar to one I’d made before. I didn’t make it in exactly the same way, I concertina’d it and stitched in place, then twisted and felted and fulled more. This is the top:

OLYMPUS DIGITAL CAMERAClose up of the ridges:

OLYMPUS DIGITAL CAMERASuper close up of the texture:

OLYMPUS DIGITAL CAMERAThis is the back:

OLYMPUS DIGITAL CAMERAA close up of the back:

OLYMPUS DIGITAL CAMERAAnd a super close up of the texture:

OLYMPUS DIGITAL CAMERANow, what do I do with the other 8 square feet of fluffy knitted stuff? 🙂

Fine Layers and Shrinkage

Fine Layers and Shrinkage

I took some photos while I was laying out my first Trilobal Nylon sample last week. They aren’t the best – fine layers of Merino and sparkly fibre aren’t the easiest to photograph – so I don’t have photos of every layer. This is the start of the first layer of Trilobal Nylon:

I didn’t overlap the Trilobal nylon partly because the length of the fibre meant 3 columns fit in the template, and trying to take into account the effect of shrinkage. This is the first layer finished:

This is how it looked with the 2nd layer of nylon on top, you can see I used quite a lot:

This is after two fine layers of Merino were added:

And this is when the four fine layers were added, just before I felted it:

It’d be good if there were some large, waterproof scales to use durinng felting, so the weight of layers could be worked out easily!

This is a piece I made last month. I got some fabric from a charity shop a while ago, it has some embroidery paisleys and little ‘gems’ on it. The way they are spaced out meant that I could either cut/tear quite narrow strips between the paisley or wider strips to include them for trying a sample piece. I hate waste, so I had a think what I would use the sample for, I thought it’d make a nice coin purse, but even after shrinkage would be too wide. Oddly for me, I actually came up with a solution before making the sample instead of 6 weeks later! If I used an odd number of layers, with 3 across the width, and two along the length, then I’d get more shrinkage! It worked too! This is the whole piece:

It is a chiffon type fabric, it feels synthetic, but I might have to do a burn test. This is one end closer up:

The paisleys are really shiny so not easy to photograph, they rose up and became even more 3d with shrinkage:

You can see the texture and migration more here:

Have you had any brainwaves and found solutions for problems lately?

Felting With Nylon and Soy Fibres

Felting With Nylon and Soy Fibres

I made a few more fibre samples this week. I thought I’d use the same template for all of them to do comparisons. In the end, I only did a ‘normal’ sample and a ‘fulled hard’ sample of Trilobal Nylon for a direct comparison. Though thinking about it, for a ‘proper’ comparison, I should really have used the same colours! Each sample has two layers of the fibre, and 4 thin layers of 23 mic Merino. This is the Trilobal Nylon sample which I felted and fulled in the way I usually do:

Here’s a close up of the ripples/texture:

This is the Trilobal nylon sample I made and fulled hard:

The texture was interesting, especially where I used different colours for each fibre layer:

This next one is Soy top which I dyed, the tops all look nice, shiny, metallic shades, but for some reason, they now look a bit like wet tissue. Maybe two layers dulls the sheen?

The silver end looked quite nice:

My favourite piece was the Nylon Staple sample. It had a really nice, thick texture:

You can see it a bit more on an angle:

At first I was a bit disappointed with all the migration, because it covered some areas:

But, then I noticed there was something quite regular, almost geometric about the migration:

It can always be disguised by using a matching colour, or made a feature of by using a complementary colour. Here is a photo of all the pieces next to each other:

And, for reference, the bigger Trilobal Nylon sample on the template I used:

Some Fiber Reactive Dyeing

Some Fiber Reactive Dyeing

The other Day I went over to my friend Elizabeth’s house To play with MX or fiber reactive dyes. these are the dye you use for cellulose fibers and silk. I had planed on doing some silk as I am low on some colours but I could not find my silk top. I know I have some but I do not know where it is hiding. Instead I took some flax/linen, hemp and tencel . I had never dyed any of them before.

Here is the dye set up, we are doing low water immersion dyeing.

dyeing 2 dyeing 1

While I was doing fibers

dyeing 4

Elizabeth was doing small skeins. Experimenting for dyeing warps for her loom and to sell.

dyeing3


Elizabeth is a “good” dyer. she measures and rights down how much of each colour she mixed and how much she used for each one. She will be able to reproduce what ever she or her customers would like.  Here are Elizabeth’s result. Various fibers: 2/8 and 2/16 cotton, 2/8 bamboo, cottolin and hemp/cotton.

Es dyeing

I on the other hand am a “bad” dyer. I just put a bit of dye in the water and wing it. That’s ok because I don’t need to reproduce the exact colour and shade again.

This is my result.

dyeing 5

Here they are with the undyed fibers, on the left hemp, on the right tencel and on the bottom is flax/linen.

dyeing 6

I did some close ups for you too. The hemp compacted a bit when I squeezed the excess water out. It fluffed up and softened when I shook it and gave it a wack on the table.

dyeing 8

The tencel got all crimpy. I was quite surprised.

dyeing 7

the flax/linen stayed compacted despite several good wacks on the table. I am not surprised really when yo spin linen you spin it wet. I think it helps it “glue” the fibers smoothly together.

dyeing 9

I think I will blend the fibers with some wool to try spinning and to felt with. It was a fun day with Elizabeth, It is always good when you are sharing with other fiber lovers.

Holiday Exchange and wool order

Holiday Exchange and wool order

We do a holiday exchange on the forum. We make Felt post cards to share. I can show you the post card I sent to Cathy now that she has it. Do you participate in any fibery Christmas exchanges or challenges?

exchange card

The only thing woolly that I did this week was get a World of Wool order. I half put in an order because I needed Finn wool to do a cat cave class next month.  this is what 40kg of wool looks like when it arrives and one box open

40kg wool box open

And all ready to go to the vireos people

all ready for delivery

Inside the box you can see in the open box is a colour sample binder. I decided it was about time I had one so I could see the colours properly.

sample book

In the bags are the colours for the 23 micron merino. I am going to have a look for more of the plastic  pages so I can put the bagged sample in them. I think they might be for coins. One lady is thinking of ordering yarn to dye herself so got a sample pack of them. They are good large samples, well labelled. They are all sock yarns.

yarn sample yarn sample back