Browsed by
Category: Experiments

Playing with prefelt

Playing with prefelt

In May this year, I wrote about about a vessel I’d made for an exhibition called ‘Edge’.  Although this hadn’t been the intention, the vessel gave me a sort of Japanese minimalism vibe, which was something I wanted to revisit.

Edge Vessel

The vessel fit the Edge brief in that I’d used a circular resist to create the shape but rather than cut the hole in the centre of the circle, I’d stood it on one edge, with the hole on the opposite edge.  I like this shape and want to explore it further.

The fibre I’d used was something I also want to come back to.  A beautiful fine carded merino and silk mix from World of Wool, it was time-consuming to lay out because of the short staple-length, but produced a lovely, light and velvety soft felt.

Before leaping into making something with so many variables of shape, surface design and fibre, I knew I needed to make some samples and decided to think first about the surface design.

I have no real knowledge of Japanese minimalist art and am not trying to replicate it, just play around with some of the simplicity of design and colours as inspiration.  I love problem-solving (or perhaps that’s problem-investigating) so was setting myself a bit of a challenge.

I’ve seen various images of beautiful Japanese brush work using black ink brush strokes and red circles on a white background and I wondered if I could create something like that in felt. The biggest challenge seemed to be how to wet felt black, red and white together while keeping the colours separate. Prefelt seemed to be one way to go so I made three different black prefelts to see which might look like black ink brush strokes.

Using commercial black merino prefelt, I cut a strip and felted it a little. I didn’t think this would work well as it’s the cut ends that move most into the surrounding fibres and this strip is basically all cut edges. Next, I tried lightly prefelting two other types of black merino wool: carded and tops, as if I was starting to make felt rope.

The tops and carded wool produced very similar-looking results and I confess, when I got to the making bit, I lost track of which was which. The advantage of these was that the fibres are mainly running along the length of the line rather than sticking out of the sides so there should be less migration into the white. I decided I’d use these rather than the commercial prefelt strip.

I then turned my attention to red circles.  I suspect carded wool might be best but I only have tops in red so that was what I used.  First, I just tried making a circle freehand.  I got about 2/3 of a circle and a raggedy bit.  On the plus side, there weren’t cut edges, so that should help minimise side-to-side fibre migration. On the minus side, the shape left a lot to be desired!  Needs further work.

Next, I made some red prefelt and cut a couple of circles out of it.  I thought this would work less well but I was interested to see how they compared with the freehand idea.


I was aiming for a very simple design, so played around arranging black strands and red circles in different combinations.

Now to actually make a sample.

My chosen layout

I used a rectangle of white silk and merino commercial prefelt for speed, and felted it together with three black strips and a red circle to see what happened.

Sample 1 completed

As you can see, the black didn’t migrate much on the long sides, though it did where I’d cut the shorter pieces (on the ends on the left side).  The lines did, however, crimp and move a bit – maybe I need to prefelt these a bit less on the length and definitely more on any cut ends.  Also, I must keep a better check on any movement as I felt.

The red, on the other hand, probably needed prefelting more as there was quite a lot of migration there.  Basically, far too many loose cut ends, so either felt the edges harder or go back to a different layout.

At this point, I wonder why the heck I’m doing this: the layout looks so much better than the felted piece.  Nevertheless, I decide to make a quick second sample before I finish for the day.

This time I used the freehand red circle with the raggedy edge. Somewhere in the dusty corners of my brain, I’d started to think about using resists to reveal the colours rather than just laying them on the surface.  I hadn’t actually developed this thought but just plonked a resist on top of the red felt and laid a second layer of the white over the whole of the piece.  I had some vague thoughts about the red incomplete circle looking a bit like a setting sun so placed it near the bottom and thought I could perhaps print some flying bird silhouettes on the upper part afterwards.

OK, I’m sort of freewheeling by this stage.


The useful learning from my experiments thus far was that the freehand circle (which has fibres running around the circumference of the circle, therefore avoiding lots of ends sticking out) works much better.  You can see this very clearly from the under side.  The cut ends clearly also migrate much more up and down as well as side to side. The freehand shape was probably also felted a bit harder than the red prefelt sheet.


For my final two test pieces, I lightly needle-felted some red circles then wet-felted the edges to make them as neat as possible. I went back to using the original white carded 70:30 merino:silk mix and decided to concentrate on getting the red circle right.  I laid out two layers of fibre at right-angles to each other and put a needle felted circle top right.

The needle-felted circle felted in well and when it was dry I printed a tree onto it.  It’s a bit big but I’m going to make this into a birthday card for my Mum.

For my final test piece I continued with the carded merino & silk batt.  I laid four layers of fibre round a circular resist and added one needle-felted red circle on each side.

As with my earlier Edge vessel, I cut it on one of the edges (rather than in the centre of the circle) and designed it to sit on the opposite edge.

Part-way through fulling, I worried that one of the red circles hadn’t felted in very well so did a little judicious needle felting around its edges before finishing the vessel.

This is a lot smaller than my original ‘edge’ vessel and much sturdier.

Conclusions?

The needle-felted and freehand wet-felted circles work better than cutting the circles from prefelt. I like the effect though could maybe make the need-felted circles a bit thinner: they do look as if they’re partially sitting on top of the surface.  I’m happy that I’ve more or less cracked that bit of my challenge.  As for the black lines, I’m leaving them for now but may come back to them at a later stage. The carded merino / silk batt was lovely to work with and I will definitely be making more things using this fibre. I might make a series of vessels using different colours and / or numbers of circles. I may also develop combining a circle and a printed tree. As usual, each experiment opens up lots of new possibilities. So much felt to make and too little time…..


Is this compost or dye material? Actually it’s both! (Part 1)

Is this compost or dye material? Actually it’s both! (Part 1)

This particular post has been inspired by some of our regular readers so here’s a quick advance thank you. I really love it when comments lead to further exploration and sharing!

Just a few cautionary words before I go on. I dip in and out of dyeing, definitely a hobbyist and I purely play so my dyeing exploits are experimental. There are lots of great sites out there if you really want to dig deep or if, like me you sometimes just love to watch someone’s process on social media you could check out @thedogwooddyer or @sashaduerr or @joanne_green_art on Instagram. Joanne has recently published a book which I would love to get hold of – it’s all about pigments. I have Sasha Duerr’s book; Natural Palettes and although it focuses on plants grown around California, there’s plenty of botanical commonality going on. It can be hard to believe that it’s Ireland I am talking about – and yes we do have some specimen Californian Redwoods here!

Second cautionary note: please exercise caution when dyeing and keep all of your dyeing equipment separate to your cooking equipment. It’s very important. Also, just because something is natural doesn’t automatically mean it is safe to handle without gloves or a mask. We recently had to burn wood in our pit. I extracted the charcoal and made some lye as an experiment. The pH is such that if it lands on skin it will feel like soap, lovely and soft, but what is happening is that it is dissolving the outer layer of skin! But please don’t be deterred by this. Just exercise caution and common sense and all will be grand!

When I started looking around for something to play with for this blog post I found some fallen branches from one of our cedar trees. I stripped the bark and left it to soak with the intention of throwing some fibres straight into the mix as the high level of tannins in the dye lot would mean that I did not have to heat the mix for it to work. After about a week soaking the mix I made the mistake of stirring it without gloves on. The resin in the mix started irritating my skin (yes, I learned a lesson that day). So it was back to the drawing board to find something safer to extract the dye from. (I haven’t yet learned how to extract the resin from the mix!)

This time I decided to opt for something most of us have at our disposal – compost! Onion skins to be more precise. I have been collecting these for quite some time (we are talking months here – I have been storing them in a cotton bag and they kept perfectly!). I had approximately 110g of skins which I just threw in a huge stock pot (used only for dyeing). I filled it three quarters way with water – not particularly scientific, probably around 6 litres, and put it on a low heat for about 4 hours. During this time I should have checked it (oops, I forgot!) but it was fine. It came to a rolling simmer. By this time it was bed time so I just turned it off and left it overnight to cool and then drained off the skins. There still appears to be colour left in the skins so I popped them into a nylon bag and left them to dry on the washing line – I will try to extract more dye another day.

The colour was a lovely rich colour – like a golden red. So I decided to extract the pigment from 1 litre of the liquid and use the rest for sample dyeing. I will hold on to the dyeing section for my next post as otherwise this will get a little too long and boring for you to read.


Let’s start with the pigment making. We are talking natural dyeing here. Extracting the pigment from the dye liquid involves introducing a few ingredients which bind the molecules to themselves and cause them to separate from the liquid. First I am using an acid (alum) (which can also be used as a mordant on fabric and fibre to prepare the surface for dyeing). Then I add an alkaline solution (soda crystals). The two chemicals react and the pigment separates and sinks to the bottom. This can fizz up so make sure there’s plenty of room in the container.  (Remember those great lava making experiments done back in the to encourage kids into science? You get my drift). The liquid is drained off then the remaining pigment is left to drain in a coffee filter. Once drained, the colour can be filtered in distilled water, dried, ground et voila! Pigment.

So, what do you need for this. As we are playing we will work in small quantities:

  • 1 litre of dye liquid (filtered to remove all the plant material)
  • Alum (potassium aluminium sulphate) You will have to check where you can source this as it differs depending on location. Like me, you may need to buy online.
  • Soda crystals (I also use these to clean my washing machine so I can buy them in homeware shops)
  • pot and cooker to heat the liquid
  • 2 Litre jug that can withstand hot liquid.
  • Glass jars (if you are patient, you will fit everything in 1 jar
  • Funnel
  • Coffee filter
  • Spoons (measuring and stirring)
  • weighing scales
  • pestle and mortar
  • boiling water
  • distilled water
  1. Heat the dye liquid but don’t let it boil
  2. Add the alum to a container then add boiling water and stir to dissolve the crystals. This may take a little while so be patient and make sure they are thoroughly dissolved. Quantities? My research has shown that this very much depends on the plant material, but a good starting point is 10% alum to liquid. I used 10 grams here.
  3. Carefully (don’t burn yourself!) pour the dye liquid into the large jug. I tend to do this at the sink. Then add the alum liquid and stir well.
  4. Now dissolve the soda crystals in boiling water. I used 5g here. Once dissolved add this to the big jug and stir. You may notice a fizzing chemical reaction.
  5. Leave the solution to cool and separate. The pigments will sink to the bottom of the jug. The liquid on top should be clear. If it is not, it means that there is some pigment left in it and you could choose to play further with this liquid, once it is drained off. (In other words, repeat the steps outlined above).
  6. Carefully pour off as much of the liquid as you can, without disturbing the pigment.
  7. Set up your glass jar: place the funnel into it and then add the coffee filter to the funnel. Make sure that the funnel is not hitting the bottom of the jar – we want the drained liquid to escape through the bottom
  8. Next slowly pour the wet pigment into the coffee filter. I find if I hurry at this, the filter can disintegrate so I let the filter soak up some of the damp as I am pouring.
  9. Leave this overnight so that the water has mostly drained off and the pigment remains.
  10. Now if you are planning to store your pigment, it is recommended that it is washed at least twice with distilled water and filtered through fresh coffee filters. This is to remove any unwanted mineral salts from the pigment. I am only playing so I did not bother with this step. I know that if this whets your appetite to find out more, you will remember this step.
  11. The next step can be done either when the pigment is completely dry or getting there, scrape it into a mortar (bowl). Once completely dry start grinding using the pestle but be sure to wear a mask for this part as the dust is quite fine.
  12. I store my pigments in tiny glass jars (yes, you guessed 1 litre doesn’t produce a lot but it makes up for it in satisfaction!).  Make sure to label and date.
  13. These can be mixed with a binding agent (note: they are insoluble in water). Here is a good article if you would like to find out more about different binding agents https://inbedwithmonalisa.com/i-pigments-a-little-bit-about-binders-and-making-your-paint/

I have put together a slide show on the process I used.

This is the basic process. Colours can be altered before making the pigment by introducing an acid or an alkali and if this is of interest to you, it will be worth doing a bit of research.

I have, in a way, put the cart before the horse here, as I am showing you the process of making the pigment before running through the fabulous colours I achieved with this in dye form. But a promise is a promise and I wanted to deliver so I hope on this occasion you can forgive me. The general ‘rule’ that I have found is to use 10% of the volume of the dye as the binder. So for every 1 litre of dye liquid use 10 grams of alum. Then use 5 grams of soda crystals (or similar) and let the substance perform its magic. This is a good starting point. But like all rules a bit of flexibility can be needed so these figures can change and this is where experience comes into play (knowing what adjustment is needed for different plants). Most importantly, your curiousity and willingness to play comes to the fore here. Just give it a go and have lots of fun.

Helene

A little post script before this blog is published:

Since my adventures with onion skins, I decided to experiment with the yellow Chrysanthemums flowers from a lovely bouquet that had seen better days and was destined for the compost heap. I used the same ratio of alum and soda crystals only this time I didn’t hold back some of the dye material for fabrib experimentation and I made up pigment with the full dye bath. Here is the result:

Chrysanths pigment made from the yelow flower head

I may have mentioned this last year, but we have a farmer who grows a number of acres of sunflowers every summer. It’s done for charity and it is open to the public to come along, pick the sunflowers and make a donation to the Hospice Foundation. There’s an honesty box on site. It is a form of Meitheal – part of Irish culture where people help others out. By the time I arrived last week, a lot of the sunflowers had ‘gone over’. That said, after a lot of searching I found some that had yet to open and I was very pleased. So I picked and made my donation. Once home I started cutting off the lower leaves and I cut some of the stems so that they would look better in the vase. Rather than discard the waste I decided to run a little experiment. I slowly brought them to the boil. The smell was not particularly nice so I let everything cool down outside. I found I had a lot of liquid (and plenty of dark green dye), so I reduced down the liquid by heating it up again. (I did this out doors this time!). Then I made my pigment. It’s hard to see from the photos but it is a lovely dark green. I worked with a little over 2 litres of liquid. As you can see, it doesn’t produce a lot of pigment but it is very concentrated:

Sunflower leaf and stem pigment

I have decided to treat myself to Joanne Green’s new book Natural Watercolor Paint Making. I have followed her for a long time on Instagram and love her short videos on how she makes pigment. She had followed this up with a book about the process and I could not be happier. I heard from the book store that it is on its way to me so I’m quite excited about that. Please let me know if you would like me to review it in my next post.

hugs

Helene

A Sample for my Seat Cushion

A Sample for my Seat Cushion

I decided to make a sample before plunging into making a seat cushion. I decided this for 2 reasons. First, I am not sure where most of the batts are hiding, so I only had a small batt handy. Second, I needed to do some quick felting for the blog today. The sample fit the bill perfectly.

This is a Swiss Mountain batt. I got it off Etsy a few years ago.

I decided 10 inches by 10 inches is a good size for a sample and makes shrinkage easy to calculate. Please excuse my dirty-looking table; it’s some sort of glue that won’t come off.

The edges a thin, so I folded them down to make it square.

I added a layer going up and down.

Once it was wet down, I folded the thin edge top and bottom to square it to 10 inches. That would have been enough to make a sample, but it would also be very boring.

I got out some balls of my handspun and made a spiral. Who doesn’t like a spiral?

I spent longer than normal rubbing so the yarn would stick without moving too much. My impatience usually results in wobbly lines.

Then, of course, lots of rolling to full it properly.

The finished sample ended up just about  7 by 7 inches

It ended up fairly sturdy. The spiral ended up holding its shape very well. However, it is quite hairy and I think it would be a bit prickly to sit on with thin pants or a dress. Once it is dry, I will try shaving it, but I don’t think it will work. There will still be short, strong fibres on the surface. I may have to try some Blue-faced Leicester or maybe some Corriedale. What’s your favourite strong wool for sturdy applications?

I Need a Seat Cushion.

I Need a Seat Cushion.

Last time, at the end of my post, I said my next project needs to be a seat cushion. I have a plastic roller chair for my studio. It is pretty comfortable as these chairs go. However, after spending a long time in it, taking pictures for the book resist workshop, I decided it needs some padding.

I thought about just felting a thick piece of felt, but I don’t think it is that easy to get really thick felt.   But what about 2 flat pieces? Then sew it together with some wool stuffed between. That would mean I have to find the one bobbin I have for my sewing machine ( after uncovering the machine). Then I thought, just do it over a resist. Then it’s twice as thick, and I can still stuff it with some wool. I would need to wash some wool for stuffing, but I could do that.

I think the resist is the best one. Have you made felt seat pads or cushions?

I can calculate shrinkage easily enough. I know it means I have to make a sample. I am always advising others to make samples; I guess I should listen to myself and not skip it.  I have some Swiss Mountain Sheep batts that should work well for a cushion.

I need to design a picture or motif for the top of the cushion, or maybe both sides. I don’t want a boring cushion. I am thinking that on one side, I could use the wet wool outline technique I learned from Ildie here on the blog/ I could probably do my farm logo. Here is one of Ildie’s posts https://feltingandfiberstudio.com/2022/08/22/modern-art-wallhanging/. I did a mirror cover for my car in this style.

After shaving

My logo and farm name are not that exciting, so I will need to do something more interesting on the other side.

Maybe a mountain scene on the other side? But in real or bold colours, subtle or bold lines. I can’t make up my mind.

Maybe a bigger version of this Monet-inspired fish pond I did.

I have been working on the online Book Resist workshop. I have all the pictures taken and edited. I added them to the instructions, and now I need to fiddle with the layout.  I do have someone taking a look at it to find the glaring mistakes. After a while, it sort of all blurs together. In-person workshops are so much easier. I had planned the workshop as a 3-part workshop. Each part is self-contained, so I will do the first part as a workshop this fall and get the other two parts done for the spring, and then expand it.

Registration Open for Felt Hats and Felt Bags Online Classes

Registration Open for Felt Hats and Felt Bags Online Classes

Teri’s online classes are open for registration today. The classes will begin on July 17. Teri teaches two great classes, one on how to felt concertina style hats and the other one on how to create felt bags. Both of these classes will teach you methods of improving your felting techniques so if you have felted around a resist before such as to make a felt pod, you should consider taking the next step on your felting journey.

For more information and to register for the felt hat class, click here. 

Have you taken a look at other student’s hats that have taken Teri’s class? There are some really fun hats and the variations are quite creative. Take a look at the student hat gallery here.

Teri’s felt bag class is an excellent way to learn how to create a variety of shapes of bags, as well as features such as straps, multiple compartments and pockets. You can find more information and register here.

And the student gallery for felted bags is here.

So what are you waiting for? Jump in and learn some new felting techniques.

Or if you’re just starting out and want to learn the basics, try our Wet Felting for Beginners class. This class can be taken at any time with unlimited access. For more information and registration, click here. 

Experimenting with household/garden stuff …… and fibre!

Experimenting with household/garden stuff …… and fibre!

I think I might have had too much time on my hands a while ago. As we say here ‘What’s seldom is wonderful!’ So I got a little curious about some things. Fibre of course had to be involved.

We don’t drink coffee in our house – my husband was never a fan and I found myself to be allergic to it after going cold turkey in China back in the 80s. I do love the coffee aroma and I can be sometimes found near one of our oldest coffee houses in Dublin, Bewleys, just sniffing the air.  At this point, I really have to post a link to their rather famous cafe in the heart of Dublin.  It’s a haunt of mine, even though I can’t drink it.  It is worth calling in to if you are on vacation (the food is amazing).  There can be queues so it is worth going early.  Besides the food, the original works of art are breath taking.  https://bewleysgraftonstreet.com/

What has this got to do with my post – absolutely nothing – but I just had to share so you have a special spot to add to your itinerary when you visit Dublin, Ireland.

But, I digress. We drink a lot of tea in the house and while I like lots of different flavours, I tend to consume mostly an Irish brand, Barrys. It, along with an Irish brand of crisps (potato chips) called Tayto are two products most requested when visiting ex-pats. We use tea bags rather than leaf tea and we compost the remainder as the bags are now biodegradable.

My first thought during this time of being busy doing nothing was, would the tea bags (without the tea) felt into merino fibre. Before I could experiment I had to empty the tea bags and wash and dry them. I have to admit this was not a favourite job. The smell of the used bags assaulted my nostrils, so I worked quickly (every cloud, silver lining and all that!). Once dry I divided the bags into two groups and I made marks on one group with what I thought was alcohol based walnut ink and let it dry. Then I went to work laying down the ‘marked’ tea bags and adding 10g of merino fibre on top (4 layers) I finished off with the unmarked tea bags, layering them so that I could see how thick it could make them before the fibre would stop permeating them.

It was a successful experiment. The bags fully felted into the fibre and the sample shrank by 45%. The marks, however disappeared, so I will add them again. It turns out the ink was acrylic – note to self: next time, read the label before buying!   

I do like the textural finish on this piece and it is good to see that something as mundane and ordinary as a used tea bag can yield a successful result.  Here’s a very quick peak at the bags and outcome:

Marking on teabags with ink

Felted sample plain tea bag up

Felted sample mark side up – lots of the marks washed out

Recently, I’ve been doing a bit of reading up on the science behind making felt. What we usually do is add soap to water, in my own case, I use olive oil soap which has a pH of 8. The paper I read maintained that wool fibre would felt once the pH value was moved from neutral. This meant that I should be able to felt a sample by adding an acid solution to the fibre. I was keen to try it to see what would happen.

First of all, I rinsed off all my equipment, my water bowl, ball brause, bubble wrap and fulling cloth to make sure there was no soapy residue around. Then I laid out my sample (4 layers). I checked the pH of the water, which was neutral. I then added a quarter cup of vinegar to my water and checked the pH value which was now 4. The water was tepid. I wet out the sample. The first thing I noticed was that the water did not soak into the fibre as it usually does when soap is added and it took a lot more water and pushing on the fibres to encourage them to soak up the water. When I turned the sample over, there were still dry patches so even more water was needed! That (plus the smell) were the only differences I noticed. It felted easily and shrank down 47%. When it came to fulling the sample, I heated up the water/vinegar solution in the microwave. One advantage of using the acid solution is that the ‘water’ could be used for the next project. That said, I reckon it could be very hard on the hands if this was my main way of making felt. So I am going to decant it into a spray bottle and use it to clean windows, no waste!

We have a beautiful Norweigan Spruce tree growing in our front garden.  I like to refer to it as the gift that keeps on giving because it constantly suprises us.  For example, last year, while I was mindlessly staring into the garden, it launched a pollen bomb.  For those of us (this included myself up to this  point) unfamiliar with the term, the tree released it pollen all in one go.  So the whole tree was suddenly surrounded by a yellow haze.  In an instant, the haze lifted into the sky and was carried off in the wind.  It was truly spectacular.  I have lots of allergies and pollen would be one of my nemesis but I would put up with the discomfort to see this again.  Here’s a short Youtube video on the topic.  Our tree did it on its own while this one was shook but you will get the picture https://www.youtube.com/watch?v=rh2Da8Ms45M

Anyway, back to my story.  I found I had lots of fallen pine cones at the base of the tree so I gathered only some of them and put them on to boil in my dyepot.  The house was filled with a gorgeous pine scent during this process. Once I had extracted the dye from the cones, I filtered the mix through some muslin to remove the resin. The colour was absolutely stunning – a jewel red. I used it for four experiments; first of all, I extracted a litre of the liquid to make a pigment, then I used the remainder of the dyebath to dye some fibres (unfortunately I do not have a photo of the results and they are now added to my mountain of experiments (unlabelled – what was I thinking!). Experiment number three involved adding some of the leftover dye bath to citric acid to make a pigment. In the last experiment I left the liquid alone and just added the alum and soda crystals to separate the dye from the liquid base. Once separated, I filtered the liquid out of the pigment, then dried and ground all the results. So, I ended up with three different pigments and some dyed fibre experiments. I have inclluded a photo of the pigment made last summer and the result of the latest experiment in winter. There is quite a difference in the colour as you will see from the slide slow:

There’s a back story to the last project. We have a number of fruit trees in our garden. Unfortunately we lost one of our plum trees last year. This was despite our eldest son’s (naturally green fingered which he inherited from paternal grandmother having skipped a generation) efforts to save it. Finally, there was no other option but to fell it. He also decided to remove the roots which was a big job as the tree had been there a number of years. It became the focus for my last household and garden project. I wanted to find out if the dye from plum tree bark differs from the dye from plum tree root. To find out, I decided to peel some of the bark off one of the branches. I did the same with the outer cover of the root. I soaked these in different containers for up to a week. Now, here’s what I found interesting. Whereas I needed to heat the pine cone liquid to extract the dye in my previous project, this was not needed for the bark/root projects; the dye naturally extracted sitting in its vessel and the high tannin level meant that all I needed to do was soak my fibres and fabric. It was like magic! I wanted to use the dye in some small vessels I made for the 10g challenge I spoke about in my last post. Then, I took what remained in the dye pot and made pigment from it. I found it interesting that the result from the plum bark dye yielded a lighter colour dye but a richer pigment – the root was the opposite. The fabric/fibre experiment produced is a lovely rich golden hue on the different surfaces. Also, it turned out to be another gift that kept on giving as each time I used up all the dye, I added more water to the two mixes and it kept extracting dye – I could not even notice if the dye was weaker in the second round than it was in the first. In the end I composted the bark and roots as I needed to move on with life (I got busy again!)

Here’s a quick run through in photos:

Do you use household or garden items in your textile practice? Have they ever surprised you? I would love to hear about your experiences.

Helene x

Paper Layering Experiment

Paper Layering Experiment

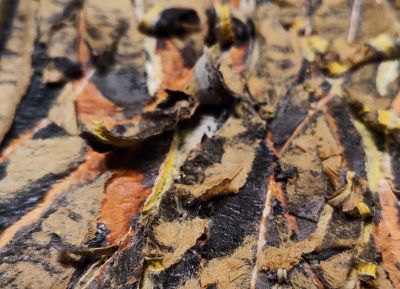
My local group had another “play” day and we created some layered paper experiments. We got the idea from this video.  I immediately thought it would give a good texture for representing bark and we decided to give it a try.

Layers of different colors of paper and string glued together with matte medium.

It’s a really easy process. Start with a background paper and then add layers of string and thin paper with matte medium glueing them together. By using different values and colors of paper, you can get an interesting look. We used painted tissue paper that we already had in our stash.

You can put as many layers as you would like but remember to leave the strings coming out the edges so that you can pull them once everything is dry. You also need to try and figure out what strings are the top layers and pull each layer of your strings as you work down. Use different thicknesses of string and thread and it gives different looks once the strings are pulled out.

Layers of different colors of paper and string glued together with matte medium.

Here’s one of mine when it was finished and drying.

Layers of different colors of paper and string glued together with matte medium.

And here are both of mine once dried completely. It took about 24 hours to dry completely.

Layers of different colors of paper and string glued together with matte medium.

Then you gently tear the strings out or rip them out. It helps to hold the paper around the string as you go so you don’t pull off too much paper. But you can’t really control what tears so it is very organic looking when you’re finished.

Layered torn paper complete

Here’s one of the results that Louise achieved.

Paula was very productive and took her photos with a matte around the pieces.

Here are my two pieces. I left the curly bits and they are quite textured.

Layered torn paper complete

You can see how textured with this close up angled photo. This was a fun process and gave interesting results. Now I have a few more pieces to add to my book.

Edge Exhibition

Edge Exhibition

I live in a coastal town in SE England called Whitstable. As a member of a group called Made in Whitstable (a loose affiliation of local artists & makers) we had a group exhibition coming up with the title of “EDGE” at The Horsebridge – our wonderful local community arts centre. We needed to produce at least one item that fit the Edge brief, however we wanted to interpret it. The rest of our work was entirely up to us. 

I could have got away with explaining that practically everything in my wet-felted pictures happens at the water’s edge, and it therefore met the brief. But I was actually quite excited to think through some new and different work. I particularly like working 3D and it feels like a while since I’ve felt really energised by the creative process. So, I thought about what ‘edge’ might mean and I ended up making 3 different interpretations.

Edge 1

For my first piece I pondered the edge of the felt as a focus of a picture. 

I decided on a flat background with strips of felt jutting out to show their edges. I’ve made things like this using multiple resists to create flaps that then stand out. I wondered if I could pre-felt some strips before attaching, rather than creating flaps with resists in the lay-out stage. 

I selected some home-dyed Corriedale wool I had left over from an old project. Just as I’d decided to use this I noticed how well the colours went with a second-hand silk scarf I’d just bought so I decided to use some of that too. 

Home-dyed Corriedale wool and charity shop silk scarf

After I’d laid it out, leaving a fluffy edge to help attach it to the background, I realised I’d made it far too wide. “Oh well”, I thought, “I’ll cut it into strips once it’s prefelted”. I’d intended this to be a test for a more thought-through piece.

I decided to stick with what I’d done and move on to something else: I never made the more thought-through piece.

Edge 2

For my second piece I started to think about the outside edges of a shape. I decided I’d try using a book resist to make a vessel with a large surface area. 

I scanned the internet for book resist ideas that didn’t have too many ‘pages’. I alighted on an article Gladys Paulus (a felting hero of mine) had written for DHG comparing bergschaf and merino wools in which she included a 3 page book resist.

https://dhgshop.it/blog/article-compares-carded-wool-bergschaf-and-merino_88.php

I decided I’d use a similar shape using black and white wool but would cut and shape it differently from Gladys’s. 

I wanted to use carded batts as they’re much easier to lay out than tops / rovings when navigating complex shapes.  I had a good supply of white Norwegian wool batts but was struggling to lay my hands on anything appropriate in black.  I found a black merino batt and decided to go with that, though I wasn’t sure how the wools would interact, with the Norwegian being much more coarse than the merino.

Book resist
Starting to full the shape

The Norwegian wool was slow to felt and the black merino didn’t come through as much as I’d imagined. Interesting, if not surprising.  Eventually I ended up with something that looked decidedly anatomical: three lungs was the most polite thing I could think of.  I got a lot of comments about the anatomical possibilities of this one!

The vessel is an odd shape so I decided to embrace its oddness and bought some curved screw-in metal studs to add to the top of each segment. Given the brief was ‘edge’, I thought these would add a little extra edginess.

Edge 3

And, finally, I created a vessel using a circular resist that I would stand on its edge.  I’d recently bought a carded merino and silk (70% : 30%) batt from World of Wool that I was dying to use – it is deliciously soft and scrumptious to feel.

I laid out the first layer clockwise around the resist, and the second in circles radiating from the centre. 

Having wetted the fibre out, I turned it tightly over the resist then set about laying out another two fine layers in the same pattern.  Or at least, that’s what I intended. Looking back, I think I got distracted and may have only laid out two layers on one side, as the reverse side feels decidedly thin and soft, despite long and patient fulling.  Distracted? When I’m making something I’m finding fun, I tend to add lots of “what if”s and “how about”s instead of sticking to my original plan. See the ‘ooh, shall I add some silk’ for Edge 1.  On this occasion my “how about”s included a stripe of mohair tops, a dark circle cut from Edge 2’s offcuts (one on each side) and a strip of curly locks.  Fun, but not very scientific.

Adding ‘stuff’

Anyhoo, here’s Edge 3.  It does feel lovely and is very light but I wish I’d paid more attention to the layout.  I’m tempted to make something similar with a 6 layer layout.

In the meantime, here’s my exhibition space. I was pleased with the results and had very much enjoyed making three experimental pieces. 

Before I leave you, I thought I’d show you a natural phenomenon I saw while I was making my edge pieces. Being lucky enough to live by the coast, I often have a speed walk in the morning by way of exercise and enjoyment. It was a clear and sunny early morning when I noticed some mist rolling in. I saw a puzzling white arc in the sky – sort of like a rainbow except it wasn’t raining. I decided it might be a ‘mistbow’ and looked it up when I got home. Turns out it’s called a ‘fogbow’. It’s unusual as you have to have very specific conditions: enough mist or fog to reflect the sunlight but a low sun behind you which isn’t obscured by the mist / fog. The water droplets in mist are very small so don’t refract the light like raindrops do, they just reflect it. It’s also called a ghost rainbow. I saw this photo while I was uploading the images for this post and thought you might be interested. I’d never even heard of such a thing but I found it really lovely.

This Weeks Felting

This Weeks Felting


This week, I managed to make a few small felt pieces.  My husband has been asking me to make some more handle covers for his cast-iron pans.


Second. I have a wrap for my travel mug.  I don’t really like the feel of the metal of the mug, especially in the cold. I have several travel mugs, but only one cover.   I have been using the same one for about 10 years. It still looks good, but I thought I should have more than one. I wanted it to be a little longer and wider than the one I’m using at the moment. The one I have now is purple and blue. This one has a green background. The colour is shartruse, I think. The curls are Blue Faced Leicester.

Then I flipped it over and folded the edges in neatly.

This is the finished piece. It still needs a couple of buttons and some elastic to hold it on.

sheep curls felted int the green back ground A close-up of the curls.

close up of curls on green background

Lastly, I finished the strange-looking book resist. This was round one. At the time, I thought it was stiff enough, so I went ahead and rinsed it out and added lots of clothespins so it would dry correctly.

green 5 pointed 3d sat shape with clothespins outside of same piece with clothespins

After opening it up, I was not thrilled with it. It opened wide. I thought maybe ironing it would help. I was showing it in a Zoom chat, and Karen asked if it was completely fulled. My first thought was yes, it was stiff, but as I played with it, it got softer and softer. So I wet it down and kept working it while watching a cosy mystery.  It shrank more and is much sturdier. I needed a lot fewer clothespins. So I rounded the bottom of the arms.

same piece fulled again with clothespins . much stiffer

This is after it was dry. It doesn’t stand on its own. I will need to flatten the bottom or make a little holder, if I want it to stand like this.

same piece, dry without clothspins

Next, I thought I would try partially turning it inside out. I think I like it better this way.

same piece semi inverted, top shot same piece, semi inverted, bottom shot

One not felt thing. Spring is here, Lambing has started.

This little lamb was born on May 2. he will end up cream coloured. You can see the true colour past the dark tips.

wooly sheep and lamb


Learning and Experimentation with Online Classes

Learning and Experimentation with Online Classes

Have you wanted to be a little more experimental in your fiber art practice? Do you want to learn new techniques and add embellishments to felt or other fabric? Why not try an online class all about embellishing felt? Anyone from anywhere in the world can take these courses, no need to show up at a certain time (you can even wear your pajamas) and the classes are 6 weeks long so you have plenty of time to learn a new technique and try out an experimental approach. My online courses are 4 stand alone classes under the title Embellishing Felt with Surface Design Techniques – A Mixed Media Approach.  You can take just one or work through all of them. The classes are only $45 US for 4 weeks of video and written PDF’s plus 2 weeks extra time on the class website with full instructor support. Registration is now open and the class begins on May 16, 2025.

The first module is called Nuno Felting with Paper Fabric Lamination. The bark I created above used this technique.

You will learn the technique of Paper Fabric Lamination and then how to use these pieces in nuno felting. As you can see from the examples above, there are many possibilities with this technique. Click here for more information and to register for the class.

The second module is Experimental Screen Printing on Felt.

You will also be able to use these techniques to screen print fabric such as silk to use in nuno felting. These same techniques can also be used on cotton fabric to use in fabric collage or quilting.

You will learn how to create thickened dye, make your own screens and many ways to use these screens in an experimental approach. Click here for more information about Screen Printing and to register for this class. 

The third module in Embellishing Felt with Surface Design Techniques – A Mixed Media Approach is Printing, Stenciling, and Playing with Thickened Dye on Felt.

This one is really fun and experimental. Learn to make stamps, stencils and how to use a variety of objects from around the house to create your own unique surface design on felt. Develop your own style with designs you have created.

The techniques you learn in this class can be used for felt, other fabric types and even paper. The stamps and stencils can be re-used over and over and applied in different ways to create exciting patterns. Click here for more information about Print, Stencil, and Play with Thickened Dye on Felt and to register for the class.

The last module in the series is Free Motion Machine Stitching on Felt.

In this course, you will learn the basics of free motion machine stitching and how to use this specifically on felted projects. Does the thought of machine stitching seem a bit scary? If so, you should take this course to get a handle on how to use your sewing machine to create wonderful embellishments on felt paintings or other felted items.

We’ll start with how to set up the machine and some great practice techniques that will build your skill level until you feel comfortable with your machine. Then you’ll learn about machine lace, thread sketching and how to incorporate machine stitching into felt paintings. Click here for more about Free Motion Machine Stitching on Felt and to register for the class.

I hope you want to expand your fiber art skills. If so, click on any of the links above to read more about the classes, see the supply lists and to register. I look forward to “seeing” you in class!

And don’t forget, if you are a beginner, our online class Wet Felting for Beginners is always available.

This class teaches you all about wet felting. You’ll learn how to make a piece of felt, how shrinkage works and how to calculate it and the basics of felting, fulling and creating felt from wool fiber. Click here for more information and to sign up.