Browsed by
Category: Experiments

Making a Shell

Making a Shell

After seeing Helene use some prefelt ribbon, I decided to give it a try too. I am thinking of differential shrinkage to get the shape of a shell.  I thought it might work well with a spider conch shell to make the ridges.

I got my ribbon from the Olive Sparrow in Toronto. She doesn’t have it on her Etsy, but if you contact her, she has it. You can, of course, make prefelt and cut strips. But this is a fast and easy way to get going.

I made a 2-part resist so there would be an overlap on one side.

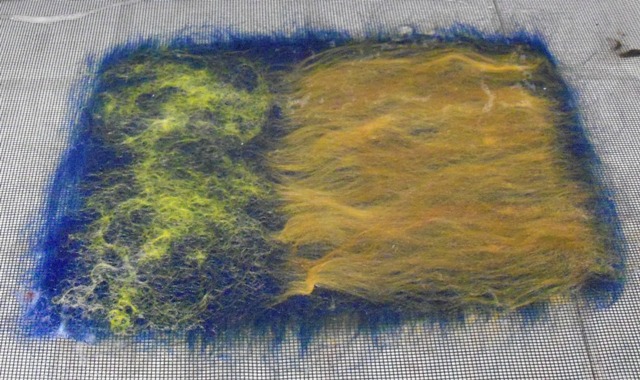
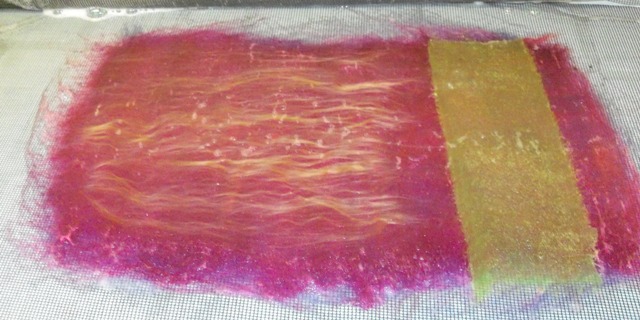
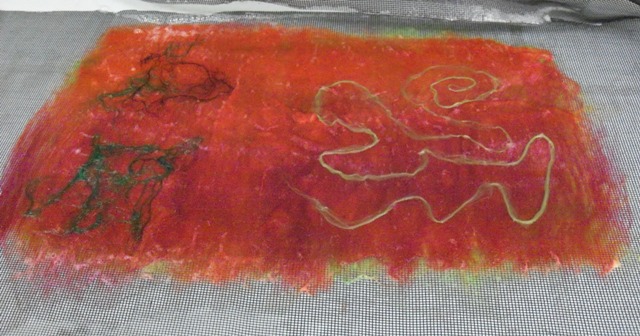
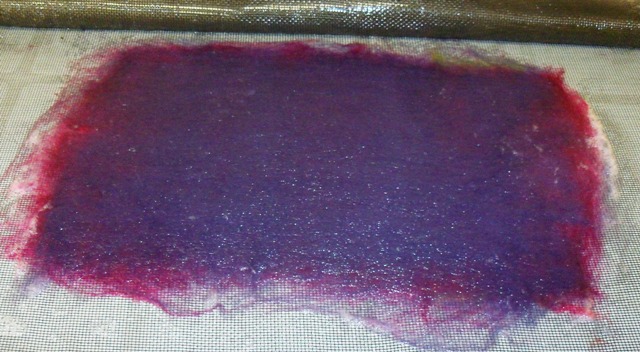
I made the inside pink, then added strips of the prefelt ribbon.

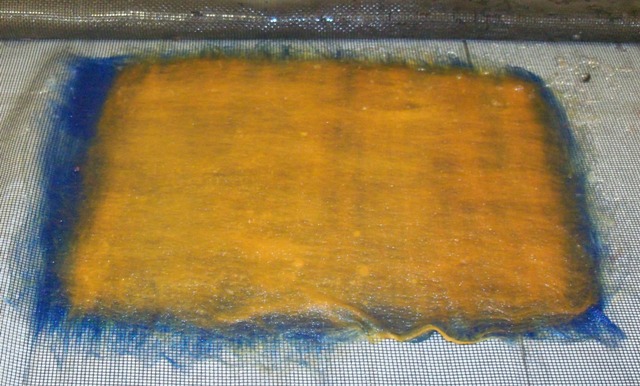
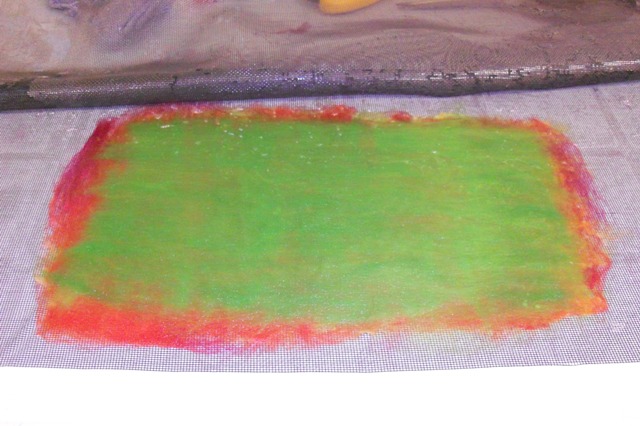
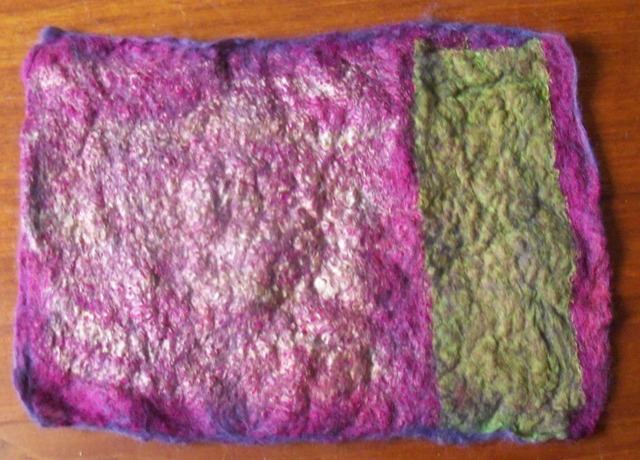
I added some blue for the outside. Sorry for the really bad picture.

Then of course the was lots of rubbing. I am using a rubbing tool from Moose Hill. It has a nice weight, not too heavy like others I have tried. I like to start gently.  It does have a nice, wide handle, so it’s easy to hold and press down when that is what you want. Jan used my phone to take many of these pictures for me. She took about a dozen of this one, complaining that I was not smiling. Seems I do not smile when I am working.

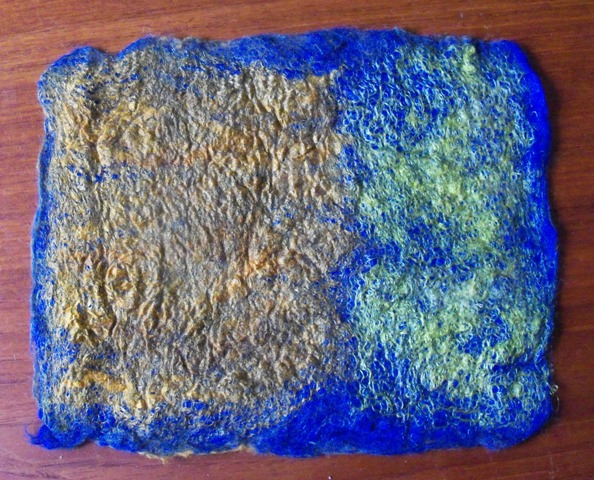
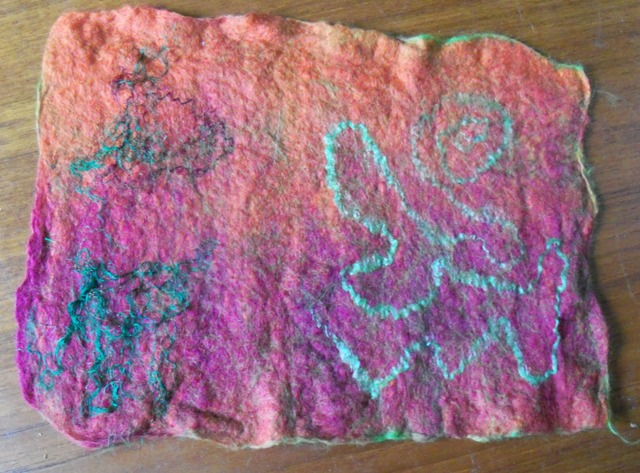
Once it had shrunk a little, I cut out the resist and removed the non-spined side of the extra resist. If I left it, I think there would have been too much to curl inside for the middle of the shell. Then of course, fulling and shaping.

It wasn’t long into the fulling when I knew I had not used enough prefelt to get the differential shrinkage I wanted. I suppose I should have known better. But often that’s the way. You need to be reminded of what you already know.

Still, it didn’t turn out so bad

When I got home, I fulled the ridges in some and then clipped it all into shape to dry. As you can see, this made the base of the folded part pointy, and that remained after I took the clips off and let it spread out.

I wet just that part and fulled it back to round in a very short time. I had been anticipating a fight with it.  I had tried to shrink this part more before clipping it with no success. This just reminded me of how, sometimes,  it is easy to get more shrinkage after it has rested or dried and is rewet. I have no idea why that works, but it does.

After it was dry again, I was not happy with how the top with the points wanted to curl around instead of standing out, so I put a couple of invisible stitches at each end to hold it in position.

And finished. I like the finished shell, even if it didn’t go the way I planned.

I may give it another try over the summer, but as spring slowly arrives here( we had a little snow again the other day), I find I have lots of ideas and more energy to do things. I have things to make for the guild sale in the fall.

Test Felting New Materials

Test Felting New Materials

My wonderful local arts centre (The Horsebridge Community Arts Centre in Whitstable) has an art bank.  People donate all sorts of lovely (and sometimes slightly odd) materials. Anyone can visit the art bank room, select things they’d like, then pay what they can.

I often have joint exhibitions in the arts centre’s galleries and do some volunteering for them too (mostly bar work). They work very hard to raise funds to keep the centre going and supporting the community. I live nearby so frequently pop into the art bank to see what’s there, and I sometimes walk away with a little challenge for myself. I’m going to talk today about felt testing two materials that are new to me: silk carrier rods and fine metal mesh.

A few months ago, I was unable to resist some beautifully dyed silk carrier rods. I enjoyed separating and sorting them; they reminded me of fish.

They got bagged up and filed in the ‘to do sometime’ section of my brain.

A couple of weeks ago, their time had come. If you’re not familiar with silk carrier rods, they’re a waste product of silk production. When silk is removed from silk cocoons, it is reeled onto a machine. Some of the silk thread and gum gets caught on the winding rods and has to be cut away. They resultant silk carrier ‘rods’ are quite thick and stiff with sericin gum.  You can peel each one into layers.  You can also stretch them length-ways to thin them out, but they don’t have any appreciable movement across the width of the rod. I suppose it’s because that’s the direction the individual silk threads lie and silk thread is strong.

I checked the internet for felting with silk carrier rods and although there were some images, it wasn’t clear to me how thin the rods that had successfully been felted were. I’d peeled mine as much as I was able but I didn’t want to stretch them out too far along the length as I wanted to keep as much of the shine and colour of the silk as possible.

I’d like to felt a school of fish shooting up through the ocean so decided I’d better make a small test picture to see how the carrier rods felted.

I selected a lovely red / yellow / green rod layer and trimmed it slightly to create a fish shape.

 Here it is with a non-trimmed layer for comparison

 I laid out 2 layers of merino to look sort of ‘watery’, placed the trimmed shape more or less in the middle and popped on a small eye using tiny bits of wet & rolled dark grey and white wool.

The felting went pretty well, though I started to worry that they eye wouldn’t attach so gave it a few stabs with a felting needle before I started the fulling.

Here it is after felting, still wet, with the other piece of silk for comparison.


You can see it has shrunk a lot along the length but only a small amount across the width, which is what I’d expected

And here it is dry.

So, what did I learn from my sample?

I’d soaked the silk briefly in water before I used it to see if it was dye-fast.  It was.  I also thought the water might soften it a bit, though I don’t actually know if this made any difference as I didn’t try felting with an un-soaked piece (good job I’m not a scientist).

I deliberately only pulled it out a little lengthways so I was running the risk of it not felting in well.  I also didn’t trap the silk with fine wool fibres: the idea was to try it and adapt if necessary for a future picture. The fish is fairly secure – I couldn’t easily pull it off – but I’d say it’s not fully integrated in the felt. There’s some movement if you rub it, especially in the central body section.  It feels like it’s partially sitting on the surface. The tail is the most integrated part; I probably pulled that bit out the furthest.

It’s probably OK for a picture but I wouldn’t want to subject it to a lot of wear and tear. Ideally it should be felted in more firmly.

Things to consider for a future picture.

  • Soak for longer
  • Stretch out more
  • Add some fine strands of wool to trap it across the fish
  • Scuff up the under-side slightly
  • Put some light clouds of wool in similar colours to fish behind it (poss in addition to scuffing up the back)
  • Trap it with wool strands round the edges

I may not do all of these but would probably do some and almost certainly stretch it out more.

I’m also not keen on the eye: it’s a bit cartoonish & feels like it should be slightly higher up on its head. Maybe next time I will bead the eye on at the end, or use grey wool instead of white. I’m not sure if I will ever make the school of fish, but I’m satisfied that the sample did its job.

My second test piece is a very small one.  I recently saw in the art bank some tubes of fine metal mesh and, as I often do, wondered if I could felt them.


The mesh is in different coloured tubular strips: I think they are intended for jewellery making.  You could put some beads inside the mesh tubes and place other, perhaps smaller, beads between them, on the outside of the mesh.

I like the idea of having the mesh on the outside of some felt, perhaps to make a seed head. You can see the mesh can be stretched out.

Again, a sample seemed like a good idea. I made it quite small, just to see if and how it felted. I didn’t want to waste too much.

I cut a small square each of merino prefelt and metal mesh, approximately 6 x 6 cm (or 2.36 inches)


Although it doesn’t look like it in this photo, the mesh is light blue.

And here it is when felted & dry.

Conclusions? It felted very securely: the metal mesh is well embedded into the felt. I managed to get 1/3 shrinkage. I tried for a while but it just wouldn’t shrink more. Perhaps I need a larger sample to test this.  The mesh didn’t give the felt as much additional structure as I’d expected.  It does fold into a slight crease and it bends a little to hold a curve.  Again, I think I’d need a bigger sample to test these properly. On the other hand, it looks pretty and is quite sparkly.  Perhaps even a bit like fish scales?

For now I’m parking this experiment too.  One day I’ll think of a really good use for it.

I do wander around thinking about what would happen if I tried to felt different materials. It’s always pleasing to have a go and make a little sample. It doesn’t always behave as I expect – which is exactly the point of a sample – but the results get stored away in my imagination for the next time I need exactly that effect.

Let me know in the comments if you’ve tried felting with a new or unusual material and what happened.


3D Multi Part Resist Workshop Opens for Registration

3D Multi Part Resist Workshop Opens for Registration

Where did time go? It is almost spring. The 3D musti-part resist (book resist) workshop opens for registration today. A Masterclass on Book Resists. You can sign up using this form on the workshops page: 3d-multi-part-resist

The class runs from March 1st to March 29 2026. The instructor is available multiple times a day to answer any questions and give advice, so you can take the workshop from anywhere in the world.

This class is for people who have done some basic felting and used a simple resist and want to try something more challenging, learn some new skills and have some fun with them.

Here are some pictures from the last class.

There is a full class description and registration form here: 3d multi part resist


A Few Oddments

A Few Oddments

On looking through my file of possible posts I have found that there are several subjects on the list about which I don’t have a lot to say, so I thought I’d put them all together.

First, my work basket.  You may recall that I told you about the craft basket makeovers that I had done some years ago https://feltingandfiberstudio.com/2023/06/12/craft-basket-makeovers-part-1/  After we moved to Dorset I acquired a marketing basket, can’t remember where from now but at the time it was “in” to be seen wandering around the shops with a basket on your arm.  I didn’t use it for that for long though as I was worried about my purse sitting on top of shopping and being a bit of a temptation.  So I decided that I’d turn the shopping basket into a work basket.  At that time I hadn’t been introduced to felt, I was still spinning, crocheting, tatting, sewing and embroidering so a market basket would be ideal for that.

I used some more of the fabric remnants which I had bought from the same shop in Maidstone where I’d got those which I’d used for the spinning baskets.  I lined the basket, having attached some internal pockets to the lining and made a padded/quilted lid.  That was fixed at one end of the lining and a covered button and loop held it closed at the other end.  I had found a miniature washing basket at a charity shop and I turned that into a pin cushion and I made a small pouch to hold small accessories like cotton reels.  That was fixed to the side of the basket lining with a snap fastener.

The basket got quite a bit of use, as you can probably see from the state of the lining.  One drawback I’ve found to sewing the lining to the basket is that it makes laundering it a bit difficult!

One of the first projects I undertook once I had learned to needle felt was a challenge from a company which used to supply packs of mixed yarns – at least I think it was from them though it might have been a Guild challenge.  It was back in 2002 and as I did not make any notes that I can find, I’m not entirely sure.  I seem to have taken some progress images as I have found lots of these though unfortunately they are not of particularly good quality.

What I do remember is that I had decided that I would make a miniature of a herb knot garden but |’m afraid that my memory of how I found/chose the design is now so hazy that I can’t be precise. I do remember that when I learned to needle felt our teacher gave us pieces of old woollen blanket on which to draw a design that we could fill in with needle felted fibres.  The idea was that we could then wash the work and it would become permanent.  I have amongst the progress pictures images of the design as drawn on a piece of blanket and of the lines becoming “box hedges” and the spaces being filled with “flowers”.  I can also see from the last couple of pictures that I added a “topiary tree” in each corner.

A couple of years later, I acquired a quantity of (I think) Jacob fleece which had been carded all together so that what I had was a sort of grey mixture.  I didn’t really want to spin it as I think I had been duped into buying a bag of really rough fibres.  At about that time I had become interested in stone carvings – gargoyles (water spouts), grotesques, and  heraldic beasts – particularly the Queen’s Beasts which are statues on display at Kew Gardens.  Anyway, I decided that I’d have a go at needle felting some gargoyles using the grotty grey Jacob.  No progress pictures I’m afraid, just finished pieces mounted on fabric covered card or canvas blocks.

Finally  you may remember that Ann M told us about some sheepy key rings that she had made.  https://feltingandfiberstudio.com/2025/06/13/sheep-key-chain/ These looked so good that I’m afraid I stole her idea.  I told you back in December 2024 about the Norwegian Gnomes that I made at our local Museum Shop, for sale there. https://feltingandfiberstudio.com/?s=The+Museum+at+Christmas

Ann’s idea made me think that some miniature gnomes impaled on the metal “spike” could look good as bag charm gnomes to sell in the Museum shop.  I had to change the description from key chains to bag charms because the gnomes were a bit too fragile to sit inside someone’s bag/purse, but should look good dangling on the outside.  Here are photos of the “shaft” on which the gnomes are made, and a few of the gnomes.


Experimenting with Watercolor Landscape Techniques on Silk and Wool

Experimenting with Watercolor Landscape Techniques on Silk and Wool

I recently wrote about using watercolors to create abstract landscapes. My purpose was to try the technique on paper and then try to translate it to silk and nuno felt. I experimented with a variety of small samples, the largest being 10″ x 13″.

My first attempt, I soaked 3mm silk in soda ash solution and placed it on white paper. I then mixed up a paste of fiber reactive dye with a bit of water and used a palette knife to apply the dye paste to the wet silk. I used dye colors pewter and daffodil. I added water with a spray bottle and with a paint brush. The photo above on the left shows the silk drying on the paper backing. The photo on the right shows the paper underneath after drying.

The picture on the left shows the silk after rinsing and the silk after nuno felting with fine white merino. It still is a landscape but I lost so much of the lovely green color. I love the paper that was underneath but the end result is a bit disappointing. I will be still using all these samples and adding further dye, paint or stitch so don’t worry, they will be improved. And I will see what other surface design techniques will give the end result I want. But I forged on trying to get a better result from the beginning.

The next step was to try painting the dye with the silk laid out on plastic. I covered my print board with plastic and laid wet silk soaked in soda ash on top. I used the same application with a palette knife and adding water as needed to spread the dye. The photo on the left is after applying the dry. The center photo is after the dye has dryed in the silk and the right photo is after nuno felting. This was a bit better and I can see the landscape in this result. I kept track of my results by taking photos, pasting them in my sketchbook and writing out the process for each piece. I also kept a running list of “what ifs” and further ideas to try.

Experiment number three was to nuno felt the silk first. The left photo shows the white nuno felt (a bad photo), the middle is after applying the dye and the left is after rinsing. The dye does not move very easily on the felted silk compared to plain silk. Therefore, the dye doesn’t spread as much. This is still using fiber reactive dye, so I asked myself “What about acid dye since now I have added wool to the equation?”

I think you can tell from looking at the results from left to right, there is some improvement in keeping the color in the end result.

I got a little off track here as I next decided to try felting some paper and see how that worked. I used small pieces of Kitakata handmade paper that I already had on hand. The photo on the left shows the felted paper. I got in a hurry and the paper didn’t felt in as well as I would have liked. But I decided since these are mainly samples, it didn’t matter. Forge ahead! I soaked the nuno felted paper in soda ash and then added fiber reactive dye for the landscape. I continued to use the palette knife method of dye application. The photo on the right shows the piece after rinsing and drying. My next thought was “What if I used the nuno felted paper but painted it with watercolor and didn’t rinse it out?”

I nuno felted more paper on to the merino and added the watercolor paint with the palette knife. I forgot to get a photo with the paint still wet. The photo on the right shows the dried result. The interesting thing with this one was that the water I applied above the horizon line (and none below) caused the water to seep into the dry paper moving most of the paint below the horizon line. Interesting end result though. Work upside down the next time?

3mm silk gauze pre-dyed with light blue for sky color.


In the middle of these experiments, I helped a friend with how to dye cotton fabric. She had not dyed before so we had a fun afternoon playing with dye. I had my pieces of silk ready for nuno felting and I thought I would dye some a very light blue for sky colors.

Silk that was light blue, painted on acid dyes and then steamed. Colors ran while steaming.

This next piece has the blue silk,  nuno felted first and then soaked in a vinegar solution to get ready for acid dyes. I applied the dyes as usual, forgot to take a photo and then steamed the piece to set the acid dye. The dye shifted all over the place and the end result looked nothing like the original application of dye. It still looks like a landscape, kept the color better but I didn’t want this much shifting of the dye.

So I tried a second one with blue sky silk and acid dyes. It’s not a good photo because of the glare but you get the idea of what it looked like after painting with dye. I picked it up, did not think to put it on a tray or flat surface and the dye came pouring out and the landscape was lost. I just rinsed the piece and you see on the right, that a slight amount of dye took without steaming. That gave a nice misty background that I decided would work for depth.

Landscape painted on nuno felt with watercolor paint.

I then added watercolor of Payne’s Gray and Quinacridone Gold Deep in the usual manner. I let the watercolors dry and didn’t rinse as this will be a wall hanging and will not be washed. This is getting a little closer to the outcome I want.

Next up was to treat the silk as if it was a silk painting. I stretched the silk over a wooden frame and used tacks to attach it to the frame. I then applied the dye with a palette knife and added water. The edges were a bit tricky as I didn’t have any gutta resist to keep the dye from spreading but again, it’s just a sample. Then I decided I could dry/heat the silk without removing it from the frame with my heat gun. Oops, I burned a hole in it. Perhaps next time, I will let it dry and then iron it. Or I could use silk paints and the proper resists. The right photo is the piece after nuno felting. Still looks like a landscape and I don’t mind the edges.

I still have quite a few ideas to tweak the process and I want to try adding more on top of the results I have shown here. I am having fun experimenting and perhaps one of these days, I will decide to make a bigger piece once I have an end result that works for me.

The Codification of Stitch

The Codification of Stitch

One of the UK’s major textile events, the Knitting and Stitching Show, is held annually in November in the Harrogate Convention Centre. It’s packed with “must have” products and showcases inspiring work by a wide variety of textile artists. Within the show there is a dedicated exhibition area called the Graduate Showcase, which highlights outstanding textile art from recent UK BA undergraduate courses. This initiative, run in partnership with the Embroiderers’ Guild, provides a platform for emerging talent in the textile art world and it was here last November that I first saw the work of Charlotte Farrant.
Charlotte hadn’t originally planned a career in textile design, in fact growing up she had formed a fascination for mechanics and saw herself becoming a mechanical engineer. At some point Charlotte discovered she also had a love of embroidery and enrolled in the Royal School of Needlework, graduating with a first class degree. 

Charlottes “Codification of Stitch” is an innovative coded embroidery system developed by the textile artist herself and it is used to form hidden messages within the garments she designs, transforming textiles into wearable narratives. Specific embroidery stitches represent letters, forming hidden messages amongst the exquisite, decorative Goldwork, Blackwork, Whitework and Raised Work.
 
It was her fabulous “coded” Ann Lister black coat that first caught my attention on her stand at the show. In 2025, in collaboration with the Anne Lister project, Charlotte designed a range of costumes re-imagining the BBC cast of Gentleman Jack and bringing them in to the 21st century.
 
I hadn’t heard of Ann Lister but I’m guessing plenty of you will have, especially if you’ve seen her life story as portrayed by Suranne Jones in the BBCs series Gentleman Jack. This woman was an ardent diarist and from 1896 to 1840 she wrote a five million word diary, approximately one sixth of which was written in code. She combined the Greek alphabet, zodiac, punctuation, and mathematical symbols allowing her to document, but also conceal, the most private aspects of her life. It’s fitting that this beautiful coat should also conceal its message which is a quote from Ann in August 1823. It reads “I am not made like any other I have seen, I dare believe myself to be different from any other who exist.”
Ann Lister Coat
 
Sampler for coat

Another “Ann Lister” inspired piece on Charlottes stand was a waistcoat inspired by the diarists love of nature and the coded message on this garment reads “We are not alive if we’re not taking the odd risk now and again.” 

Ann Lister Waistcoat
Detail of waistcoat

There was also a selection of beautiful intricately stitched, coded brooches on display, each with a printed label providing its deciphered message.

Check out Charlottes website charlottefarrantembroidery.com where you can see her portfolio of designs as well as her shop selling Coded embroidery kits, brooches and many other embroidered coded art works.

Throughout history textiles have been used not only for protection and comfort but also to communicate our personal values and identity. Long before the written word came in to use Ancient civilisations would use specific colours and symbols to convey their environment, spiritual believes and culture. In this way meaning could be woven, felted or stitched into rugs, blankets, clothing, etc. delivering visual messages that could be easily read by the people around them. Examples include the felted rugs created by ancient nomadic tribes which would embody powerful symbols across different cultures signifying the wish for good health, long life, prosperity, etc.

Examples of just a few of the Symbols used in Middle Eastern rug making.

On the other hand, hidden “coded” messages in textiles have been used for a very different, but very important role in history. While imprisoned Mary Queen of Scots embedded complex and personal symbols within her embroideries to express her frustrations, assert her claim to the English throne, and comment on her unjust captivity. This panel depicts a grapevine and a hand holding a pruning knife. It references Mary’s claim to the throne, suggesting the need to cut away the fruitless branch of the Tudor tree represented by the childless and ‘illegitimate’ Elizabeth. The point is driven home by the Latin motto ‘Virescit Vulnere Virtus’ (virtue flourishes by wounding). (source:vam.ac.uk)

Embroidery also enabled Mary to communicate with her supporters by sending coded messages hidden in her needlework. 

In the realm of espionage, traditional handicraft skills were to take on an even more covert dimension during the World Wars when prisoners, spies and resistance members used embroidery to pass on information under the noses of their enemies. After all, who would suspect that something as innocent as an embroidery or tapestry could offer any threat from the enemy? Morse code and binary code were easily represented using a combination of long and short stitches, or French knots and seed stitches, and these would go undetected when hidden amongst other decorative stitches. Other methods required the person receiving the work to “undo” the embroidery as messages were hidden in the padding of trapunto or concealed beneath a second layer of embroidery. 

Knitting was another innocent looking but very useful craft when it came to espionage. Morse Code knitters employed single purl stitches for dots and sequences of three purl stitches for dashes. Their sequences translated into short and long coded signals. Some knitters used knots to conceal Morse code by tying specific configurations to represent dots and dashes, or varying the distances between their knots. These encoded messages could then be discreetly passed across enemy lines or integrated into knitted items such as hats and scarves to be decoded by the recipient. Written messages were also known to have been passed on, hidden in balls of wool!
This practise wasn’t exclusive to the allies. Using a system similar to Morse, German agents based in the UK also passed encoded messages using knotted yarn which was then knitted in to garments. 

Although an extremely dangerous occupation it’s said that the practise of covert knitting became so prevalent during WWII, some countries actually banned the posting of knitting patterns aboard, fearing they may carry coded information to the enemy. 
During times of war, a knitter was often more than just a creator of warm garments; they were also keen observers and messengers, their needles clicking away as they kept watch. (Source: Timoneillstudios.com)

Image Source: ww2wrecks.com

I will leave you with an embroidery created by one Major Alexis Casdagli. Alexis was captured and spent four years in a German POW camp where he passed the time in the innocent pursuit of cross stitch. He also set up a stitch school, teaching other POWs to embroider. Of the many embroideries he made this piece was so admired by his captors that they proudly hung it in the castle where he was being held and subsequently had it displayed in three other camps.

The prisoners must have found it very amusing that the guards had no idea of the defiant message hiding in the Morse dots and dashes stitched around the borders which read “God Save The King” and “Fxxx Hitler”. Fortunately it was never deciphered during those four years and so the embroidery, and the Major survived the war. He told his son on his return that the Red Cross saved his life but embroidery saved his sanity! 


Making Bubbles

Making Bubbles

This is an old post from several years ago of some fun bubbles I did with a friend. I thought you might like to see it again. This last weekend was our guild sale, and I have nothing to show you felt wise. Jan has so many pictures of the sale to show you, I will leave that post to her. I have such fond memories of this friend and our felt journey.

A while back, I went to a felting friend’s for a few days of fun.  She showed me how to make bubbles and cut them open to great effect. Here are the pictures of what I did.

First of course, I laid out some wool to felt. But these are samples, so plain felt won’t do. I added silk threads, a silk square, some silk roving and other wools to see how it would all go. This is the underside.

This is what the top side looks like

Then, of course, there was the usual rolling and fulling.

rolling rolling rolling

Here they are all finished and ready for the marbles.

The next step is to put marbles in while it is still damp. You pull the felt tightly around the marble and secure it with an elastic, and now it looks like a bubble. We used the elastics they use to put braids in horses’ tails and manes because they are small, stretchy,  strong and cheap.  You put in as many as you like and whatever sizes you like. You can also use felt balls. The felt balls are good if you want to leave them uncut. Marbles are too heavy for that.

Here they are all tied up.

Felt with marbles tied in to make bubbles

Here they are cut.  I cut the tops off, I cut x’s and star patterns, and some I turned inside out. If you cut more off, you see more of the inside, and you can stretch them flatter, too.

Bubbles cut open

You can see how the underside becomes the inside of the bubbles. These samples started out about 6×8 inches, and the finished pieces are about 1.5 by 2.5 inches. They take up a lot of room. I only have 2 of them left; my friend’s dog ate one. I think I will glue them to some leather and make brooches out of them. They are lots of fun to do. I made some wrist cuffs with this method, and I will blog about them next week.

Further revelations on Onion Skins and book review on Pigments (plus new course announcement!)

Further revelations on Onion Skins and book review on Pigments (plus new course announcement!)

I’m hoping the featured image will make you curious!

Before I start into my post I want to mention my new course on wet felting which was recently launched with the Felting and Fiber Studio. It’s designed for felt makers who are new to using resists.

It’s fully supported by ‘how to’ videos and PDFs and we work with the simple circle. You will learn how to make a vessel and at the end I discuss with you the possibilities of how you can take it further.

So, you start by learning how to make something like this ….

Then I discuss a few variations that can be made with the circle and you could choose after the course, to make something like this ….

I discuss how to make this sculpture on the new course

This course is permanently open so if you fancy it you can register anytime. Curious? Then feel free to head over to https://feltingandfiberstudio.com/classes/online-course-wet-felting-a-vessel-using-a-simple-resist/ to find out more.

Promotion over! Thanks for your patience, Now let’s move on to my post.

Onion skins were at the centre of my last post – I talked about making pigment out of the dye. I mentioned that I would return and show you a little bit more of what I did with some of the dye. Here is the link to the post in case you missed it: https://feltingandfiberstudio.com/2025/08/18/is-this-compost-or-dye-material-actually-its-both/

I had set aside around half of the onion skin dye pot to try out on some fabric (I used the rest to make the pigment). I decided to experiment with a little margilan silk and some woven wool fibre. I mordanted these fabrics first, using an alum solution. The alum attracts the dye particles and the colour is less likely to wash out.

Margilan Gauze dyed with yellow onion skins.
Woven wool sample dyed with yellow onion skins


I love the vibrancy of the results. I would describe the wool sample as deep orange while the silk sample turned out more of a golden colour. It is quite the challenge to get the photo to reflect the true colour of the fabrics. I now need to work out what to do with these two fabrics. To be honest, there is not a lot of either and I don’t have a toning fibre to use behind the margilan – I think I will have to make up another batch of the onion skin dye.

Once I finished dyeing the few bits of fabric, I transferred the remainder into a 5 litre container. I basically forgot about it and only remembered it when I came to put together this post. So it has been sitting around for two months.

Now I need to digress a bit. Our lovely little pooch, Archie developed a lump on his elbow a number of months ago. We have been keeping an eye on it as his vet warned that it would become impossible to remove if it grows much bigger. (there would not be enough surrounding tissue to easily sew up the wound). As fate would have it, it grew and Archie went ‘under the knife’. He was discharged wearing his ‘cone of shame’ which we quickly swapped for an inflatable version – much more comfortable for Archie and for the humans too – less bruising on our lower limbs. The only downside was that the cushioning around his neck caused him to snore. He sleeps in the bedroom with us and this was cute for about five minutes….. The cone was tied with an elastic bandage. I was having fun playing with the weave and thought it might be fun to felt with.

Archie in his blow up collar and sore paws

I made a bangle. First I laid down the bandage and wrapped it around a resist which matched the length of the bandage. Then I laid down layers of merino fibre – 6 thin layers in total. I felted it to fit my wrist and shaped it. The whole purpose was to see how it would take the old onion skin leftover dye. I did a cold mordant – I soaked it in 10% of its weight in alum and left it overnight. I rinsed it out and popped it into the dye bath, slowly bringing it to the boil.

Here is the result. The colour is a lot lighter than its first run. That said I decided to speed up the process as the smell of the dye bath was pretty awful. In fact it was pretty disgusting. I endured it for around one hour and then my nostrils got the better of me. I poured off the majority of the dye bath and then left the bangle to cool in the rest. I also lit a scented candle (it really did take away the stink – good to know going forward!)

Bangle made with merino and elasticated bandage dyed with yellow onion skins

While I like the colour, I think I will use it as a base to play with stitches. So I may be back to you on that.

I mentioned in my last post that I had just ordered a book on pigment making and that I might review it, if readers would like that. I know I am stepping away slightly from textiles and felt here but it is possible to combine pigment and textiles (alcohol inks anyone?). I was feeling quite excited as I had ordered the book and it was on the cusp of delivery. I got a positive response so here it is.

The book is called ‘Natural Watercolor Paint Making’ and it is by the artist Joanne Green. Some of you may already follow Joanne on Instagram (#joanne_green_art). I love watching her magically transform plant matter into pigments and then reconstitute it into a paint which she uses in sketches of the plant which has formed the basis of the actual pigment. Very clever and a great pleasure to watch.

Cover sleeve of Joanne Green’s book

Joanne’s book is beautifully presented and very readable. It’s a bit like sitting with a knowledgeable friend having a chat over coffee. The materials and supplies list is very comprehensive and I found that there’s really nothing on the lists that could not be sourced. With regard to the topics covered, I think the easiest way to show this is by sharing the contents pages. As you can see, there’s a whole section devoted to step by step instructions on how to make the lake pigment from the moment you have produced your dye bath through to turning your powdered pigments into watercolours and how to store your new treasures. Joanne is living in Canada but I can easily access many of the plants she uses in her recipes in Ireland.

Source: Natural Watercolor Paint Making; Joanne Green

Photography (primarily by Canadian photographer Tegan McMartin) – is sumptuous and a pleasure to view. It’s interspersed with Joanne’s tiny watercolours that are a feast to the eyes.

Source: Natural Watercolor Paint Making; Joanne Green

I am so pleased that I made the leap and purchased this book. I found it easy to source too. If you are a fan of Joanne’s social media postings or are curious about producing pigments, then it is a worthy purchase.

Fish should not have squishy centers!

Fish should not have squishy centers!

A few weeks ago, I turned my attention back to working on the latest Mer-person (the boyfriend for Miss Mer) and realised I had a small problem. It is very fixable, but I thought you might like to chat about what and how it happened.


A quick review of the newest Mer-persons progress so far;

3 fotos, the armature, head body and fist arm initial wrapping in white wool, second hand close up has 5 fingers and a thrumb... 3 photos: front and back of upperbody and head, adding first wrapping on tail1.1-1.2) 05-2025 Cangames (you can see what happens if you get distracted winding fingers…I fixed that too.)

mer-person (under layer underway) self stabing while holding a ball of core wool 1.3) 06-04-2025 Mer-boyfriend trying to get me to rush his felting

adding more fiber to fish parts at demo in Dunvagon Museum1.4) 06-15-2025 Blacksmithing weekend and felting the mer-boyfriend

visiting the guild mer-person lounging langudly on table (back vew)1.5) 07-14-2025 Social

Mer-Person with felting needle self felting his 6pack abs.1.6) 08-08-2025 Friday Twist shop and demo

As you can see in the review, I had a few problems with counting fingers and rushing to build up the shape. I do have an excuse, as I started this project, I was still heavily distracted by lingering anaesthetic. I think there may be a few tendrils of the stuff still clinging to bits of brain, but most of it has now left the building. (Yah!)


When I was wrapping, especially in the Fish parts, I had not kept the second layers of wrapping as tight as I would have liked. This was exacerbated by starting to block in the superficial features before getting the understructure as firm as I would like. This meant that the Fish parts were now close to the correct shape at the surface, but squishy if you applied pressure to the felt. Squishy does not suggest strong young fish!!! (Fish also usually do not have the ability to fold mid fish.)


Working on superficial features (shallow poking of the wool with 38T333 and 42T222 needles) gave me a nicely felted surface with a much more loosely felted under layer. (I got excited, I jumped ahead and started into the fun sculpting, before a firm under layer was achieved!)  Well, that is not what I was wanting. How am I going to fix that?


Diagram of superficial felting with a less felted core.2.1) Diagram of superficial felting with a less felted core.


Since I am still working on the understructure, I can fix this now without too much difficulty. I will need to move fibre at a deeper layer, and since I am making the under structure, not the finished surface layer, I don’t have to worry about surface pitting if I move to a courser needle (a 36T-333). Pitting is telling you to keep felting, until the raised area (the parts not yet felted) is even with the lower spot (which is felted more).


Why would I move to a courser needle? I want to move fibre, but I will not be adding more fibre superficially at this point. Also, if I work deeply with a finer needle, it is more sensitive to minor directional changes (which can lead to OOPS!!) I would prefer not to have to go searching out broken needle bits from his fishy parts.

Synopsis: A Courser needle is more aggressive when moving fibre, and is less fragile than a finer needle, especially when working deep into the under layers.


Diagram inserting the needle deeper to affect the under layer 2.2) Diagram inserting the needle deeper to affect the under layer


Synopsis: The barbs affect the fibre by grabbing one to a few fibres as they are passing through. If you only work to a shallow depth, you will only be affecting those fibres. If you are working to a greater depth, you will affect the fibres that are located there and some of the fibres above them.


There is another way squishy interior felt can occur;

As with Wet felting, some breeds of sheep have fleece that is less inclined to create a dense felt than other breeds. I have had trouble with a couple of the Rideau Arcott fleeces (created with a mix of breeds) I have used. No matter how much needle felting of that wool I did, it remained spongy, but it was holding together, so it was felted.  A Less than appropriate wool choice is not the problem this time, since I am using Corradale carded roving, which I have used before without problems.


Before I started to firm up the understructure of my fish person, he was able to fold his tail tightly in half and fit in the smaller project bag. Now, after hours of poking, he will have to go into the big project bag.


mer-person at wet felting workshop. he is face down on the table and may have fainted?3.1) 10-05-2025 Slipper workshop (I think the wetness was too much for him?)


He now bends and stays in position, but no longer stays when the bend is extreme. (The increase in felt stiffness has strengthened the wool. He is poseable, but the wool felt is getting closer to overpowering the wire. I can stop increasing the firmness now, and work on adding more of the understructure superficial detail and the missing fins. (I will return to shallow poking rather than deep stabbing!)


I should mention the importance of gauge choice and wire type for your armature. It is important to figure out the gauge of wire you need for the size of your sculpture, and the pose or position you would like your figure to be in. You can make a blind guess, an educated guess from previous experience, or you can make samples. (I know some fiber artists, I am looking at a couple of my weaver friends, who are vary avers to sampling but it can be both educational and inspirational even if you don’t get the result you expected.) 


I organised a study group during COVID to make samples of various gauges of mainly aluminium and Steel (floral) wire. It gives me a reference sample I can use to select a good wire gauge to try for a new project.  (Before the samples, I could adjust the armature to make it stronger by adding steel floral wire to a limb to give it more strength. This can be done over part of the wool under structure, as long as more wool would be added on top.) I have also had to add lateral supports when the lumbar spine of Mr. Mer broke (I wound up doing surgery with a sharp awl, inserting Harrington rods running up each erector spinae muscle and down into the upper Hamstrings.)

  awl inserting harrington rods (10g aluminum coated wire) lower section is imbeded from lower lumbar to below his glutes Mr Mer showing where the two rods is hidden on one side of his back4.1-4.3) 01-19-2022 Mr. Mer’s Fishy parts, augmenting armature after felting is well underway. (Insertion of Harrington rods in progress) fixing this far into felting becomes harder to hide the surgery, but not impossible.


With armature wire gauges and felting, you have 3 options for outcome.

1) Wire overpowers wool (felt):

  • The wire holds the wool/felt staying in position when posed.
  • A lighter gauge of wire could have been used and still held the wool in position (working with heavier wire than you need can stress your hands and may develop metal fatigue if you are moving the figure often)

2) Wire = wool (felt):

  • The wire holds the wool staying in position when posed

This is the balance you would like to achieve, since you will not have worked with over-stiff wire.

3) Wool overpowers wire (felt):

  • When posed, the wire is moved out of position by the density or strength of the wool.
  • Augmenting the armature might be possible if you catch the imbalance before you finish the understructure. It is increasingly difficult to strengthen the wire the closer you are to finishing the sculpture. (but you can see with Mr. Mer it is not impossible to strengthen the armature quite far into the felting.)


If you have the opportunity, you may also want to make samples of various gauges of wire or combinations of gauges if you don’t have access to a full range of aluminum and floral wire (there are sources online if you can’t find a range of wire locally).


Investigate locally easily available types of wire first. One of the English felters uses rubber-coated garden wire for armatures.  A few felters on YouTube, like pipe cleaners, but craft pipe cleaners are weak compared to the strength of other options. If you are doing very lightly felted structures  (a lot of the faceless fairies are only lightly felted), pipe cleaners might work to su0pport the wool. What pipe cleaners are very helpful for is wrapping around your armature, to help secure the wool as you wrap it. Cheap quality pipe cleaners, in areas of high humidity, have another problem: they can rust.

As you find more gauges and types of wire, make samples of them too. Keep notes, was it easy to shape or twist, or did your hands tire quickly? (Note: Uncoated aluminium will leave marks on your hands.) Also, try a gauge and augment it with a second finer wire too; it will give you more options if you don’t have access to a full range of aluminium and floral wires. I made a series of legs, with feet, and to test floral wire as fingers, I made arms with hands. I can now refer to the samples when I start a new project.


I have been puttering along, firming up his fishy bits and then moved on to work on his upper musculature. I will have to print off another set of photo-reference if I cannot find the book with the last set. (found it!)


Front vew of the firmer fish bits back vew of the firmer fish bits5.1-5.2) The fish parts are now quite firm. I think I am almost ready to start adding the little spikes.

I will try to remember to take some more in-progress shots while I figure out the fish details. I apologise! I am afraid that for this part of “stiffening-of-the-Fishy-under-structure” felting, I climbed into bed with a big pile of pillows and felted while listening to the end of the new Lynsay Sands vampire book. Then started the latest Wen Spencer (this one has a vampire and werewolves) audiobook, and forgot to bring the camera! (Needle felting in bed is not the suggested location for optimal felting and avoiding self-stabbing as you fall asleep while felting…. a table is really a better choice)


Photographic collection of some of the refference photos i have collected to help with the next part of the project adding the spikey parts5.3)Some of the sturgeon reference photos I have collected, focusing on the spines/spikes.


What’s next;

You may remember last year, about this time, was the Kanata games (and felting) convention (last year I found a sheep game). It is coming up, and I wanted to have most of the basic shape blocked in and firmed up so I could start working on the fiddly bits of the ridges and rows of spikes. If all is going really well, I hope I can start to add some of the colour layers during the convention.


PS: I can think of a reason you may like to have that firm outside and softer felted inside. I am sure one of my cats would have appreciated something to pounce on that squished in a satisfying way.

One way to achieve this would be; wrap your fist layer securely (around the armature, if you are using one, which will keep the felt from rotating around the armature), then wrap the next layer a bit looser. Then, focus the majority of your felting on the shallow depths, and you could recreate the squishy inside effect. If you wrap around a bundle of fresh catnip leaves, it will be even more appealing. Just make sure the outside is well felted, so no one can tear off and eat the wool, to get to the catnip!


Even from what is technically an anaesthetic-incused mistake, you can notice something and save that thought for later use. Who knows when it may be a useful idea?


I will update you on his progress at the convention!  Maybe there will be more felters this year! Stop by between games if you are there. I hope you too are enjoying this late summer/not-really-fall and getting the last of your summer fibre purchases washed, before the weather remembers to look at the calendar and realise we used to have snow in about 2 weeks from now. (Really, there is no rush! I am enjoying this not-fall and am perfectly happy not to be having snow any time soon!)

PSS, if you would like to comment on any of the posts you read in the blog but cant find the comments button, it has vanished from the end of the post! (it is either very shy, or trying to avoid work) since it is now hiding all the way back at the top of the post (where no one would ever think to look for it! silly button you have been found and will hopefully be put to work!)


This and That.

This and That.

It is almost Fall. You can feel it in the air, and a few trees are starting to change. Usually, we like to hang on to summer as long as possible, but I am happy the dry, searing heat of this summer is finally gone. Yes, I am touching some wood as I say that.  It’s been a busy 2 weeks with school starting and the market picking up. Suddenly, we were out of meat pies, and I had to get baking. That doesn’t leave much time to felt. I did manage to get to the Almont Fibre Festival to help with the demonstration.

I put all my sheep key chains together

I am wondering about putting some wax or something on their ears to make them a little flatter and protect them. My thread wax is too hard. I wondered about some of the solid lip balms. It’s mostly wax. I think that might be too soft. I’m not sure what to do. I don’t want to use glue because it will make them too hard, or the PVA (school) glue can take up water and get tacky. Any suggestions?

I am packaging them so they stay neat. I had to get bigger bags for them. The ones that came with the card were not big enough. I have a shrink wrap machine that has a hot wire cutter, so I will cut the bags down so they fit properly.


While searching for some lost samples, the book resist thing I did about 10 years ago surfaced. The idea I had was to weave the ropes into a basket. But not thinking it through, I made 6 lobes and strings. You need an uneven number for the weaving to work. I took it to a social, thinking I had a good idea of a way to weave it. It didn’t work. Partly, it was not cooperative and partly (mostly?) I was impatient. Anyway, everybody had fun looking at it and playing with it. The general consensus was that it wants to be a jellyfish. So, I need to create some long, wavy, ribbony pieces, and possibly some long curls for the middle to hang down inside the long tentacles. I wonder if it will take me another 10 years. LOL
 

We would love to hear from you. If you would like to leave a comment, the comment button is at the top of this post, just below the title.