Browsed by
Category: Book Making

Tree Specimen Book Update

Tree Specimen Book Update

I thought I would update you on my progress in my junk journal Tree Specimen book. I use up left over paint to paint pages after I have worked on another project. So most of these are plaster pages that I have added to.

This shows the progression of one of the pages. I had painted the background with walnut ink (I think, but it was a while ago). The ink didn’t stain a portion of what I think was a medium that was mixed into the plaster. I don’t have a picture of just the white but it is the lichen portion. I decided to add a variety of blue green paints to represent lichen on bark.

This page was using leftover yellow paint. That was way too bright for me! So I added a variety of oil pastels and rubbed them in. I think this page needs more added to the layers. It doesn’t feel finished yet.

Book page with painted plaster background and applied tissue paper with rubbing of poppy foliage.

This page I had already painted the plaster background. I had made a few rubbings on tissue paper of my California poppy foliage. It looked very tree like so I used matte medium to put the tissue paper on to the background. Does it need more?

Book page with painted background, relief pine cone, free motion stitched moss and label.

I have shown you the pine cone page before but I am thinking of adding the bit of machine stitched moss on the bottom left and the label at the top left. The page feels more balanced with the additions.

Plaster book page with first layer of walnut ink.

This is another plaster page where I added walnut ink. That’s the first layer. Who knows what will go on top.

Tree specimen book (junk journal) opened to middle of book.

Here’s a photo of the book open. It’s such fun to page through now. I only have a few more completely white pages that need some color. I always have fun getting the book out and adding a bit here and a bit there.

Book Folding Party

Book Folding Party

My local group of artists has started back onto our regular schedule of monthly meetings. This month, we folded books. In the past we have created lots of paper with various methods of surface design, so one of our goals this year is to use paper from our stash.

Supplies laid out for bookmaking

We have been working through this book to learn more about folded book techniques. This shows the supplies and tools that we used to create the books.

Thanks Paula for hosting and here we are getting ready to start. We have our cups of tea and snacks too! And we have already chatted and had show and tell before we start our project for the month.

This time, we were folding a set of “tree fold” pages with a “diagonal pocket” cover.

Four Books Created at our Art Group Meeting

Here are the four books that we made. There are a couple of pieces of double stick tape on the tree fold pages but the cover holds together with just the folds. We then used pamphlet stitch to attach the pages to the cover.

Here is a little closer look at the books.

Top View of Hand Folded Book Showing Inside "Tree" Pages

And an inside view from the top of my book. The pages form a tree shape with graduated branch pages. My book was made from paper given to me by my friend Nanci. She has had this paper for over 30 years and she said it was probably closer to 40. So I used vintage hand made paper to create my book.

Selfie of four friends on a walk after our art group meeting.

After our book making session, we went for a short walk. Here’s the group in front of a small pond.

I have really been enjoying creating different book forms. It’s interesting to see how each book comes together. It’s similar to origami but with a variety of sizes of sheets of paper to create different books. I’m sure we will be creating more books this year as there are quite a few in the book that we haven’t tried yet.

Another Art Retreat

Another Art Retreat

My last post was about an art retreat and normally, I would just have one a year to tell you about.  But this year, I had two only weeks apart. This is the annual retreat that my small art group does in late summer/early fall at the Kiwanis Lodge on Little Bitterroot Lake.

Landscape of Little Bitterroot Lake with pine trees in foreground and mountains in background on a cloudy day.

This is the view off the deck of the lodge. The weather was a bit cool and rainy but so much better than smoky skies from wildfires.

This year we decided to play around with making our own natural inks, printing and painting with the inks and then doing some bookmaking.

Before anyone points out that many of these types of ink are fugitive and might not last, we realize that. We were just playing around to see what happens and what colors we could get as a result. No “serious” artwork is being made from these inks.

We started by grinding up Haskap berries (Fly Honeysuckle) with a bit of water and straining the result. That is the bright red color on one of the acrylic printing plates in the foreground of the left hand photo. We also ground up beets, grass and kale and tried grinding choke cherries. The choke cherries were a disaster but Sally tried boiling them after she got home and got much better results than the fresh berries.

So Paula had gotten all of us some acrylic printing plates which we covered with ink and then let dry. We left watercolor paper in a baggie with water to get damp overnight and then printed the next morning. The two photos on the left show different prints and the photo on the right was painting haskap berry ink on to a page and soaking three squares of felt in the ink and laying these down on the paper. The ink changed colors depending on oxidization and what paper it was applied to.

Make Ink book by Jason Logan.

This is the book we referred to for various recipes and what mordants or modifiers to use with different foraged materials.

Drawing organic lines with oak gall ink on to previously printed watercolor paper.

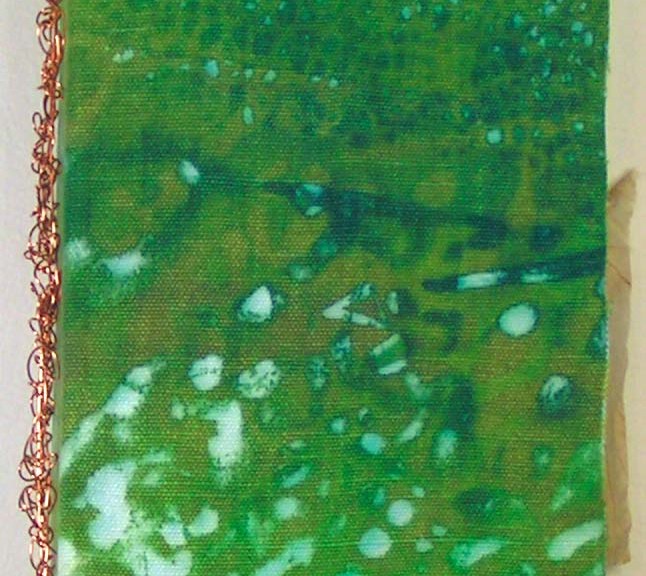
I also added further ink (oak gall with ferrous sulfate) to one of my prints with my new fountain pens. I wanted to get used to using the fountain pens so this was good practice.

We then set about making a bunch of inks including hibiscus, acorn caps, acorn caps with ferrous sulfate, oak gall with ferrous sulfate, avocado, turmeric, blue pea flower and walnut ink. Paula also brought copper ink which takes several weeks to make but is the most beautiful blue. We put these in small individual jars with a whole clove to keep the ink from molding. These are now stored in the refrigerator in hopes of keeping them good a bit longer. These should be used fairly quickly. Paula had some that she had stored in the fridge for 6 months or so and they were mostly dull and brown and had lost their original color.

We then set about making little samples of the colors from these various inks. And then you can start adding the different inks together and see how they mix on the page. Such fun!

Table set up with blue pea flower dyes and various modifiers.

Our next set of experiments were with blue pea flower. Apparently, you can buy this as a tea. All you do is steep the blue pea flowers and then add different modifiers. The modifiers that we used were baking powder, baking soda, vinegar, cream of tartar and vinegar. The modifiers change the color of the ink.

Sampling of blue pea flower ink with a variety of modifiers.

Here is some lovely sampling of the different colors that you can get from the blue pea flower inks. They range from green to blue green to blue to purple.

Here are a couple of landscapes that I painted with blue pea flower dye. I love how they mix on the paper and the variations that you get.

You can also paint your paper with blue pea flower ink and then drop dry modifiers on top such as baking powder or baking soda. You really get some interesting effects with that.

Shibori tissue paper dyed with inks glued to watercolor papers to create bookmarks.

We did put some ink on shibori folded tissue paper that could then be overlaid on previously inked watercolor paper and glued down to make bookmarks.

Paper coasters with natural dyed organic patterns.

Paula supplied us with white paper coasters and we played with ink on those too. The left is a combination of walnut ink, acorn caps and oak gall. The right is blue pea flower and hibiscus with baking soda dropped on top while still wet.

Here a three of the books that I created at the retreat. The middle one was using a bit too thin paper which had not been ironed so it is a little sad. But I learned how to fold the triangular pages which was fun. I was using papers that I had previously printed with deconstructed screen printing.

I took my tree specimen book with me and painted one of the plastered pages with oak gall. The photo on the left shows that page which was interesting. The photo on the right is Sally’s book where she has collage parts of the page and added oak gall ink to as well.

We had the best time and thanks to Paula for most of our supplies. We also want to thank the Kalispell Kiwanis Club for letting us stay at the lodge each year!

Salt Spring Island Retreat

Salt Spring Island Retreat

I recently went on a trip to Salt Spring Island, BC, Canada with a group of my friends from my Level 3 Stitch Class. What an enjoyable visit we had!

We drove up from Anacortes, WA to the Vancouver Tsawwassen ferry and then ferried over to Salt Spring Island.

We stayed at Catherine’s sister Fran’s, who kindly hosted us at her house/farm. It was a gorgeous property on the water, with a working farm/orchard.

The first day we went to the farmers and craft market. I took a bunch of photos of colorful produce as you can see above. We also visited the town of Ganges and went to a few galleries and shops.

Next up was a walk on the beach which was rocky but Edgar had a blast. There were four dogs during our stay and I think Edgar thought he was in heaven. He played and explored and had an absolutely wonderful time.

Then we started making baskets. Fran is a wonderful basket maker who supplied us with everything we needed and taught us how to make a simple basket. We thought it would take two days but it actually took three. I haven’t made a basket before and I think this will be my last one.

Here we are working away on our baskets. You can tell by my face that I am having a great time – ha ha! We also made a basket for one of our classmates who could not come to the retreat. That’s the basket I am working on in the bottom right photo.

Here is the result of our basket making. We all have a finished basket and they are pretty colorful too. Group of women sitting at dining table folding small books.

We also had a short session of folding small books with pockets.

Sunset over the water from deck.

We had a wonderful time together, great meals and Fran was so welcoming! Thanks for everything Fran and Catherine!


Tree Specimen Book Continues

Tree Specimen Book Continues

I haven’t shown my tree specimen book since March. The main reason for this is because I got a bit discouraged. The book has plaster coated pages on canvas that were meant for sketches. But the pages are very rough so I needed to get more gesso to apply on top. I also decided to get some charcoal to use for a bit more “rough” sketching.  I got my supplies, painted all the canvas pages with gesso, let that dry for a while and then tried a sketch.

Handmade book open to a page with a sketch of a pine branch in charcoal.

The pages are still very rough and are difficult to sketch on. I was disappointed with my sketch and really didn’t enjoy the process. So that discouraged doing any more sketches. The book sat for quite a while with nothing added.


Then when I was painting other things, I had leftover paint. I hate to waste paint so I decided I would start painting the canvas pages. Then I could add more on top and there wouldn’t be that intimidating white page (that I didn’t like the feel when sketching).

Handmade book open to a page with a print of a tree and definition of tree collaged on top.

I showed you this one before but I added the definition of tree to the bottom. The fun thing about this book, is that you can keep adding as you go.

Handmade book open to a page with a print of a thicket of trees.

Here’s another print of a thicket of trees that I added.

Handmade book open to a page with a print of a tree stump and cut out leaves.

And this one is a print of a tree stump and some little blue leaves that I got from one of my friends. Thanks Christa!

So I haven’t given up on my book. I’m not sure it will ever be “finished”, but that’s OK. I will continue to add bits and bobs as time goes by.


Tree Specimen Book Update

Tree Specimen Book Update

If you missed my other posts about this mixed media handmade book you can find post #1 here, post #2 and post #3. It’s a work in progress that I’m taking slowly, adding bits and pieces as I get inspired.

Handmade book open to one page with eco printed background and print of aspen branch with leaves and catkins.

As I was getting ready for my upcoming Level 4 Art and Design class which will involve printmaking, I was going through my stamps and also some previously printed papers that I haven’t used. I thought they would make a good addition to the book. This is a print of an aspen branch with leaves and catkins. I added the black outline with a felt pen. The aspen branch is printed on the back of an eco print.

Handmade book open to one page with brown painted background page and black print of weeping birch on multi colored paper.

I found a print of a weeping birch which I added to this painted brown paper page.

Handmade book showing one page with painted green background and glued cut out of aspen branch from multi colored paper.

While I was looking through my prints, I found a cutout of another aspen branch. I’m not sure what I made it for but thought it was perfect for this green painted page. I might add a few more details into the leaves with colored pencil. I’m not sure yet.

Handmade book open to center page spread with inked background page of orange and green.

The back of the green painted paper above, was white. I added some ink in orange, green and brown around the edges so the white wouldn’t show around the print I planned to add there. This is the center of the book.

Handmade book open to center page spread with inked background page of orange and green covered partially by printed autumn leaves.

Here is is with the print I added. I also finally bought some gesso and added it to all the white pages. Now I can do some painting or sketching on those pages with more ease.

Handmade book open to one page with brown wrinkled paper background and black and gree print of leaves hanging down.

Here’s the last print I added. I have more prints, but for now, I think I have added enough. This book has a lot of pages and I have a long way to go to get it completely filled. I think I will start sketching on the white pages next.

Collage of felted lotus pod created in online class by Glady Paulus.

And for those of you who think I haven’t done any felting for a long time, here’s a felted lotus pod that I created for an online class I took with Gladys Paulus. The class was marvelous and if you get a chance, it’s well worth taking.

Also, registration is open for Helene Dooley’s Hanging Felted Spiral online class. Click on the link and scroll down to the bottom of the page to register. This is a great class to learn more about complex three dimensional felting. You need to be an intermediate felt maker who has worked with resists and three dimensional felting. The class is online and can be accessed throughout the class period at any time. You don’t need to be online at any certain time. So join Helene to create wonderful felted spirals!


Handmade Mixed Media Tree ‘Specimen’ Book

Handmade Mixed Media Tree ‘Specimen’ Book

I have been continuing to slowly add bits and pieces to my tree ‘specimen’ book. You can see most of the ‘blank’ pages of the book in this post and some pages that have had ‘specimens’ added to them here.

This is definitely a ‘slow’ project that I am working on very intermittently. It’s been fun to pick it up again and just add a few things here and there without pressure to finish it or make it look perfect.

Mixed media book, front page painted watercolor background, machine stitched moss glued to background and definition of mossy torn paper glued down.

I added some more machine stitched moss to the first page and a definition of mossy.

Mixed media book open to left page painted cracked plaster on the left and torn sketchbook page with 'pine needles' on the right.

On this page spread on the left, I had one of my plaster coated pages but it had cracked significantly. I need to get some gesso to paint over these pages but since I haven’t ordered it yet, I decided to try something different. I layered different colors of paint on the cracked surface. You can click on the photo to enlarge it. The page on the right is a torn piece from one of my small sketchbooks. It kind of reminds me of pine needles. It was originally screen printed and I added colored pencil to enhance the look of the pine needles. Torn and messy is the point of this book so I ripped the sketchbook page and glued it down to a lightly painted background page. You can see the dark edges of the next page which is next up.

Mixed media book open to a page spread with an eco print of leaves and buds on the right hand side.

The page on the right is an eco print on paper that my friend Paula created. She has a big stash of these papers and kindly let me use a few.

Mixed media book open to page spread with blank plaster coated page on the right and back of eco print with cut out frame of painted paper and tea bag machine stitched skeleton leaf on the left.

This is the back side of the eco print above. I cut a window out of the painted background so you could see more of the backside of the eco print. I added a machine stitched tea bag leaf as well. The right side is another plaster coated canvas pages that needs to be gessoed and then drawn or painted on.

Mixed media book open to page spread with blank plaster coated page on the left and green painted paper background and stenciled/painted brown pine cone on the right.

This pine cone on the right was stenciled ages ago. I pushed some kind of thicker medium through the stencil to give a relief effect. It didn’t work all that well and got a bunch of bubbles in it. I painted it green at some point but didn’t like that either. I got it out of my paper stash and decided I needed to finish it. I added walnut ink, sepia marker and matte medium to get it to a point that I was satisfied with it looking like a pine cone. It also needed more strategic cutting out than I had done previously. I glued it down to the painted background letting a little bit of the pine cone stick out over the edge of the page. This is a testament to never giving up on a piece of artwork!

Mixed media book open to page spread with orange feathers woven into a gridded hand made paper on the left and an eco print glued to a dictionary page on the right.

Next to the feathers that I had shown you in my last post, I glued another one of Paula’s eco prints down on to the dictionary page. I can’t decide if this page needs something else but I will just leave it for now. I do want to leave more simplified areas where the eye can rest.

Mixed media book open to page spread, blank plaster coated page on the left and painted skeleton leaf on the right.

This one on the right is the last page that I worked on this time. It was originally a deconstructed screen print on paper all in the brighter green. When I was looking through the book, this page caught my eye as I saw a leaf in the middle of the page. I used Inktense pencils and then water on a brush to make the darker leaf appear more strongly on the page. I hope you can tell I am having fun with this. It is a very freeing process not worrying about the final outcome.


Handmade Book Continued

Handmade Book Continued

About a month ago, I showed you my handmade book that I created at our annual art retreat. I have since then been slowly adding “stuff” to the book. The theme is the forest and I am having fun finding things to add to the book.

Handmade book open to page spread with fabric photo of trees in morning light stitched to page and small torn piece of paper below photo with definition of woodland.

I had this photo of morning light on trees printed on fabric for my class homework but hadn’t used it. I decided to hand stitch it in place on this hand dyed page. I then glued a piece of handmade paper to the page spread and added a definition of woodlands scrap of paper that Paula gave me. She had a bunch of definitions printed out on “old paper” and she kindly gave me the ones relating to the forest. As you can probably tell, I am not starting on page one and working through the book. I am adding things randomly through the book depending on what the page looks like and what I think works best. This way, I’m not stressing about each page being wonderful. I just find something that I like and add it in. So these pages may have more things added as I go along or not.

Handmade book open to inside cover and first page. Specimen label on cover and small piece of handstitched "moss" on first page.

Paula also had some “old” labels and I used the Specimen Book label on the inside cover. And then I took a small piece of machine stitched “moss” that I had made for my moss covered branch and glued it on to the first page.

Handmade book open to page spread with a charcoal sketch of an aspen tree on plaster coated page.

The pages that have been covered with a mixture of plaster and gesso will all end up with some type of drawing or sketch. This Aspen tree sketch was done with a charcoal pencil and then I sprayed the page with a fixative so hopefully the charcoal won’t smear.

Handmade book open to page spread with lattice type handmade paper and feathers woven into paper.

I collect a lot of “stuff” when I walk through the woods around my house. I have a lot of turkey feathers but they were a bit too big so I used these smaller orange veined feathers to weave into the page of hand made paper. I’m not sure what bird these are from but they are much more rare to find on the ground than the turkey feathers.

Handmade book open to page spread with a torn edged photo of chickadee artwork pasted on dictionary page.


I wanted to try a photo transfer on some pages. I thought this would work on the regular paper of the old dictionary page. So I tried to transfer a photo of this painting that I did of a chickadee. The transfer did not work out so I ended up printing the chickadee on to regular copy paper, tearing it out and gluing it on to the page.

Handmade book open to page spread with transfer of a photo of a sketch of an Oregon grape leaf.

Here’s another attempt at a photo transfer on to a watercolor paper page. It worked slightly better but came out very lightly. I used a black marker to outline the Oregon grape leaf but decided to just leave the lighter colors as they were from the transfer. I am not trying for “perfection” in this book. It’s about collecting “stuff” about the forest in one book. The rocks on the page in the photo above are just there to hold the page in place so I could take a photo. But perhaps I need a sketch of the rocks added in? I’ll keep that in mind for another page idea.

I’m enjoying this process of working randomly in the book. It’s a storage vessel for all my forest “finds”.

Handmade Book

Handmade Book

I told you in my last post that I had created a handmade book from deconstructed screen printed fabric and paper at our retreat. We followed this free tutorial by Jeanne Oliver. She has lots of free content on her site and some wonderful online classes. This is the book I created.

Here’s the book from the front. I used hemp canvas fabric that I had screen printed. The cover was constructed from the hemp canvas, book board and deconstructed screen printed paper.


The book was bound with pamphlet stitch and copper wire. I have created many books with pamphlet stitch but had never used wire. It was a bit tricky but I like the result, plus it’s very sturdy.

Here are the inside front cover (L) and inside back cover (R). I really love the organic feel of the screen printing. I made three signatures and used plaster on canvas pages plus additional pages of various papers and a bit of fabric. The main pages were created with canvas, plaster and gesso.

I didn’t take photos of all the page spreads but wanted to show a range of what was included in the book. The brown paper on the left is a “faux rice paper” that I made with tissue paper, walnut ink and matte medium. The photo on the right shows the inside of the copper wire binding.

These next photos shows a variety of papers that I used in addition to the plaster and canvas pages. Some were painted, some eco printed and I used some specialty rice papers as well.

Here are a few more page spreads. Besides paper, I also added in some hand dyed canvas as well. The book is fun in itself and could probably be left as is. But I want to make it into a book about the forest with sketches, additional ephemera related to trees and whatever else reminds me of the forest. So I will be working on this slowly and adding bits and pieces to it over time.

These are a few of the types of things that I might add. Paula kindly gave me the pieces with definitions and the labels. She has loads of ephemera and is very generous. Thanks Paula! You could easily make this type of book with felt as the cover fabric. I would love to see your results if you give it a try. You can submit photos of your work here and we will post them.

I am running behind so…..

I am running behind so…..

I declare throwback Tuesday. I seem to have run out of time this week so I thought you might like to see this post from 2017. Jan posted some pictures in our guild group and it reminded me and I thought it was worth another look. I hope it and the links to the other 2 posts about it will give you lots of inspiration for your own work.

Ann


This is the 3rd and final set of pictures from this exhibit. http://mvtm.ca/?exhibition=colour-unboxed the first is here: https://feltingandfiberstudio.com/2017/01/18/colour-unboxed-by-out-of-the-box/ and the second here: https://feltingandfiberstudio.com/2017/01/26/out-of-the-box-part-2/ Again I apologize for some of the odd angles as it was very crowded with people enjoying the exhibit. In the last picture, you may find it hard to see but there is a very long weaving draped across the ceiling.

This slideshow requires JavaScript.