The making of ‘Barnie’ – part 2
Following a workshop I did with Helen Walsh, I left you all hanging….with an acetate tracing over Barnie’s face to ensure perfect placement of his eyes.

Now, I will explain how he got his distinctive features….
Having decided at the very outset on a cropped image, Barnie’s face was going to be the most important element in the overall picture. Um-ing, ah-ing and generally ruminating, I finally decided that to achieve the measure of importance he deserved, his face needed to be 3D. Then came more ruminating, and a good sprinkle of cogitating, to work out the best way to achieve said 3D effect.
I finally settled on padding out his nose using some cotton quilt wadding. Placement, particularly vertically, was critical and took various trial & error attempts….


Completely covering the wadding with the same fabric as his head gave the correct amount of ‘lift’ – tiny dabs from a glue stick worked perfectly as it was very fiddly! This was then stitched and blended into place with more fly stitches.

We all know the eyes are the window to the soul and importantly what makes a crafted being come alive. Sadly, you may recall, the original photo was not ideal in terms of eyes or beak.

Fortunately, October owl was blessed with great ‘wide open’ eyes, so I simply interpreted them in stitch and fluffed out the fabric to create his nostril feathers.


So far, so good – with everything relatively easy and going according to my new plan, which I must admit had now moved very significantly away from first intentions of the workshop….Stop thinking 🤔….Yep, you are now getting ahead of me in my story 😜
Since his face was now 3D, his beak could no longer be the fabric I’d first trialled for use.

This is where suddenly something very simple became very difficult and very time consuming….trying to find the right beak material and how to achieve the right colour. Barnie was no longer a flat appliqué piece having become more representational, so it all had to be ‘right’.
Easy….plastic!
But try curving plastic in 2 directions especially when it is so small!!! Think….coiled spring! ’Ping’….’Where has the blooming thing (or similar 😜) gone this time?’ Hair dryer = no, heat gun = no (total distortion) etc, etc. Hours, of ruminating, later….maybe cutting the piece from the corner of the plastic container would help?….Taadaa.
In the meantime, attempting to get the right colour match to October owl beak, using supplies available in the house, were unsuccessful….even nail varnish was tried! Problem – whilst I was easily able to mix the colour with paint, it just wouldn’t stick permanently to the plastic, neither on the outside nor the inside, and it always looked streaky and way too shiny….totally wrong!

Finally (a couple of weeks have elapsed by this point, with way too much ruminating having gone on….just for….a BEAK!!!) I hit on 2 simple ideas – chocolate and sandpaper. The sandpaper I carefully used to roughen both the inner and outer surfaces….Barnie has certainly lived and been scratching around for his food!
Chocolate?….it was the image from a cardboard box – yes, I did happily enjoy the Chocolate eclairs (shared of course)! Soaking the back, I carefully finger-rubbed all the cardboard away (a great way to hide one’s identity as it stripped my fingerprints away for days) leaving only the very thin printed paper image, which I then successfully glued to the inside of Barnie’s beak. All this time and trouble….I can already hear your cries, echoing mine earlier…. for just a……..BEAK!


It was then onto stitching the very distinctive barn owl feather ‘spots’ (open chain & seed) before auditioning supplies for the snow.


I finally settled on two very different materials, crystal organza and viscose staple fibres which I needle-felted into the linen edge. The organza was too shiny and the colour just wasn’t right. I much preferred the subtle sheen of the viscose which also allowed me to make full use of the interesting ‘matted’ bits. Some might argue that if I wanted to be more authentic my white colours should be swapped – the snow to be more blue and the owl more off white! I’ll just content myself by saying that it is a trick of the lighting.


Finally – mounting time….
After ironing/steaming out the circles left by the embroidery hoop which was an ‘oh boy!’ nightmare….any advice is welcome here!….I did not lace the picture as would be traditional but adopted a newer stretching technique I have learned.
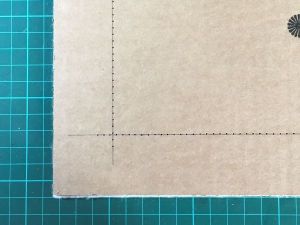
The linen picture was laid, in its exact position for the mount aperture, onto some thin cotton wadding suitably cut to my 37x37cm (14.5×14.5in) frame size. I wanted the finished picture to feel softer rather than tautly stretched, hence the wadding.
Together this was laid onto thin cardboard (again cut to frame size), through which I had machine stitched (largest stitch length, no thread) a square. The sandwich of cardboard, wadding and linen were then hand stitched together. I even pencilled a line on the linen warp & weft to ensure accuracy….ooops perfectionism struck again!


I hope you have enjoyed Barnie’s journey into being. He is now quietly bemused watching my activities, and he won’t be leaving my side any time soon!

Have you had small niggly details that just needed to be right? Or are you more ‘Laissez faire’?
22 thoughts on “The making of ‘Barnie’ – part 2”
What a journey Antje! Totally understand the ‘beak thing’ – it just has to be done doesn’t it?
Your method of getting Barnie ready for the frame really worked 🙂
The background is faultless and your stitching is perfect – his feathers look so soft. Barnie is alive and watching everything you do!
Thanks Lynn. I still can’t believe how long I spent resolving the….BEAK….but looking at him now I’m glad I did persevere.
I like this new (to me) method of stretching the picture. It’s much simpler, easier overall & more regular in terms of the stretching.
Barnie is beautiful. Perfectionism is King, sorry, Queen. I’m a nit picker and “oh that’ll do” is not allowed, it’s always been “if you’re going to do it, do it properly”.
I’ve not seen that method of mounting before and it’s an eyeopener thanks. I may well use it to mount Glorious Devon as I’m about to get it framed.
Ann
To continue (my husband chucked me off “his” computer: The closeups of the stitching, especially the chain and fly stitches certainly reveal Barnie’s feathers, and the beak/nose feathers are really effective.
I have found that plastic is sometimes difficult to use, but have used very hot water to help with shaping; and I’ve found that a coat of PVA glue as a primer gives a much better surface for paint. Your idea of coloured paper glued on the inside was inspired though, it looks really authentic (my literal mind again).
Love him.
Ann
Ann – I’m so pleased there are others in my camp too.
I’m glad you like him.
I agree about the hot water, however the beak was so small my fingers were rebelling at the very thought!
I hope you do try this method of mounting and that my explanation above is sufficient, if not – messaged me.
What a great job you did, all the trials and sampling was worth the effort. I really dislike embroidery hoops and I always have difficulty ironing out the lines left in the fabric. I rarely use them. I use a frame if I have to have the fabric stabilized. The fabric is stretched and tacked to the frame. It doesn’t leave any marks. But usually I just hold the piece in hand when hand stitching.
Barnie has really come to life, peering out at us with such curiosity. Love him!
Now why didn’t I think of that…. a frame! I’ve often used one. Next time a workshop asks for a hoop I’ll have to take both, so that I can choose (assuming it is only for hand stitch)….good idea Ruth.
So pleased you like the curious fellow.
Let me just say that despite the time it took, that beak was well worth the effort! Thanks for sharing this, a stunning piece.
Thank you Jody for your lovely comment….I must admit, I am pleased with the beak. I never thought I could equate manipulating a bit of plastic to childbirth – the struggles are forgotten 🤪😂
Absolutely gorgeous, Antje. Worth every hour (or day) of effort. He’s very beautiful and you’ve really captured his inquisitive expression and his soft feathery owlyness. Great to follow you through quite an elaborate journey too.
I find if there’s one thing I’m not quite happy with in a picture, I can’t see anything else at all so I agree that perfectionism is essential if you’re going to live with the end result.
I’m preening & shaking my feathers after such praise coming from you. Thanks
Yep, that ‘one thing’ can determine the whole piece. It’s comforting from the comments, knowing I’m not alone in ensuring a detail is right 🤪
Barnie is a beautiful birdie Antje. You were perfectly justified to take your time over all the sections because the result is stunning. I also love the beak – it looks so real. One word comes to mind regarding the minimalist approach to the background …. classy.
Your way of mounting the piece (and the use of the batting) is very effective – I might be stealing this from you soon. 🙂
I’m delighted you like him Helene.
I was about 90cm from a buzzard’s & a falcon’s beaks yesterday in a bird of prey demo & I’m quite pleased that Barnie could give them a run for their money….even if he can’t give a fly past!
I like this method of mounting for two reasons – it is done front facing, so you can see exactly what is needed and, with smaller stitches it is more even, compared to the lacing which pulls in sections. Go for it girl!
Antje, you really went above and beyond with your barn owl! I loved your solution of adding the chocolate box to make the beak, although I must confess when you mentioned “chocolate” in your solution, I was left wondering whether I’d be seeing people trying to lick the beak away in the future 🙂
Have you seen the works of @agentlemanfelter on IG? He makes stunning barn owls, his latest tiny one has tweed fabric for wings!
(Also, my birthday is in the beginning of January. Just saying that in case you need to give this owl away :p)
No licking required by folk Leonor & the beak won’t melt 🤪
Now you’ve sent me down another rabbit hole….his work is amazing!
Barnie is a home bird but you never know he might get restless one day 🤪🥰
He turned out lovely! Love the 3D effect.
Thank you Tesi. I’m glad you like his 3D-ness!
Wow Antje, Barnie is terrific. His beak is a triumph…..that is a detail which would make or break a piece like this and you absolutely smashed it! Having said that there are inspiring details everywhere on this from the overall composition to the stitching of his feathers.
Off to check the link that Leonor suggested…..
So pleased you like Barnie & thank you for your kind comments….he & I are preening our feathers 🤪
I hope you do check out Leonor’s link….amazing.
He turned out wonderful. If anyone says he is too white tell them a snowy owl visited one of his ancestors. Such a lot of work. You are very patient and determined. I am better now with things that aren’t just so but still get very picky. If I see something as a mistake it will bug me forever or until it’s fixed.
Thanx Ann for my ‘get out’ phrase and your praise.
Many of us share that niggle when things are not right. Sometimes, if I think it is minuscule & no one else would see it, then I can leave it, but something like Barnie’s beak….no, that just had to be right!