Browsed by
Month: March 2022

Small felt

Small felt

As some of you know I am moving my studio. I am not moving far, just from one end of the building to the other. I will gain some storage space, another room and a direct entrance. And importantly I will be closer to the bathroom.

I have packed 90% of my studio into boxes and they are piled up in the extra room. Consequently, I do not have a lot to work with. I did make a box with a blob of each colour of merino I have. and collected a bag of prefelts etc.

So there I was on Monday, wondering what on earth I would post about today. I was looking at my inspiration file and going through e bags of prefelt and I found this small odd-shaped one.

This is the back of it because I forgot to take a picture before adding wool to the front.


I added some sky

A blue sky is pretty much one colour. light at the bottom but not a mix of colours. The grass on the other hand is not one colour. so I mixed some up using my dog brushes.


this is the finished background. the needle is to give you an idea of the size. Jan thought it looked knife-shaped I thought it looked like a bullet train.


I want to add some flowers along the bottom. I wasn’t sure what thread to use. I hat unpicking so I grabbed a piece of fulled sweater off cut and covered it in green to try out some different threads.


the dark pink is Filtex. these are very old spools they are shiny rayon, like fake silk.  the orange is 1,2 and 3 strands of embroidery thread., the blue is an embroidery cord and the green is a different kind of silk or fake silk embroidery yarn.


Here’s a picture of the back. You can see what each thread looks like a little better.

Next is doing the stitching. I think I will use the green to add a few bigger leaf shapes. the orange and blue worked well. I will try using 2 and 3 threads of the pink to see if they show up better. stitching on felt is odd. you have to make your stitch about twice as long as you want it to get it to show up the size you want. It must be because of how soft the surface is. Does anyone else also find this to be true?


New Community Pages

New Community Pages

I’m excited to announce that we have developed some new community pages for all of our readers and followers. We have had loads of requests from interested readers who wanted to submit photos after reading a post or being inspired by a challenge. We now have a place that anyone can submit a photo. Our Community Photo Submissions page is now ready for you to submit a photo. It’s under the Community tab on the menu.

We only ask that you resize your photo before submitting it to something smaller than 1MB. This allows more space for the photos and quicker loading of the site. Please include a description of what you are submitting as well as why you are submitting the photo. Once the submission is complete, we will review the photo and put it in the gallery under the community pages. This may take a bit of time (up to a week) but soon your submission will be available for everyone to see.

We have also included our Links/Resources page under the Community menu tab. There is some great information there if you haven’t checked it out before.

The other page in the Community menu is Links to Blog Posts. The page gives you a list of the last forty blog posts by name. It automatically updates whenever a new post is published. You might wonder what the purpose of this page is or how you would use it. If you read a post in the last several months, and you want to find it again, you can look on this page to find the post easily. That way, you aren’t scrolling endlessly through long posts trying to find a particular post. It’s also a place where Instagram visitors will land so that they can find the post they would like to read easily. Thanks Helene for setting this page up!

These changes have made this site much more interactive and we’d like to encourage all of you to submit some photos of your work. Have you created samples or a finished piece with repurposed or recycled items? The First Quarter Challenge is coming to an end but we’d love to see what you have created. It doesn’t matter if you created it recently or in the past, we would love to see how you are repurposing items into something new. And it doesn’t matter if it’s a finished piece or a small sample, show us your creations. You can upload photos here.

Or do you have some felt samples that you have from different breeds? Ann posted about her felt sample class recently and showed a sample of white welsh mountain sheep. Perhaps you have some samples of some wool breeds that aren’t commonly used in felting? We would love to see the samples with information about how the sample was made, about the breed, how the felting process went and the end result.

Also, don’t forget that registration is still open for the Hanging Felted Spiral with Helene. Class begins on April 8th.


LEARNING CURVES

LEARNING CURVES

A learning curve is a graphical representation of the relationship between how proficient people are at a task and the amount of experience they have. Proficiency (measured on the vertical axis) usually increases with increased experience (the horizontal axis), that is to say, the more someone performs a task, the better he or she get at it. (Wikipedia)

Recently I’ve become intrigued with learning how to quilt on my domestic machine using a ruler foot and quilting rulers. It seems kind of silly for me to learn that skill since my quilts the last 10 plus years have been tile quilts and I have nowhere to put fancy quilting. Maybe it’s time for me to move on with my style or allow places in my tile quilts that I can do the ruler quilting in. Hmmmmm….ideas forming…

Most of my quilts require little thought when I machine quilt them. The tiles are all fused on with Wonder Under so I quilt each of the tile pieces in order to make sure they don’t fall off. So not much creativity in getting them sewn on. The quilting is not the star in my tile quilts.

I decided to sign up for a ruler class at a quilt shop near me, Quilting Mayhem. It is a yearly “club” using Westalee Rulers that meets every month. Last year they made a whole cloth quilt. I can’t imagine making a full-size quilt that way, but I do admire any of them that I have seen at quilt shows and on social media. The project they are making this year is the Jewel Quilt by Angela Attwood using the Westalee Design Sampler Set 1 and it is a quilt as you go pattern. So not only am I learning how to use the rulers, but I am also learning how to attach the sections to each other using sashing.  You can see from the photo on the front of the book that there is lots of open space for the ruler work to go.


Here are the rulers I’ll be using in this quilt, plus a couple others that I have in my stash.

I wondered why some of the enclosed shape ones had the little puzzle pieces taped to them. I soon found out why…I can’t tell you how many times I got my needle, thread and foot already to start a new design and forgot to insert the ruler around the needle and foot!

Here is my machine all set up, but oops! I forgot to insert the ruler!


Easy solution! Just remove the jigsaw puzzle piece and slip it around the needle and foot, then replace the puzzle piece. Saved by the puzzle piece!


It’s been an interesting process to learn how to use these rulers. It was recommended that we draw the blocks out on paper first and follow the direction of the quilting instructions given in the book using a pencil. It took me quite a few tries to figure out how to use the Spiral ruler, keeping in mind that there is a ¼” space between the edge of the ruler and where the needle goes. I was grateful for doing it on paper first. It really helped me to get the gist of it. I am not a big fan of drawing things out first. I’m usually chomping at the bit to get going and see results, however had I done that with this project, I think I would have been un-sewing a lot more than I actually did.


After I made the paper drawing, I made a fabric sample. I was also glad I did this because I got lots of practice trying to figure out how to keep the ruler snug to the ruler foot! It was also suggested that we make sure that the fabric marker we were using would come out. Can you imagine doing all that quilting only to find out that your marks were permanent? I’ve been using the Sewline pink lead. Another good lesson doing this sample was that you could hardly see all my imperfect stitches!

By the time I finished the fabric sample and washed it to make sure the fabric markings all came out I was ready to start on the real thing. I was pretty tired of drawing out this first block by now. I think I drew it 4 times. It’s 16” square.

With quilt as you go you must cut your pieces before you can begin. Each block needs to have the top and bottom fabrics and the batting cut. The top needs to be marked before sandwiching the three pieces together. Normally you make a quilt top, then worry about backing for it once you get ready for the quilting. If you send it out for a long armer to quilt it, you usually don’t even need to worry about the batting as that will be provided and included in your quilting costs. With the quilt as you go, you have to buy all the backing AND the batting. Pretty spendy to have all those upfront costs going on at once. But it will all be quilted when I’m done so I’ll just have to add the binding to the outside and be done!

And dealing with all the start and stop threads! ACK!! I don’t worry about them too much on my tile quilts, I usually just snip them off. They are going on a wall and probably won’t be coming undone. But this quilt will be a bed size quilt and I don’t want the threads to come loose. Each of those set of threads must be knotted and buried in the quilt sandwich. OMG there are so many threads! I initially started tying square knots and trying to get the two threads through a sewing needle. Fingers and eyesight were definitely being challenged! I finally watched a YouTube video and found a method that worked for both my fingers and my eyesight. I discovered Clover’s Self Threading Needles. Highly recommend having some of those in your needle stash! It made all the difference in the world, and I think saved my sanity. I LOVE these needles!

So far, I’ve finished the center block and the first round and have cut out my second round, marked each block out and sandwiched the pieces together. I’m happy with the results so far. Here is the front and the back of the first round. I’m using a line of fabrics called Grunge by Moda-Basic Grey. The blue cornerstones will get darker in each round.

The backing fabric is by Jason Yenter for In The Beginning fabrics and was designed for the Western Washington Quilt Shop Hop 2019. I’m thinking I may be able to flip it over if I get tired of the other side.

I still have a big learning curve before I become proficient at this skill, but I think by the time I am done making this quilt I will be pretty good at it! It’s kind of addicting, too.

Happy Creating!
Tesi Vaara


What Have I Felted On?

What Have I Felted On?

Last week I took a trip south of Ottawa to visit Ann and see her future studio space. There are two more rooms connected to this one through the back door, that in total seem close to the size of this one if combined. I am sure Ann will show you more as her great studio migration continues.

1  Part of Ann’s New Studio Space

She had a present for me, a piece of black foam used for packing boxes with air purifiers.  Looks like a potential felting surface to me! Yes, I stab. I like to stab. I am very stab-ie, ok, there are rumours I am dangerous to be around (possibly just when I am felting but maybe not. It could just be the long fingernails, I am enjoying this part of my retirement.) You have seen many of the things I have stabbed, but what have I been stabbing on? Let’s investigate!


My first dry felting experience was using a sponge, a cellulose sponge and a cheaper car washing synthetic sponge. (NOTE* do not leave needles in a cellulose sponge they will rust if you forget them there.) Neither lasted well but I was also rather enthusiastic in my early stabbing as I began my felting creations. The sponges limited the area I could work on at one time but they were cheap! I can’t find the originals, but they’re the type you find at hardware or the kitchen section of other stores. They were ok for small figures, a mouse or a bird, but require more shifting of your figure if you tried something larger. I think you too would likely upgrade to other types of foam from these, especially if you wanted to work on pictures.

2 Cellulose sponge


3 Rainbow Dollorama sponge (Foam)

4 Car wash bone sponge


My next felting surface was a piece of upholstery foam (not the type with a fire retardant). It worked well but eventually created a sunken area where I had been working. Occasionally little bits of the foam would get embedded in the piece I was working on and I would have to remove Foam bits. It did last longer than the sponge and was a bit bigger. If you are also an overly enthusiastic stabber the depth of 3 or 4-inch upholstery foam may be a good way to keep from stabbing through to the table (or your lap!)  As you likely have noticed a bit of fibre is sticking to the foam, using one side of the foam for darker fibres and the other for lighter fibres helps reduce picking up unexpected colours. This is not a problem if you are working on a picture rather than a 3-D figure. Remember to lift your work frequently, leaving the plastic covering on the foam, if it came with one, will also reduce fiber pick up.

5 Upholstery Foam Note clinging fibers

 6 Close up of deterioration of upholstery foam

Next, I upgraded to new foam seat cushions from Walmart (found in the craft or sewing section). These were good for larger pieces and painting with wool I started with a 12×12 inch piece and added a couple of larger sizes. I found that the wool tended to sick to the foam but didn’t if you left the plastic on. The plastic covering for the foam would, with enough poking in the same spot, eventually break apart and first the plastic and later the foam would stick to the work.  About this time Memory foam was becoming popular and available. I looked at it but it looked like the needle’s barbs would tare into the softer foam quickly so have avoided it. If I find a free piece I will give it a test run, or I guess that would be a test poke.

7 Seat Cushion foam 18×18 by 3 inches deep

I used the seat cushion foam for a number of years finding the 2 inch thick pieces were good at keeping the needles from going through and they did last a reasonable length before expiring and needing retirement. (yes, I have worked with the foam on my lap so I know the needles did not penetrate at that depth. Or, I could have just have been less violent by then. I guess if you really were overly violent in your stabbing you could go through the foam but it seems a bit excessive and you probably should not be felting if you’re that angry! Unless the other options to needle felting foam would bleed if you stabbed it, In that case, vent your wrath on the foam!)

My next introduction to a felting surface was a foam kneeling pad from Dollerama at a portrait felting workshop. (It was a great workshop!) The pool noodle-like foam lasts longer than the chair seat foam and has not yet broken down in the same way that the upholstery types of foam crumbled as well as pitted in. As an area is overworked it collapses and turns from pool-noodle-firm to squishy, thinner on one side and indented.  You can get a bit of fibre build-up which happens on the cushion foam without the plastic cover but not to the same extent.  The second side of the pad is still usable but I have found it wears out quicker on the second side. The type I am using has a hollow center to each channel of the extruded foam that has been stuck together. The channel may be separating one side from the other as I use/stab it.

8 a reasonably well used kneeling pad foam, note that the plastic has started to tear away from a lot of felting.

 9 some indentation and collapsing of the foam from lots of use

10 very well-worn foam like a pool noodle, note some fibre sticking to the foam.

While thinking of pool noodle types of foam, don’t forget to consider pool noodles. They are not good as a flat surface but work very well for a support under a limb when working on a sculpture. I have also used pieces of pool noodle to hold needles if I don’t have them stuck in my work surface. Pool noodles come in various sizes from the tiny one Mr. Mer used to demonstrate a passive anterior shoulder stretch(about the size of a large primary grade pencil) to the extra-large adult-sized ones, with many other sizes and now shapes in between.

11 pieces of pool noodle used to hold needles

12 working with a kneeling foam and a picture

13 showing the hollow centers of the pool noodle like foam kneeling pad

I have tried the Closes Cell foam ½ inch thin kneeling pads, which are Much firmer than the 1-inch thick pool noodle kneeling pads. It has much more resistance to the needle penetration, which can be a good thing, as I will discuss shortly. The pieces I have found are small and work best for smaller sculptures or little pictures. It is similar to an interlocking child’s play floor. If you find the floor mats feel too thin, you can add a second or third layer to feel safer. This would allow much larger pictures worked on all at once. Remember that with this type of foam there is more resistance. Thus breaking the rule of “the needle travels the same direction in as it does out” will more easily wind up with broken needles. The resistance of this firm foam in conjunction with over-enthusiastic stabbing can also either tire you more quickly or cause you to feel muscle or joint fatigue faster than the softer foams. This problem may be a solution since it promotes shallower careful stabbing. This foam may also be better used with a slightly thicker wool base, a pre-felted batt rather than a thin sheet of lightly felted pre-felt

14 firm close cell foam

15 laying out dragons wing on close cell foam

16 Dragon standing on the close cell foam

17 a smaller version of the kids play interlocking foam tiles, which would allow for larger projects.

The Pink (I think I may come in other colours) foam insulation for basement walls is another option if you want to work big. I have a couple of pictures I would like to work on in a larger format so the pool noodle kneeling pad foam will be too small. (I know I could work one area at a time but I don’t really paint like that. I like to see the whole piece. I tend to work basically from background to foreground like a pastel but also adjust tones with thin wisps of overlays of fibre like a Watercolour or a vary washy acrylic. (Yes, I know it’s scandalous, but I did use my acrylics like watercolours occasionally, the Horror!!!). Pink foam is cheapish and acquired easily at a home building store. Sometimes it can even be found as garbage at constructions sites. The piece I have is 23×24 inches. It can be purchased in up to 4×8 foot sheets so the scale of your work can get Big if you want. At that size, it is not too heavy but it is awkward to move around and does not fit on a bus easily.  The other piece of Pink foam insulation I had was closer in feel to Styrofoam and it made a truly unique sound when you stick your needle into it. It sort of screams, in a way that does send shivers down my spine. If I kept going, I might be able to overcome this squeamishness since I know of other artists who do use this product for large scale work. This new “Foamular” hard foam is not as shriek-y as the previous piece of pink foam, so try to find one that is not as much like Styrofoam and closer to the close cell foam (at least for felting I am not sure if one or the other is better at insulating your basement).

18 close cell insulation foam board (Pink)

As I mentioned before for the ½ inch firm foam, also applies to the pink foam Styrofoam insulation sheets. Both have an unexpected advantage in depth training. They can be helpful if you find your enthusiasm in stabbing is destroying surfaces quicker than you would like.  With many of the foams, the needle will easily enter the working surface under your work, with the firm foams you can feel (and with the older pink insulation, hear) as the needle hits the work surface. The hope will be that you notice this and reduce the depth of your range-of-needle movement. (Remember look at the position of the barbs on your needle or needles. For most uses you don’t have to go any deeper than the working depth of the needle which engages the barbs.) Using a good working depth and not wasting energy plunging into your work surface will also reduce stress on your body. The exception would be when you are attaching parts of a sculpture, (Oops! I forgot to attach a limb!!). When attaching parts you will want to have the needlework deeply into your piece, sometimes beyond the working depth of the needle, but again not deeply into the mat.

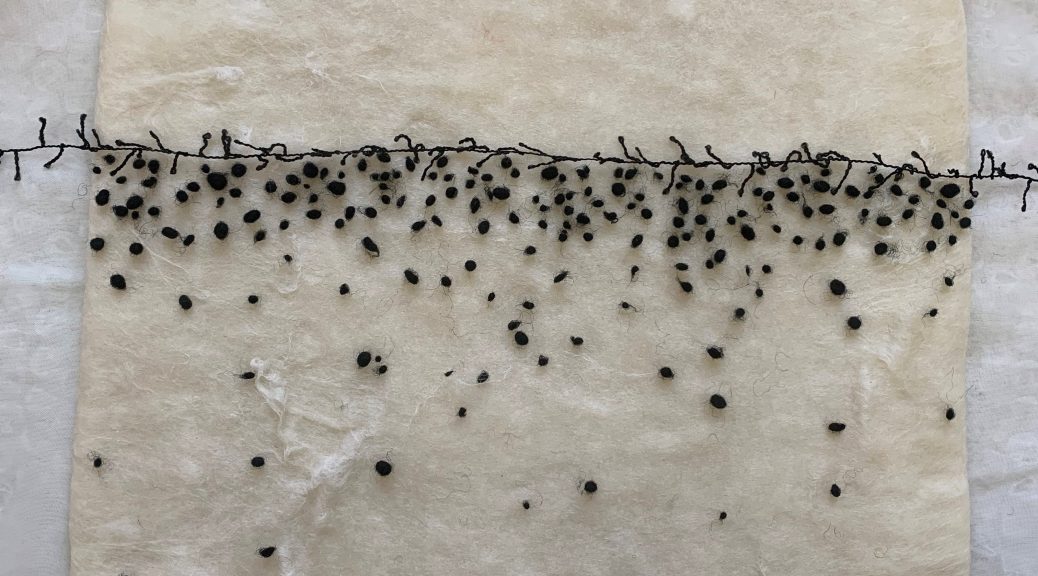
While we are talking about foam, I should talk about the black foam Ann gifted me with. It was part of the interior packing for boxes of air filtration units, which were delivered to her husband’s work. Its structure is more open foam than the pool noodle. You can see little bubbles that make up this foam. I, unfortunately, tore the pieces apart before I thot to take a picture for you!  I used a single needle as well as the fake clover tool to work on one mouse ear. It created a dent in the area I worked heavily on, quite quickly. It has a soft feeling as the needle entered the foam so may be quite nice to work with if I was using a thicker base layer (my test pieces were mouse ears and vary thin!!) I have asked Ann to save me a piece of the larger padding for a larger project.

  19 Open Cell Packing foam

20 Anther view of the dent from a mouse ear

I have watched the rice in burlap bags used, for a number of years now, and was very curious what the feel would be like to use one.  So, I have purchased a bag of burlap wrapped rice when it went on sale at the grocery store (Chinese New Year had excellent prices!). It was specifically identified as “not-for-cooking, this-is-an-art-thing” when I brought it home. I had wanted to try out the rice in burlap to see how it would feel as a work surface. When I was ready to try it out, it took me a while to locate the bag (it was sitting with the other bag of rice hidden in a corner of the kitchen. A sneaky hiding spot, it probably didn’t want to get impaled, repeatedly.) Unfortunately, Rice in burlap, at least this brand, only comes in 10lb bags on sale!

21 the brand of Burlap Sack of Rice I purchased

22 testing the bag of rice with mouse ears, flip frequently

23 little fibre attachment to the burlap but larger ears may have produced a larger amount of adhered fibre (note the needle-reacquisition-from-the-floor item)

24 Mouse is comfortably sitting on the rice bag

I found that the burlap did grab a bit of fibre and required me to flip the mouse ears frequently. (I have heard rumours that something rubber rubbed over the bag will lift some of the embedded fibre without damaging the burlap.) The feel of the needle entering the rice bag (end-feel) was quite comfortable (low not a lot of resistance). Since I have seen patches offered for burlap covered rice bags I suspect that the burlap if stabbed frequently in the same spot will wear out. Being able to add an inexpensive piece of burlap to keep it going should make this an economical, (if heavy), option to stab into or even better, to stab on top of rather than frequently stabbed into.  I am unsure how long the rice will last. In Ottawa, we can have an outside temperature swing from -40c in the winter to +40c in the summer. If your studio was outside in a lot of humidity I would suspect the rice would not last as long. In addition, if left undefended, this would be a very attractive item for the local chipmunks, field mice, Voles and probably the raccoons too.


Now there are 2 types of surfaces left that I have not yet been able to acquire that I would like to try, wool pads and a clover tool brush mat.

There are two wool options, one seems to have a wool cloth or felt stuffed with wool or a thick wool pad like an acoustic felt or firm ironing board pad felt.

A Wool pad, (like an ironing pad), I have been trying to track down. From what I have found online, from those who use or sell them, avoid the ones that stink and don’t use those. I suspect the smell will be from a chemical additive, possibly a fire retardant, or it is not made from 100% wool.  There are also mentions of wool adherence to the surface so again frequent lifting like the rice bag is recommended. I have seen mention of a thin piece of wool felt between the wool pad and the work, again it requires lifting to keep the wool from wanting to adhere where you don’t want it to stick. I am also wondering if the type of process used to make the felt will make a difference. Since most photographs I have seen so far, look like hot press rather than needle felting machine-made felt. This is not like the felt wadding that was under my ironing board, but a ¾ to 1 inch thick very firmly felted pad. I am looking forward to getting my hands on a piece of this to try out too. So far, there are not many places selling it as a felting surface and the price has been painful when you add shipping. (I will be a wimp and wait for the pain level to go down! –when it’s cheaper.)

A second needle-felting pad is popping up in some Etsy stores. It is a wool cloth or firmer felt cover that is stuffed with wool. It’s marketed as a more environmentally friendly option to the various foams used as felting surfaces. these are still relatively new and I would be interested in investigating both, what the end feel of the needle is like and what sort of length of use can be expected before patching would be required (similar to the rice bag patching perhaps?).


The other surface I have I have not yet tried is the Clover brush mat. Its small size and the very large price has kept my curiosity in check. If I find one secondhand, I will defiantly investigate this too.  I suspect the end-feel of the needle entering the brush would be very low resistance since there are just bristles and air spaces between them. I think the smaller working surface would keep this from being a favourite work surface for me. It is still worth investigating and may have some useful purpose in my felting tool collection. (Unlike the cellulose sponge I began with, that has been brought out to classes as a cautionary tale.


Now because I have heard rumours that I can be verbose, I also made you a chart. You can add another box with your notes on findings from different work surfaces too. The feeling of how the needle enters a work surface is from low to high resistance but what feels best to you is subjective. Try different work surfaces and see what is best for you for that project. I do change what I am using not just by what is close to hand, but by the scale of the project or what feels right for that piece.

Felting Surface Feel of use with the needle Size/projects Notes:
a sponge Cellulose felt slightly firmer than synthetic. Small size projects.

Car sponges are larger.

Both are cheap and easy to obtain.
upholstery foam Soft, little resistance from the needle. Larger sheets can be purchased and comes in deeper thicknesses than other foams. Can be pricey. I have read from different sources to avoid foam with fire retardant.

Working in one spot will deteriorate foam

foam seat cushions Soft, Soft, little resistance from the needle. I usually see 2” deep by ether 12×12 or 24×24 but other sizes are available. Leaving the plastic cover over the foam reduces the wool sticking and seems to lengthen the life of the foam a bit.
foam kneeling pad

– pool noodles

A bit more resistance than upholstery or cushion foam but still easy to insert the needle. 11.5”x13”  but a larger pool floaty was available briefly. It can collect fibre and collapses as it is used.  I have used these a lot and find them vary economical for 5×7 and 8×10 landscapes.
closes cell foam (Kneeling pad or interlocking play floors or some yoga mats) Firm, there is resistance to the needle entering the foam. if you tend to try to kill your felting with enthusiasm, this will tier you as well it may stress your joints. The kneeling pads I have are 7.5X17.75 They are easy to pack with you and can be used for both sculpture and pictures. They do tend to make me aware if I am stabbing too deeply. Puncture holes but no denting noticeable from 1 ear construction
Black plasticy packing foam Not as firm as the close cell or pool noodle foam Varies by the box it came out of. (Air filtration box)

Free from Ann.

This dented just under ¼ inch after making 2 mouse ears in the same spot with the punch tool. this would be better for pictures with a thick felt base. But otherwise worked well.
Pink foam insulation Firm even more resistance. There is also a sound that may offend your ears as the needle enters the foam. Easily available from building supply stores up to 4’x8’. Good for learning not to stab too deeply, good for Large pictures.
rice in burlap bags Vary comfortable to work with. I waited till the rice bag went on sale. the size was 12×11” I purchused a 10lb bag so I with back problems this is not a bring it with you surface. I suspect with extended use it will ware thin since I have seen burlap patches discussed on line.
Wool

-Felt over Wool stuffing pad

-Firm felt pad

-have not yet acquired one
Clover brush mat -have not yet acquired one

25 Chart of wool felting surfaces


I wish to thank Mouse for Her (?) assistance with this post. I watched Sara’s latest felt-along mouse but wanted to try a more close to life-size mouse. Mouse is close but still a bit big for a field or house mouse. Mouse also didn’t like the brownish outer layer I had made for her and insisted white was rite, well for her. I am sure the next one will be more mouse sized and I hope brown or maybe a lovely charcoal, like the voles in the backyard were.

This slideshow requires JavaScript.

26-32 Mouse volunteer to investigate felting surfaces.


I hope this has given you a few ideas about possible work surfaces to keep you Happily Felting.


An interesting felt sample

An interesting felt sample

I’ve been running a felt study group and I wanted to share one of the more interesting samples I did in the group.  I had some white welsh mountain sheep wool. I have no idea where I got it it was raw and I have had it for years because I didn’t know what to do with it.

By Vertigogen – woolly sheep, CC BY-SA 2.0, https://commons.wikimedia.org/w/index.php?curid=4875408

This is the description from Wikipedia with them giving credit to Morris, Jan (2014). Wales: Epic Views of a Small Country. Penguin Books Limited. pp. 53–57. ISBN 978-0-241-97024-9.

The Welsh Mountain sheep is usually white with a white face with no wool on forehead or cheeks and white legs with no wool below the joint. Females are polled but rams usually have curved horns, although some are polled. The fleece is thick and moderately long and the tails are not normally docked.

Breeders give a high priority to hardiness, milking ability, mothering quality and lamb survival. (Lambing percentage can be 130%, which rises to 180% under favourable conditions on improved pastures.[2]) It was not always thus; the 18th-century English agriculturist Arthur Young described the Welsh Mountain sheep as “the most despicable of all types” and a judge at an agricultural show in the 1880s described it as “a diminutive ill-shapen animal with its shaggy coat more reminiscent of hair than of wool”

I had a shoebox sized amount. As you can see not the nicest looking stuff, a bit like a horse’s mane.

I washed it in a laundry bag with some dish soap.

It took 2 washes but it came out a lovely white, white horse but white.

The locks average about 10 inches long.


I weighed out 25 grams and divided it into 4 and carded it into little batts. Each batt would be one layer of the sample.

The samples were all laid out 10×10 inches for easy calculation of shrinkage. At this point, I was skeptical that it would felt at all, it is so much like stong, straight hair

The piece was rubbed and rolled to felt and then rolled on a textured mat and scrunched for the fulling. Throwing doesn’t work well with such a small piece.

Much to my surprise, this is the final result. It’s a bit wonky but that’s down to my hand carding

It’s about 40% shrinkage and it is rock solid.  The most I got of any of my samples. It is rock solid. I tried to felt it more but it wouldn’t budge.  All the samples were made with 25grams of wool. It makes me wonder about people that say they get 50% shrinkage on their felt protects. Are they measuring differently or are they using very thin layouts?  I could see this felting more if I used half the amount of wool. so if I made a sample 20inches by 20 inches with the same wool I would get a higher shrinkage rate. What do you think?

Making a heather, tweed blend

Making a heather, tweed blend

The saga of our group silk purchase continues.  I was part of the purchase along with Ann and Jan.  I am a silk junkie so had to be very, very careful this time.  I only purchased some really new-to-me silk called peduncle.  As described by the vendors – “This is one of the most unusual spinning fibres we’ve ever encountered. It looks like pewter in fibre form. It has a stunning luster, and the brownish-grey colour is breathtaking. Peduncle tussah is fibre from the pedunculus (foot) of the cocoon, which is the little stalk the silkworm makes to attach itself to a tree branch.”  “Like all tussah spinning fibre, this one has “tooth” that makes it easy to spin. It’s a rare and spectacular spinning fibre.” I’ve been clearing out my stash and found a wonderful bag of grey with globs of coloured wool and thought it would be a perfect time to give tweed a chance.

I needed to do a test spin of the silk on its own to see how it feels, to be sure it would work with the wool.  I wanted the colour, but I wanted the lustre and strength too, so two small samples were done.  One is pure silk and one is a mix of silk and some wool.

Peduncle silk with a little skein of two ply silk
Close up of peduncle silk two ply
Close up of the silk/wool blend


Because I tend towards very, very bright colours working with heather tones is going to be a real challenge for me.  But I have been asked by a couple of people to at least give it a try to find some sort of earth tones that are complex to make into a yarn.  So this is my first shot. I dug through my stash and found a large bag of gorgeous wool, unknown breed and origin, but washed and ready to go.  It even had interesting colours added to the wool.

The best part for me was that the wool was washed.  This was a major time saver for me, especially at this time of year.  The colours in with the wool are some of my favourites, little bits of teal, brick red, olive green and the occasional dab of yellow or hot pink.  I was certain the silk would really work well with this mix.  The wool was teased apart into gorgeous clouds of wool. And then run through the drum carder for a preliminary mix.  This mix was weighed into 250 gm lots, that were split into 16 units, mixed and recombined into a final group of 16 batts.  This would give an even colour blend, but not a total mix.  The batts were only put through the carder four times.

I decided to keep things as simple as possible and weighed 250 gm of the wool blend to which I added 25gm of silk.  I’m saying this is 10% silk.  I suspect the percentages are not accurate, but so be it.

It’s really easy at this point when you need to add a weird weight to just divide the roving into equal lengths to suit your purposes.  In this case, I was going to do half of the 16 batts with the silk and the other half without, so I divided the silk into eight equal lengths.

I started the blending process on the drum carder and was surprised at what a difference adding the silk didn’t make.  I really thought there would be much more lustre, more glow.  I was certainly expecting more bang for the amount of work going into this.

These are examples of the two final products.  The top batt is 10% silk.  It is slightly more brown, and that’s about the best that can be said for it.  The batt at the bottom of the picture is the original before adding the silk and it has a slightly more blue tint, which I like.  I am not giving up on this silk.  While stash diving I found some other earth tone wool.  The strong pewter-tone of peduncle really is great and I want to find the right wool to pair it with.  I’m sure it’s out there. Experiments are always a way to learn something, so they are never a waste of time.  I never knew that making a really dynamic heather/tweed could be so challenging or so interesting.

Registration Open for Hanging Felted Spiral by Helene Dooley

Registration Open for Hanging Felted Spiral by Helene Dooley

Registration opens today for the online class Hanging Felted Spiral with Helene Dooley. The class is all about learning to felt a hanging spiral and will begin on April 8th. There are only 30 spaces available so register now to reserve a space. Register here by filling out the contact form at the bottom of the page. 

Helene has developed a method to create the felted spiral shown in the photo above. You will learn with Helene’s excellent videos and downloadable PDF’s. She will also be available on the class website for questions, sharing of your spirals and to encourage you to experiment with the knowledge gained in the class.

If you’d like to learn how to create a felt spiral, now’s your chance! To register for the class, fill out the form on the information page. 

Please note that Helene’s class is aimed at felt makers who have already developed their technical felting skills.  It is not suitable for felt makers who are at the start of their felting journey. A knowledge of book resists is preferable, though not essential.  Previous experience working in three dimensions is essential.  Also required is a basic knowledge of needle felting and sewing.


If you are a beginner, our online unlimited access Wet Felting for Beginners course, is always available. Please click on this link for further information and to register for the class. 


Let There Be Light

Let There Be Light

I’m out with lanterns, looking for myself.   Emily Dickinson

Sometimes things happen, that change our perceptions of who we are. That’s where I have been for the past 6 months, or more. I have suffered with anxiety and depression my whole life, but something wasn’t right this time. I decided to bring in the professionals, and I am so glad I did. Covid-19 and being rather isolated, to protect my mother with Alzheimers, has been really tough on me.

In an effort to turn things around, I started reading about the benefits of journaling your feelings. I tried bullet journaling, a couple years ago, and that lasted about a week. I have a gratitude journal, that I write in occasionally, but it’s hard to be grateful when you’re not feeling it. I read about art journaling and it seemed like a good option. It allows you to tell a visual story, with collage, paint, inks and all kind of media. Of particular interest to me, it can be amended anytime, with additional layers. I watched several videos, and was particularly intrigued with gel printing. I bought myself a small gel plate set, and used the brayer, I had from Ruth’s paper lamination class. It was a lot of fun, and husband Brian, got interested too. We signed up for an online class, Mastering the Layers with Carolyn Dube.

This article was coming up, and I thought a Multi Media Art Journal, would provide a perfect way for me to express all my different art interests. I found this wonderful journal, made by Ranger, that has fiber pages; denim, burlap, and heavyweight cotton paper. (Dina Wakley Media Journal – Blue Edition) This journal is perfect for expressing myself and the things I love.

For this article, I created the title page. I decided to include many fibers, and my related interests on this important page. My title “Love the Journey” reflects the new path I plan to uncover. I found an old set of magnetic letters, headed for the trash bin, and put them to use.


The butterfly was made from a gel print. The antennae was made from denim threads that raveled off the page. The right corner shows, some hand dyed coral silk lapp, cut from a wet felted piece I did quite a while ago. The blue pieces of knitting and crochet, are a combination of 2 threads; silk covered stainless steel, and a lace weight yak/alpaca/silk blend dyed by me. The silk covered stainless steel is one of those things, that seemed like a good idea when I bought it, yet has languished in a yarn bowl for years. Now, I have all sorts of ideas on ways to use it.


I included my shrink plastic and metal pieces, and embroidered them on the page with linen thread. The plastic hearts were a last minute addition to show humor is always a good thing.

Capi

9 Vases & a Plant Pot

9 Vases & a Plant Pot

Some of the first felt objects I made were vases: made around a flat u-shaped resist that I designed to try to get a good even layer of felt on the base (wobbly bases not being good for vases). Every so often I get the urge to make a few vases, so I thought I’d show you some I’ve made recently.

My felt pictures are often inspired by my coastal environment. So, I thought I’d make some coast-inspired vases.

I prefelted some recycled silk scarf pieces to make pebbles then added pebble shapes to the lower section. The sea area had a pewter-coloured merino base with blue and green wisps of wool plus some silky fibre for the sea foam. The wave was a combination of some sort of knitted yarn I’d also found in a charity shop, with added mohair and the same silky fibre (I’m not completely sure what it was, it was just hanging around and looked suitable!)

I made 3 in total – here are the other 2.

Sometimes it’s the materials themselves that suggest pieces rather than the local scenery.  I put some beautiful bright coral-coloured dyed locks against contrasting duck egg blue and teal merino and thought that might be interesting

‘Locks’ vase

Continuing my vase-making spree: I’d dyed some merino for a workshop last year and I thought it might be a good idea to use up some of the hand-dyed wool on vases.

Now enter stage left the plant pot.  A friend who’d previously bought a plant pot holder from me asked about making one specifically to suit a plant she had.  I wrote a blog a while ago about my love / hate relationship with commissions but that was about pictures – I felt much happier about a plant pot as it’s not such a big commitment.

I was keen to include her in the design so I did a couple of very quick potential design sketches and consulted her on the fibre colour choices. As the plant was only in a plastic pot with holes in the bottom, I scoured my local charity shops and found a beer bucket to make the plant pot water-tight.

We decided to go for coral / pink / burgundy colours to highlight the under-sides of the leaves and an overall texture rather than a leaf-shape pattern.

I decided to do the top of the inner 2 layers green so it would show when you look down at the pot. With hindsight I should have done the whole of the inner layers green but I wasn’t sure I had enough of the green so did the lower section white. I carded together various colours of merino and silk fibre rather than use the fibre labelled ‘carded’ on the fibre picture – but keep and eye on that as it comes back later on….. Then laid locks on top.

And here’s the plant in its personal designer pot. My friend was very pleased with it.

Then it was back to the vases but with a twist.  I recently found in a charity shop an old chemistry lab heavy glass 3 neck flask and, as ever, I thought….I wonder how that would work with felt.  There’s a little corner of my brain that is devoted entirely to felting possibilities and it kicks into play whenever I’m mooching about charity shops, which is often!

On the same day I found some interesting yarn in another charity shop so I splashed out a further 20p and thought I’d bring these 2 finds together.

I was clearly wearing my sensible head that day as I made a sample with the yarn to make sure it would felt and see how it came out.  Even more sensibly, I used it on both sides of my sample (I wish I always remembered to do that) so I could decide which effect I liked best

I stared to ponder the engineering challenge of the 3 neck vase and decided I’d have to have a hole underneath.  Usually my vase covers are solid on the under side and the glass slips into the top. With this I wanted the felt to fit tightly round the necks so I’d have the glass entry point on the base.  I carefully measured and calculated at least 40% shrinkage then made my resist.  This time an upside-down U-shape

I laid 4 layers of natural white merino over both sides of the resist then ran a single strip of the yarn around.  I then added single black nepps below the yarn line, more densely near the yarn and just a few further down the shape. This seemed like a good idea but it took absolutely ages to separate out individual nepps, pick out only round ones and of a similar size, and then place them where I wanted them to sit.  One of those decisions you regret before you’re half-way through but can’t bear not to finish as you’ve already invested so much time in it!

Anyway, here’s the finished vase.  Actually, I’m pleased with the pattern, although I’d intended the yarn to sit a bit further up the flask. I’d not properly taken into account how much of the felt would be underneath.

I thought I’d find some more old 3 necked lab flasks. Having consulted both EBay and Google it rapidly became clear that they are not to be had.  I have not found a single similar 3 neck flask (there are new ones which are much thinner and tend to have domed bases, no good for vases).  The nearest I could find was a similar heavy glass 2 necked flask which is on EBay for £40.  £40!  I now feel I can’t sell my vase as I don’t want someone to buy it for the flask and rip off the felt! So, that one is staying with me, at least for the time being.

And finally we come back to the pre-mixed fibre I mentioned (labelled ‘carded’).  If you’re ever lucky enough to visit World of Wool in Yorkshire, you’ll see they have two huge skip-type bins full of ends of lines and wooly remnants (one with coloured fibres and one just cream /white). There’s a low fixed-price per weight for the content of each bin and you can ferret out all sorts of hidden gems. I can spend a long time almost falling into those bins. This mystery fibre-mix was one such find.

I thought I’d make a vase using that plus a piece of a pink silk scarf I’d just found in a charity shop.  That day, alas, I was not wearing my sensible head and didn’t think to make a sample: partly because I didn’t have a lot of the fibre and partly, well, because I just didn’t think about it.

I laid out 2 layers of a matching pre-dyed merino, 2 layers of the mystery fibre and a strip of silk and set about felting.  Fairly soon my error became clear.  The mystery fibre was not felting at all.  I persisted.  It still didn’t felt.  I persisted.  And persisted.  In the end it did felt, presumably with help from the 2 inner layers of merino.  It shrank more than I’d expected and the fibre hadn’t been all that keen on pushing through the silk, which means the silk ruching is rather loose in places. But it’s fixed completely round the edges and anyway, I like a bit of loose ruching.

So, here are my recent adventures in vase-making, with a little diversion via a plant pot.  I hope you’ve enjoyed them. Do you have a favourite?

Mac Dragon

Mac Dragon

The Snow started Friday just in time for rush hour and continued into the early parts of Saturday. (Sometimes it’s good that I don’t usually go anywhere.) I do not want to go out and look at the driveway.  Looking at the garage roof, it may be better to stay in and finish writing this note to you. Then tomorrow, Sunday, I have some feet to work on if I can finish the gastrox and soleus muscles so I can get to the feet. I promise I will show you how that is coming in a later post. I also can report I have received Mr. Mer’s Hair! I will show you that but thought a week less fishy might be in order.


So to get to today’s topic I should get you caught up with my frantic (HA!!!) social life. Last week we were able to visit my brother, his family and my Mom for the first time since…. Well, sometime last year…. I think it was early August actually. We were hoping for a safe Christmas dinner but that plan was thwarted.  So it was an early March, (my)  Birthday / (Mom’s) Anniversary,  Dinner My brother was hosting. It was fabulous to see everyone and meet the new kitten (not quite so new now but still stuck with kitten brain). We were very pleased to get caught up on all the family news, especially exciting was the news that my Niece had been accepted into McMaster University. My parents and brother all went to Mac, I was a rebel and wound up in fine arts at the University of Toronto after doing 3 years of commercial art. (My Dad and brother were both PhD Geologists, but I love landscape so I guess that sort of fits in.)

I had brought my little ice dragon to show my niece since she has been interested in some of the strange things I felt. She did like the little guy too.

When I got home, I dug through the little ice dragons’ box and found I had his wing template but not the armature measurements. I did a few quick measurements of the ice dragon then started working on the little Mac dragon. I pulled out a couple of 18-inch steel florist wires and found the roll of 26 gauge steel floral wire and got to work.

 1 Armature in progress

This little guy is a bit bigger than the ice dragon but only a little. I used the 20ga for the main frame and used the 26ga for the tows and lower jaw (both yet to be twisted in the photo). I also added the 26ga over the main frame to give it a bit more strength. He needs to be able to stand up and look fearsome!

This slideshow requires JavaScript.

2-3 Adding wool to the armature body

I used a fine crimpy fleece I had purchased at the wool Growers Co-op in Carlton Place but found it to be too brown in tone. I switched to some of the core wool from Sarafina Fiber Arts, trying the darker grey but deciding on the lighter grey. (It’s really important to go check your source or reference material, in this case, the school colours.)

4-5 Always refer to your reference material

Now, to find the burgundy for the wings.   It is time to dig through the Red bin, I have a bag of red tones also in the basement.  Luckily, I found I had a corriedale called Aubergine by Ashford I had picked up at Wabi Sabi (one of the local fibre and yarn stores).

 6 “Mine!!”

The colour was perfect but looked a bit flat since it was too homogeneous. I added a bit of “i-have-no-idea-where-this-came-from fuchsia,”  which I had found while looking for my sari waste, which I never did find and I don’t think it would have been the correct tone if I had found it.

7 Mac Heraldry

A quick check of the McMaster shield Heraldry added the background colour of gold to the two colours Burgundy and Grey.  Ok, where did I put the boxes of beads, I need to find eyes!  They should be Gold or dark amber.

8-9 finding the right colour

I chose one of the dark amber beads in the little bag in the center of the second picture. The colour seemed to work with the body and upcoming wing colours. To add the eyes, I used a long needle to get the position, then used the tapered awl to get the depression the bead would be sunk into, (the eye socket). Leaving a longish tail of thread at the back of the head, I went from there across to the hole for the eye, added the bead and drove the needle through to the other eyehole. I again added a bead this time taking the needle out at the back of the head so I could tie the two threads together. I covered the knot with a bit more of the grey fibre.

This slideshow requires JavaScript.

10-14 “Don’t look yet! I can see my wings are naked!!!”

I again made a template to layout the wings. I dry rubbed them a bit to get them to be cohesive enough to remove the cards.

This slideshow requires JavaScript.

15-17 the strangely expanding wings.

Strangely with wispy wings, as I felt the wings tend to get bigger, not shrink like a good felt should do! Even my fiber is dyslexic and can’t be relied on to do anything the normal way everyone else dose! I could have done this using wet felting but I would have to have gotten wet so I went for the dry option. I am sure you will be much braver and may not melt with the application of dampness. If in dought you might try surgical gloves.

18 Mac Dragon is keeping close supervision on my work.

I counteracted the expansion that the punch tool seemed to encourage by working with a single needle on an angle, from each end, along the leading edge of the wing membrane. It was still a bit longer at the front edge than I had planned on, but I made a design change at the shoulder and was quite pleased.

This slideshow requires JavaScript.

19-24 the wings

“No don’t show that side! You haven’t added my tail enhancement!!!!”

“The Embarrassment!! Just for that, I will show them what you were drinking while you were making me!! That will explain any blurry or inappropriate pictures!!”

25 “Ha! She was drinking BEER!!!”

Mac dragon, it did take me 2 days to drink that one can, out of the 3 days it took to make you, so I am not likely to be too tipsy to operate a camera. Though it’s probably not a good idea to drink too much alcohol while needle felting…….

My final additions to dragon were the ear puffs with a bit of gold Bombay silk and the bifurcated tail embellishment. I added a secondary piece of wool and silk above the bifurcation. (I am sure it will attract other dragons with its flamboyantness and the bit of gold silk)

26 “I am the magnificent Mac Dragon! I can’t wait to start classes! I wonder what we will be taking…. I hope it’s Art!  Maybe stop motion animation would be fun?”

I tried out the Christmas video camera (the zoom is a disappointment and the frame rate is not as listed.) I had a long argument with the file this afternoon and got it finally to crop, rotate and convert to avi format.   I pulled out the little display turntable I had ordered in December(?), time is getting much trickery to keep track of than it used to be.  Let’s just say it’s the pandemic and I won’t worry about that too much. If I can get the file to add, I will add it here.

Video of Mac Dragon pretends to be a merry–go–round (If this doesn’t work I will beg Ann to help! Second try, my phone is much more shaky but worked better than the new video recorder for formatting!)

I would like to have been able to get Mac Dragon (short for McMaster U. Dragon) to his new home but I am snowed in until tomorrow. So, no one say anything to my Niece until after I can deliver him on Monday!

Keep safe and Keep Felting!!