Where did the sun go?
By the time you are reading this I will be back home in Lincolnshire but, right now, I’m tucked away in a lovely holiday cottage a few minutes from the beach at Beadnell in Northumberland wondering….. where did the sun go? This is one of my favourite parts of the UK, come rain or shine, and this week has certainly been a mix of both! One day I needed sunscreen and the next it was a full set of waterproofs!

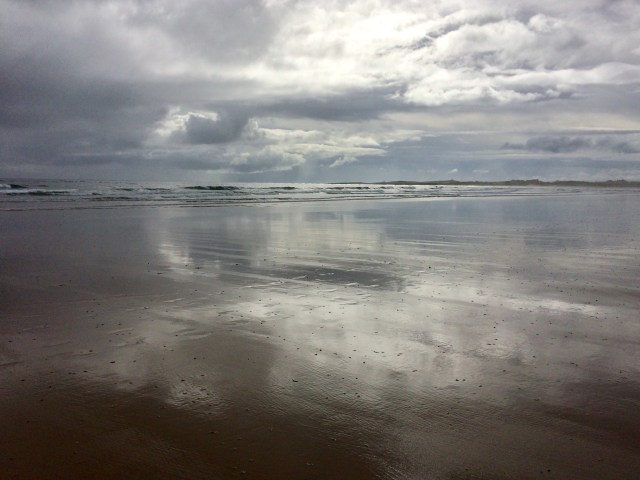
The beaches up here are a mix of fine golden sand, pebbles and wonderful layers of colourful rock – I can see a few of these images coming in useful as inspiration for future textile work.


But I digress……what I was wanting to share with you this time is my first attempt at sun printing. My friend Jacky has been doing a lot of this over the summer inspired by Micky Lawler’s “Skydyes”. A few weeks ago she suggested we get together in her garden, following social distancing guidelines, and she would show me how it’s done.
The first task was to roam around Jacky’s garden selecting leaves and flower heads for our prints. With eco printing certain leaves give better results (due to their chemical make up?) but with sun printing you can get sharpe prints from any leaf as long as you can make a good contact with your fabric. Some of the leaves we picked were hammered a little to flatten them out prior to use.


It was a very windy day so we used masking tape to hold down our cotton fabric before spritzing it with water.

Once we had wetted out we used a wide paintbrush and watered down (1:1) Pebeo Setacolor transparent paint to completely cover the fabric. You can buy paint specifically for sun printing but I’ve also read that any transparent acrylic paint will do the job.
Whilst the paint was still wet leaves and petals were then laid on and pinned, or weighted down using small pebbles, to ensure a good contact. We worked in the shade as fast as possible to avoid the paint drying out. As it was such a hot day the fabric was spritzed occasionally as we worked. Anything placed on the painted fabric acts as a resist for the sun, resulting in bleached out areas.
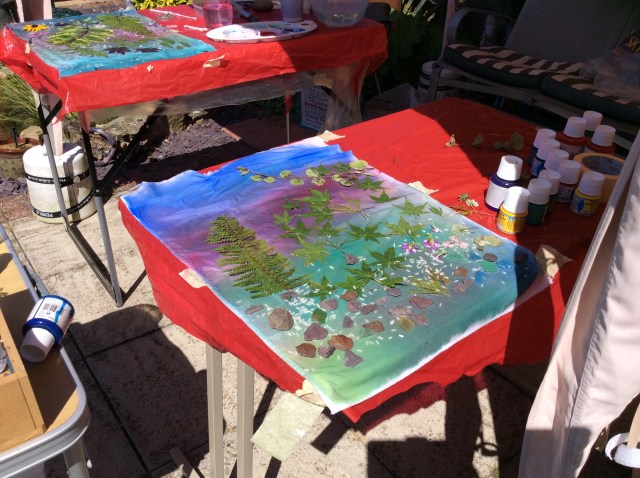
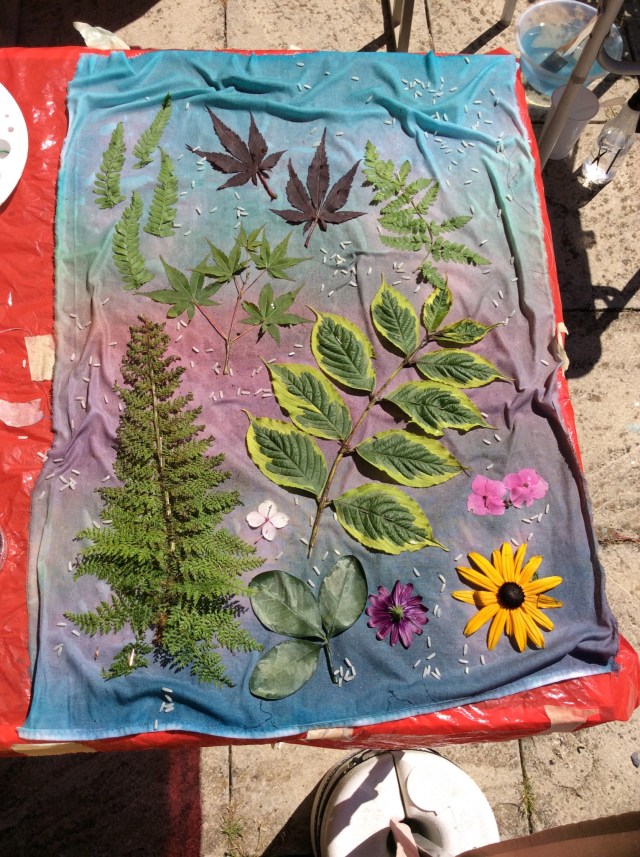
The work was left in the sun for an hour or so while we ate lunch and once it had done its job the fabrics were ironed and this was the result…..


We had a lot of fun and varying degrees of success but it’s surprising how much more interesting certain areas can appear when you use a view finder.


This final image is a beautiful quilt that Jacky went on to make using a piece of her sun printed fabric and silhouette appliqué. The effect is pretty striking!

23 thoughts on “Where did the sun go?”
I love this and will have to definitely give this a try with my kids. Thank you so much for sharing!
They will have so much fun!
That looks like so much fun Karen! Plus you have a lot of inspiration for new work. I just want to say, Who turned off the heat! I had to wear a coat today! 🙂
Me too Arlene, even had a felted scarf on this afternoon. Just got in from dog walking and needed a drinking chocolate to warm me up!
stunning
Thanks Lynn
Thanks for the lovely photos from your trip Karen. I do love examining rock strata and lichen. We recently did some sun printing with my group too. It’s fun and does give some interesting results. We used Dye-na-Flow paint but as you said, most acrylic paint will work. You can also do this technique with stencils. You don’t have to put them out in the sun. They will print as long as you have good contact with the paint and the resist.
I am always amazed how cropping can change the look of a piece. Your little framed pieces would make lovely greeting cards.
Thanks for the suggestion Ruth, I hadn’t thought of using them for cards. I did wonder if the technique would work equally as well without putting the fabric in the sun….I will have to give it a try with stencils.
Lovely part of the UK – super photos – and the colours you found there will find their way into your work.
Your printing is wonderful and the crops do look amazing.
Jacky’s imagination has resulted in a unique, beautiful quilt – love it.
Thanks Lyn and I will pass your comment on to Jacky
Very interesting and lovely results, thank you.
Glad you found it of interest!
This is inspiring- I love it.
It’s such a simple process but can yield some lovely results.
I’m sure I would have had duplicate photos, given the chance. Our weather has been baking to freezing in the blink of an eye!
Thank you for sharing the technique, I’ll have to try it, combined with Ruth’s info.
Your cropped pieces are real stand out works. I’m always fascinated by the difference cropping can make. Lucky you having mounts to hand.
With the additions Jacky has created an amazing, eye catching, story telling quilt.
I often frame my work so I’ve always got a pile of picture frames and mounts available. It’s also useful to have a pair of “L” shaped pieces of card to use as a viewfinder as it allows you to make the area of focus larger or smaller.
Jacky has created some wonderful pieces with her embellisher too….I must get some images of that work to share another time.
What lovely beach pictures. The sun printing is interesting. Is the fabric stiff feeling when its done? It Is amazing what framing can do for a piece. The quilt is really good. The ghostly leaves really work.
I can certainly recommend those Pebeo paints Ann, they are designed for fabrics so don’t cause the slightest stiffness.
Wow! that is a cool afect! i love the way a mat give gavatas to an image and it make finding a compelling compositon much easyer. beautiful work thankyou for sharring!
Thanks Jan, glad you liked it.
Thanks Jan.
Lovely pics! Lucky you at the beach. The prints turned out nicely. It’s good you could spend some time with a friend out in the sun!
Yes it’s a lovely part of the world Marilyn.