Browsed by
Month: August 2020

Felt Rope and Structure Part Two or How To Wet Felt A Dill Pickle

Felt Rope and Structure Part Two or How To Wet Felt A Dill Pickle

I showed you my first failed experiment with a felt rope and using it for structure. I got loads of good ideas on how to improve the experiment and took those suggestions and came up with a plan.

First off, I decided to work around a flat resist and use the same kind of wool for the felt rope as the rest of the surface. So I used mixed 56’s that I hand dye. I dry felted a felt rope from the yellow wool. I didn’t add any water at all but just rolled it dry until it was holding together. It wasn’t firm at all. I left the ends loose so that I could make sure the rope was well attached.

I covered the resist with light green wool with a couple of thin layers all running lengthwise to the resist.

I then wrapped the felt rope around the wool covered resist and added a couple more thin layers of wool in the light green. I added a bit of darker green to the ends.

And then I rubbed and felted and began fulling before removing the resist. Here it is after I took the resist out.

And then I fulled it into submission. You can see how much shrinkage there was in comparison to the resist. It is very hard and certainly won’t lose it’s shape.

And here it is after I shaved the surface a bit. It could use a bit more shaving but I haven’t had time to let it dry yet. So once it’s dry, I will shave it again. To me, it looks like a dill pickle or perhaps a small minnow? It is much more in line with what I was thinking when I first tried the experiment. I will have to try it on a larger scale. I’m not sure that the felt rope adds any advantage over prefelt cut in a strip. Perhaps if I have gotten the rope a bit harder, it might have effected the shape more. Next time, I think I will lay the resist wool going around the short side of the resist instead of lengthwise. I would also use less wool on the ends of the rope or just use a cut strip of prefelt.


Cuffs and Stuff

Cuffs and Stuff

A couple of years ago a friend alerted me to the wonderful Australian magazine simply called “Felt”. It’s only published twice a year but I look forward to it eagerly as it’s always crammed with interesting photographs and articles including artist profiles and project tutorials.

One of the artists featured in the latest edition is the Canadian born feltmaker Christianna Ferguson. Christianna’s work is very colourful and textural and, as well as teaching and exhibiting, she also creates what she calls “more functional art: scarves, purses, cuffs, tea-cosies and wearables.”

Examples of the colourful and textural work of Christianna Ferguson

So, having read about her work, when I turned the page and saw the tutorial for making her fabulous little Nuno felted and hand embroidered cuffs I had to have a go!

The fasteners are particularly cute and make an interesting feature but I struggled to get them as firm as I would have liked. For an added twist I’ve included some hand stitching and a bead to my fasteners. I added some hand embroidery to my green cuff but wasn’t happy with it…..looking back at Christianna’s examples I can see that my stitching wasn’t subtle enough! I much prefer the grey one which I left plain.

The good thing to come out of this exercise, having made two in this style, is that I’ve been reminded how much fun cuffs are to make. I designed several Nuno felted & free motion stitched cuffs for my sales tables last year and this has encouraged me to get on and make more.

Some of my earlier cuffs – can’t help but think of bacon rashers when I look at this photo!
Nuno felted and free motion stitched cuffs

I also got thinking about other possibilities and how much more sculptural I could make my cuffs. The next set are based on the design of one of my bangles, using a felt ball as the fastener and keeping the little beaded element.

The bangle that inspired the cuffs
The slits have been filled with half balls and metal buttons

They were all fun to make but I’ve come to the conclusion that I prefer the irregular shaped, Nuno style with the stitched edging (from last year) so I’ve come full circle! These are two I started this morning…..

Pre-felts laid out and wetted prior to felting
Using differential shrinkage creates an undulating surface

And this is them finished. Christianna said that when she makes hers “each cuff feels like a little piece of abstract art” and I couldn’t agree more. Although I love creating larger pieces of work there is something very satisfying about making these little cuffs and ending up with a totally unique, wearable item.

Felting Alfresco (outside! Its Summer!) Pet Two Part 3 She is Naked! We must fix that!!!

Felting Alfresco (outside! Its Summer!) Pet Two Part 3 She is Naked! We must fix that!!!

Felting Alfresco (outside! Its Summer!)

Pet Two Part 3 She is Naked! We must fix that!!!


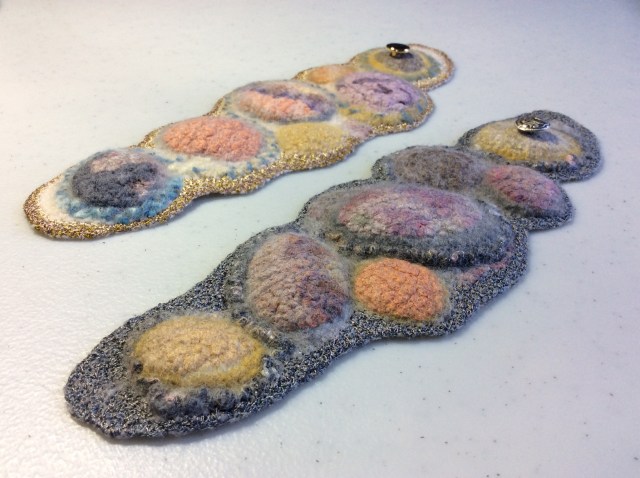
Now it’s time for me to start adding a bit of colour! this is where we left off last time.

1928

this is the understructure of the manta ray next will be laying colour on top of the structure, like a gresi painting.

12 1-2 laying in the T line so she is an oceanic manta

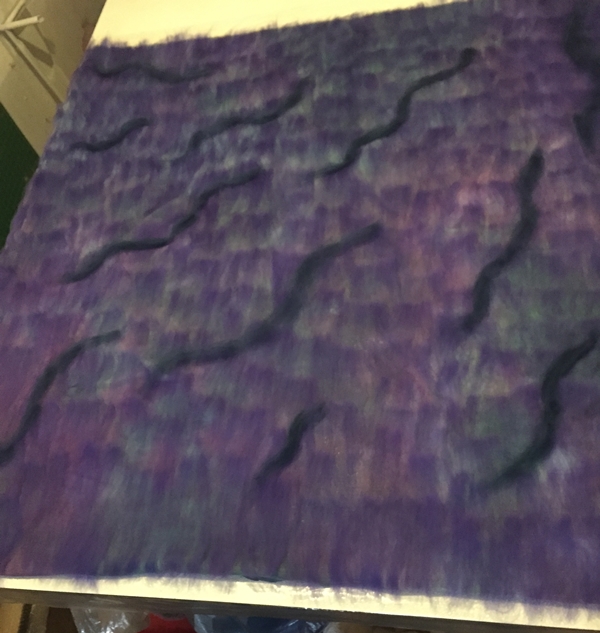
If you have taken art classes, either commercial or fine art, you may have had a teacher that reminded you that paintings with large black spaces are not as effective as deep shadows with suggestions of something within the shadows. So not a solid black but layers of dark blue, green, charcoals and browns with maybe a bit of pure black. I mixed the darkest charcoal with a very dark green and blue. I also started to add some of the lighter greys in thin wisps over top to give that dappled light effect.

 3-5 base layer of simplified pattern and fibres I was working from

 I kept a zip-lock sandwich bag of mixed greys which I could then make lighter or darker as I needed.

676-7 Zip-lock of greys, a bit of mixed colour sitting on her shoulder about to be added in a thin layer over the dark sections.

Distracted by Princess Auto flyer, the snap ring plyers I have and use to bend the ends of the wire are very tiny and not as smooth as I would like. So I will be off to check these out at next weeks’ sale. I will likely also replace my old wooden bench (the one I was stuffing unskirted raw wool into bags on) while I’m there.

 8-9  This is Next week’s Princess Auto flyer! Another great place for fibre related tools, really! It is where I found the Bee combs! (Yes!! We got the Bench!! However, they were out of the cool plyers)

I added the Dorsal fin, I made the basic shape and added it just above the base of the tail. I then build up the sides of the fin to give it more of the correct shape.

1011 10-11 added the Dorsal fin then built up the sides

After checking with the photo reference I brought the darkness around the edge of parts of the wings

1213

12-13 Bringing the colour to the edge and just around.

Next adjusting the angle on the lower part of the white shoulder markings and adding white to cover thin areas where the understructure was showing through. So far she does not have any under spotting but I may revisit before the end of the entire project.

1415 14-15 Final touch-ups on the back of the mantel.

16-19 looking good, but she will need eyes so she can judge that for herself

Time to add eyes!  Hmm, I think we need a bit more extension on the eye orbs or she will not be able to see around her Cephalic fins. I surrounded the pupil then used the super sharp scissors to cut off the excess. (I found these again at Dollarama, for 4.00 Canadian, they have worked very well so I bought a couple more pairs).  I may leave her for a couple of days then re-evaluate the eyes, they are not quite right yet but close!

  20-24 Adding eyes and the nice scissors from Dollerama

I think the heat was getting to her since she started her photoshoot by stealing my glasses and mask!

  25-27 Mantas seem to be curious and playful and maybe a short-sighted

Oddly, the glasses seem to fit her.  Unfortunately, the mask does not quite cover both her mouth and gills.

So on to the photoshoot!!!

2829

28-29 She seemed a little static in her poses, so l let her loose in the garden to have some fun.

     303132       3335343736  30- 37 A quick swim through the front garden (wait till she finds out there is a back garden!)

I took her out to buy butter tarts and to show Ann. It’s good to get out and meet new people but she forgot to wear her mask!! I think she will need to quarantine before she can play with her Mer-People!!!

38-40 Felting is better with Butter tarts

I hope you have enjoyed the creation of my adolescent female Manta Ray. I still have more to do with this set of sculptures so please keep checking in on how it is going. Have fun and Keep felting!!

3rd Quarter Challenge and Summer Poker Challenge in One.

3rd Quarter Challenge and Summer Poker Challenge in One.

My guild does a summer poker challenge every summer. first, you pick weaving or spinning or new this year felting. You pick 3 cards from a deck of cards to find out your challenge for the summer. The idea is to get you to try something you wouldn’t usually do.  I picked my card in June. I got blue, cotton and metallic.  Then Lyn and Annie announced the 3rd quarter challenge of a personal item to keep you warm. There is more about the challenge here:

2020 Third Quarter Challenge

The first thing I did was dye some open-weave cotton I had.  You can read more about that here in this blog post I did:

Cotton dyed and some new fibre.

All the pictures will open larger if you click on them.

My plan is to make a lightweight poncho for cool evenings. This requires a big layout. the start is 4feet by 4feet. I put the first layer of cotton down and decided to use thin plastic for the resist so it would roll up easily. I don’t need to feel the edge of the resist like you do making a hat.

I added the second piece of cotton and sewed around the edge using big basting stitches.

Then I took it all out and overlapped the edges and sewed it up again. The edge will be visible on the inside and I didn’t want the seam sticking out.

All sewn together

Next, I added a very thin and not perfectly neat, layer of medium blue. I want the cotton to show through. Then started adding the embellishments. Sorry about the pictures not being great but I am holding my phone as high up as I can, trying to get an overall shot.

This one is a bit better. Mostly the embellishments are wool in different colours.  I added the metallic threads to take care of that part of the poker challenge but didn’t get a good picture.

These are the 2 sparkly nylons I used for the metallic part of the challenge; bronze and steel. I only used a little. I don’t want to sparkle very much.

Next is wet it all down, and start felting- rubbing and rolling.

When it was starting to shrink I opened one corner to be the hole for the head and opened the bottom 2 sides.

Here it is finished.

And the cotton sides

Here are some closeups

The cotton side

The wool side

And the metallic bitts, they don’t shrink so they get wiggly.

I am very happy with the result. The wool separated out and let the cotton show through. It has a nice light feel and I think it invokes the feel of moving water or ripples on a pond. It should work well for cool nights.

Slow Stitch Update

Slow Stitch Update

Sorry for the short post but I have been busy with my Level 3 Stitch class this past week. We are continuing online and even though I don’t have to travel, it seems to take more time this way. But at least we are able to move forward.

I have still been stitching for 15-20 minutes per day on my autumn nuno felted piece.


The last time I showed you it looked like the photo above. I continued to add more dark values in the rows of “aspen” trees and also added more dark green to the distant pine trees. Ann had commented that she didn’t see trees in this piece. Hopefully, the additions I made will make them more “tree like”.

Here it is after those additions of darker value.

And here’s a close up that shows the difference in the distant pine trees before and after adding more thinner thread in dark green. The trees on the left are finished as compared to the ones on the right.

So what do you think? Did adding the darker values help the distant tree lines?

I hope you’re staying well and spending time being creative. Thanks for stopping by!