My local art group had our annual art retreat the first weekend of September. We were lucky and had gorgeous weather and no smoke from any forest fires. We get together on Friday afternoon and stay through Sunday mid afternoon. Our two activities were deconstructed screen printing and gelatin plate printing.
Here we are inside doing some gelatin plate printing. The area in the middle is covered with plastic and we lay out all our work to dry. I took the photos from up in the loft. The floor was covered with loads of wonderful color by the end of the day.
Most of the photos that I took at the lodge didn’t come out all that well. The light isn’t good inside the building and it was a bit windy to take photos of papers outside. And I didn’t get any photos of screen printing because I always get so involved in the process that I forget to take photos. The slide shows below show mainly my work because I took photos afterwards but there are a few from other members. Anything on fabric or felt is not mine as I only printed on paper this time.
This slideshow requires JavaScript.
These are deconstructed screen printing. Paula brought some paper coasters that we tried printing on too.
This slideshow requires JavaScript.
And these are the gelatin plate printed samples. We used a variety of methods including stencils, magazine transfer and alcohol inks.
And here is the pile of printed papers that I can now use for my art and design class. I use them for collages and backgrounds. We had a great time and we’re already looking forward to next year. We have big plans for all our monthly sessions and I will share those as we go along. Do you have a group of people who you create with? We’d love to hear about it over on the free forum. It’s free to join and you can share your work, talk with other felt and fiber makers and ask questions. Come join us!
A few weeks ago I spotted a last minute ecoprinting workshop that Kim Winter from Flextiles was running, this is a technique I have been curious about for some time so I jumped at the chance to go play with a lovely group of ladies. It turns out this is the perfect time of year (in the northern hemisphere) to be ecoprinting as most plants are at the end of their growing season and I don’t feel so bad about denuding my beautiful Acer knowing it will shed its leaves in the next few weeks anyway.
The workshop focussed on printing on silk, probably the easiest of fibres to print as it doesn’t need to be mordanted first. These are the pieces I made during the workshop, out of respect for Kim I am not going to share her methods here but I think most of what we learned is available on the net. All but the first piece were printed with an iron blanket:
Printed and simultaneously dyed with onion skin, note the repeat (ghost) prints as no barrier was used
Silk dyed with tanin and iron blanket
I also took a few scraps of nunofelt along to the workshop just to see what would happen and was pleasantly surprised with the results:
Top piece was dyed with tanin before printing
Although I came away from the workshop with a good range of samples I wanted to test more of my local plants on both cotton and silk and with my notoriously hard local water. The cotton was mordanted with 10% Weight of Fabric (WOF) Alum (Aluminium Potassium Sulphate), rinsed and dried before use. Mordanting is a process that makes it possible for the dye to form a chemical bond with the fabric, therefore making the dye colours stronger and more light- and wash-fast.
For almost all the leaves I placed one leaf (on the left) with the veins facing the fabric and a second leaf with the veins facing up. In almost all cases the side with the veins gave the best print.
These are my results on silk, as you can see, some plants produce much better prints than others. Clicking on the photos should enlarge them enough to read my plant labels, I am ashamed to admit I don’t know names for all of the plants are, so some are just location labels for my own reference:
And these are my results on alum-mordanted cotton (the cotton is pink from a magenta coloured top included in the mordant bath, but had the unintended benefit of revealing which plants might discharge the dye):
In the next photo the leaves in the lower left corner clearly discharged the dye.
I also had a play with some natural dyes too, madder and logwood. My biggest learning is that madder loses its colour above 60ºC so printing with steam onto madder-dyed fabric causes the colour to fade. But how I love logwood! You can get anything from pale grey-purple through to the deepest indigo-purple colours depending on the strength of the bath and how long you steep your cloth.
Pre-dying cloth with logwood has opened up the option of discharge printing, a technique that relies on the ability of certain plants to remove the dye from the cloth. These are some of my test pieces, very few of the plants I tried removed any of the logwood dye:
Feeling brave I raided my local charity shops for pale coloured clothes with a high cotton content and these are the results of my first attempts, some I am really pleased with and have been wearing at every opportunity 🙂
This was my first attempt, I was a little disappointed that the large fern frond I placed on each side only left a pale smudge rather than a print but otherwise there were some nice geranium prints.
This was the offending magenta top that dyed my test cottons pink but I was really pleased with the subtle crimson prints it gave.
This one was initially shibori-dyed with logwood – that gave the barbed-wire effect across the top (best seen in the second photo) and then printed with sycamore and deutzia leaves.
This is my favourite print so far, it was predominantly sycamores and acer. The lovely orangey-yellows were from just one tree, it still amazes me how different trees from similar species give such different prints.
This shirt was dyed with logwood and then printed with sacred bamboo and sycamore leaves. Unfortunately you cannot see distinct leaf shapes from the bamboo, it looks more like I splattered the shirt with white paint, the sycamore leaves gave a nice crimson print though.
I tried reprinting over the white areas with some more sycamore leaves and some virginia creeper. I’m still not happy with it… perhaps I will dye it with logwood again and just print with sycamore leaves instead.
I found some very pale lilac jeans, they still had their original shop labels, clearly whoever bought them had second thoughts about them by the time they got them home. Initially I printed them with chestnut and geranium leaves but was really disappointed with the pale quality of the prints so over printed them with sycamore leaves, that added the yellows and greens you can see below. Some of the yellow patches were in some rather unfortunate places…
So back into the dye pot they went! This time I rolled the jeans up with more sycamore leaves and a few from my acer tree and put them in a logwood dye bath….
I was hoping the logwood would reach the groin area on the front as well as the back but I do like the way the purple plays against the yellow.
If you are interested in exploring ecoprinting, these are some resources that I have found useful:
Printing with Botanicals FB page – there are several FB pages dedicated to ecoprinting but this one insists that anyone posting their work shares the method they used – incredibly helpful for beginners.
Wild Colours – a UK supplier of mordants and natural dyes but they also list methods and recipes on their website.
For natural dyeing I can recommend Jenny Dean’s book, Wild Colours, she provides recipes and methods as well as colour swatches to give you an idea of how alum and iron will impact the final colour.
I finished the needle felted piece I showed in my last blog post, and with some nice, bright weather I managed to get a good photos of it too!
I also finished another piece that I made using the same wools from Cathy which I showed in a wet felted piece previously:
The natural dyed fibres look far less ‘harsh’ than the acid dyed ones, I think. This is the same Turmeric dyed locks I used on the wet felted piece:
And, I don’t know what this was dyed with, but I think it’s Alpaca:
And one last needlefelted piece, I had forgotten all about this one! I was looking for a box to use and found one on top of a bookcase, it didn’t seem to have much in when I shook it, I was surprised when I opened it and saw this! I’m not sure if I’d considered it finished or just forgot all about it. I made it using scraps I’d saved, I think I got concerned about some of the threads which had got mixed up in the ‘wool for birds’ tub, after reading about how threads and long hair are responsible for pigeons losing their feet. It’s really soft and lightly needled:
I think I’ll be making felted soaps this week, we made one at the well being centre on Monday and I didn’t hate it! What are your plans for this week?
This is a guest post by one of our forum members Antje Ream.
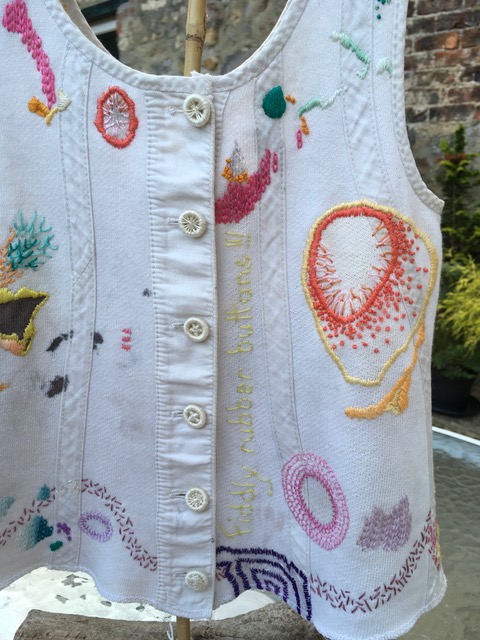
Many women of a certain age will remember ‘Liberty Bodices’. These were the vests of the day. At the age of 7 or 8 I was not a fashionista, not like so many children today. We had more serious things to do like play doctors and nurses with our dolls or build dens with bed sheets over washing lines etc. All I remember about them was that they kept me warm but more importantly they had EXTREMELY fiddly rubber buttons down the front. Some bodices even had them on the side.
As already mentioned I am of a certain age, but to my surprise one of my bodices resurfaced a couple of years ago when my late father asked if I remembered this ‘cloth’. He had been using it for decades as a shoe polishing cloth. Although badly stained it was still complete and somehow it set my creative juices going….which meant dad had to find ‘another’ cloth! Sadly the rubber buttons totally dissolved when I laundered it.
Above I’ve started stitching, although I didn’t like it. Nearly two years later and the juices had found the right recipe. I’m sure I’m not alone in this regard. I started to stitch around the stains using different colours and types of stitch, but nothing tooooooo complicated. It helped me remember many happy times growing up.
From my avid explorations and research on (read that as addiction to!) Pinterest I gleaned some useful ideas, combined with input from my EPH (Ever Patient Husband – he is a brilliant hobby painter so has a good eye) and others, I finally completed my slow stitch piece. The last few days were not quite ‘slow’ stitch as I wanted to enter it into a village show. Then came the method of presentation problem.
Using a piece of polished driftwood, I roped my neighbour into helping me create the stand – the night before!
I titled the piece….Polished Childhood. I could say more about the colours and continuous line of stitches but I’ll leave that to your imagination. Unable to replace the original buttons I recreated them by making individually patterned ‘Dorset’ buttons and stitching a comment about the rubber ones as a reminder. Dad would have loved the result and we would both have laughed and giggled at all the memories. Writing this has just made me realize the bodice is a tribute to him (and my still active mum)….totally by chance.
EPH and I arrived at the show just at packing up time….WOOHOO……..a red ticket I will certainly treasure!
Thanks for the wonderful post Antje! I am sure it will bring smiles to the faces of those who remember wearing the same type of bodice.
Although the Ottawa Valley weavers and spinners guild is the largest guild in eastern Ontario, we also have many smaller neighbour guilds. One of the closest neighbours is the West Carleton Fibre Guild who hold their meetings on a Tuesday afternoon in Dunrobin, Ontario (just a bit past the west end of Kanata). But the September’s meeting was special.
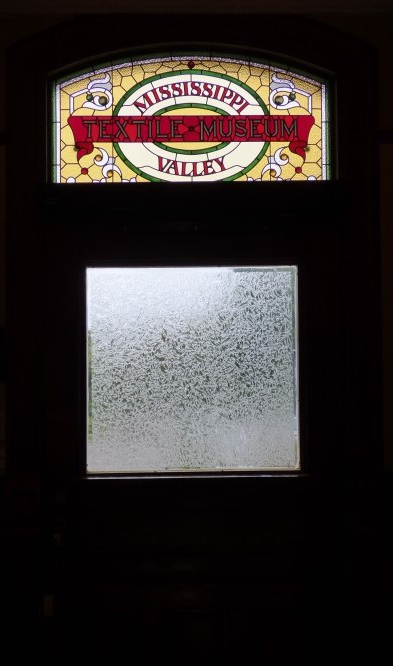
Back door of the Almonte Textile Museum
They had a field trip to the Mississippi Valley Textile Museum in Almonte. The trip was planned so they could have a special tour of the Puppet exhibit by Noreen Young. At present there are 3 exhibits at the museum. There permanent display of Mill equipment and modern weaving looms, a spectacular quilt exhibit and Noreen Young: a Puppet Retrospective. With 150 examples of some of her life’s work in puppetry. She is internationally known and has received the order of Canada for work with producing, writing and puppeteering in many children’s and educational programs.
Poster for the exhibit. First puppet in the exhibition (a rod puppet with detachable legs
Noreen with her first puppet
She gave us a tour through the exhibit explaining different puppets and giving anecdotes of her work with them. She was asked if she had a favorite and told us her Granny character, Mrs. Gertrude Diddle and Gloria Gopher she was particularly fond of. She took some down from the display and showed us how they moved and what they voice sounded like. She did the voices for most of her puppets but occasional had to lip sink to a voice actor which was harder.
Almost all her puppets were to be worked with the puppeteer below holding one arm up to operate the mouth and the other hand controls the rods to move the hands. She showed us how it was important to make the puppets bob as they moved or it looked like they were skating along or floating in the air witch just wasn’t right.
Her earliest work was in the 60’s “Hi Diddle Day” 1967 to 1976. These puppets are in a glass display case with a couple more the puppet cast. Not all the puppets are in display cases though.
Displayed on shelves with monitors showing bits of the program they were used for beneath them were the Puppets for “under the Umbrella tree” which ran on CBC, Disney and Canal Famille from 1987-1997.
She explained about the studio being an old garage and having a lower ceiling than studios usually had. So the puppeteers had to sit on rolling boxes since they could only raise the live actor up a certain height before the ceiling was a problem. For most shows she said the puppeteers stood on the floor with the live actors raised on platforms so they could interact with the puppets. The head bands the puppeteers are wearing holds their mikes. This insures the mike is always the same distance from their mouth as they switch between looking up at the puppet and down at their scripts.
There were puppets from series I didn’t remember but am now sorry I missed. “Bats” from a 1987 Pilot.
Also “Wacky Palms” from 1994 about a small boutique resort in the Bermuda triangle. Run by a cow with a theatrical past and with an eclectic staff. Strange things happen when a time portal opens and havoc is unleashed upon the hotel.
She said that some of her most effective puppets had elements of movement such as the feathers for hair, parts that dangled or the way the fabric moved with the puppet.
Noreen was also known for her Caricatures of real peoples. Her Prince Charles from 1975, created for “What’s new” a kids news show for CBC, is very recognizable. She also made a copy of the mayor of Ottawa.
She has made caricatures of may Almonte area people (about 50 on display) who have been used in various puppet shows in the area. She was the artistic Director for “Puppets up!”; an annual international puppet show from 2005 to 2016. International puppet shows from across the planet performed in the tiny town of Almonte.
There are some puppets that can be interacted with. It will take 2 people to run them one is the head and hands and a second person runs the feet.
She did puppets for and educational spot about food nutrition.
This is the Granny Bride puppet she made for a friend in 2000.
I didn’t recognize this group of puppets but it looks like an interesting cast.
Most of Her puppets are made by sculptor the head in plasticine then casting it. She uses the cast to create the flexible, expressive rubber faces she uses in her puppets.
She has given 3 workshops on making puppets during the run of the exhibit and has another lecture to do before the exhibit closes. My husband was lucky enough to get a spot in one of her workshops. She said he was very well prepared and had amazing focus making his puppet Blacksmith. He said he had a blast and was very glad he had gone.
Glenn Martin Blacksmith puppet
This exhibit made me smile! I couldn’t help but feel happy looking at all the puppets many I recognized. I am sure you would enjoy seeing them too. Keep an eye out for Noreen she says she drops by regularly to the exhibit.
We’ve been needlefelting at the Well-Being Centre. We started last week when there were just a few of us. One of the members liked this painting of ducks that is on the wall:
This was how far she’d got at the start of this week after doing a little of work after taking it home last week:
I think I’ve mentioned it’s a basement room with strange lights and 2 tiny windows, so the light isn’t great. I started an abstract piece using some of the dyed locks we have:
Some of them are commercial dyed BFL from World of Wool. This is a green one:
And, I think this is some dyed locks Lyn donated to us when we were first starting out:
These weren’t done at the centre, but one of the members brought them in. She was a really good sport about us laughing at her first attempt. And we weren’t being mean, we know it’s just at a stage where it looks comical:
She started on a different one, and liked how that progressed so did a little bit more:
I’m looking forward to seeing them finished! She also brought in a nuno sample she made a few weeks ago, at the same time I made mine, this is the blended 18.5 mic Merino side:
This is the front:
And this is a close up of the texture:
I’ll have updates of the needle felting next time 🙂
Last week I taught a Ruffle Neck Scarf workshop. This was the first time teaching it and it went very well. I was worried about the timing but it all worked out. I thought the class at the Mississippi Valley Textile Museum. They have a nice big classroom with lots of light. and water.
As usual, I forgot to take pictures early but here are two of them being laid out
You can see the template they used to get the layout right and keep it even from one end to the other. I drew it with the outline to follow and a line on them to let them know when they had shrunk enough.
Here they are using the plastic under their scarves to make nice edges.
And a shot of the class working.
Here are the results. I really like the ones where you can see the wool that migrated through the silk.
The Class was a lot of fun. I made the written instructions more detailed than normal because I want to make it a kit. If I ever figure out video iI would like to make an online workshop. If you were to buy a kit for a ruffled scarf would you want it to be a short neck scarf or a long scarf? the only difference really would be the amount of wool included and the length of silk. I was thinking a short scarf but include the sizing to make a longer template too. I am wondering about the template I usually use thick plastic to draw it on. but it is too bulky to fold flat and too big to ship cheaply rolled up. Should I include a template on thinner plastic or just the instructions on how to draw it up on whatever you want to use?
Believe it or not, 2018 is coming to a close and the last of my online classes for 2018 begins on October 5, 2018. There are four different modules that are all about experimentation with mixed media techniques creating surface design on felt. Each class is 4 weeks in length with an extra 2 weeks of instructor support at the end of the 4 weeks. The classes are only $45 US with PDF information and videos presented each of the 4 weeks. There is a ton of information packed into the 4 weeks so it’s a great bargain. Anyone from anywhere in the world can take these courses, no need to show up at a certain time (you can even wear your pajamas).
The first module is called Nuno Felting with Paper Fabric Lamination. You will learn the technique of Paper Fabric Lamination and then how to use these pieces in nuno felting.
The second module is Experimental Screen Printing on Felt.
The samples above were created by former students in the screen printing class. You will also be able to use these techniques to screen print fabric such as silk to use in nuno felting. These same techniques can also be used on cotton fabric to use in fabric collage or quilting. You will learn how to create thickened dye, make your own screens and many ways to use these screens in an experimental approach. Click here for more information about Screen Printing and to register for this class.
The third module is Printing, Stenciling, and Playing with Thickened Dye on Felt.
(Photos above by a former student.) This one is really fun and experimental. Learn to make stamps, stencils and how to use a variety of objects from around the house to create your own unique surface design on felt. Develop your own style with designs you have created. The techniques you learn in this class can be used for felt, other fabric types and even paper. The stamps and stencils can be re-used over and over and applied in different ways to create exciting patterns. Click here for more information about Print, Stencil, and Play with Thickened Dye on Felt and to register for the class.
The last module in the series is Free Motion Machine Stitching on Felt.
In this course, you will learn the basics of free motion machine stitching and how to use this specifically on felted projects. Does the thought of machine stitching seem a bit scary? If so, you should take this course to get a handle on how to use your sewing machine to create wonderful embellishments on felt paintings or other felted items. We’ll start with how to set up the machine and some great practice techniques that will build your skill level until you feel comfortable with your machine. Then you’ll learn about machine lace, thread sketching and how to incorporate machine stitching into felt paintings. Click here for more about Free Motion Machine Stitching on Felt and to register for the class.
I hope you want to expand your fiber art skills. If so, click on any of the links above to read more about the classes, see the supply lists and to register. I look forward to “seeing” you in class!
And don’t forget, if you are a beginner, our online class Wet Felting for Beginners is always available.
This class teaches you all about wet felting. You’ll learn how to make a piece of felt, how shrinkage works and how to calculate it and the basics of felting, fulling and creating felt from wool fiber. Click here for more information and to sign up.
This weekend sees the launch of the latest body of work by Lincolnshire based textile group LINQS. The group, which welcomes any gender and any ability, is now in its fourth year. The only criteria for becoming a member is that you must reside in the county of Lincolnshire. Members are given an annual challenge to make a quilt, or quilts, based on a particular famous person, place or theme. It was being invited to join LINQS in 2014 that first got me started on the path to textile art so I have a lot to thank them for!
Our first challenge was Inspired by David Hockney. The group had a terrific response from local ladies and secured a national tour with Grosvenor Shows with our quilts being displayed up and down the country. Our work visited venues from Ardingley in the south to Edinburgh in the north and various places in between.
These are just a tiny number of the quilts in the first exhibition…..
By Wendy SkinnerBy Mary JacksonBy Textile LincsBy Carol Parkinson
Being completely new to this medium I was fired with enthusiasm and produced four quilts. The first was a small black and white take on the painting “Woldgate Woods”….
My next attempt was based on a photograph taken by the river in Horncastle, keeping with Hockneys recurring theme of “trees”.
The third one was my take on a 1954 mixed Media self-portrait….
By now I was gaining confidence and moved on from making small quilts (30cm x 40cm) to making my fifth quilt which was 30” x 40”…..
The following year it was decided that in future we would make our person, place or thing “Lincolnshire” based and Isaac Newton, being born in the county, was selected. These are a few of the quilts from that show created by four of the members…..
By Karen LaneBy Mary JacksonBy Jean Proud
By Pat Cave
Our third challenge was to make quilts inspired by the famous Botanist and Explorer Sir Joseph Banks whose family estate was at Revesby. The first showing of this body of work will be this Friday at “The Village”, Lincolnshire’s only living museum, which is in Skegness.
Banks became the president of the Royal Society in 1777, where he remained until his death in 1820. He was known as a prominent endorser of travelers and scientific men. Many voyages of discovery were approved and carried out under his supervision. He was the first person to introduce the Western world to acacia, mimosa, eucalyptus and Banksia, a genus named after him. About 80 other species of plants were also named after him.
While researching Banks I came across an image of a Banksia Seed Pod which had been charred in a bush fire. Anyone who knows my preferred colour palette will recognise why this provided the inspiration I needed for my Banks quilt!
I began by making a background using cotton fabric and painted tea bag paper……
Next came the individual “pods” (no idea of the proper technical term for these bits!) which were cut from painted interfacing free machine embroidered and wadded with thick felt…..
The main body of the Seed Pod was wet Felted Norwegian fibres, free motion stitched before adding the “bits” on top. My finished piece measures 48cm x 30cm.
I can‘t show you anyone else’s work as I don’t have photos as yet but if you are in the Skeggy area this weekend why not drop in and see them for yourself. For everyone else I will post an update very soon.
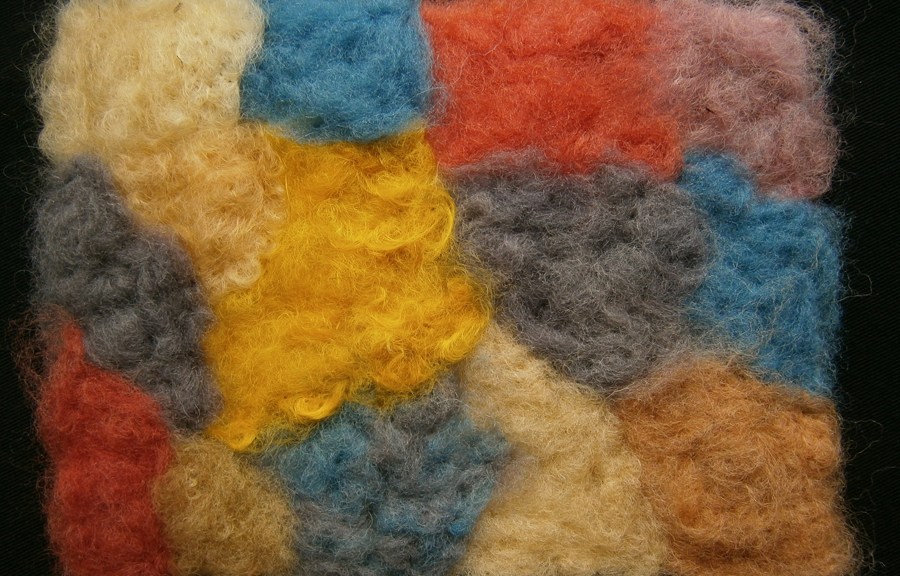
This is probably going to be the least informative post I’ve ever done, but it has nice pics! A while ago, Cathy sent me some wool and fabric which she’d dyed with natural/plant dyes. I tend to be a little bit ‘messy’ and had misplaced them, but found them last weekend. I took them with me to the well-being centre and made a piece of felt with some English 56’s and lots of the wool and locks Cathy sent. Unfortunately, I forgot to write down what I used and left everything at the centre, so I will edit the post once I get the info! So, this is the finished piece with all the samples:
On a bit of an angle to see the textures more:
Closer along the surface to see the locks:
These grey locks looked really silvery:
This rose coloured wool had a nice rich colour:
I think this was Indigo dyed, I wish I’d used more of this:
I love the colour of these locks, I think they were Turmeric dyed:
How gorgeous are these, with the rich yellow and subtle orange, and gorgeous sheen?
I don’t think these locks had been dyed, I love ones like this, with small, tight crimp, they remind me of crinkle-cut chips!
I think these are the same as the Turmeric dyed ones, but natural:
Sorry, for the complete lack of info! But I hope you enjoyed the pics 🙂 One thing I can tell you is that none of the wools I used lost any colour.


 I tried reprinting over the white areas with some more sycamore leaves and some virginia creeper. I’m still not happy with it… perhaps I will dye it with logwood again and just print with sycamore leaves instead.


 Noreen with her first puppet


