Browsed by
Month: July 2014

Monet Challenge

Monet Challenge

I didn’t get a chance to do any felting for a while until this week because we had a ridiculous heatwave here. I did manage to make a few batts for the Monet challenge though. After choosing some of my favourite paintings, or ones which I thought I might be able to use as inspiration, I made a simple montage:

OLYMPUS DIGITAL CAMERA
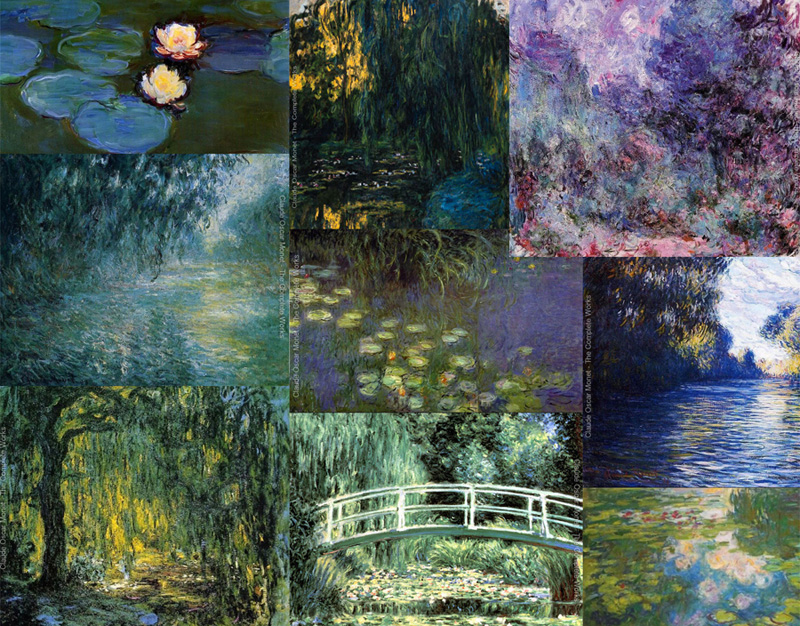
I then messed about with it in Photoshop:

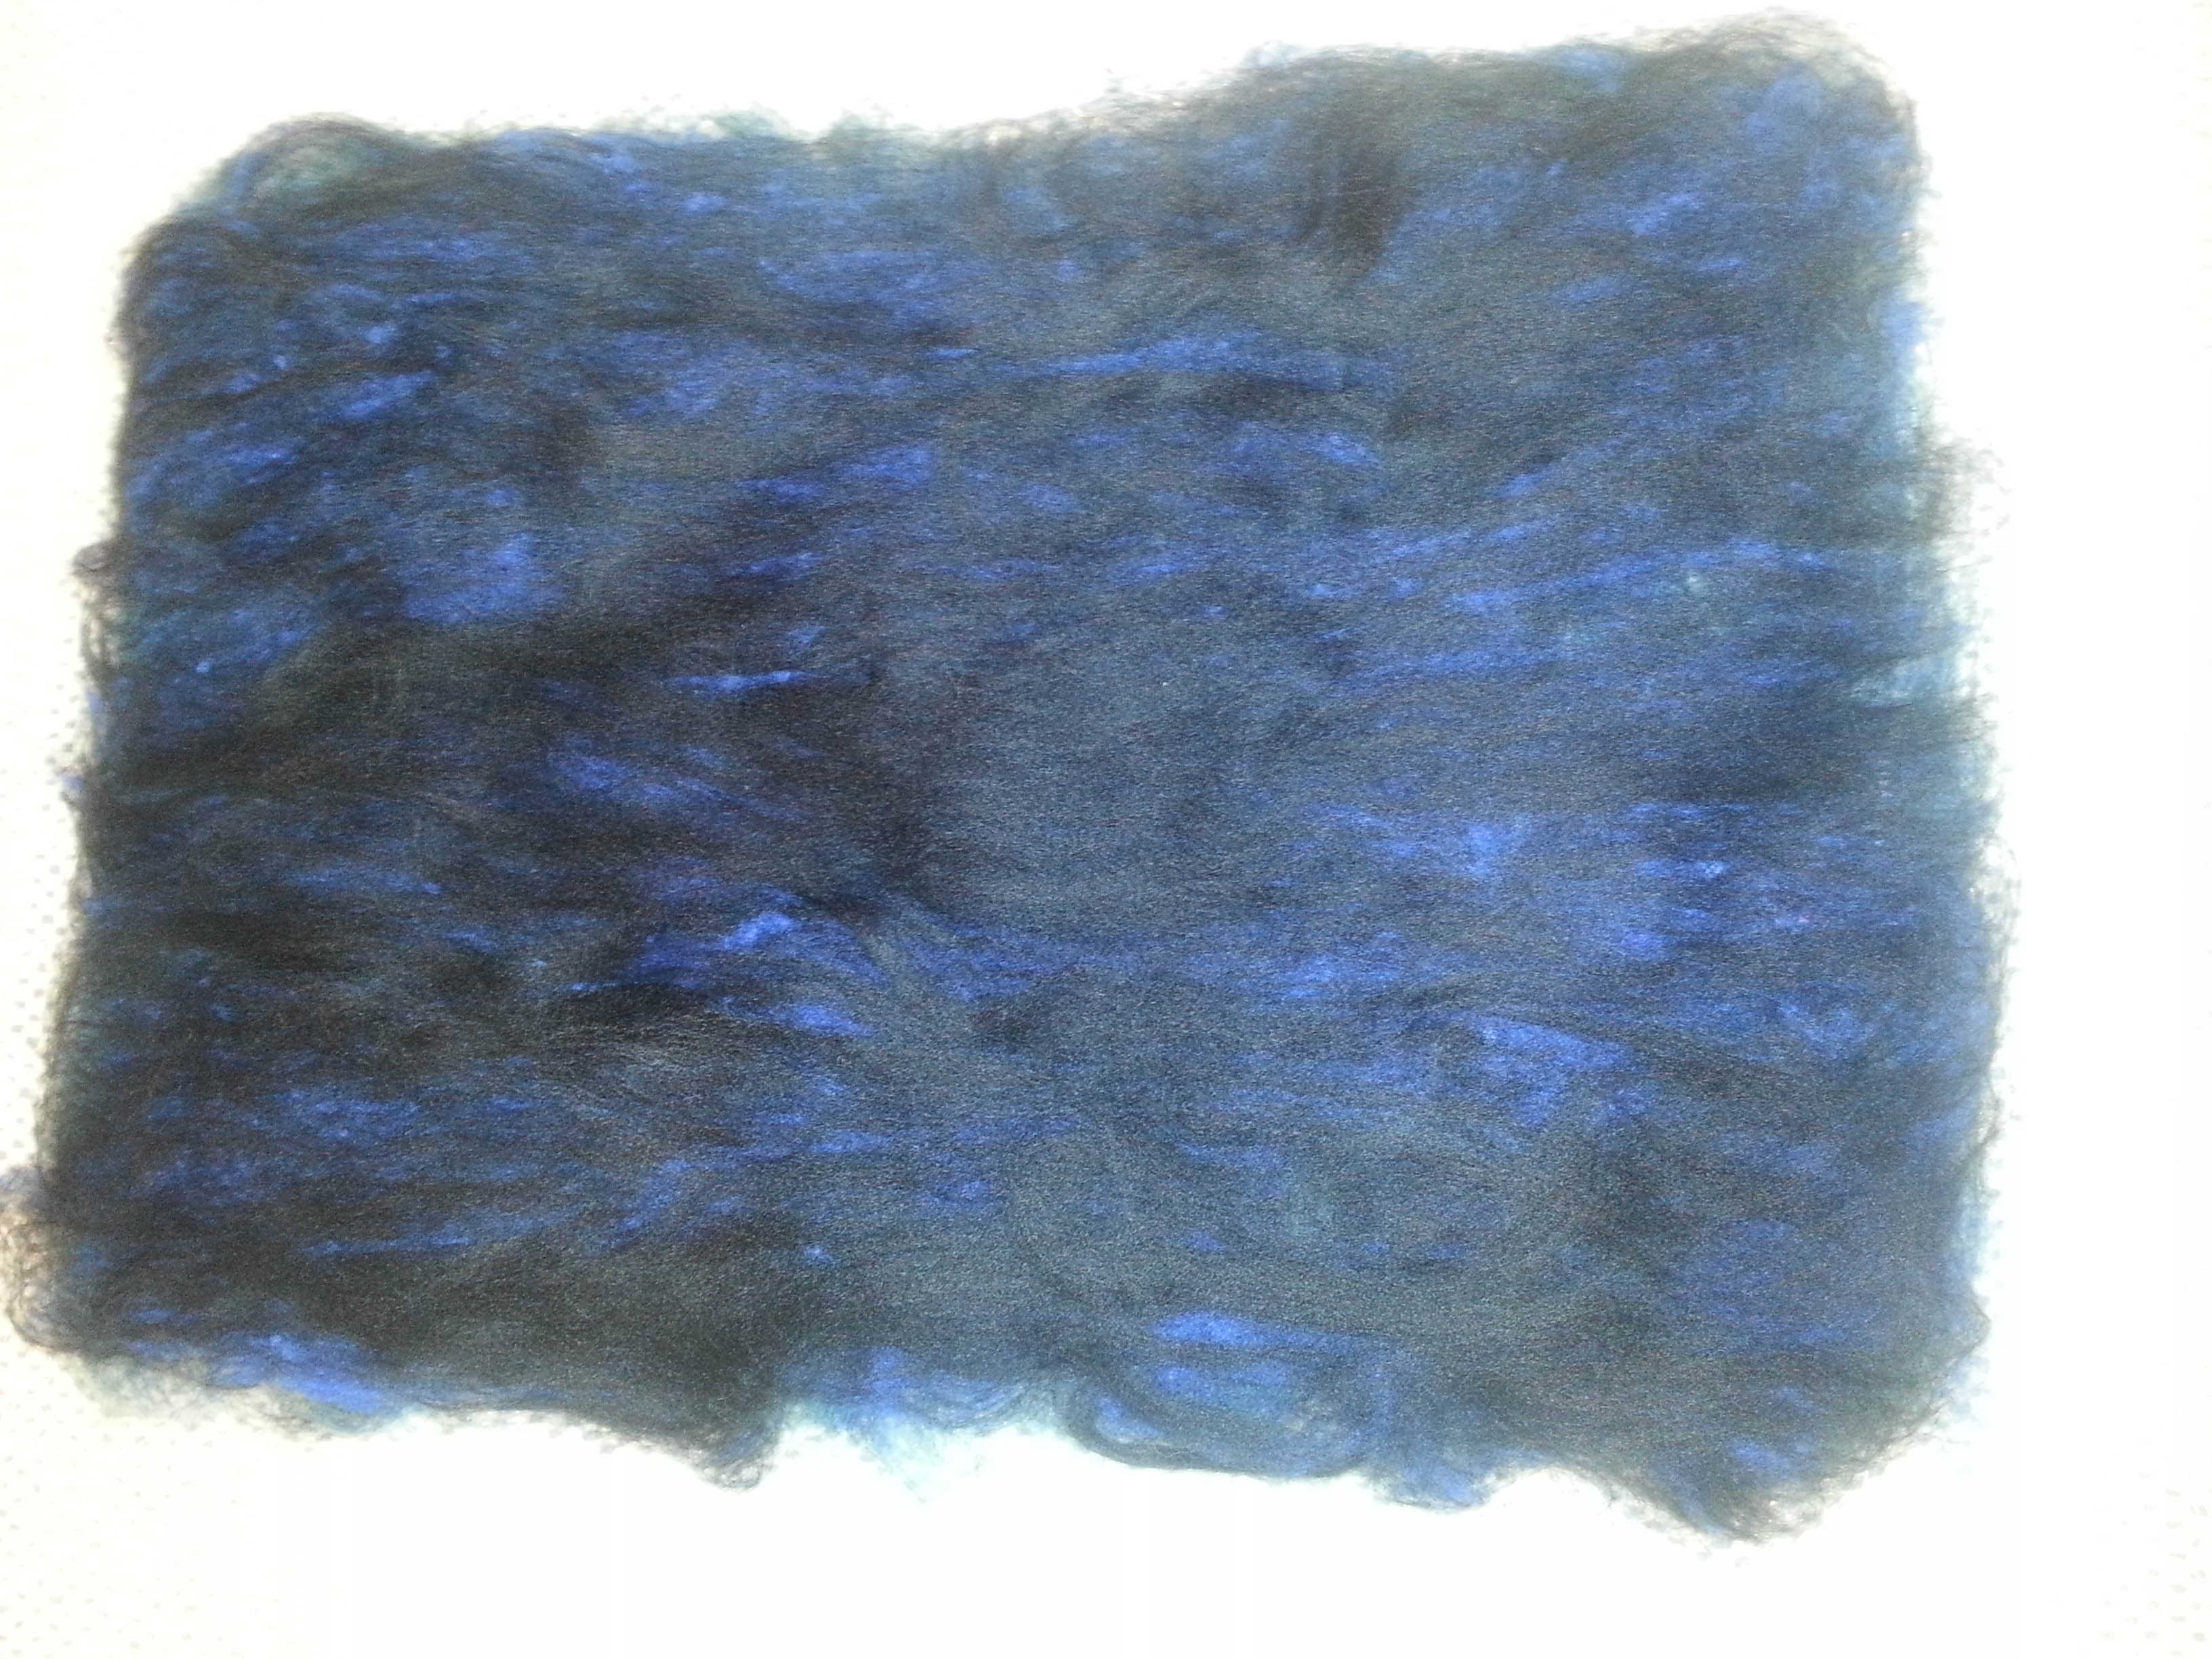
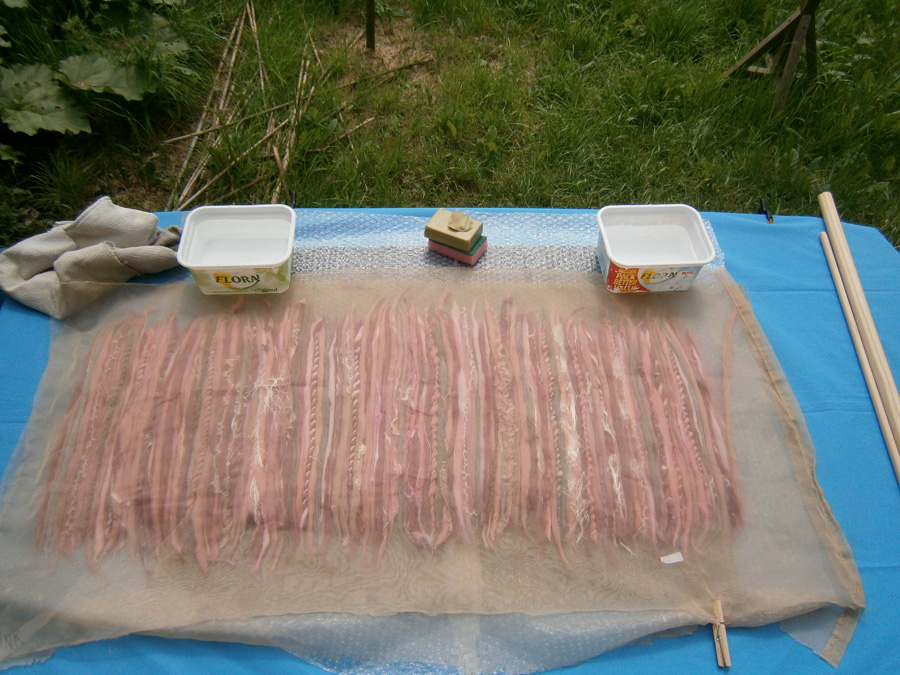
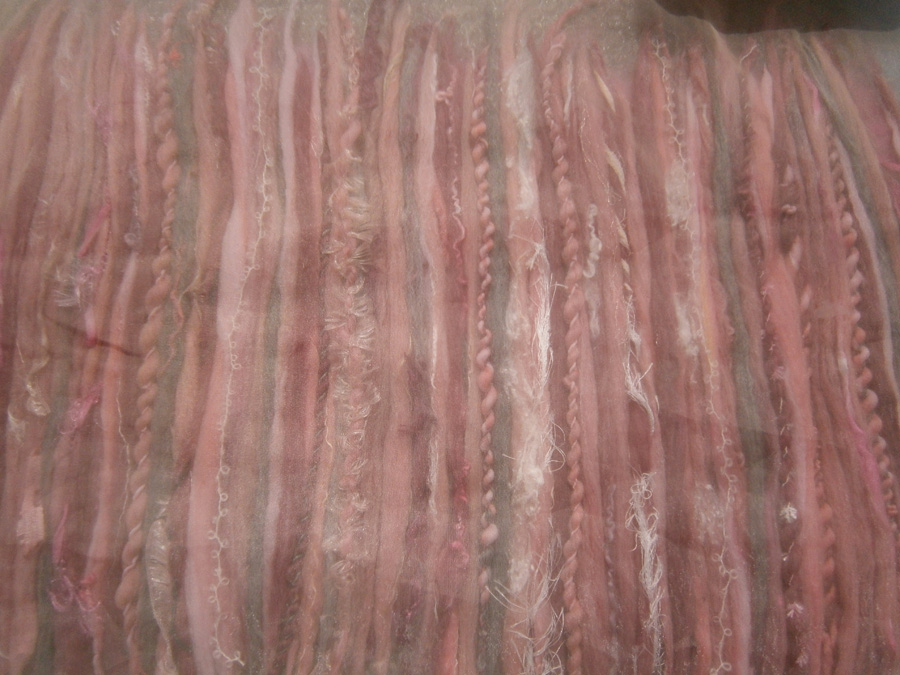
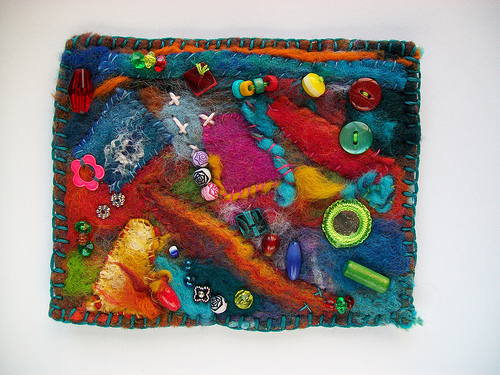
Using this for inspiration I made a couple of green batts; a purpley one; a purple and yellow blended one which looks kind of mustardy/mossy, and a mixed blue one. Looking at Monet’s style he mostly had a straight/dashy style, but some paintings or certain areas of paintings had a softer swirly style. For the first piece I made using the batts I laid out areas of different colours then added softer wispier swirls of wool and fibres:

OLYMPUS DIGITAL CAMERA
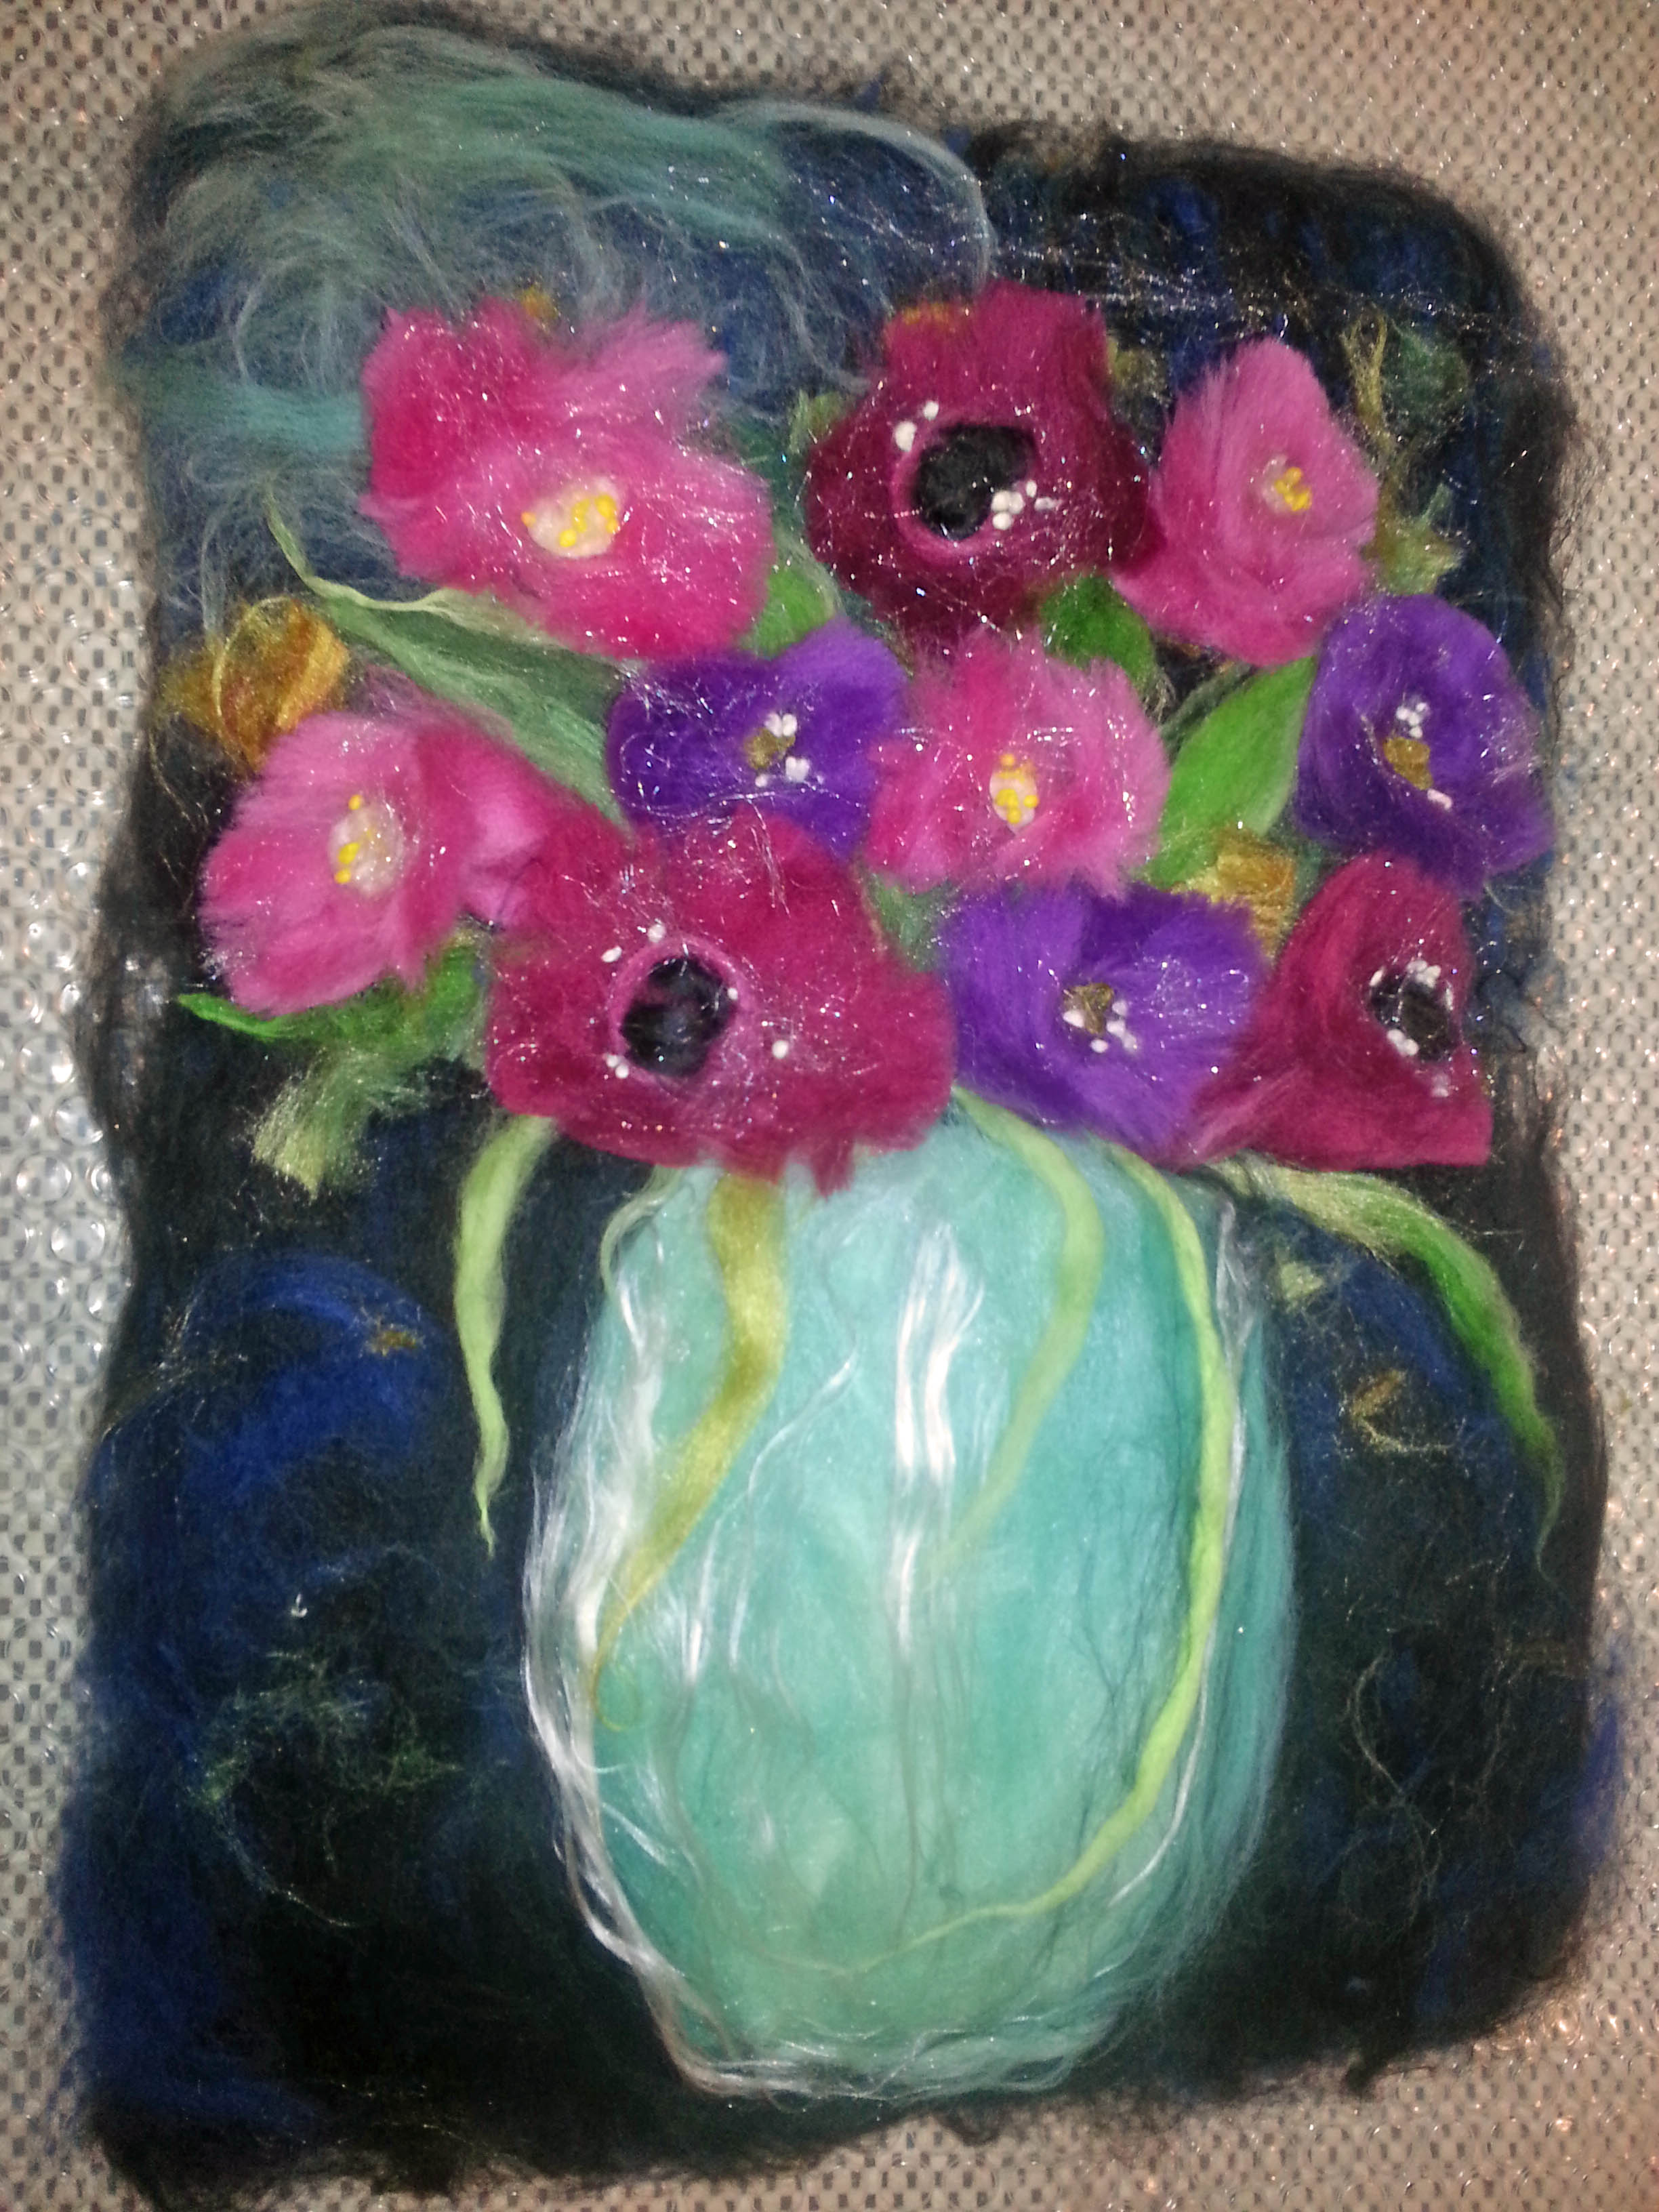
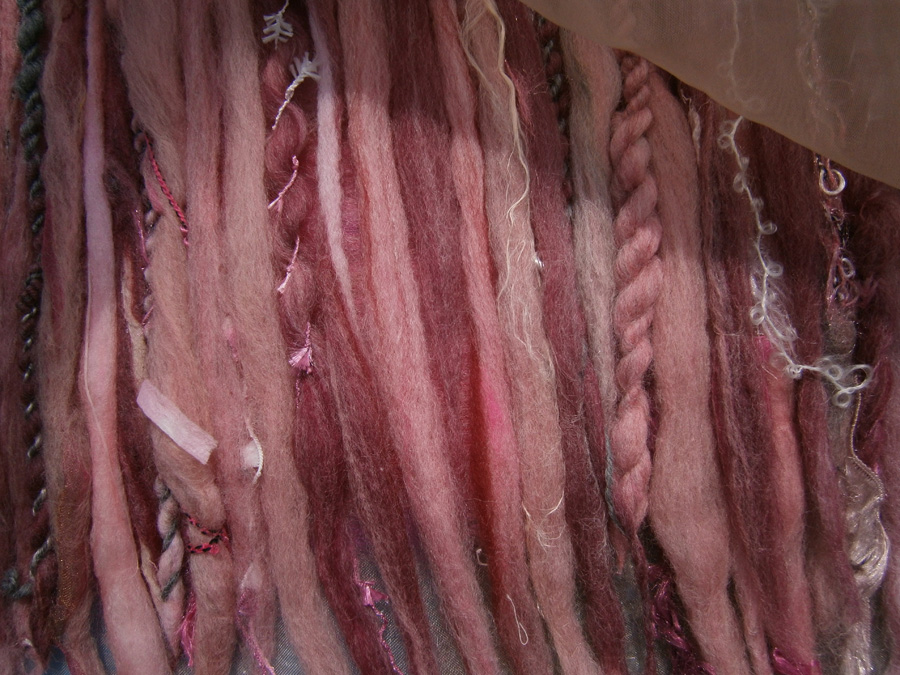
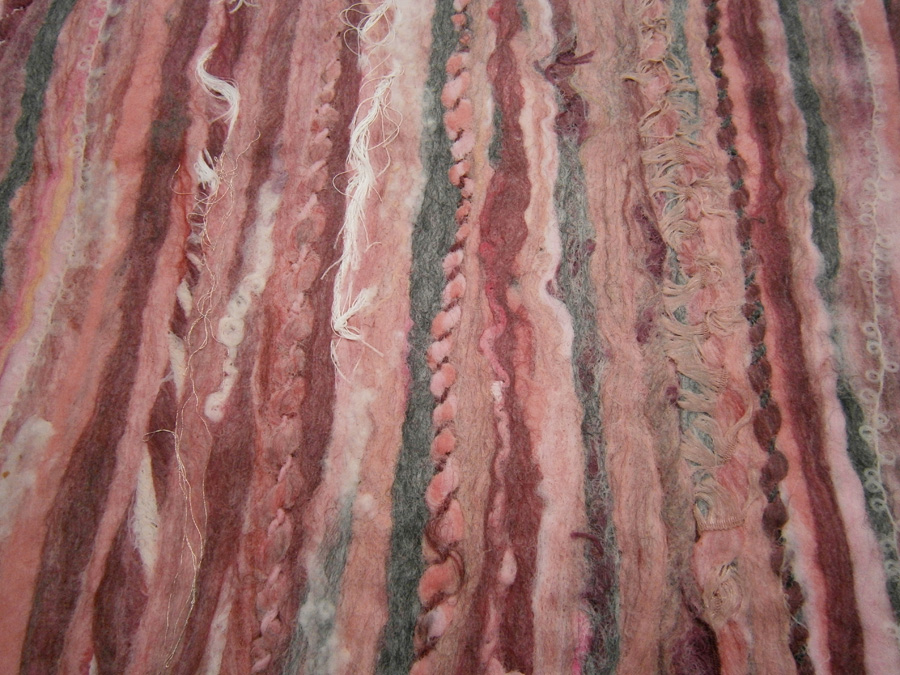
I made this piece using the batts too. Neither of these first pieces copy Monet, they are just inspired by the colours.

OLYMPUS DIGITAL CAMERAI wasn’t very confident I could do an actual ‘copy’ of a Monet painting, but I thought I’d have a go of at least doing an impression of a Monet piece 🙂  I chose Morning On The Seine In The Rain.

Morning-On-The-Seine-In-The-Rain-largeI was actually quite surprised when this started to dry and it actually looked like something! I don’t know if it’s because I’ve stared at the original so much that I can see the similarity and that it’s meant to be it, but I’m pleased with how it turned out.

OLYMPUS DIGITAL CAMERAWhen I was fluffing up the fibres for the swirly piece, I thought I might have a go at needlefelting a piece too. Since I had all the colours out, and had really started to like it, I thought I’d do another based on Morning On The Seine In The Rain. I used a piece of thick commercial Merino prefelt as a base, and blended some texturey wools like Icelandic, carded lambswool and Devon longwool with Merino to get the colours and texture I wanted. I like the way this turned out too 🙂

OLYMPUS DIGITAL CAMERAIf you want to join in the challenge, you can comment on any of our Challenge posts and link to your piece or post it on the forum in the thread we have there: http://feltandfiberstudio.proboards.com/thread/1587/third-quarter-challenge

A Trip to the Australian Sheep and Wool Show

A Trip to the Australian Sheep and Wool Show

Today we have a guest post from Felicity of flicstarstudios who is a keen fibre crafter from Melbourne, Australia.

Last weekend I went to the Australian Sheep and Wool Show  which is held in Bendigo, Victoria every year. It is a highlight on the calendar for farmers and fibre lovers. There is sheep and wool judging, sheep dog trials and shearing, but the other half of the show is all about wool craft. They hold a wool fashion parade, craft competitions and many fibre vendors sell their wares. There were wood turners (with lots of crafty tools like spindles, crochet hooks and yarn gauges) as well as representatives from the Spinners and Weavers guild and Feltmakers guild of Victoria.

I left Melbourne at 8am in this:

001badweather

But on the way up, Bendigo turned on the weather and I arrived to a glorious sunshiny day. This is my third year of going to the show so I know the layout now and straight away made a bee-line for the good stuff. I had a pocket full of cash and every intention of spending up big!

It wasn’t long before I made my first purchase: a sari silk batt for spinning. I am excited to try it.

There was a display of knit, crocheted and felted poppies for the 5000 poppies project which is a community tribute to the ANZACS. The poppies will be on display at Federation Square, Melbourne in 2015. Anyone can get involved to make and donate some poppies to the cause.

006redpoppies

Next I headed to the sheds to check out the livestock. Smell the country! (A potpourri of straw, manure and sheep.) There was a mix of international and Australian breeds of sheep including Merino, Corriedale, Finn, Border Leicester as well as Angora goats and many more.

It was really interesting to see the different sheep breeds, the judging and the classed wool. The trophies looked pretty impressive, and it was all a very serious business.

One shed displayed all the place winners of the craft competitions in embroidery, felt, knitting and weaving. Unfortunately no photography was allowed in that shed but I can tell you the finished pieces were amazing. After seeing all the sheep I’d built up a farm-sized hunger. What else do you have for lunch at the sheep and wool show – barbecued lamb from the spit!

018lunch

I watched the sheep dog trials out on the oval while I ate. There are a variety of tests on the course that the dog has to herd the sheep through, over and into. The owner has to stand with their hand on a pole and just call out the commands – most of them sounded like “go beyond”, “get around”, “to me”, etc. There is a time limit and if the dog doesn’t herd the sheep in time they have to give up. Like a fresh deck of cards in poker, each new dog gets a fresh set of sheep. These guys looked a bit pedestrian compared to the blue ribbon winners I’d seen in the shed. It was great fun to watch because it was clear that the dogs loved it and were very good at their job. The sheep didn’t seem too impressed though.

019sheeppen

After lunch I chatted with a boutique wool farmer (Bennett and Gregor) who was selling natural coloured wool tops and yarn. He was saying that unfortunately it is becoming much harder these days for smaller operations like theirs to get their wool processed in Australia. Luckily there are still woollen mills in New Zealand they can use – their only other choice is to ship to China. I suppose this is a sign of the times. There was still loads more to see and I had more money to spend so on to the next shed.

Check out these big needles:

020bigneedles

Amazing felt balls and knick knacks from Papoose:

This felting machine will set you back a cool $7,000. It made lovely smooth finished felt.

023feltmachine

The Ashford stall is always worth a look because they have demo spinning wheels and blending boards.

It was a great day out and I was pretty tired by the end of it. I came home with enough yarn and fleece to keep me busy for a while. The most unusual fleece I bought is “Gra trondersau” which is from the Grey Troender a very rare Norwegian sheep (apparently there are only 50 of them!).

Thanks Felicity! It was a wonderful armchair trip you gave us and I’m sure everyone will enjoy the journey 🙂

Same Picture, Different Techniques and Outcomes

Same Picture, Different Techniques and Outcomes

A while back, I purchased Moy Mackay’s book Art in Felt and Stitch.  I like her use of bold colors and particularly like her flower and bird pieces.  While chatting with Cathy (Luvswool), I learned she also had Moy’s book and we both liked one particular vase of flowers in the book called Anemones.  We decided to do our own interpretation of that picture below.  (The quality is not great because I took a picture of the picture in the book.)

Moy anemonesCathy —

Moy lays out her fibers from start to finish, with “brushstrokes” of fiber, much as a painter applies paint to the canvas.  When she is finished laying out her merino roving, she then felts the entire picture as one piece.  Later, she needle felts details and then embroiders with machine stitching.

My approach was a bit different, in that I prefer to layout my base first then wet felt it so that I end up with a pre-felted white base on which to paint my picture.  I had previously used this technique in creating other felt painting and so was comfortable with the approach.  After my white domestic 56’s base (2 layers) was completed and dry, I began the process of laying on merino fibers in various colors, not exactly the same as Moy.  I added tussah silk highlights and then wet-felted the entire piece.

After drying, I began to needle-felt details, such as shadowing for the vase, some detailing for the flowers.  I chose not to machine stitch or hand embroider, rather I allowed the needle felting to be my finishing.

Cathys Moy

Newly armed with a stapler gun and some stretcher bars, I backed the 12″ x 12″ piece with blue commercial felt and framed it.

IMG_5752

Marilyn —

I chose to follow Moy’s method as mentioned above in Cathy’s description. For me there were a few firsts — I had never “cut” roving, had done free motion machine stitching or embroidered felt.

base

I made the base from batts I had made using dark colors, then added the lighter accents, the vase, then built the picture from the background forward laying out the background leaves then cut the flowers and laid them out.  I added some silk embellishments, angelina and nepps, then I wet felted the piece.

moy layout

After it was dry, I needle felted around the vase and added needle felted shadows on and around the vase and some details in the flowers.  My challenge came when I started the machine embroidery.  The felt around the flowers was thick because of the layering of the background leaves. My machine wasn’t happy about that.  After a couple of broken needles and a lot of frustration, I finally finished.  I added a couple of hand embroidered flower details to finish it.  I enjoyed trying a new technique, but will keep in mind the potential thickness issue when doing anything similar again.

Moy 2

After cleaning it up a bit, it is now sitting in the “to be framed pile.”


Present For My Mum

Present For My Mum

A few weeks ago, my mum was talking about getting her bedroom redecorated. I’d been struggling to think of what to get her for her birthday, so this gave me an opportunity. I casually asked about the colours and she said she wasn’t sure because she wanted to match the paint to the wallpaper she was having on one wall, luckily, she knew what the wallpaper was called, so after she left, I looked it up:

ella wallpaper biggerMy first thought was to try to convince her to have the nice blue and brown version! But, I resisted and downloaded the picture. Then I opened it in Photoshop and tried to pick out all the colours and made an image with a few stripes in the various shades.

ella wallpaper shadesThen I printed out the sample and stripes and started to plan a wall hanging for her new room. I wanted something soft, texturey, not too neat. ‘Raggy’ is the best word to describe what I was after, I think. I spent a couple of days making blended batts in the shades I wanted. Then I spent a few days making twists of wool and fibres and also spun some ‘arty’ yarns for the piece. Unfortunately none of the photos I took came out  🙁  but when I’d finished making them there were at least 150 lengths of wool, commercial art yarns and fibres twisted or spun together. I laid out a couple of layers of wool tops, then carefully added all the twists where I wanted them. I had to take my table outside to felt it because it was so big and I knew I’d make a mess.

OLYMPUS DIGITAL CAMERAThis is a close up of it with the netting on:

OLYMPUS DIGITAL CAMERAAnd a peek under the netting

OLYMPUS DIGITAL CAMERAIt didn’t take as long as I thought it might for it to felt, probably because it took so long to make sure it was all thoroughly wetted! This is when it was all wet down and starting to felt.

OLYMPUS DIGITAL CAMERAAnd this is the finished piece:

OLYMPUS DIGITAL CAMERAI knew as soon as it was dried that my mum would want it as some kind of rug/mat and the first thing she said was ‘Oh, this is going on top of my drawers, it’ll be perfect.’ Some of the yarns I made were by plying handspun merino with commercial yarns, but mostly I just plied half thick, half thin merino together. Closer view of the middle:

OLYMPUS DIGITAL CAMERAHere are some commercial boucle yarns, one twisted in on the left and the one I laid on top is mohair from Marilyn, I think. There are a couple of my yarns in there too:

OLYMPUS DIGITAL CAMERAI’d forgotten I used some organza and cotton gauze in the twists too, you can just see a bit of organza here:

OLYMPUS DIGITAL CAMERAYarny Texture:

OLYMPUS DIGITAL CAMERAI thought a bit of colour might make a change from all the natural wools and fibres this week 🙂

Felting Along

Felting Along

I am felting along. I do not have anything much to show for it yet but I am plugging away at several things.

I am almost finished the instructions for a nuno felt bracelet kit I plan on selling. I have all the instructions for the felting done but still need to do the finishing, adding buttons and button holes. It takes so much longer to do than you think it will.

Pull the wool roll

check fit again

I have been working on finishing some other bracelets. This is the one I am working on at the moment.

bracelet in progress

I have been spinning on a new drop spindle made by my friend Judy.

spindle 2

Have you been tackling big jobs or small ones so far this summer?


Shibori Felt Sample

Shibori Felt Sample

I have made a couple of pieces of shibori felt before but not for a while. I wanted to try it with two layers of color and cut back the top felt.

This is the shibori felt I made in the past. For the sample I am made today I used some wool that I got as a gift. I’m not sure what breed it is but it felt a little coarser than merino but it felted easily.

MINOLTA DIGITAL CAMERA

This is the wool I used. I think it’s German packaging.

MINOLTA DIGITAL CAMERA

So I laid out a circle of red wool with a fairly thick layer.

MINOLTA DIGITAL CAMERA

Then I added a layer of green wool.

MINOLTA DIGITAL CAMERA

I wet it down and rubbed for a bit on each side. I then rubbed it gently on rubber stair tread.

MINOLTA DIGITAL CAMERA

Here is the felt at pre-felt stage on the back side.

MINOLTA DIGITAL CAMERA

And here is the green side. It’s already starting to shrink a little bit as you can see by the wrinkles.

MINOLTA DIGITAL CAMERA

I then used straight pins to figure out where I wanted to put the folds in the felt.

MINOLTA DIGITAL CAMERAI stitched it together using a running stitch and button thread. I pulled the thread tight as I went. I then fulled the felt keeping the folds tight together as I fulled.

MINOLTA DIGITAL CAMERA

Here is the piece after fulling. I removed some of the thread but it still has some in there as I couldn’t find a lot of it.

MINOLTA DIGITAL CAMERA

Here’s the back side after fulling.

MINOLTA DIGITAL CAMERA

And then I took a pair of scissors and cut off the top of the ridges revealing the red wool underneath.

MINOLTA DIGITAL CAMERA

I love the textures and the contrasting colors.

MINOLTA DIGITAL CAMERA

Here’s a little closer view. I’m not sure what I’ll do with this piece but I do like the way it turned out. Have you tried this technique? I’d love to see what you’ve made, come on over to the forum and show us!

What Does Your Calling Card Look Like?

What Does Your Calling Card Look Like?

In a few weeks, Cathy (Luvswool) and I are going to attend the Midwest Fiber Fair in Grayslake, IL.  I started thinking about what a great opportunity it might be to introduce some people to the Felting and Fiber Forum/Studio.  But I didn’t have any business cards.

So, while working on one of my felt projects I decided that if I’m representing a fiber collaborative I should have business cards that reflect that concept.

I pulled out a bunch of prefelt pieces leftover from other projects and piled up a stack of embellishments and went to work. Of course, I forgot to take a picture before I felted them.  I used just one layer of prefelt so that it wouldn’t be too thick and proceeded to play with the embellishments using yarn, silk, silk habatoi, silk hankies,  sari threads, throwsters waste, silk gauze with sequins and ribbons.

When I finished felting/fulling the pieces, I cut out a business card size plastic piece and cut out the cards while the felt was still wet and soapy.  Then I worked the edges some more before rinsing and drying.

biz cards wool side

After they dried, I steamed and shaped them a little more. Some of them shrank while drying so I did a bit of pulling and stretching.

I didn’t want to sew them on, so I used three different types of glue (Elmers Clear, Sobo and Tacky Glue) to see which would work best, but all worked nicely and didn’t leave any residue.  I applied it using a wooden stick so it was evenly covered. The nice thing about the glue was that while it was wet I was able to stretch and manipulate the felt to cover the card.  To make sure they stayed put I piled a couple of heavy books on them to let them dry and flatten.  I left the organic edges because I like that look.

2014-06-27 13.10

I’m not sure how people will react to wool business cards, but I think it sends the right message.  I’m definitely a fiber enthusiast.

2014-06-27 13.09

The next time I make more cards I will stick to silk and embellishments that are flatter.  While the yarn and ribbon are nice and very textured, it is a bit more bulky.  What do you think?


Using Black and White Viscose together

Using Black and White Viscose together

I think most of the natural wool and fibre panels I’ve posted about have used one breed of wool and one fibre. I did post about Humbug (black and white striped) Jacob about a month ago, and I’d used both black and white viscose top with that. This first piece is light grey Swaledale, it’s mostly a creamy white with light and dark grey flecks which give it the light grey appearance. I blended some black and viscose tops by hand and laid them on top of the Swaledale:

OLYMPUS DIGITAL CAMERAThe overall appearance of the blend is a dark grey, with white streaks:

OLYMPUS DIGITAL CAMERAThe separate colours are a bit more obvious close up, I like the way the fibres appear to sit just on the surface, lightly tangled with the Swaledale fibre.

OLYMPUS DIGITAL CAMERAThis is a bit closer and slightly at an angle, showing where the fibre is a little bit thicker, I like the twists and waves.

OLYMPUS DIGITAL CAMERAThis next piece is one of my favourites, it’s English 56s with Angora locks. I don’t know if there’s a proper name for older goat locks, I’ve heard ‘yearling’ used, but I don’t know how old the goat was these are from. They are a lot thicker and generally less soft and more wavy than curly kid mohair. I loosely combed the locks through a handcarder with either black or white viscose, to blend with the locks. I laid them out loosely alternating each row: black, white; white, black etc.

OLYMPUS DIGITAL CAMERAAn angled shot:

OLYMPUS DIGITAL CAMERAA close up where the locks were felted in more:

OLYMPUS DIGITAL CAMERAAnd a supermacro of course:

OLYMPUS DIGITAL CAMERADo you prefer combinations of wool and fibres which have lots of character and texture or do your prefer the more softer effects of fibres closely felted to the surface of a smoother wool?

Making a Felt Hat with T-pins

Making a Felt Hat with T-pins

A little while ago I received some T-pins. I had never used them before. I haven’t mad and hats with folds for some time as they are difficult to get the folds where you want them. As you try to put the second fold in the first one can easily get pulled out and so on. with the T-pins it was much easier. I could put a fold in and then pin it and then work on the next one.

hat with pins


The hat block is a hard foam raffia hat block. the only place I know that sells them is Franks, http://www.franksupply.com/raffia/hatmaking-supplies.html  I left all the pins in while it dried. Here it is after is is dry. It is merino wool with silk lap on accents

hat1 hat 2 hat 4 hat 3


I am quite pleased with it. I haven’t yet decided if I want to leave the organic edge or if I want to trim it smooth and even.

Ten Ideas for Increasing Your Felting Creativity

Ten Ideas for Increasing Your Felting Creativity

Do you generally work in the same way every time you create a piece? Do you feel like you’re in a rut and need to change up your routine? Here’s a list of 10 ways that might get you jump started and moving creatively in a different direction. Put on your experimenting hat and try something new. These suggestions are geared towards felting but you can adapt these ideas to almost any type of art. I have used a variety of photos from our library and not all the photos are of my work.

4 batts together

  1. Switch up your color palette. Do you use the same color palette frequently? Why not try changing one of the colors that you normally use. Perhaps you always use bright, jewel toned colors, why not try a more muted color? For example, if your color scheme included a spring green with bright yellow and turquoise, what would happen if you changed the spring green to a dark olive green? Wool Snakes in the Bathroom
  2. Try a different breed of wool. If you always use the same type of wool, such as merino, why not try a different breed? See how that breed felts differently than the one that you normally use. Take a look at a few of Zed’s posts to get inspired 🙂comp of raw wool
  3. Use a new technique. Have you seen a technique that you haven’t tried before? There are lots of free tutorials online so take a few minutes to browse online if you need instructions and then make a few samples using this new technique. Once you’ve got the method down, plan a piece around using that new technique.Texture of Newspaper
  4. Switch the blend of fibers that you use. Do you usually add your embellishments on top of the wool after layout? Try blending the embellishments into the wool before layout. How does that affect the felting process? How much embellishment fiber can you add to the wool and have it still felt?

    Third time through the carder
    Third time through the carder
  5. Work inside out. When you are using a resist, do you usually add the embellishments to the outside and then felt? Try adding the embellishments to the resist first and then the wool, felt as usual and then when you open the felt to remove the resist, turn the piece inside out so your embellishments are now on the outside. Or perhaps you could make your piece reversible and have embellishments on both the inside and the outside?Resist Shapes
  6. Cut up an old piece. Do you have any UFO’s (unfinished pieces) that are just lying around taking up space? Try cutting the piece up and putting it back together in a different configuration. Or use the cut up pieces to make greeting cards by stitching the felt down on to the paper card. Or if you have several UFO’s, cut them all up and put them all back together into one new piece.ufo's
  7. Hand mix your colors. Do you always use solid colored roving that you’ve purchased commercially? If so, why not try mixing several of those colors together by hand to achieve a variegated color instead of one solid color? You could use hand carders or you can do this in small amounts just using your fingers to mix the different colors of wool together. What color do you get if you mix complementary colors (colors on opposite sides of the color wheel) together?

    Food Color dying
    Food Color dying
  8. Try using only prefelts. Do you normally mainly use wool roving when making a felt project? If so, try making some prefelts (don’t full, just leave the felt soft or buy them commercially) and use only prefelts in your next project. How many different ways can you think of using prefelt?dreamspin prefelt
  9. Add in a different media. Try going to the bookstore and finding a book on a type of craft that you haven’t tried before. Look through the book to get some ideas of how you could add that media to your felting. It might be as simple as finding a stained glass design that you want to replicate in felt or it might be more complex by actually adding that media to your felt in some way.

    Beads, Buttons, Stitch
    Beads, Buttons, Stitch
  10. Take your studio outside. This might not be too practical in the winter time but if you can, try doing part of your process outdoors. Be inspired by your surroundings. Just moving where you normally create can change your thinking and give you new ideas for further creations.IMG_2673

Most of all, play around, experiment and just have fun!