Another Hat
A couple of weeks ago, I posted about my first felt hat. I had a think about how I could improve on the design and resist and thought I’d give it another go. I also thought more about shaping it and blocking it to get a better shape. This time I used an upturned glass bowl with a couple of microfibre towels and bubble wrap on to finish the felting/fulling. Last time I said I’d used mt head and for some reason most people had a vision of me with soggy soapy roving wrapped around my head frantically rubbing for hours! 🙂 What I really meant was for pulling the hat into shape and the final fulling stage, I used my head. This was the finished hat:
 As it dried, I removed the bubble-wrap and added the lid from a storage tub, this gave the top a flatter shape. I kept checking the size, and removed another towel and let it dry with just one towel and the lid over the bowl. This is the flatter top.
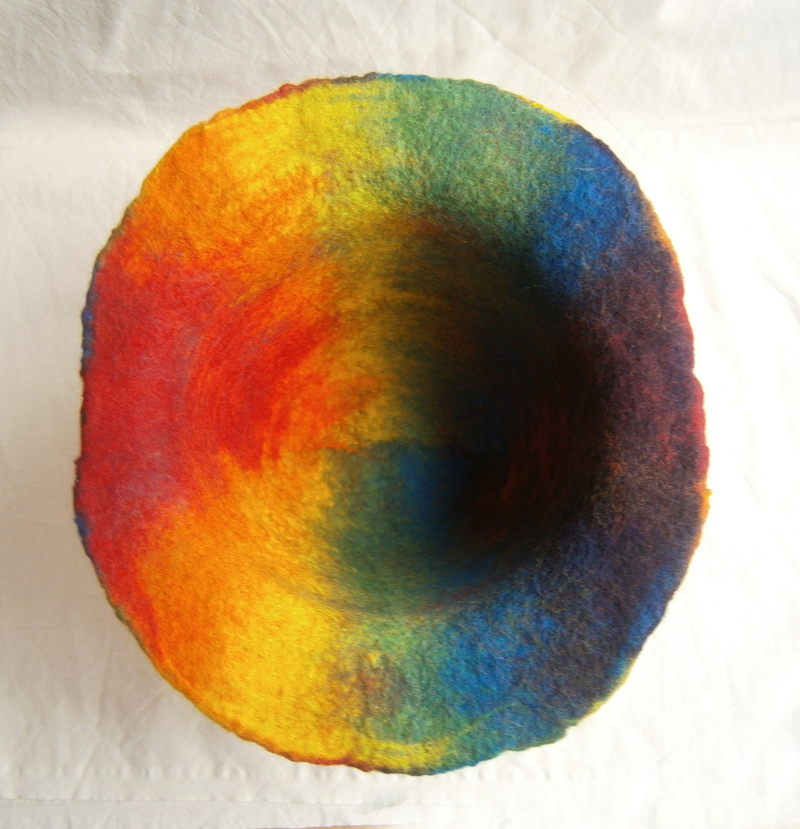
 I increased the size of the resist slightly, but this time only used 2 layers of wool, I thought this would keep it softer, and not shrink so much. The idea worked in theory, but the amount of fulling I had to do to get the correct shrinkage caused a lot of wool migration which makes the hat look very fuzzy and the colours are dulled. This is the wool migrating through and over silk:
 Yellow and red wool migrating through blue:
 Wool over silk and cotton gauze:
 I might shave it carefully to remove some of the fuzz. You can see the shape a bit better from underneath, and I had the narrow sides again, where the edges of the resist were, I’m working on ideas to prevent that for next time.
 I mentioned in my bag post last week that I’d been looking at eyelet kits, but couldn’t decide. I’m glad I couldn’t, because while I was out on Friday I had a good look around a ‘bargain’ shop and found myself a kit for £2.50. I also found a pack of 2 rainbow luggage straps, which I’m hoping will be perfect for the drawstring channel of my Pollock bag. If not, they will be perfect for something else! I also found some woven cord too, which will be ideal for drawstrings. I got a couple of different colours of this.

20 thoughts on “Another Hat”
The hat turned out great! So much fun. I love the flatter top, it gives it a more finished look. I hate when the fibers migrate too much. I think shaving it would be a good idea. Have fun finishing the bag. You could sell them together. I can see someone walking down Michigan Avenue now…
Thanks, Marilyn 🙂
Ha, I’d love to see that!
You just HAVE to take a picture of yourself wearing it, even if you didn’t literally use your head to make the hat 😀
Ha, maybe when I’ve made the matching suit 😉
I think it turned out great too. I would shave it. I always have to shave my hats with silk caps on them. Nice find at the bargain shop I need to find some of those for my little bags.
Thanks, Ann 🙂
Yeah, I was pleased with the kit, I saw a smaller, plastic one at the fabric shop for almost £7, so I was very happy!
Beautiful hat! The shape is good and the colours are joyous.
Oooh I love a bargain – you did good getting that little haul.
Thanks, Lyn 🙂
I’ll definitely be going back there!
The hat looks wonderful and the shape is perfect. Are you going to make more? Good find for the eyelet kit!
Thanks, Ruth 🙂
I might have a couple more tries at a hat, I wanted one for when the weather is too warm for a woolly/bobble hat, but I can’t be bothered doing my hair to go to the shop kind of thing 🙂
Love how your hat turned out, Zed–but I also liked the colors in your first hat. You mentioned you added silk and gauze to the hat. At what point did that happen? Was the wool roving laid directly over the bowl? I can see another tutorial for you to make somewhere down the road! Terrific work!
Thanks, Cathy 🙂
I made this hat in the same way as the bag — inside out, but still over the resist, like the first hat http://feltingandfiberstudio.com/2014/03/23/my-first-felted-hat/
So, I laid out the gauze and silk onto the resist, then added wool tops, wet down, flipped over, folded over any fabric, added gauze and silk to the other side, folded the wool around the edges, then added wool tops that side. Wet down, flip, fold wool in, add wool tops, wet down, flip, repeat. I just did two layers. I don’t think I’ll ever get good enough for a tutorial!
Love the colors – the brighter the better for me!
Thanks, Frances 🙂
Hi Zed, I think your hats are terrific! You really should post them on Etsy, although perhaps this is not the right season. You only need to post 2 hats, give optional custom colors. Just want to encourage you to try new things. Best, Cathy
I’d get tired just trying to find the right sized box! I’d think of taking them with me to a craft fair, but I think I’ll leave the hat selling to people like Ann who make really excellent hats 🙂
Once you make a felted hat from wool, is it not foldable?
Not really, these are quite stiff. Though if it did get folded, I’m sure re-wetting, and blocking again would put it right.
luvswool –
I think a foldable felt hat can be made if it is not ‘fulled’ too much. The Hat I made is quite soft – I have a soft wool hat from Eddie Bauer and it can be folded. I have other commercially made felt hats that would be destroyed if folded. So the indicator would be how stiff your finished hat is..
Frances, that makes sense. Difficult to tell how stiff a hat is from the photo!