Third Quarter Challenge Entry
I have been quandering what to make for the third quarter challenge for some time now. I had thought about making a coat for our new dog Edgar but he is so rough and loves to chew everything, so I wasn’t sure it would last long. I don’t wear wraps, scarves, hats or mittens much so I kept putting it off. But it’s getting down to the wire so I decided I would use my layout and differential shrinkage methods on making a hat. I’m not a hat wearer. I always think that hats make me look silly plus I have a really big head. But up in my closet, I have several hat blocks (from Hat Shapers and Frank’s Cane and Rush Supply – I have no affiliation with either of these companies). I thought I should try using things I have learned in my prior experiments to see if I would enjoy the process of hat making more than I have in the past. Plus I had a suggestion for using my leftover prefelt in a way to look like a brain. Doesn’t this sound like a recipe for disaster?


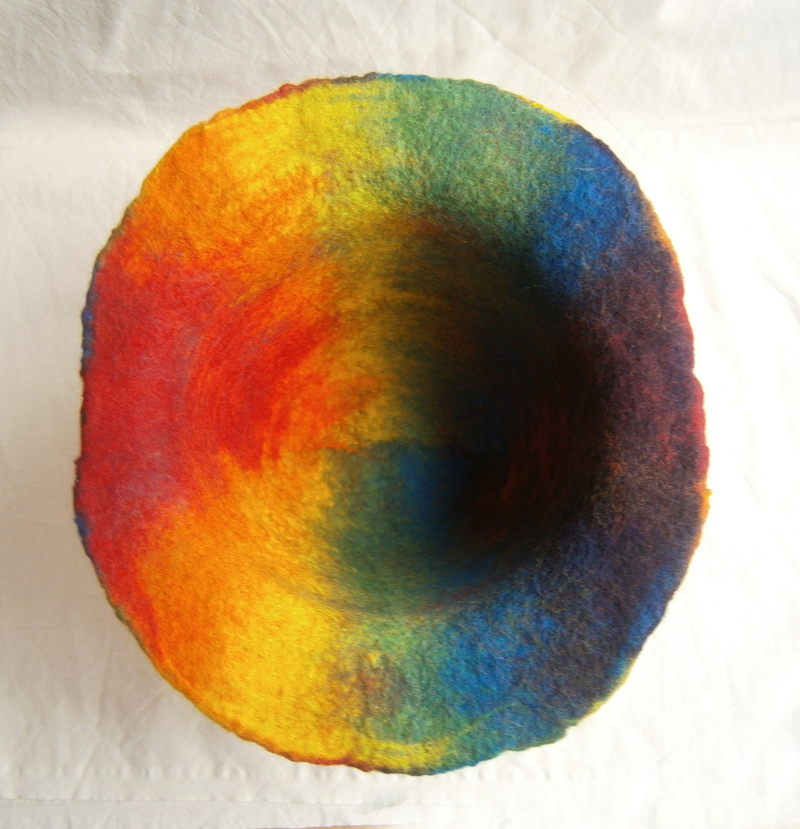
I started out by laying out two layers of red wool. I did the same layout that created a nice bowl shape here. The inner part of the circle is laid radially and the outer edge is laid around the circumference. Normally when I make a hat, I use a resist. But here I just started with a flat circle of laid out wool. I then added the cut prefelt for the “brain” idea. I covered the prefelt with another two layers of red wool. I then started felting and made sure it was all holding together.


Once the piece was at prefelt stage, I got out the Hat Shapers Shaping Dome. I worked the felt around the circle to get it to shrink and fit the dome shape. Once it was fitting that shape a bit better, I switched to the final Hat Shaper.


This one is called Flanged Brim Cloche. I soon realized that my circle wasn’t big enough and also that my ring of circumferential fiber/wool should have been larger. I worked and worked on getting it to shrink down, but it was done shrinking and very stiff. Perhaps I should have just turned it upside down and called it a dish at that point!


So what to do? I put it on the Frank’s Rush and Cane Supply high dome hat block. I just started playing around with different ways to decrease the circumference where the hat sits on your head. So I ended up with the back looking like a bonnet from Little House on the Prairie (a television show in the 1970’s for those of you who aren’t in the US). But I took a problem and made it into a design feature. I did stitch the back together after the hat was dry to keep the folds in place.


And here it is after I dressed it up with a felt flower that was hanging around the studio. And remember the yellow prefelt? It hardly made much difference in the shape at all. I didn’t double it up like I had in my previous experiments, nor did I stitch it down. So it gave just a small bit of shape and color to the end result. You can see the yellow best in the hat photo from above. And guess what? The hat doesn’t fit me, it’s too small and very shallow so it sits on the top of my head and looks ridiculous. It was so bad, I didn’t even take a photo. You’ll just have to imagine it. Anybody need a hat?
At least I have an entry for the third quarter challenge and now I remember why I don’t make hats.