Browsed by
Month: August 2013

Catching Up

Catching Up

I’ve been trying to some of the projects I started before I began working on my polymer clay e-book. I had a few purses and glasses cases cut out or part sewn up. The first one I finished was a ruffle camera case. It hadn’t even been cut out, so I did some measuring and cutting then discovered my electric machine won’t work 🙁 I cleaned out the bobbin case and took the parts off and wiped them and put them back, but the needle won’t pick up the bobbin thread. From what I can tell it is timing or something and I don’t think it’s something I can fix. So, out came my ancient electric Singer without the electrical parts. It’s slow going but it works, for straight stitching anyway 🙂  This is the front of the case:

rufflesAnd this is the back:

ruffles 2
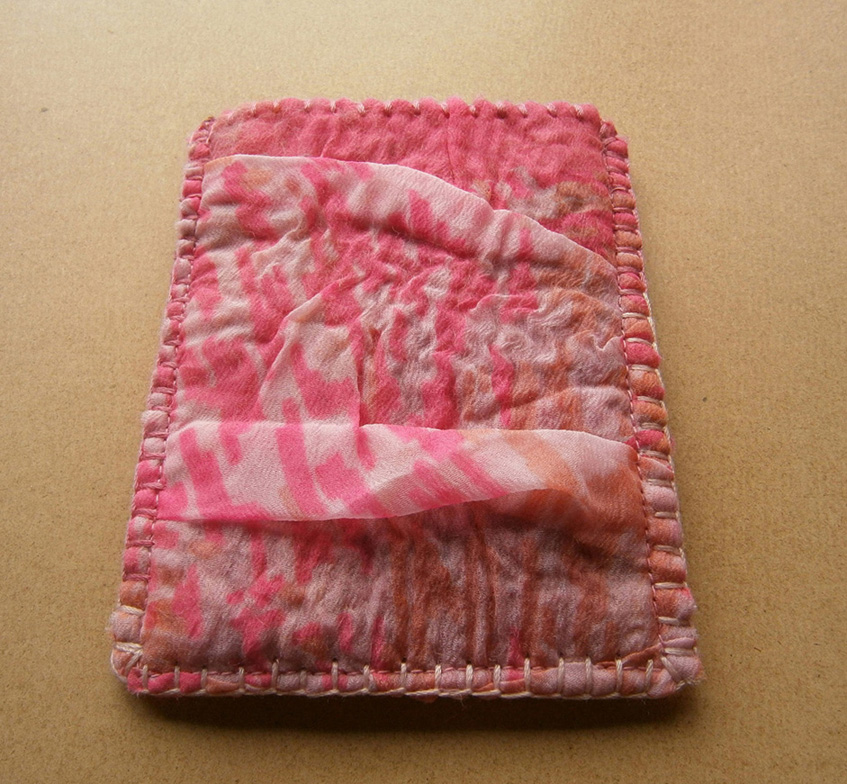
This was one of the purses I hadn’t even blanket stitched, it’s made from the same piece of felt as one I made earlier. It’s a slubbed wool which I added some cotton and silk threads to and some strips of rolled edges from silk scarves. Front:

purseInside:

inside purseThe felt this wool makes has a really nice texture. Back:

purse back
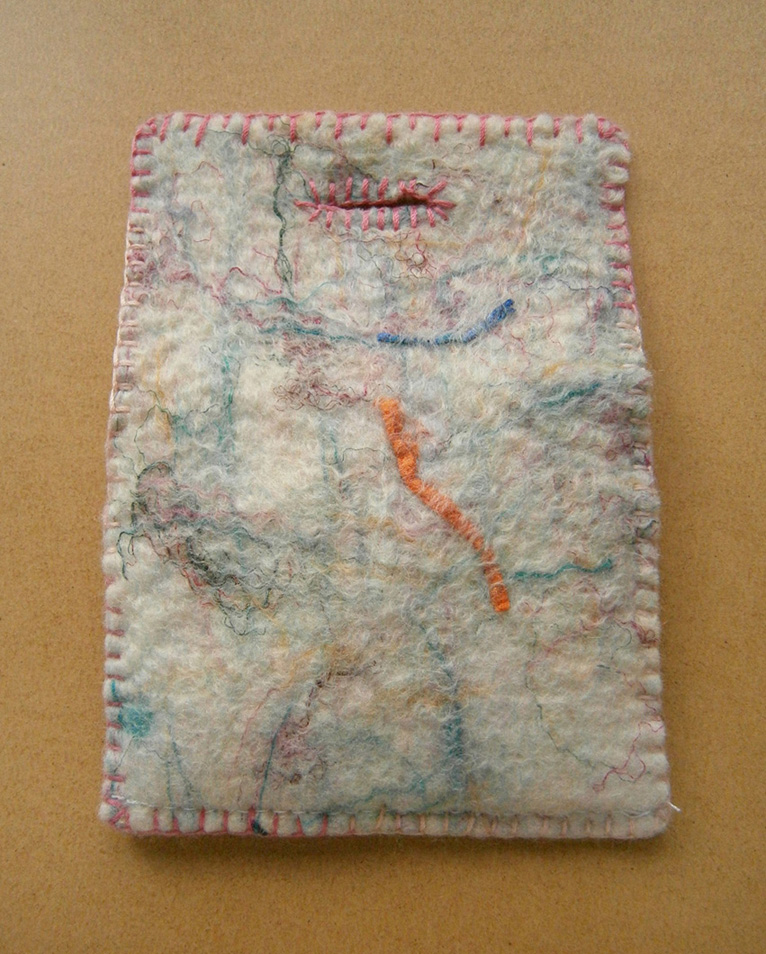
A piece of coppery bronze felt that I made a while ago was just big enough to make a purse and matching glasses case.

coppery bronze
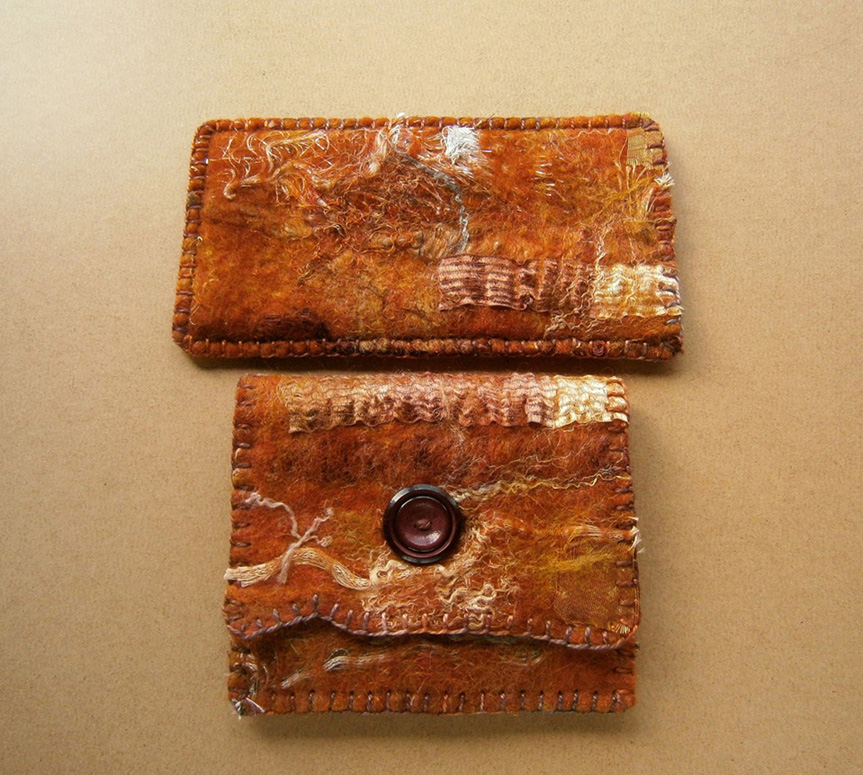
Do you have piles of WIPs at different stages?

How to Build a Yurt in 51 Days and Counting

How to Build a Yurt in 51 Days and Counting

I thought it would be a catchy title if I could say “How to Build a Yurt in 30 Days” but once I started counting how long we’ve been working that somehow didn’t work out. There is even a YouTube video on how to build a yurt in three days. Obviously, they had a few more people working on the project and didn’t have all those things like working full-time, running a gallery, doing paint class homework, company visiting etc. to get in the way. Any who, we’ve been progressing along. Dennis is still working on the tono which is the central ring in the roof that the roof poles fit into.

MINOLTA DIGITAL CAMERA

This is the top layer of the three rings that will be glued together. Dennis made 4 grooves with the router for the crown portions. He made cuts in both of the crown pieces so they would fit together.

MINOLTA DIGITAL CAMERA

Then he glued and screwed the crown portions in. Then he worked on drilling holes to put the dowels in the various layers so that the entire tono will be solid.

MINOLTA DIGITAL CAMERAHere’s the bottom tono layer with the holes drilled.

MINOLTA DIGITAL CAMERAAnd the middle tono layer with the dowel bits in place.

MINOLTA DIGITAL CAMERAA side view of the middle layer so you can see how the dowels will go into the top and bottom layers. Now he just has to put it all together and drill the 52 holes evenly around the edge at exactly a 33.3 degree angle. That should be easy 🙂

MINOLTA DIGITAL CAMERADennis has also been working on the roof poles. They need to fit into the holes in the tono.

MINOLTA DIGITAL CAMERASo we got this neat little multi-purpose tool to do that.

MINOLTA DIGITAL CAMERAHere’s about half of them completed. So you must be wondering by now what I have been doing. I have still been sanding wall rods. Remember all those holes in the wall rods? Well, they ended up having bits of wood still in the hole from the drilling process.

MINOLTA DIGITAL CAMERA


So I have been using this little tool to get the wood out of the holes in the wall rods.

MINOLTA DIGITAL CAMERAThat’s only 990 holes that need to be reamed out on both sides. And then I had to sand them lightly again. So I have been sanding, sanding, sanding… And the roof poles still haven’t been sanded. This weekend though I am starting the felting process for the walls. I hope to take some videos to show you next week.


A small weekend show

A small weekend show

It was a long weekend her in Canada and I went to a small outdoor show in a small town near me. It was part of Canalfest. It was a very nice weekend with a little rain but not enough to keep people away. The fingerless mitts and bobble bracelets were popular.

I had a great spot right on the end next to one of the main streets and parking. I got to set up so people could walk right through the booth.

canelfest 1 canelfest 2

I got to meet a young woman who reads our blog. That was really nice. I didn’t get her name but she sells soy candles.

The other great thing that happened was I got to trade with another  vendor. She got a hat she wanted and I got this great statue. She has real attitude.

girl statue 2 girl statue

She is by Lynn’s divine Creations. She is a fabric statue but she is hard. Karen help me out here what Do you call it? Paverpol is a brand name and I think she uses a different brand.


Running A Small Fibre Business

Running A Small Fibre Business

Today our guest writer is Lyn from rosiepink who, with her daughter Annie, has run a successful small fibre business. They are also the authors of the excellent books, Creating Felt Artwork and How to Make 3D Felt Vessels Using Flat Resists.

*****

I like to buy small packs of assorted fibre-goodies because it’s an economical way to try different fibres and materials, and a good way to build up a varied stash. As a felt maker, stitcher and general fluff lover I can never have too much of various bits ‘n’ bobs in every colour to dive in and out of.  I like to include coloured scrim in my felt, and a few years ago I couldn’t find much available to buy, so I bought a roll of un-dyed scrim and my daughter and I made a batch of small pieces in a big variety of colours to play with.  It was a fun day, with lots of tea and laughing.  Then people asked if we sold it.  So we had a go!

We sold bundles of hand-dyed scrim and then expanded to offer small packs of wool in several colour choices.  The scrim bundles were well received by people who wanted a wide variety of colours of hand-dyed fabric to use as textile inclusions, and the packs of wool were popular with people who wanted a lot a colours but not a lot of wool.

hand dyed scrimAfter three years, we decided to take a change of direction and wanted to concentrate our spare time on making and designing things rather than selling the materials, but it was a great small business experience.

Small packs of unique or varied textile items are a good product for a ‘kitchen table’ business, and if you have thought about taking the plunge, hopefully sharing our experience will help to give you a checklist of things to consider before you start, and show you what was involved for us to run a small online fibre business.

Before you start a kitchen table business, the first thing to consider is space.  The making of the bundles of hand-dyed scrim used not only the kitchen table, but the rest of the kitchen and the room next to it as well.  The wool was bought in bulk from a well-known company and the making-up of small packs of wool needed a whole room.  When you’re done with producing the packs, you then have to find storage space for them.

Are you fit enough?  Dyeing a few pieces of fabric is a relaxing pastime, but producing a great quantity is hard physical labour.  And rolling up a few balls of wool is pleasant, but will your shoulders and wrists still feel the same after doing it for eight hours?

But don’t worry too much, after a few weeks of walking backwards and forwards to the post office to dispatch your sales, you’ll soon get fit!

Merino woolYou’ll need a good head for figures to calculate the retail price of your packs.

First, add up how much the materials for your packs cost, and remember to include: the cost of the raw materials and the postage you have to pay to get them; packaging materials; listing and selling fees; paypal or other bank charges.

Then work out the cost of your labour, based on the hourly rate you choose, for: sourcing and purchasing the raw materials; producing the packs;  photographing and listing them for sale; dealing with orders and enquiries; packing and then posting.

You will need to keep an account of all the money that comes in and all the money that goes out, because once a year the taxman will need to be informed.

However, despite the hard work, it’s lovely being your own boss and spending your working day surrounded by fabulous fibres!

Thanks a lot for all that information, Lyn 🙂  If you have any questions about running a small business, please leave them in the comments. If you have any suggestions for future articles, please use the Contact Us page.

Playing With ‘Natural’ Dyes

Playing With ‘Natural’ Dyes

Have you tried ‘natural dyeing’ or dyeing with things you commonly find around the house such as tea, beetroot or food dyes? I had a bit of a dabble this week. I made some camera cases out of felt which was made with natural white/cream coloured wools and fibres. I wanted to blanket stitch them with natural thread, but only had enough for one case and didn’t feel like spinning any more up. The white cotton perle 5 thread and white embroidery floss I had was super bright white. This is the Perle cotton with my handspun natural thread.

OLYMPUS DIGITAL CAMERAI had lots of white embroidery floss, so I thought I’d see if I could colour them with what I had available. The first thing I tried was tea, I put a couple of used tea bags in a tub with boiling water and put the thread in. It looked too pinky, I rinsed out as much as possible but it wasn’t right. The next thing I tried was coffee, I left some ground coffee ‘brewing’ in hot water for a few minutes, then sieved out the grounds.  I just left the thread in a short time and rinsed well, it was more of a beige, but still on the pinkish side. The Coffee is on the left and the tea on the right, with a bright white for comparison.

OLYMPUS DIGITAL CAMERAI left another skein of floss in coffee for longer then tried some onion skins. I’ve been saving red onion skins for a while so I thought I’d give them a try since I was making a mess anyway 🙂 I broke up some of the papery skins and added hot water, I put the thread in and left it while the skins ‘stewed’ for a while. It turned out a nice light pink. The onion skins is on the left and coffee on the right.

OLYMPUS DIGITAL CAMERAI also left a skein of yellow in the brewed coffee for a while, to take some of the brightness off. There’s a skein of the original colour for comparison.

OLYMPUS DIGITAL CAMERAThe next thing I tried was turmeric. I know from making curries and dahls that turmeric stains plastic containers, so hoped a small amount would tint my thread. I sprinkled a small amount in a tub and added hot water, it seemed to dark, so I added more. And more. I dipped the end of some cotton perle 5 into the tub and rinsed immediately, but even this quick in-and-out stained it a bright yellow. I put the whole lot in and  left about 30 seconds and rinsed.

OLYMPUS DIGITAL CAMERAThe turmeric was a gorgeous colour, nice and bright, but much more natural than the dyed bright yellow, the turmeric is on the top, the bottom is the bought dyed yellow:

OLYMPUS DIGITAL CAMERAI don’t know what to try next. I tried bleach on a cotton thread the colour of sweetcorn silks, but it didn’t change. I might just have to get the spindle out, but does anyone have any ideas for what I could try? Actually, any tips at all for ‘natural’ dyeing would be great, it’d be nice to be able to make some custom colours now and again 🙂

Coming up on Monday we have a guest article from rosiepink about what running a small fibre business entails.

Yurt Update – Finally a Little Bit of Felting

Yurt Update – Finally a Little Bit of Felting

I finally started on felting for the yurt. Not much, but a sample to figure out shrinkage.

Wool BattThis is one of the batts rolled out on the living room floor. That is a yardstick so you can see about how big it is. It looks grey here but it’s really brown.

Wool LayoutHere’s my sample square ready to felt. I used two layers of batt so I can make sure it will be thick and heavy enough to keep out the weather.

Wool Layout ThicknessIt was almost 6″ thick.

Yurt Felt SampleAnd here’s the final sample after felting. It is very thick and sturdy. The wool felted easily but it only shrank 6%. That seems minimal to me. I’m used to 30% so I hope that it doesn’t shrink differently when I do a large wall piece. But after a bunch of math, I figured out that I might just have enough wool for the walls and the roof. Now, we just have to work out exactly how we’re going to pull the big rolled bundle behind the tractor. There is talk from my husband about field draggers, PVC pipe, chain etc. But that’s his job. I’m rolling the felt up around the PVC pipe and he’s going to do all the connecting to the tractor and pulling it around the field.

Short Wall Slats with 45 degree Angle Cut for DoorWe’re also still working on the frame and I still have some sanding yet to do. These are the final pieces that I needed to cut shorter for the walls. The ends needed to be cut at a 45 degree angle  as they will be butting up against the door frame.

Cutting the TonoThe next part we started working on is called the tono. It is the center section of the roof where all the roof poles insert. Luckily, we already had this set up for our router. It is to make circles. It is kind of like using a string and pencil to draw a circle.

Tono CutHere’s one of the circles completely cut.

Remaining BoardWe saved the extra piece to make the rest of the tono.

Cutting the Inner CircleThen we needed to cut another circle within the circle. More measuring and the nail is what holds the plastic jig in the center.

Inner Circle Cut


Here it is as we finished cutting the inner circle out.

Proud Hubby


Doesn’t he look proud!

First Tono LayerHere is the first layer cut out. We made three all together that we will glue together to make the wood thick enough for the holes for the roof pole ends.

Cutting Other Tono PartsThen there are pieces that arch up over the flat tono circle. We rigged up a way to use the old center circle and made an arc cut with the router. Now we just have to cut the ends and this piece will be the arch over the circle. It’s a little hard to picture but I’ll show you more photos when we have it together.

So the wall felting will begin in the next two weeks. If you’re in the area and you’d like to join in, let me know and I’ll give you the schedule. I’d love to have you join us!