
Electric Fringe Twister
I have a confession to make… I seem to be falling behind on my fringe twisting duties. It is a bit of a tedious job and requires sitting at the table and focusing on the task. In the winter I find our kitchen quite cold, and so I have been putting off working on fringes.

Recently another weaver was talking about how much they loved their electric fringe twister. I had a look on Amazon and ended up ordering a Lacis fringe twisting tool. It was about $45 Canadian.

The tool uses two AA batteries. There are two modes and you select them by pushing the button to the 1 or 2 position. The 1 position rotates each black spindle and twists each cord separately. The 2 position rotates the entire head and twists all the strands together. I found a short video showing these two actions online here.
Before I could get started, I needed to prepare the piece of weaving. I selected one of the pieces of weaving and folded it in half, lining up both ends. I add a heavy book to the weaving to help keep the pieces aligned. Next I use an open toothed comb (I think it is from the pet shop in the cat/dog tools) to untangle the warp strands. Once the strands are combed out you can see that the length of warp left on each side is not the same. I trim the warp threads so that both ends will have fringes of the same length.


Once the warp threads are trimmed, I move the book and reposition the weaving so there is only a single end of the weaving on the table. The book is re-positioned to weight things down and I am ready to try out the electric fringe twister.
Depressing the bottom of the black spindles opens a hook at the end and I am easily able to position a bundle of threads on the spindle. I repeat this for each of the four spindles. Then I move the button to position 1 and add twist to the strands. Once there is enough twist, I remove two adjacent bundles from the fringe twister, tie a knot on the end, and then let them twist together. This is then repeated for the other two bundles attached to the fringe twister. Yeah! The first two pieces of twisted fringe are done.


Next I repeated this across the width of the weaving. When that was complete, I went back and gently trimmed the ends of each piece of fringe to tidy them up. (Before trimming they look a bit ratty because the warp threads are different lengths.) I rotated the weaving and repeated all these steps on the other end of the weaving.


It took me 30 minutes to complete the fringe twisting and trimming on the second end of the piece of weaving. I do think the electric fringe twister is slightly faster than manual fringe twisting. And it is easier on your hands as you are doing fewer repetitive movements. So those are both very positive things. (I did get faster and my last piece of weaving it was about 35 minutes to twist both edges and do the trimming.)
On the cons side of things… I found the fringe twister motor noise to be a bit annoying as it seems very loud. I also found that because the unit is round, that it rocks on the table. This makes it more challenging to attach the warp bundles to the black spindles. More importantly, a few times when I hit the switch nothing happened. I had to shake the unit to get the power to come on. (I guess the batteries are loose, so the power connection is flaky.) It is very disappointing that a brand new unit does not function well.
After trying the electric fringe twister for the first time I give it an 8/10 rating overall. The first night I twisted the fringe on one first piece of weaving and started work on a second piece before calling it a night. On the next day I finished up the fringe on pieces two and three. And I sewed a tag on the one piece that is shawl length. The other two pieces are longer and should eventually get turned into a sewn garment of some kind. Here they are all laid out together. Next up for all of them is wet finishing.


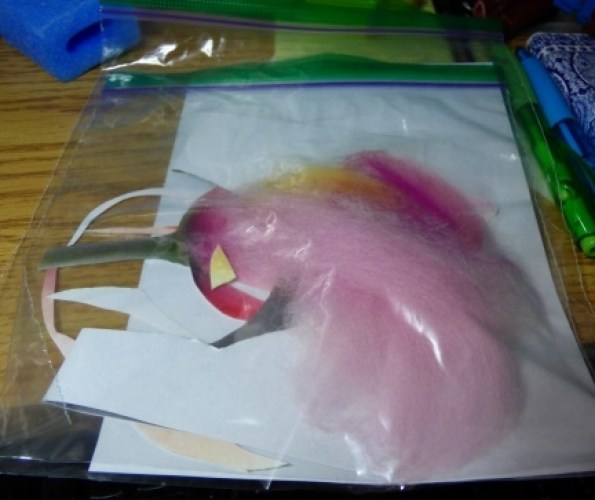
 12 The photo was taken May 2nd, 2021. The needle felted picture is based on this tulip and was started the evening of May 6th and then worked on over the next 2 days while Glenn still puttered on the garage clearing.
  13 I used the template method of transfer, although the felt was thin and light so if we had a sunny day I could have done the window or lightbox method. I did not want to use the black permanent black markers and could not remember where I had put the coloured permanent markers so I used coloured pens instead. (the lost markers could have been replaced at Dollerama but are not considered essential!!!) I measured out the 5×7 box and since my cardboard mat has also disappeared after I cleaned my desk I just kept checking with the ruler to make sure I was staying in the correct size for framing. (It is a lot cheaper to work in a standard size so you don’t need to cut a custom mat later.)
 14-15 I laid in the background first and used both the single needle and fake clover multi-tool to get the background blocked in.


 20-22 getting a stronger contrast along the edge of the tulip
 23
23

 24-26
24-26
 27-28
27-28


 31-33 The later spring garden
 34 This is the same tulip I was felting. Now it is almost finished blooming and will soon drop its petals. What an amazing colour change!