Browsed by
Tag: silk

Final Project

Final Project

Happy holidays everyone and to those who celebrate,  Merry Christmas!

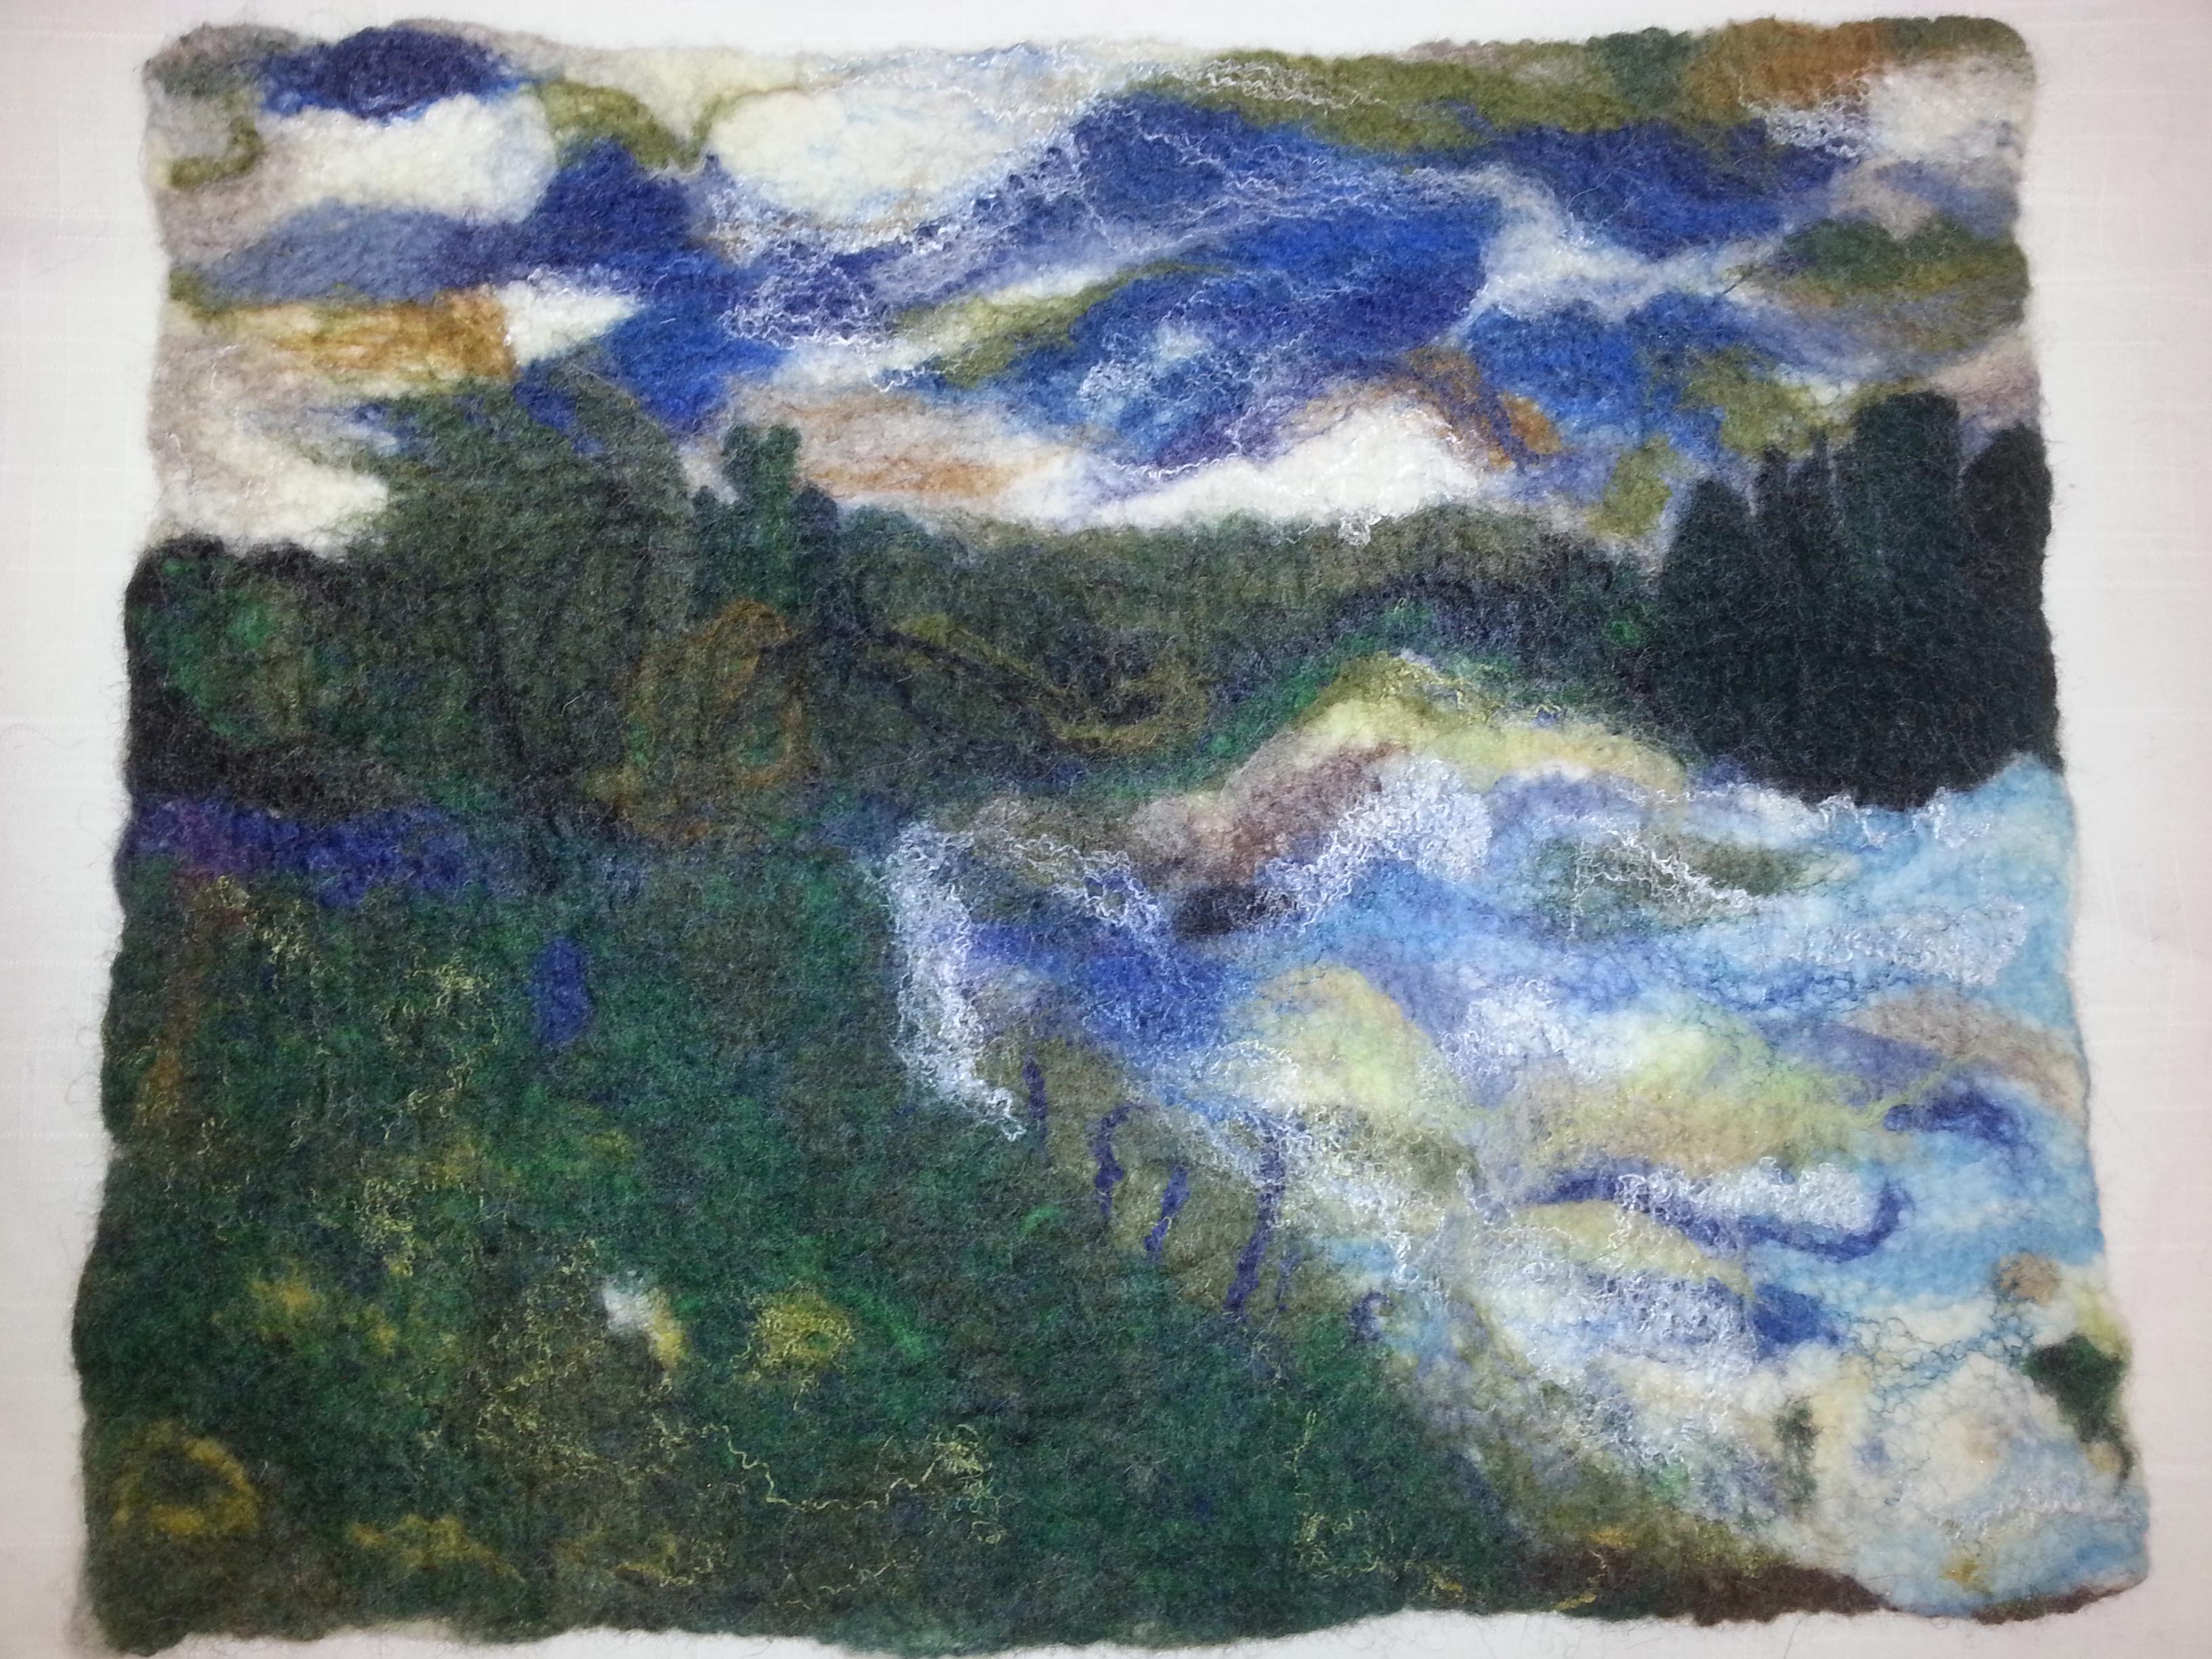
As we wind down for the year and start planning for next year, I’ve decided to share my final project from Fiona Duthie’s Surface Design class.   My intention is to use it as a reminder of incorporating more of these techniques in my felt work going forward.

I didn’t set out to use a specific number of techniques, but let the picture dictate which ones to use.  We learned many more than I used here.

I started with making a bridge using the lace technique and decorated it with pencil roving and stitching with yarn on the top  to create a handrail on top and matching decoration below.

2014-05-16 13.41

I added the cracked mud/tile effect to the ends of the bridge.

2014-05-20 16.03
Before adding techniques and felting


The water is fabric manipulation using some silk habotoi with some shadowing under the bridge.  The hills in the background were prefelt cut outs with silk embellishments for texture.  I also used pencil roving to define the shoreline in the distance.

2014-05-24 16.18

On the beach is a tree trunk made using the shibori and carving techniques then added beads, cotton batting  and gems as inclusions under silk gauze.  I used silk and locks for the water rushing over the sand and to embellish the sky.  There is a 3D water lily on the waters edge.

2014-12-07 12.14b

2014-12-07 12.14

I also added loops on the back to be able to hang the picture.   I debated straightening the edges, but decided I like the organic edges.  While its not gallery material, I enjoyed making it and am proud to hang it in my family room.

The class was fun and I learned a lot.  I would highly recommend it to anyone wanting to expand their felting techniques in a classroom setting working at your own pace.

What projects or techniques are on your list to try next year?


Wool Experiment

Wool Experiment

Our Guest Artist/Writer is Leonor Calaca from Felt Buddies

A while back, I saw a blog post written by Marilyn, aka Pandagirl, about how some fibres merged (felted) together by using the wet felting process. You can read that post by clicking here.  https://feltingandfiberstudio.com/2014/02/14/sample-fibers/?preview=true&preview_id=7469&preview_nonce=af58dd7ec7&post_format=standard

Being someone who knows only about needle felting (and believes to have much, much more to learn), and who had never before tried some of the fibres mentioned, I was very curious as to how they would perform under the barbed needle. I asked Marilyn about it, and she was generous enough to send me some samples to try myself.

There were nine samples to try, and some of them were fibre blends. I decided to go about this by analysing each sample by touch and sight, then taking a small portion out and needle felting a little ball; a round form would allow me to see whether the fibres would take a 3D format well, and easily (or not).

samples together

I also used The Field Guide to Fleece book, by Deborah Robson and Carol Ekarius, to help me understand a little more about each fibre. This book referred to some fibres being curly (having ‘crimp’), but all my samples were straight, which has to do with the way they were commercially processed (this is the reason so many of our fibres shrink when wet felted).

Yak_Gotland_Navajo

Yak
This sample was a dream to touch and smell! It is so soft and the colour is absolutely lovely, too. The Yak needle felted very easily, and the resulting ball was springy and so very soft. This might be my new favourite fibre!

Gotland
This sample arrived slightly felted in its bag, which tells me Gotland might be one of those fibres that need careful storage and not too much friction or weight on it. It is a soft, shiny fibre.  My ball was a little fuzzy, with a slightly scratchy finish. It smelt wonderfully sheepy!

Navajo Churro
This sample was also a new-to-me fibre, and I was very curious to see how it would behave. It is much coarser than what I’m used to (merino being my main source), but I find coarse fibres to be much nicer for needle felting.
My first thought when looking at this fibre was that it would make great mock bird nests, it mimics the materials and branches really well!  Navajo Churro needle felted really easily, as expected, and I got a fuzzy ball as a result of the coarse nature of the fibres.

Yak_Gotland_Navajo_balls
Organic Polwarth/Silk
This is a very shiny and, obviously, silky blend. I’d say it’s a 50/50 blend. I’ve yet to work with Polwarth wool alone but this blend made both a very nice combo to the touch.  It felted easily, although it took a little for me to get that ball shape, which I suspect is the silk’s doing, being the slippery fibre that it is.

Merino/Silk
Although Merino is possibly one of the most used fibres in felting, and well known for its softness, this blend isn’t as soft as I’d expect, nor as soft as the Polwarth/silk blend I mentioned above. It is, however, very shiny due to the silk content.
Again, due to its long staple length, it’s harder to make a circular shape. The shine ended up a bit muted because the fibres are randomly pulled together when needle felting – I’d say one would keep the shine best with the wet felting technique.  As you can see, the colours came out rather muted due to this type of blending.

Alpaca/Silk
A very soft and shiny blend, possibly a 50/50, it took a bit to felt and the shine was a bit lost with this technique.


Pol_Merino_alpaca_Silkblends


Silk_blends_balls
Blue-Faced Leicester
If you like spinning, chances are, you love BFL. This is a very lofty fibre, although this particular sample wasn’t as soft as alpaca or merino. It needle felted very easily and retained its shine very well.


POY Corriedale

This blend has a long staple, is very soft and has a lovely sheepy smell. It needle felted very easily and I was able to make a ball very quickly, despite the staple length.
Teeswater
Although it’s a curly fibre, this sample was straight. It’s got a lovely lustre, and is softer than Gotland (which is, incidentally, something my reference book disagrees on). This was, by far, the fibre with the longest staple length I’d ever tried!  The Teeswater doesn’t felt very easily and it took me a while to get it into a ball. Also, because it’s a long staple, it was harder to get a smooth finish on the size I did it in.

Wensleydale
Another curly fibre that was processed to be straight . It’s a longish staple, very soft (but less so than Yak)  Although it felted, it resisted my needle a bit. Some strands wouldn’t blend in with the rest.


BFL_PolCorr_Tees_Wens


BFL_PolCorr_Tees_Wens_balls

So there you have it, my little experiment. Feel free to ask any questions you might have, and tell me all about your own experiences with different fibres!

Thanks Leonor for this informative experiment with needle felting!

Batts, Bamboo and more…

Batts, Bamboo and more…

Our Guest Artist/Author today is Cathy Wycliff aka Luvswool

Recently, I received some nifty embellishment fibers from Zed (thanks again!) around the same time my Opulent order of batts was delivered, so I decided to combine two experiments.
One experiment idea was offered by Fiona Duthie on her blog and involved combining batts for color overlap or shadowing. I chose moss, chlorophyll, teal and sand. All were Opulent coopsworth batts except for the teal, which was handmade and provided by Marilyn (Pandagirl). As I recall, the teal was a combo of hand dyed Cheviot, Domestic 56s, merino and mulberry silk. I lifted the edges of each batt and overlapped the next color of batt, then wet-felted to the pre-felt stage.


IMG_0169
Next, I added the first set of embellishment fibers, shown up-close in the photo below: bamboo staple, banana, milk fiber and crimped viscose.


IMG_0222

I wanted to see which fiber proved to be the shiniest. As I worked the fiber in, I was not paying much attention to the coopsworth batts, which did not provide as much shadowing as I had expected. Could be the unevenness of the batts or unequal distribution of the overlapped batts, or perhaps not enough fulling. All of the embellishments added shine, but I think maybe the crimped viscose turned out best, closely followed by the banana and milk. Although the bamboo staple did not provide much shine, it sparked an idea for a future experiment as an inclusion in nuno-felting.

IMG_0169 IMG_0168

I grabbed my next set of Zed’s embellishment fibers, this time using (top to bottom) black bamboo, pale blue acrylic (looks white in photo), black nylon tops and green nylon.

IMG_0223
I placed all of the fibers on Domestic 56’s roving, which I lightly pre-felted. I was pleased with the sample results, especially the grey/black bamboo (top) and the crazy/wild green nylon (bottom).

IMG_0228

I’ll definitely want to use these fibers as embellishments in my upcoming projects!

Thanks Cathy! You had some great discoveries with new fibers!

It’s that Time of Year

It’s that Time of Year

Congratulations to Jolanta, winner of the Third Birthday Giveaway #4!  Please  send me your snail mail address and I’ll put the batts in the mail to you.  I look forward to seeing how you use them. I hope you have fun!

Here in the Midwest USA, the weather has turned cold and the snow has started to fly.  With the holidays and New Year around the corner, my thoughts have turned to warmth and gifts.

I’ve wanted to experiment with cobweb felt so I made a cobweb scarf with one layer of  a merino/silk mix.  I didn’t intentionally make holes, but let the process dictate the outcome.

2014-10-16 11.25

Here are some closeups:

2014-10-17 13.39a 2014-10-17 13.39 2014-10-17 13.38

It is very lightweight but has enough fiber to keep the neck warm.

2014-10-17 13.38b 2014-10-17 13.45


Using the same type of merino/silk mix,  I made two additional scarves.  But this time I didn’t want holes, so I used two layers of fiber and carefully inspected each before felting for weak spots filling in where necessary, then checked frequently during the process.

2014-11-11 17.02 2014-11-11 16.59


Of course, with the process of rolling and fulling each ended up with some holes.  The brown more than the lilac.  I like the look of them, but disappointed in the outcome.

Last year I made my husband a scarf with the merino/silk mix, but used a prefelt between layers and it made it much heavier.  Perhaps, next time I will use an additional layer of merino  instead of prefelt for a thinner scarf.

2013-12-13 10.37

I’ve also been pod happy again and have made two more  as gifts.  I made batts using merino/silk, and merino for outside layers and Cheviot as an inner layer to give the bowl strength, but of course, it migrates through and had to be shaved.

2014-11-13 10.45

What projects have you been working on for the season?


Introduction to Wet Felting at The Fold

Introduction to Wet Felting at The Fold

A couple of months ago while shopping at The Fold in Marengo, IL, owner Toni Neil asked me if I’d be interested in teaching a wet felting class.  Many of the people who shop there are knitters, crocheters and spinners and she said they were curious about the felting. I agreed and we settled on November 1, class size and I provided her with a class description and supply list along with a list of the items I would be supplying.

I always think when taking a beginners class it’s nice to come home with something you can either use or show people, so I chose to make a place mat.  In preparation, I made a couple as examples and gathered some other samples to show how embellishments can be used.  I also brought along, yarns, prefelt, and some silk for embellishments.

2014-11-02 14.40

I provided a pool noodle, bubble wrap, a template, a piece of polyester curtain fabric for each student and gathered up my samples and other tools to discuss as we worked. In addition, I printed out flyers for the forum, a resource list and a general step by step guide to basic wet felting for future reference.

preparation

The class was held in Toni’s kitchen at The Fold which was comfortable for four people. Unfortunately, they had to turn away a fifth, but I don’t know where we would have put another body.

I was surprised to learn that a couple of the ladies had come from as far away as Beloit, WI and Highland Park, IL which is an hour and half away.  The other two lived closer to me.

layout 3_edited-1

The kitchen was nice and bright.  So sunny, pictures were a little hard to get.

laying out lay out 2

The one thing I learned is that they would have preferred to not have choices as to design.   However, I’m never one to squash the creativity of a group and as it turned out they helped each other and while they followed basic designs they added their own creative touches.

Toni M (not the owner) finished first and was pleased with her first project and decided she liked her organic edges.

Toni

Dana brought some beautiful Churro yarn she’d purchased from New Mexico and made her mat a bit more abstract with a lovely turquoise background.

Dana

Carolynne purchased her roving and yarn to match at The Fold with the intention making an additional five mats of the same design which featured the stripes and abstract yarn design.

Carolynne

Since Candace had just purchased all the merino sheep from The Fold, she chose to feature a sheep on her design that she cut out from prefelt and used yarn for a fence, silk for clouds and some roving for grass.

Candace and sheep

They were all pleased with their place mats.  We worked hard, but had a good time.  Now these knitters, crocheters, spinner and weaver have a new tool in their fiber kits!  I hope they will continue to experiment and join us on the forum.  For more information on The Fold check out their website http://www.thefoldatmc.net

I haven’t taught a class in a long time.  I was tired, but a good tired and had fun meeting new people and sharing my passion with them.


Recent Work

Recent Work

I mentioned recently that I’m doing a Craft Fair soon. It’s this coming Sunday at Victoria Baths on Hathersage Road in Manchester. They also do guided tours that day, so if you’re interested, have a look at their website.
In my post last time, I showed a faintly plaid felt piece which I’d started to make into a diary cover. Here is the finished cover:

OLYMPUS DIGITAL CAMERAI also mentioned a piece of silk I got for £3 a metre. I did manage to use it on a felt piece, but I haven’t made it into a cover yet. It looked a bit nicer and brighter just before the final fulling, but I wanted to make sure it would stand up to years of handling:

OLYMPUS DIGITAL CAMERAI don’t know if you remember a couple of pictures I posted as part of the Jackson Pollock challenge from a bag I was working on, well, I never did get around to finishing the bag, and when I saw it recently, I thought I could cut it up and turn it into a nice sturdy diary cover. So, I did 🙂  This is the front:

OLYMPUS DIGITAL CAMERAAnd, this is the back:

OLYMPUS DIGITAL CAMERAI always forget just how long it takes to do these covers! Also, because I didn’t have any coloured threads which I thought would be just right, I ‘blended’ my own. I took a strand each of Red, Orange, Yellow, Green, Blue and Violet embroidery floss and made a 6 strand rainbow. I had to do that for each part I stitched, and I was starting to regret it by the end 🙂

One of the things I wondered after the last fair was whether it was obvious that my stuff was actually handmade felt made from real wool. A lot of my stuff is well felted or nuno felt, so to anyone who doesn’t know felt, it could just be commercial fabric I’ve bought. So I thought I would make some obviously wool natural pieces for book covers. They are made from lots of different breeds of wool and embellished with locks, some mohair boucle from Marilyn, some silk noil, and viscose and bamboo. This one has the most added embellishments:

OLYMPUS DIGITAL CAMERAI did actually use the same size template for these pieces, but with all the different wools and embellishments there was different shrinkage. For this piece, I tried to stick to wools which were more similar: Merino, Bluefaced Leicester, Finn and Corriedale, and there are less embellishments:

OLYMPUS DIGITAL CAMERAIf I get chance before the fair, I’ll upload the finished covers to ipernity or the forum.

Christmas Balls

Christmas Balls

This last week I bought some empty Christmas ball to fill for an upcoming sale. I am always looking for something a bit different. They are plastic. They are very clear. I had planed on getting glass but theses where so clear  I though it would eliminate the breakage problem.  I was going to get a different shape as well but for some reason a flat circle cost twice as much.

pink 1

First you pop of the top and then add what every you like.

pink 2

You can add anything that fits through the hole. This is silk throwsters waist fluffed up.

pink 3

When it’s full you pop the top back one and your  done.

pink 4 pink 5

I used Blue Faced Leister Curls, some mohair curls, silk hankies fluffed up and some throwsters waste. in a few I added some sparkly angelina.

balls


A Weekend of Felting in Quebec

A Weekend of Felting in Quebec

Our guest artist/author is Cathy Wycliff sharing her experience of
felting at Meech Lake, Quebec, with Fiona Duthie, October 3-5, 2014.

When I heard about the opportunity to felt with Fiona amidst the Fall splendor of Quebec province, I did not hesitate to sign up for this class! There were eight female students and Fiona, and the weekend was informative, fun and felt-a-licious! Not too many photos taken, and no long walks as previously imagined, simply because we were too busy felting.

The country cottage where we stayed was just outside of the Galatin National Forest, a beautiful area just twenty minutes from Ottawa. In the first photo, you may see a small boathouse in the background, which was just by the side of Meech Lake. It was a bit chilly for a swim, and besides, we were too busy felting!

IMG_0077

I took a minute the first afternoon to shoot these photos, and I was playing around with capturing the hanging bird chimes on top of the tree.

IMG_0085

A quick photo of the planter, and then onto felting.

IMG_0080

We learned how to make two different projects:  a nuno tunic (choice of white or black) and  a lampshade (varied sizes and wool choices).

IMG_0107IMG_0115


The lampshade is not totally finished.  It needs to be ironed and steamed, then a final shaping. It was made to be a pendulum light, hanging from the ceiling. For blog purposes only, the lampshade is sitting atop one of the posters on my 4-poster bed.

With 8 different women felting, you would think there would be some uniformity in what we chose to make, but I can tell you that each project was different, and each was amazingly beautiful and well-crafted. There were white tunics and black tunics, tall lampshades and wide lampshades. Embellishments were as varied as the attendees.

Most of our meals were at the cottage and we all pitched in to make it work. Some cooked, some loaded dishes and others provided scintillating conversation over mugs of coffee and tea (and at times, glasses of wine). One lovely lady who did not stay at the cottage brought fresh croissants and scones one morning. We and several local ladies celebrated Felt United on Oct. 4th at the cottage by making a very large piece of “Peace” felt.

IMG_0091

On the last eve, some of us took Fiona out to dinner at a marvelous nearby fish restaurant. If you ever have an opportunity to take a class from Fiona Duthie, I highly recommend her–not only as an instructor par excellence–but as a wonderful human being.

Podfest

Podfest

Last week, I traveled to Cathy (Luvswool’s) home to have a “podfest.”

Cathy wanted to try making a small vessel   So, since l have been making pods  on and off for months for family I offered to work with her using the method I use from Rosiepink’s Tutorial for Felt Pods http://rosiepink.typepad.co.uk/rosiepink/tutorial-how-to-make-a-wet-felted-pod.html

I had selected fibers I had dyed from my 4 day dye experiment – Cheviot, merino, domestic 56 and brought some silk, throwsters waste, locks and hankies in a similar colorway. I also brought the tools I usually use for fulling for both of us to use and for Cathy to try to see which ones she favored. The soup ladle was the winner!

Cathy had some mystery fibers she wanted to try that she hadn’t used and used some of my embellishment stash.

Of course, we were anxious to get started and forgot to take a picture of the first side.  Here is our first turn.  Mine is the turquoise, Cathy’s is purple and gray.

marilyn side 2 Cathy flip side

Here is our final layer before wetting and embellishing.  We both used throwsters waste and silk.  I added some locks.

Cathy layers Marilyn final layer

Rinsed and ready to dry.

After rinsing

At that point, I packed up for my trip home and Cathy set her pod out to dry on a bamboo mat.

Cathy pod drying Cathy pod 2 drying

We were both happy with our pods after drying.  I could have used more curls, maybe next time.

final M pod final M 2 We had a great time and look forward to our next felting adventure!  What new felt technique have you tried?

Monet Challenge

Monet Challenge

I’ve always been a fan of Monet.  I don’t think there are too many of his works I don’t like, but I particularly like his irises, bridges, weeping willows and water lilies.  But I decided for this challenge I would step out of my comfort zone and try something different. So, I chose his “The Seine Near Vetheuil – Stormy Weather” for my challenge.

The-Seine-Near-Vetheuil--Stormy-Weather

Since I have a new drum carder, I decided to make a batt for the base from the domestic 56s I have. I used merino, pieces of unknown wool batts I had purchased to paint the picture and some mulberry silk and throwsters waste for accents. It was harder than I thought to simulate the brush strokes and capture the color subtleties and layers in this piece.  I could have stopped here and put it under glass, but I kept going.

before felting

When it dried I noticed the coarser domestic 56 wool had migrated thru and made the piece very hairy.  It definitely needed a good shave. I wondered if I had wet felted the base first if I would have had as much migration.  Next time I’ll try that.

before shaving

After shaving it, particularly in the darker areas, I felt it still needed something.

after shaving

So, I put it on the floor and looked at it for awhile to decide where I could needle felt some of the areas to give it more definition.  I added some wool to some of the tree lines and needled around others.

Seine final

Since its my impression of this work, I’m satisfied with the outcome.  There are a few places I would have done things differently when laying out, but they weren’t obvious during that stage as they were after the felting.

Have you found your Monet challenge yet?