Browsed by
Tag: nylon

Making Socks from Start to Finish

Making Socks from Start to Finish

Our guest artist is Leonor  from Felt Buddies who is sharing a special sock story and process.

Today I’m sharing with you some sock making, from the dye pot to the finished product.

A few months ago, I got a new tattoo from my husband’s co-worker Jim (if you’re guessing my other half tattoos for a living, you’re guessing right). In exchange for his work, Jim asked me to knit him a pair of socks – he’d seen me knit whilst in the studio and was fascinated by the concept of having a garment made especially for someone. I happily obliged!

Because I own my own fibre business, I have a lot of sock yarn available to dye at my pleasure. After talking to Jim about his colour preferences, I got to work. I loved that he asked me for three of my favourite things in socks:

  • Mismatched colours with contrasting heels and toes;
  • Bright colours (you can’t get brighter than magenta and purple!)
  • Socks that glow under UV light.

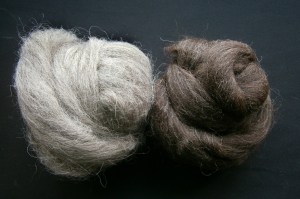
I had some yarn I was keeping for a special occasion and this was the perfect time to use it. It’s a very soft alpaca/merino/nylon blend.

For some reason, at the time I thought it was a good idea to break down the yarn into four pieces – two for the main body, two for the heels and toes. I’ve no idea why I did this, since I was only using two colours, but hey. I simply weighed the skein and took out 15 grams for each foot to make the smaller parts.

I then soaked the fibre in some water and synthrapol in preparation for dyeing. Synthrapol is a wetting agent and helps the wool absorb more dye. It’s also excellent to rinse out fibres.

After the yarn was thoroughly wet, I made my dye stock using professional-grade acid dyes and to the pots I went.

After adding the colour to the water, I placed one little skein and one big one in the pot and let the fibre sit for a few minutes without any heat. Because this yarn isn’t treated to be superwash (non-felting), the dye takes longer to penetrate the fibre, so I wanted to give it some time to get to every bit of wool.

I then turned the heat on and once the water started simmering, let it be for about 10 minutes, turned it off and let the wool cool completely in the pot. This allows for the remaining dye to be soaked up, and also makes for a brighter finished colour work.


In order to turn my skein of yarn into a ball, I used an umbrella swift (pictured above, on the left) to hold the fibre whilst I pulled it onto a skein winder (above right) to make a neat ball. I have all the cool gadgets!

Once the yarn was dyed, washed, rinsed and dry, it was time for knitting. I had made an impression of Jim’s foot beforehand and used it as my template to make sure they’d fit. If you’re curious, this is a technique taught in a pattern called Fish Lips Kiss Heel that makes for fail-safe sock fitting (and heel-making). It’s available on Ravelry at a very low price and I highly recommend it.

And here’s the finished socks! I still had to weave in the ends in this picture, but I’m happy to report that’s been done since and I have presented this squishy pair to a very enthusiastic Jim.

Now, for a fun little extra: I asked for a photo of him wearing the socks for my social media. Be careful what you wish for! Jim took the picture, alright – he got down to his underwear and struck a hilarious sexy pose for me. If a bit of skin doesn’t offend you and you like a good laugh, hop on to my Instagram @feltbuddies and look for yourself. There’s a black and white photo with a disclaimer about the partial nudity, and after you swipe there’s Jim happily wearing my socks… J


Thanks Leonor!  If you’d like to follow more of her fiber adventures,  you can see her work here:  https://www.feltbuddies.co.uk/


Combining Weaving and Felting by Fiber Artist Cathy Wycliff

Combining Weaving and Felting by Fiber Artist Cathy Wycliff

For many years I have been a lover of textiles, but I never wanted to knit or weave. Too fiddly….knit, purl, knit, purl. Or weave to a pattern but first figure out the sett, the epi. No, not me.

And then last year, I saw Meta vd Knijff’s small homespun weavings on felt on Flickr. Meta also uses natural dyes and paints and takes cool photographs as well. Meta is an artist in the Netherlands who I discovered on Flickr. So, back to the weavings on felt. I thought, hmmmm, if I could do that with weavings, then maybe I would like to weave. Then I discovered Saori weaving quite by accident, somewhere on the world wide web and subsequently took instruction.

I discovered that weaving doesn’t have to have patterns, that weaving can be creative and free, and what’s more–I could combine it with felt.

Over the period of a week or two, I made a bunch of small sample weaves, no plan in mind whatsoever. Then I grabbed some pre-felt I had in my stash, some homemade and some commercial. I fooled around placing the small weavings on pre-felt.

IMG_1527sm

IMG_1526sm

IMG_1532sm

IMG_1537sm

Most of the weaving samples are cotton and/or wool, and all are woven on black thin cotton warp. There may be the odd novelty yarn thrown in there, since when I was weaving samples, I was not thinking about combining them with felt. I chose 3 samples to felt with: the largest is multi-colored, all cotton warp with all cotton weft. I chose a large bright turquoise commercial pre-felt batts called “Maori” from Opulent Fibers, which I recall being Corriedale. I used small pieces of the same prefect batt to cover parts of the all-cotton weaving.

The second largest piece was a weaving I made with mostly wool and some cotton weft. I used as pre-felt a piece I had cobbled together with my naturally dyed wool, half madder and half logwood. I did not use any wool wisps to cover parts of this weaving.

The last and smallest piece was a small sample weaving I made using partial wool, cotton and nylon weft on cotton warp. I placed the weave onto cider merino ( handmade by me) pre-felt–again no wool wisps to cover.

I felted all of them in the usual way but not rolling as long as normal because I had used pre-felt as the base. Besides, I was impatient to see how they turned out! All of them successfully felted, although I did use a bit of needle-felting to secure some areas, mostly with the largest all-cotton weaving. I think that will make a nice wall-hanging for someone who likes a lot of brightness in their decor. Unsure about the medium-sized one, perhaps a small wall-hanging or pillow-cover? And the third piece I have fashioned into a cuff with vintage buttons. The inside is soft as merino should be!

IMG_1546sm IMG_1557sm

IMG_1558sm

Any weavers out there? You really don’t need a floor loom if you would like to get started weaving. You can even use a table loom, a pin-loom, or just hammer some nails into an old wooden photo frame, and you’ll be ready to weave and felt!


Thanks Cathy for yet another fiber technique to try!

Fibre Giveaway

Fibre Giveaway

Today it’s my turn for a giveaway, I’m doing fibres too, and very predictably it’s naturals! There are 4 different breeds of natural wool tops totalling aproximately 300g. There’s roughly 100g of Texel and 50g of Devon:

OLYMPUS DIGITAL CAMERAAnd roughly 100g of Grey Norwegian and 50g of Zwartble tops:

OLYMPUS DIGITAL CAMERAI’m also including some embellishment fibres, aproximately 150g altogether. There’ll be fibres like Ramie, Bamboo fibre, Kapok, Cotton top and Soy staple:

OLYMPUS DIGITAL CAMERAAnd Ramie, Plastic Fibre, Nylon Fibre and Cotton fibre:

4fibresI’ll try to include as many different fibres as possible. All you have to do to enter is leave a comment on this post. Make sure you use a valid email address because I’ll use that to contact you for postage details. I’ll announce the winner on the 3rd of February, so check back then. Good Luck!

New Samples

New Samples

I’m going to do workshops at Manchester Museum of Science and Industry MakeFest in August, so I wanted to make a couple of felt samples to get an idea of how much wool I need to order for supplies. I made a 10 x 10 inch sample, using pinks, since I didn’t want to waste my nicer colours 🙂 It actually turned out alright!

OLYMPUS DIGITAL CAMERAThe other one I made is kind of double sided. I wanted to try out some multi-coloured Merino I got from wollknoll. So one side is just ‘plain’:

OLYMPUS DIGITAL CAMERAAnd I thought I’d make the other side colourful and full of  extra bright fibres and sparkle to take with me as one of my example pieces, some people seem to be drawn to that:

OLYMPUS DIGITAL CAMERAThese are some shiny synthetic threads I saved from a piece of fabric, which I think was synthetic habotai:

OLYMPUS DIGITAL CAMERAAnd some neon green crimped Nylon:

OLYMPUS DIGITAL CAMERAI also made a small sample using some Stone Sheep I bought and carded. I used some of my dyed Soy tops with it:

OLYMPUS DIGITAL CAMERA

More New Wool

More New Wool

I got some wool tops listed as ‘Arctic Fox’, no other info about what the wool breed might be, just that it is 25 micron. It feels really soft, a lot like Bluefaced Leicester, and it felted really nicely too:

OLYMPUS DIGITAL CAMERAThough it’s soft and felts like a fine wool, it does have some wiry bits:

OLYMPUS DIGITAL CAMERAI tried a variety of fibres it, along the top is Soy top, below that is black Bamboo top (L) and Milk Protein (R), then some Hemp fibre, and at the bottom is Viscose top:

OLYMPUS DIGITAL CAMERAInterestingly it made the soy look like hemp or flax, which it only usually does with a coarser or curlier wool:

OLYMPUS DIGITAL CAMERAThis is a closer picture of the Bamboo and Milk:

OLYMPUS DIGITAL CAMERAHemp and Viscose:

OLYMPUS DIGITAL CAMERAAnother wool I tried was Skudden or Skudde. I couldn’t find any info on it in English, but there’s a Facebook group with cute lambs: https://www.facebook.com/groups/Skudden It isn’t in the Fleece and Fiber Sourcebook, but apparently it is in the Northern European short-tailed family. I used this straight off the batt without carding it first, so it’s a bit uneven:

OLYMPUS DIGITAL CAMERAIt felted immediately, it was like it was felted as soon as it was all wet and soapy. It is weirdly hairy though. I was using new netting and thought frayed fibres had come off and got all over the felt. This photo is actually in focus, but the hairiness makes it look like it isn’t. I used black nylon tops, which are actually very black:

OLYMPUS DIGITAL CAMERAThis is a close up of the hairy corner:

OLYMPUS DIGITAL CAMERAClose up of the left side:

OLYMPUS DIGITAL CAMERAFurther up, it looks like diagrams of cell walls:

OLYMPUS DIGITAL CAMERAIt’s different to any other wool  I have, it’s unusual, but I like it.

A Bit Of Colour

A Bit Of Colour

I thought I’d do some colourful pieces this week. The last time I ordered from World of Wool, I got some dyed Shetland wool tops, and some dyed 18.5 mic Merino. I used the dyed Shetland tops for this first piece, and a variety of cellulose fibres that I dyed a while ago, using rosiepink’s tutorial. I think I used Bamboo, Banana, Ramie, Flax, Hemp and Viscose, and there are a few wisps of soybean top too.

OLYMPUS DIGITAL CAMERAI didn’t add the fibres in any particular way, just lay the tops out and added more until the spaces were filled in. Overlapping in some places.

OLYMPUS DIGITAL CAMERAI like this close up, I like the way the fibres appear to be just sitting on top of the wool, which my girlfriend thinks looks like grass.

OLYMPUS DIGITAL CAMERAI wanted to try out some of the 18.5 mic merino, and some crimped nylon before I made a large scarf. I won’t be using these colours together, but thought it would help to see them better.

OLYMPUS DIGITAL CAMERAThe way the thinner areas of fibre contour the ripples of the felt reminds me of felting with those stringy produce bags that oranges and onions often come in.

OLYMPUS DIGITAL CAMERAI thought this was an unusual contrast, the denser matte nylon around the shiny Merino gives the Merino a synthetic look.

OLYMPUS DIGITAL CAMERAA close up of some of the crimped fibre:

OLYMPUS DIGITAL CAMERAI really liked the way this turned out, I even like the two colours together 🙂

OLYMPUS DIGITAL CAMERA

Synthetic Fibres and Fabrics

Synthetic Fibres and Fabrics

A couple of felt pieces I chose to make into things for etsy recently were both made using nylon fibres. This first piece has crimped nylon fibre which I dyed myself, blended with merino tops. The felt had a really nice feel to it, thick and kind of spongy but still light, and the nylon gave it a nice texture and sheen, a kind of wet look.

Nylon rainbowoIt was the perfect length for making into a notebook cover, and I got to keep the natural edges again too.

notebook coverI decided to use the orangey yellow side as the front cover:

OrangeThe other piece was one I made a while ago with trilobal nylon. It comes as rainbow tops and I carefully separated out some of the colours and blended them with merino. The result was hard to capture on camera but it gives a nice texture and shine to it, and when the light catches it, it really sparkles. The piece was big enough to make two camera or gadget cases out of. I’m just finishing a slightly larger one than this, but this is the first one I made:

stripey nylonI hadn’t realised how small my new camera was until I used some props for demonstrating the size of the cases, apparently mine is about the size of a pack of cards, it makes the new iPods look huge 🙂 I used a standard sized camera to test the ‘fit’ here:

OLYMPUS DIGITAL CAMERAI was really pleased with the way the flowery camera cases came out. These were made from a piece of nuno felt I made with a polyester scarf on the top and muslin underneath.

OLYMPUS DIGITAL CAMERAAnd because I keep moving all my sewing stuff from upstairs to downstairs and back in a shoe box, I thought I’d make myself a little case to keep my glasses safe. It was made from a piece of felt I made ‘just for fun’ last year and has as many different fabrics and embellishment fibres on there as I could find room for!

glasses case

Making Felted Soap

Making Felted Soap

I have a show coming up soon and I am almost out of felted soap. They are always popular at Christmas time.

Here you can see some of my bins of small amounts of different colours, the pieces of nylon stocking I use for felting in and the first soap wrapped up in wool.

first a wrap a thin strip of wool around the edge of the soap then roll it up in a wider strip of roving. Next I pic a complementary or contrasting colour to wrap around the soap. I usually do a spiral from one side to the other.

I use small pieces of nylon stocking to put the wool in for felting. It’s the only thing I use nylons for these days. The reason I put the soap and wool bundle in a stocking is to keep it under control. the first thing that happens when you wet the wool is it gets bigger and its hard to keep it all in place.

Here is a soap with some silk added. this is silk roving that is teased apart. I also us pieces of silk hanky to give it a marble like appearance.

I managed to get this far yesterday but I didn’t manage to get them felted. so here is a picture of a different batch all finished. there are 2 with silk hanky on them.

That’ s the way I do it. If you have any questions or tales of soap making tell us about it.

Just For Fun

Just For Fun

It’s been quite a while since I made a piece of felt just for the fun of it. And quite a while since I made a piece of felt without worrying about even layers, straight edges, nice corners etc 🙂  So it was a lot of fun making this piece of green felt. I got out all my greeny shades of wool, fabric and fibres and started laying it out.

I started with two plain layers of merino tops, then added a third layer of lots of different greeny shades of merino blended with fibres like plastic, viscose, silk, banana and bamboo. Then I started adding all the other fibres, fabrics and yarns. I unravelled some fancy fibres I had in green, yellow and blue shades.

I used fabrics like organza, silk, tulle and a few shades of cotton gauze

There were a few sparkly bits

And lots of shiny bits too 🙂

What have you been working on just for fun lately?

Works In Progress

Works In Progress

I feel like I’ve been working on a production line recently, making lots of pieces of felt that will eventually be made into something. Some of the pieces were made with specific things in mind, some were just for the fun of it or to try things out. I never really enjoy making felt during the summer when it’s hot, so around about this time of year I start working through my stacks of felt, working out what I want to use them for, or having an idea and searching through to find the perfect piece. After measuring, cutting, pinning and sewing, I then have a nice pile ready to making a start on stitching and adding buttons etc.

One piece of felt that I found when I was searching through, was a sample I’d made using silk throwster’s waste, rainbow trilobal nylon and nylon fibre that I’d dyed. It wasn’t a pretty piece, but then it was only a sample 🙂 The first piece I started to make out of it is a pouch just the right size for holding a pack of cards, small notepad and a pencil-perfect for train journeys with young kids. There’s silk throwster’s waste on the left and dyed nylon on the right.

The second piece I started to make is a camera case. This has silk fibres at the top and rainbow trilobal nylon at the bottom.

Both the camera case and card pouch are lined with cotton fabrics. The 3rd piece is a pouch for earbuds. The front has trilobal nylon and the back has silk fibres. All 3 of these pieces have a loop of elastic on the top for using with a button to keep them closed.

These next two pieces are a camera case and an ipod case, made from a nuno felted piece using muslin. I added machine stitching in an uneven zig-zag pattern to the felt for the camera case, just for a little extra thickness. I’d made this for my new camera, but I’m torn between this and the one above. These pieces are the only ones I’ve finished with blanket stitches so far.

These last two pieces are coin pouches. I first made one of these a couple of years ago because I was tired of reaching into my back pocket and trying to find coins, but getting a handful of keys instead.

Now all I have to do is find a few films to watch while I get started on blanket stitching the edges of all of these! Do you have a particular way of working? Do you like to streamline your process, work on a few items at once or maybe complete a project before starting another one?