Browsed by
Tag: needle felted picture

Plain Air wool painting at a the Pinhey’s Point demo

Plain Air wool painting at a the Pinhey’s Point demo

One of our local guilds mandates is education and we fulfill part of that by doing demos for the city of Ottawa at their local Museums. This weekend we were requested by the Pinhey’s Point Historic Site to provide a demo focusing on weaving but including other fibre arts.

Sign for Pinhey's Point

1) Sign for Pinhey’s Point

Pinhey’s Point features a nearly 200-year-old manor house (Horaceville) and surrounding ruins on 88 acres. There is a fabulous view of the Ottawa River overlooking sailboats at anchor in the bay in front of the house.  There are remains of the original old kitchens and a couple of outbuildings visible from where we were located.

2)  Views from Pinhey’s Point

We had been having high temperatures during the week, not as bad as parts of the States, but still hot for what is normal for us. On Saturday morning I checked the weather and was happy to see a lovely (cool) high of 26c but under the tent, on the top of the hill with the breeze, it felt more like 20c and I should have brought a sweater or jacket! (Never complain, because it could always decide to snow!!!)

The staff had set up a number of 10×10′ tents with tables and chairs. It was overcast most of the day but a lovely spot to chat with visitors, some of whom had come up from the sailboats to see what was happening under the tents.

  3) Part of the Demo team showing, Weaving (2 harness, 4 harness, 8 harness looms), Spinning (2 different wheels) and Felting (Just 2-D today)

I was running late and selected a spot for my table overlooking the front lawn and down into the bay with the sailboats. It would be a lovely spot to work.

3) Morning view of the front lawn

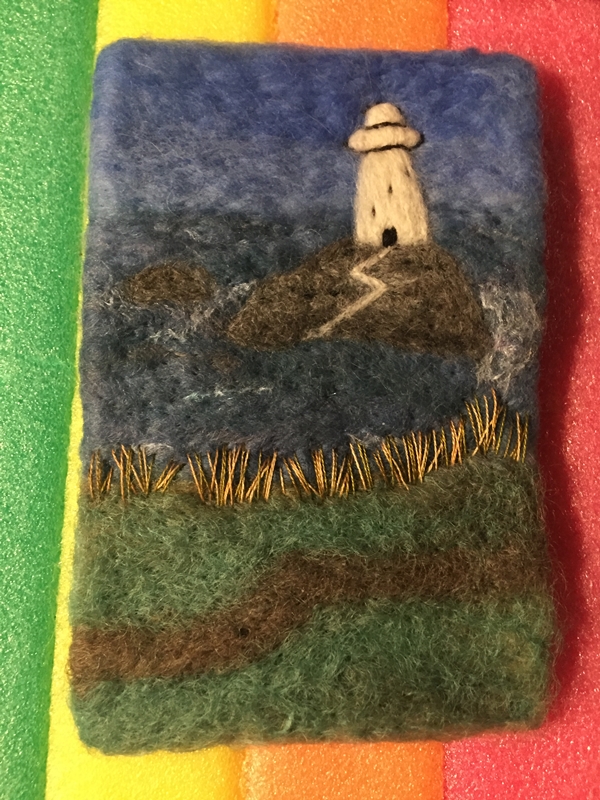
I originally had intended to work on the sheep horns that you might have seen me working on at other demos. I may have been watching too many episodes of Landscape artist of the year, since I was inspired by the vista, even in its overcast colours, before me.

4) the not quite 8″x10″ felt base for my picture

I had a piece of felt with me that I could use as a backing, about 8×10 inches so started laying on a white wool base. (the base layer was a bit uneven and seemed a bit kempy.) It was also not quite 8×10 so I had to spend a bit more time adding more width and a bit more height.

5) the not quite 8″x10″ felt base for my picture

 Next, it’s time to draw in the basic shapes using a bit from a micro-batt Bernadette was not pleased with (thank you, Bernadette! It worked perfectly for my use!)

I started to add the murky skies and reflected water.

6) Beginning to add sky and water

There is a small airfield nearby but I am not sure if that was the origin of the float plain we saw circle, then land and take off a number of times over the morning.

7) float plane practice landings on the Ottawa River

As the day progressed, more groups of people arrived with picnic paraphernalia and headed down the path toward the shoreline. More of the sailboat people came up the hill to check out the tents, their occupants and visit the museum. I have worked at this demo 3 or 4 times, this is the busiest I have seen it.

This slideshow requires JavaScript.

   8-12) More of the Demo Team

As the afternoon went on I spotted the first bit of Blue sky!

13) the first bit of blue sky (still almost all grey)

Drat, do I have to add that in? I still haven’t got the foreground done!! Sneaky Weather!!

14) I didn’t get as far as I had hoped but I had a lot of fun

It was getting close to 4:30. Where did the time go? I will not win landscape artist of the year if I am this slow!! I will just have to practice more!!

Since it was getting late, I went in to take a peek at the ground-floor exhibits. It’s a fabulous 200-year-old stone house that is very grand for its time.  It has a central grand staircase and a fabulous main door.  The Dining room is at the top of the stairs and very posh when built.

I toured the ground level displays but did not feel inspired to try the stairs (it had been a long day by then).

This slideshow requires JavaScript.

 15-21) inside the ground floor at Pinheys Point

By the time I was heading down the hall towards the kitchen, I was behind a woman telling a younger woman about living in the house when she was age 13 to 21 when her grandmother still lived there. It turns out she is one of the Pinhey descendants visiting from BC and had brought some artifacts for the museum from her part of the Pinhey family. She was telling her niece stories about living in the house in winter, flooding, and taking over from her aunt living with her grandmother in the old stone house. (Her parents lived nearby in another house on the property). I asked her about the spinning wheel in the kitchen room but didn’t want to interrupt her touring her old home. She said she remembered a different wheel when she was there.  She explained about the setup of the house when she lived there with her grandmother, who in the winter slept in the room that had been behind the stove in the kitchen (the warmest part of the old stone house). It was fascinating and I felt extremely lucky to hear some of her stories.

22) The Great Wheel in the kitchen

She told me about her Grandmother getting unexpected, uninvited visitors one winter while she had lived there. The hill path down to the side door by the kitchen, which was the house access commonly used, was particularly icy and treacherous that day. Some very well-dressed men arrived to see the house, it was the Governor General of Canada and his entourage. When they entered the house she was sent out to put ash on the ice so they would be able to leave, after her grandmother reluctantly gave them a tour of the historical house.

I returned to my spot but it was time to pack up, the weather was showing signs of improving further. I took a couple of quick reference shots as we packed up.

23-24) A couple of quick shots as the sky started to show more blue areas

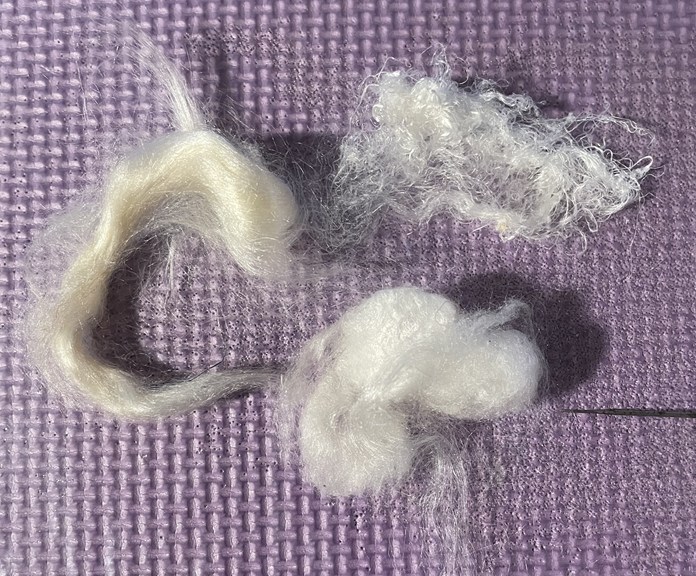
It was time to pack up, Bernadette had been combing as well as carding and spinning so there were lovely tufts of fluff floating around the landscape. The staff was sure that there would be some stylish squirrel nest this winter!

This slideshow requires JavaScript.

25-26 Bernadette droppings left to improve the homes of the locals

This slideshow requires JavaScript.

27-33 a few more shots of the area as we were packing up and heading to the car

We had packed up and were on our way out when we met this guy coming in. He was a bit late for the demo. I don’t know if it was the weaving, spinning, felting or the loose fibre he was looking for.

34- the last visitor was just a bit late for the demo

I love to see auto-mobile-lawn decor. Maybe he/she, or some of the landscapes will inspire a bit of picture felting? Have fun and keep felting!


If you are in the Ottawa Ontario Canada area and you would like more info on Pinhey’s Point you can check here;  https://pinheyspoint.ca/

There is more info on the house here; https://en.wikipedia.org/wiki/Horaceville,_Ottawa


PS Today is Mom’s 91st birthday, don’t tell, but there may be some of Ann’s amazing chocolate chip cookies involved in the celebration!

A small night picture.

A small night picture.


I told you there would be another small picture. I wanted to do a night scene with water and a moon reflection.

I searched up lots of moon on water pictures. I won’t share them because even though I put public domain pictures in the search,  I am sure they are not all in the public domain. Once I had done that, Pinterest sent me some more, some in weaving and other textiles.

I had this small offcut. I put my fingers in the shot so you can see the size.


I knew I had a nice really dark purple merino to make the sky but I had to ask Jan for some navy blue. She had some nice dark BFL, so it had a nice shine, perfect for water. This is the best picture I got of it. I had to fiddle with it because my camera on my phone wants the purple to be red and it’s more blue. Jan got some pictures for me too but her computer has died so I am afraid you’re stuck with my pictures.

I divided the picture into 1/3 sky and 2/3 water. I tried to keep the navy fibre running across the picture to give it a better water feel, like tiny ripples on the water. the hardest part was making the horizon straight and level.

For the moon, I made a disk separately and then added it. I think it makes it seem separate from the sky and closer than the sky. I then added the thin glow around it.  the glow looks more transparent in person. I thought I had a picture of just the moon but I accidentally took a movie of it and I can’t figure out how to save one frame.

For the reflection in the water, I used silk. I tried throwster’s waste, some fluffy silk ( I think from silk hankies) and some top, it was a little yellow.

The throwster’s waste was too stringy

The fluffy stuff was too hard to work with. It wouldn’t stay put.

The top worked wet. and even though looked yellow as a blog of silk once it was spread out a bit it was good.

I laid it all across then needled the pattern I wanted and trimmed it then needled some more.


I like it, it’s ok but not great.

I tried adding some grey for clouds and some silk at the edge for reflection. I just tacked them down, I am not sure. It may be the silk reflections on the clouds that I don’t like. Maybe white wool would be better.

so I asked my son. He is more artistic than me but also observant. He said well the moons to big. So I showed him my examples and with the slightest glance says well they’re all photoshopped, to make the moon more magical.  So much for that. I guess once I did it, my brain knew it was wrong. I will try thinning the glow and shrinking the moon and the reflectins and see how I like it. the trying may mess it up beyond repair and it will have to become dryer ball innards. I will let you know how it goes.

Post Script

I managed to fiddle with the picture last night. First I pulled up the edges of the reflection and tried it back then I pulled the moon haze off and made it smaller and more transparent. I think it is better. not great but it will do.

A while ago I bought some fine mica. the kind they use in cosmetics. I got this set and a blue set. I wanted to try adding a little blue to water in a picture just to see what it looks like. This water was far darker than the blues I bought but I thought the moon could use a little shine. You can see how fine it is. I left my fingerprint in it, from just a light touch.

I took a close-up of the moon. I think the camera picked up some of the sparkle.


Another small picture

Another small picture

I am still all packed up so decided to do another small picture. This one is 3.5 x2.5 inches. I wanted to do a sunset. Step one google sunset pictures in the public domain. Well, that was disappointing. It seems that the popular configuration is oversaturated with the blinding sun dead center and if there is anything else in the picture it is a black silhouette. I was looking for something more subdued with lots of colour in the sky but with colour still in the landscape. I tried adding qualifying words to my google search but it didn’t help. I just kept scrolling and scrolling. The further away from the top hits the better it got. Sometimes page 5 has better pictures than the first page.


I started with this small piece of offcut from a long-ago project. I think it was a little bag.

I decided to go with my imagination rather than an actual picture.  Drew in the horizon, the lake, the hill and an indication of trees. I knew the trees would disappear under the sky so not much point to that.


I added some sky using 2 shades of blue.  I used 3 shades of orange and a little white to do some nice sunset-kissed streaky clouds in the sky.


The water was next. It is a combination of Prussian blue and navy.


I added the grass. It is antique, olive green and a puter/brown colour. I was thinking of late in the year when the grass turns golden. I carded the colours together but not too much so I would have some nice variation.


Then I added the cloud reflection in the water.

I wanted some trees on the ridge. I want the ridge to be in the distance with the trees striking up a little. I don’t like them. they look too much like they belong at a Christmas tree farm, so I took them off.


Next, I tried mixing some shades of green and then drafting it thin. I told it in my fingers to give it some cohesion and needled 3 trees on the ridge. I like these better but am still not sure. I think I probably just need to not look at them so closely. The thumbnails that show along the bottom of my photo editing software look better than the big picture but it’s twice as big as the actual picture so it shows too much detail. I would like to add more trees but not sure it won’t just end up looking like a green blob. I may leave it and more onto the flowers in the foreground. Any suggestions for the trees.


For the next one, I hope to go bigger. I always want to add too much detail and it’s just not possible with a small picture.

And one last thing, a cute thing. This is Storm. He was born on Saturday. we have no idea who his mom is. Perhaps the storm spooked her.

We had a huge storm in Ontario it took out power to most of the south of the province. We were out for a little over a day. Many people are still out. You may not see Jan in 2 days. It hasn’t been like this since the Icestorm of 1998. At least the weather is better for this one.

here’s the outage map the darker green is the area the hydro company covers and all the dots are the numbers of outages in that area. London, Toronto, Hamilton and Ottawa have separate hydro companies but they all have huge outages too. if you follow the link you can zoom in and see different areas.

https://www.hydroone.com/power-outages-and-safety/stormcentre-outage-map?bodyOnly=true/


A new picture: A lighthouse

A new picture: A lighthouse

I seem to be in picture mode. I wanted to do something with water but not necessarily as the main feature. I thought about a beach and that was my intention as I started but as was looking for pictures and some of the cliff-top pictures really took my eye.

I used a nice thick piece of wool prefelt that I bought at the Almont Fiberfest a few years ago. It is 4inches by 6 inches, 10cm by15cm  I think it is wet felted on a flatbed machine. It is course wool and more solid (felted) than the thin needle felted prefelt we usually get. It is much closer to being felt.  I would love to get some more but don’t know where to find it.  If you know let me know.

I start with what is farthest away, sky and water. When I do sky, it’s always cloudy and I have to do a google search to remember if the sky is darker or lighter near the horizon. The wool I used for the water has a few bits of sparkle in it. I think that’s what is making the white dots in the picture.


Then some land and the rocks. I used a mix of 3 grays so the rock wouldn’t be flat.

Added the lighthouse and the path


Then I used throwers waist to make the white water around the rocks and some whitecaps. At this point I gave it a light felting mostly to sink the silk into the felt so it didn’t look so much on the surface. . There was still more needling to do though. I added the top of the lighthouse and started the stitching.


And as usual when you start stitching you start unstitching. The grass stitches here were much too small. The path needed changing as well as being far too straight it was much too wide.  you can see how all the extra stabbing pulled the piece in even though I was poking up and down and not sidewise.  I stretched it out.

Back to stitching. I am using 4 colours for the grass, 2 shades of gold and 2 of green.


I added some small blue dots for flowers.


Then the foreground grass


Then some french knots for more flowers. I used a couple of shades darker blue for the foreground.


This is a close up of the stitching.


That’s a lot of pictures but I hope you enjoyed seeing the progression.  Stitching really helps a picture pop. And as I promised picture without Sheep. I can do it. LOL

So a week has gone by since I wrote up this post ready for the 4th of February. After a comment from a friend, and looking at it after a break from working on it,  I decided to fiddle with it more.  First I ripped off the path it was far too white, I remade it with some light gray. I did want it to be distinct but not a lightning bolt from Zeus. I added a tiny little dock, not easy but that’s what I get for working small.  And the sky was too much open space so I added some birds, again very fiddley. I did add some slight shading to the lighthouse but it doesn’t really show in the picture the wight really reflects.

so here it finished again. I hope you like it.


A Scribble Tree

A Scribble Tree

Last week in Ruth’s post  Batik Post  she had a scribble tree. I have always liked them so Ruth suggested I make some. Ok them what to make. then I remembered these felt pieces I made a long time ago, I think,  because I do not remember making them or what they were for.

They seem to be white felt with black silk hanky on them that were make to the prefelt stage, then cut out and put on some black prefelt(maybe) and felted again.  I had no idea what to do with these but then thought why not just treat them like pieces of tile and just make a picture on them like painters do.

First I needed some tree green yarn so bot out my carders. It is some sort of curly fiber maybe Blue Faced Lester as that is what I have most of and the curls are small.

I made some rolags to spin. It is full of lumps and nepps so it will be a textured yarn.

I spun up a single, then plied it and made it into a center pull ball ready to use.

I used the yarn to needle felt a scribble tree onto one of the bigger pieces.

I decided it needed a star so used some embroidery thread to add one. I would like to add some hanging Christmas balls but there really isn’t room for them. The piece is only about 4 inches square.

I decided to try it on one of the smaller pieces too about 2×3 inches. The picture on the right is the back. I love how all the little stabs of fiber stick out.

So thats been my weeks worth of daily doses of fiber.

As It is so close to new year I am going to Wish you all a Fibrey New Year full of creativity. I am planning to do more hangable art work, work out an online workshop and an intermediate vessel class for my guild. But also to learn how to use my new camera to make and document my work. See you next Year(8 whole days form now).


%d