Browsed by
Tag: Kumihimo

Making Jellyfish Bracelets – Kumihimo

Making Jellyfish Bracelets – Kumihimo

This summer I am volunteering at Camp Judy Layne in Kentucky for a week. I grew up in Kentucky and went to CJL Girl Scout camp every summer for years. Girl Scouts and this camp made me who I am and I have many fond memories and friends from more than 45 years ago. I will be helping with arts and crafts and also teaching wet felting to the campers. In preparation, I decided I needed to make some friendship bracelets to give away. Here is the tutorial that I found on Instagram for “Jellyfish” bracelets (Kumihimo).

Kumihimo means gathered threads and was historically used for samurai armor ties. The round ones that are made with this technique are kakugumi. The seven color bracelets are considered lucky and ward off misfortune. Mainly, I wanted something simple and easy to make.

Variety of #3 perle cotton threads in different colors.

I started with some wool yarn that I had in my stash and made a few bracelets. But I thought they were a bit too “hairy” and might be itchy for some people to wear. Suddenly, I remembered the embroidery threads that I got from my mom. There were a bunch of #3 perle cotton threads that I rarely use in my stitching/embroidery. She had already cut most of them into lengths and I found that I could make two bracelets from the cut lengths.

Cardboard circle used to create "jellyfish" Kumihimo bracelets.

The nice thing about the Instagram tutorial was that the disc used was made from cardboard and was simple to create. There are Kumihimo discs that you can purchase with more slits and you can create more intricate patterns, but this was something that can be reproduced to teach the girls at camp.

Cardboard circle with #3 perle cotton threads separated into slots on edge of circle.

Here’s the top of the circle once the threads are “loaded”. If you put similar colors together as shown above when you start, the pattern is different than if you randomly place the colors.

And here’s why it’s called a jellyfish bracelet. It definitely looks like a jellyfish when you’re making it. The directions are quite easy and it is a simple pattern. The bracelet slowly developing is quite satisfying to see.

Finished jellyfish/kumihimo friendship bracelets

Here are my finished bracelets so far. You can see the “fatter” ones on the right are the wool yarn bracelets. I think I will use small rubber bands to connect them although I will also look into a sliding square knot closure. But I was supposed to leave long ends for that type of closure which I didn’t do.

Closeup of different patterns of bracelets

Here’s the difference in the patterns using this method. The bracelet on the left is loaded with the orange threads together and the blue threads together. The one on the right is random blue and orange mixed when loading.  I have been making these at night while watching television. Not sure how many I will get finished but it’s been a relaxing activity.

Here’s the square knot closure for the bracelets. The bracelet needs to be long enough to easily slide over the hand for this to work correctly. The video I viewed used long lengths of extra thread for the closure but I had already cut off those ends. I will use this type of sliding closure for the longer bracelets and use a small rubber band for the shorter ones.

Nametags: Glenn

Nametags: Glenn

Nametag for Glenn

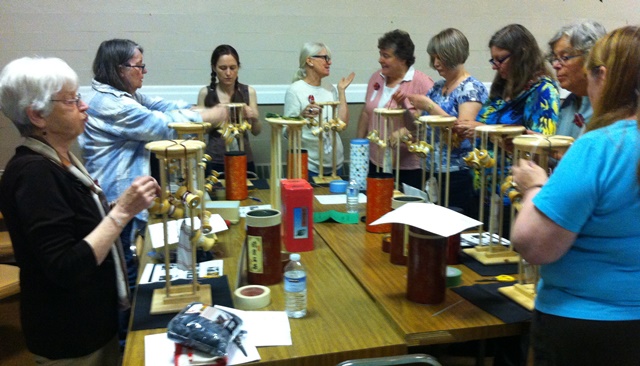
As I mentioned previously,  this is the local Weavers and Spinners Guild’s 75th anniversary. One of my jobs to get ready for the party was to find and print out the nametags I had made for Demoing, quite a while ago, when I was demo coordinator.  This aligns perfectly with one of my goals for this year; to learn the names of more of the guild members.

One of the ways I am trying to do this is by suggesting using nametags. For the party, we seemed to run out of time to get everyone to make their own name tag, but I did have the old weird sheep name tags I had made when I was the guild’s demo coordinator. We used some of them last year for the Sale and Exhibition for vendors and demo people.

I dug through the computer and found an old file with some of the pictures.  After a quick perusal of Google image search, I added to the weird sheep pictures, then added them to the formatted guild name tag file. After a couple of days of work, I had the updated sheep-related nametags printed, cut, and ready to go into lanyards or pin-on tags for the party. This would also allow non-guild members to know who were guild members at the party.

a pile of nametags with odd or funny sheep photos and cartoons. printed on cardstock, cut out, and ready to use.1) Silly sheep Name tags for the Party Sale and Demos

As cute or silly as the sheep theme is, it does not fully represent all guild members as well as making their own personal name tag would. So for the long weekend, Monday social, I suggested we start the personal nametags-making project.

Name Tag Supplies: plastic bag with a bit of wool in a few colours. Bag of green wool felt underneath it. dollar store “embroidery” thread, little balls of acrylic yarn, bag of safety pins, Reece’s peanut butter cups and KitKat mini chocolate bars, plastic bin with sewing stuff, and bag with the last of the coridale bump In white and top black possibly merino wool.2) Name Tag Supplies: plastic bag with a bit of wool in a few colours. A bag of green wool felt underneath it. dollar store “embroidery” thread, little balls of acrylic yarn, a bag of safety pins, Reece’s peanut butter cups and KitKat mini chocolate bars, a plastic bin with sewing stuff, and a bag with the last of the corriedale bump In white and top black possibly merino wool.

I already have a nametag on my apron (one of the sheep ones and a magnetic needle felted sheep head), but Glenn is unidentified.  Glenn has been attending socials with me since he was released from the hospital in January. This might be his last for a while as he is finally starting a graduated return to work.  I had brought some over-washed green wool felt.  It looks like a pool or billiard table green, that’s been washed. Why someone would want to wash it, I have no idea but I found it second hand and it would either work for miniature war gaming or name tags.  It will make an excellent base to build up colour to make the nametags.

I suggested a landscape.  Glenn said he also wanted to have a train. (He likes those long, math-involved, 18XX train games. The trains are not X-rated!  it’s just that all the various versions of the game are covering the 1800’s involving trains laying track and the stock market. Board Game Geek describes them as: “18xx is the collective term used to describe a set of railroad-themed stock market and tile laying games. The 18xx set has two main branches: the 1829 branch (1829, 1825, 1853, and 1829 Mainline) and the 1830 branch (1830, 1856, 1870, etc).”)  it still doesn’t sound fun to me but OK, landscape with train. Ann kindly gave me about 6 inches of light blue combed top, for the sky, I had white, black and some weird bright green with flecks of orange and blue. I also had a bit of heathered purple with me. I overlaid the white first, it would tone down the billiard table green. Then added the green ground blended with a bit of the purple to tone down the green. As well as a blue sky with a few clouds.

covered green felt with white to make a slightly thicker baseand hide the intesity of green . starting to add sky and ground, using Clover tool and small pet brush for blending sky with clowds and grass with small flecks of colour suggesting posibly flowers3.1-3.2 ) Covering the billiard table green wool with white then adding the ground and sky. I used the Clover tool to block in the basic colours.

showing the back of the felt and how much wool has been pushed through4) The back of the wool base

Off to Google to find historical train silhouettes.

This slideshow requires JavaScript.

5.1 a selection of train silhouettes

5.2) the train silhouettes under consideration in various sizes, then cut out to get approval.

-5.3) I thought he would choose this one

I had thought, “smaller train pulling the name “Glenn” behind it”.

Train selected, I printed out a range of sizes and cut a couple out to show him.  Glenn chose the largest one that obscured most of the landscape. I cut out the train and traced around it with a permanent marker. I should have cut out the train to make a stencil but oh well. I placed the train on the background and realized that a black train would overpower the tag.  so suggested a compromise, how about an outline of a train?  With the “Glenn” inside? That was agreeable to him and off I went outlining the silhouette.  I scaled up the train a bit further, so the name would be easily read inside the train.

outlineing train sillowet in wool outlineing train sillowet in wool6.1-6.2) Glenn chose the largest train which I traced with permanent marker, then started to outline in black wool

Next, what font to use? I went through the list available in Microsoft Word (2010 edition, yes I am retro but it still works just fine.) I found four options I liked and thought would work with the train, and then narrowed it down to Lucida.

4 text fonts “Glenn” in Freestyle Script, Gulim, Pristina, and Lucida Handwriting7) “Glenn” in Freestyle Script, Gulim, Pristina, and Lucida Handwriting

I drew a picture of the name on a card that would fit in the train. Going with Lucida as I like the letter spacing and the curves juxtaposed with the angles. Which I felt mimicked the feeling of the old train. Text isn’t just letters, it’s shapes, spacing and negative spaces and it’s filled with emotional content. Ok, that is likely just the dyslexia compensating for the rest of you telling me that b-d-p-q is not the same letter just seen from different viewpoints. Don’t get me started on the untrustworthiness of u-n-c, w-m-3-E or even t-f depending on the font.

glenn drawn onto a scap of file card to get spacing8) Drawing out the letters to make sure they will fit in the space available

Font decided, I worked from the guide and added the name to the tag, by this point it was after 11 pm but I was still inspired so kept going. The N’s wound up to be a bit off, so I blame the lateness and they are a tricky shape.

Well, it has all the letters, they seem to be in the right order, and I didn’t miss any of them (Glenn got both his N’s even if I think the second one is just there for decoration. Look how silly Jann would be with 2 n’s! well, actually, it gives it a bit more gravitas and does balance the weight of the J ……. Maybe I do need a second N too? No that’s just one more letter that could go horribly wrong!!!!)

text added into the train9) All letters are there and in the correct order! G L E N N

Now I am at the last step, how to attach it to the Glenn. I could add magnets, a broach pin or I could add a lanyard. I think the lanyard would be most practical for Glenn. So where did I put my kumohimo discs and fake embroidery thread (it’s braided so doesn’t actually come apart, so it’s not embroidery thread) from Dollerama.  No clue where the box with disks went. Glenn has been working through stuff in the living room and has moved everything… but I know where some of the dollar store embroidery thread is!! (Bedroom, wicker basket, little plastic bin with sewing stuff.)

I had the remains of a box of crackers so used a glass to make the circle and then messed up the bisecting of the segments. I need to divide the circle into 8 sections. Then cut a ¼ inch in at each section for the yarn to fit in. I have 7 embroidery thread bobbins (in plastic) to wind and I will find one of the big bulldog clips for a weight.

Cracker box cardboard with hole in the center divided into 8 sections. Plastic embroidery floss holders are my bobbins10) Cracker box cardboard with a hole in the centre divided into 8 sections. Plastic embroidery floss holders are my bobbins.

I want the cord to be reasonably thick so it will be comfortable on the neck so I divided the scenes in half. The tags say they are 7.3m or 23.9 feet. That should give me about 8 feet of braid. I will need enough to go around the nametag then up and around his neck. Not more than 4 feet. Just keep braiding until it’s long enough! You would need less if you did not want to outline the tag too. I got comfortable with making the cordage,  watching YouTube then listening to my book and realized I had enough cord and still quite a lot on the bobbins. I guess I can finish it while I listen to another book later.

Before I cut it off I sewed around the tag and got Glenn to try it on. There is enough! So did a bit more tied off and cut the braid. The last bit of sewing is to join the braid to the name tag and then assess it. Hmm, it needs a bit more wool to hide the stitches at the back and a quick touch-up of the front and it will be all ready for next Monday’s social.

Kumihimo cordage sewn to the name tag11) Border on and length of lanyard adjusted

testing the nametag at a guild social. yes it works12) Name tag working correctly at the guild social.

Ok, the tag works at socials, one last test will it work with the Kanata Board Game Group?

the Name tag works on gamers as well as it works on spinners and weavers!13) The name tag works on gamers as well as it works on spinners and weavers!

While Glenn was busy,  I started another little landscape on one of the name tag bases. I was inspired by a friend’s vacation photo and wanted to try it as a landscape, but I will show you how that turns out later.

Update needed on my Name tag Part 2 (a 3-part process).

Update needed on my Name tag Part 2 (a 3-part process).

Part 2 the Lanyard

For this falls’ guild sale and exhibition hands-on area, one of my suggestions was a cardstock marudai. Since then I have been sampling colours, and varying thicknesses of cotton yarn.

9-2.jpgPrototype marudai with garden Rabbit holder.

I started with the “embroidery” cotton from the local Dollerama. Since you can’t pull it apart it’s not really embroidery thread but it is cotton! The cotton comes in packs of dark solid colours, pastels and variegated colours. I have a fondness for blue so I pulled those colours for my lanyard. I had a mid-tone and light blue as well as variegated.

10“100% Cotton, each skein is 7.3m/23.9ft.”

The marudai should be printed out on a heavy cardstock. I made a template in publisher then saved it in PDF and Jpeg.

11

the 4 version of the English edition

You will also require;

  • 8 slots,
  • a hole in the center and
  • 7 strands of yarn.

Good options are

  • tiny elastics and a
  • mid-side Bulldog clip

18-1.jpg

Tiny hair elastics and Bull dog clips were available at the Dollar Tree and Dollarama

12

With help from the guild I made a French side. Originally it was to be on opposite sides from the English one but my printer would not pull the paper in consistently so I was getting miss-registration I couldn’t correct, So it looks like there will be French and English versions separately. (Sorry!!)

14

Set up:

Depending on how you set up the colours and position them you will get different patterns. (I have not yet tried all the variables) gather all the 7 strands together and Tie a knot (leave extra length after the knot if you want to have a fringe). Ether push the knot through the hole in the centre to the back side or from the back side, thread the yarn through leaving the knot. I add the bulldog clip to the knot so it won’t slide through the centre hole. Skipping one slot, space your strands into the 7 other slots. Wind your strands up so they’re about 4 inches loose; the rest wound up in a butterfly. Use the knot for marudai bobbins or elastic to keep if from slipping when you don’t want it to. (See the picture above)

How to weave:

This is really important. I’m sure you have heard how complicated weaving can be! without trepidation keep reading!

Step 1) From the empty slot count clockwise to the third strand.

Step 2) Pull it out of its’ slot and move it to the empty spot.

Step 3) rotate the marudai so that the empty slot is towards you again.

Repeat from step 1 until you run out of yarn to weave.

When the cordage you are making gets too long curl it up and clip it with the bulldog clip.

Keep the marudai surface flat and the strands will not tangle as much. Also keeping them not too long will help keep them in order.

So that wasn’t too bad for instructions. Even if you have the type of dyslexia that gets left and right confused and thinking clock wise and anticlockwise dose not help, it will still work as long as you keep going the same direction for the length of the band. I look forward to seeing what you do with your cordage. Trim for hats or ties to keep the hats on, lanyards for scissor cases?

Some of the patterns I have tried so far;

I tried 1 colour /6 of another colour

15

I tried 2 of one colour / 5 of a second colour

16-2.jpg

I tried 3 of one colour / 4 of a second colour

I tried 1 colour / 2 of one colour / 4 of a second colour

I also tried a pattern called Fenestrations (it’s a fancy way to say windows) but I did it backwards (it’s probably the dyslexia) Fenestration requires multiple threads or using a thread of a larger diameter for most of the yarn and the last one being significantly smaller (3 or 4 threads to 1 worked well for me with the embroidery cotton) It is supposed to look like windows if it’s done right. Mine was inverted so the window stuck out instead of in!

21

You can see how the dark blue is multi strand (3 or 4 strands) while the light blue is only one strand.

One of the weavers (Janet Whittam) brought in a bag of scraps and thrums (the leftovers from a woven warp which are lengths or bits or yarn) thrums can be cut up and carded into fiber to make interesting pops of colour. Or you can do as I did and take a long time untangling the mess it had become and use them for further experimentation with the cardstock moridis. (I’m sorry I didn’t take a before sorting picture it really was a mess)

24 
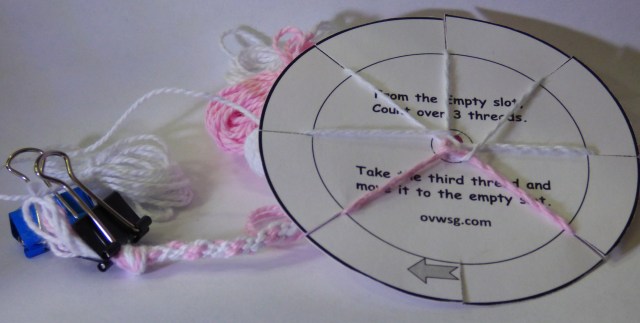
the mostly untangled thrums

I have 5 colour samples on the go plus a few others I have been puttering on in various baskets around the house. I have found they are easy to keep in an extra-large Sandwich Ziploc bag so you can easily bring them with you. I don’t find I get as many people asking what I am doing they may be miss identifying what I’m up to as corking instead of Japanese braiding.

2625

This is a fast portable way to make cordage. This particular pattern, 7 strands in an 8 slot marudai, makes a number of variations depending on colour and strand placement. It is easy to pick up and put down and not lose your place. So interruptions won’t destroy your progress! i have defiantly found the equivalent to a drop spindle for weaving!

Cordage can be used as pull tabs for zippers, fobs for key rings, trim on garments or accessories, and ties and laces. It is highly portable. ( I keep mine in individual extra-large sandwich Ziploc bags. I used it last night chatting with Glenn at Al’s Diner before dinner arrived. ) they are also extremely cheap to make so you can have more than one! (OK i do have a lot more than one spinning wheel or one loom and a lot more than one felting project on the go!)

27-1.jpg

Check back, Part 3 will be the needle felting of the picture and the name. Now what will I do? I suppose I should stick with Jan since I can mostly spell that correctly!

Keeping my hands busy

Keeping my hands busy

This is just a little something to keep my hands busy, like knitting which I don’t do.  I was playing games on my phone too much, to fill time and all that does is waste time and give me a crick in my neck. I would felt or spin but that is not always practical to do so I started making some shoelaces on a homemade kumihimo marudai disk.

Mine is made out of a piece of a cardboard box.  It is 4 inches across and has 8 slots to do a 7 strand braid.

This is the simplest one to do so is a good place to start. Count 3 stings left from the empty slot and move that strand into the empty slot. Turn the disk and count again moving the 3rd strand down into the empty slot. That’s it, you just keep moving and turning.

I started this before I thought about blogging about it so I am using black mercerized cotton for shoelaces for my husband.  Not the best to photograph. I will leave it large so you can see it better.

I tied up the long ends with small hair elastics so they are easier to handle. Each strand has to be about twice as long as you want the finished braid so they get in the way and get tangled even more than when they are tied up.

This is one Jan was making with nicer yarns so you can see the round braid easier. She is using a bulldog clip to weight her braid so she doesn’t have to pull on it like I do. It’s hanging down the bunnies neck.


You can buy foam disks with more slots so you can do more complicated patterns or if you are cheap like me, just cut more slots in your cardboard disk.

If you really enjoy doing it you can get a proper Marudai.

there are other kinds and shapes depending on what you are doing but you can do round or flat braids on this and make some really nice patterns.

At our guild show this year we will have these on our make and take table. Jan made up some nicer ones (like in the bunny picture) with the instructions printed on them ( there are french instructions on the other side too)  for us to use on the make and take table. I see a night of cutting and prepping braids in many colours in my future.


Demo Time

Demo Time

In September I do two demonstrations at local country fairs. They are a lot of fun and we get to meet lots of people. Wet felting is not the easiest to do as a day long demo so I take lots of sample to put in the display and explain it to interested people.

richmond

I usually take my drop spindle but one day I did Kumihimo ( Japanese braiding) on a meridi.

richmond bernadette and i richmond me on the meridi

Jan did some weaving on a table loom and Carlene was on the peg loom.

Carp jan 2 Carp Carlene and the peg loom

Alison( trying to keep warm on a freezing morning) spinning  and Bernadette combing some fiber to spin next to the lace maker.

Carp Allison richmond Bernadette and a lacemaker

As usual there were other things to see.

richmond ag collage 2 richmond ag collage

There was some felting in the Agriculture competition building.

richmond hand crafts

I zoomed in to show you . The Santa and dog and the two dogs.

richmond needle felt

Doing Demonstrations is really fun. Anyone else do them?


More distaff day

More distaff day

Last time I showed you what I did at distaff day.  http://feltingandfiberstudio.com/2014/06/03/distaff-day/ I thought I would show you some of the other classes that were going on.

needlfelting class Needle felting class

sock knitting Sock knitting class

weaving a bag over a card. Weaving a little bag over a peace of card

inkle weaving Inkle weaving with wire added  for manipulating

kumihimo Kumihimo, Japanese  braiding. here they are using marudai to do the braiding but you can do it with a piece of cardboard with slits cut into the edge.

beret on a card loom Weaving a beret on a card with holes punched in it.

rug hooking with roving rug hooking with roving finished          Rug hooking with roving. This is done with a hook  similar to a crochet hook and thin roving. I had only ever seen it done with woven wool strips.

This rug hooking really interests me. It looks like a great project to carry with you when you travel. Have you seen a new to you  fiber craft you want to learn?