We had our yurt (ger) raising party last Sunday and had about 20 people show up to help us raise the yurt. It took about an hour and a half to raise but I think it will go much quicker the next time we put it up. The plan is to take it down for the winter and then next spring, we’ll buy a canvas cover and keep it up all the time. Before I show you the party, I’d like to explain how we tried to get the last piece of the roof felted completely. Dennis had suggested that we use a plate compactor like a sander to finish felting and to full the last roof piece.
 So we rented a plate compactor. This piece of equipment is usually used to flatten sand or gravel before you lay a patio. But it’s like a giant sander, so in theory, it should work just like a hand sander on a small piece of felt. The first plate compactor we got was really hard to get started and then it just kept quitting and wouldn’t run correctly. So we had to call in and the rental company brought us another one. You should have seen the delivery man when he saw how we were using it. 🙂
 So we wet down the roof panel and laid pool cover on top of the felt bubble side down. And off I went with the big sander.
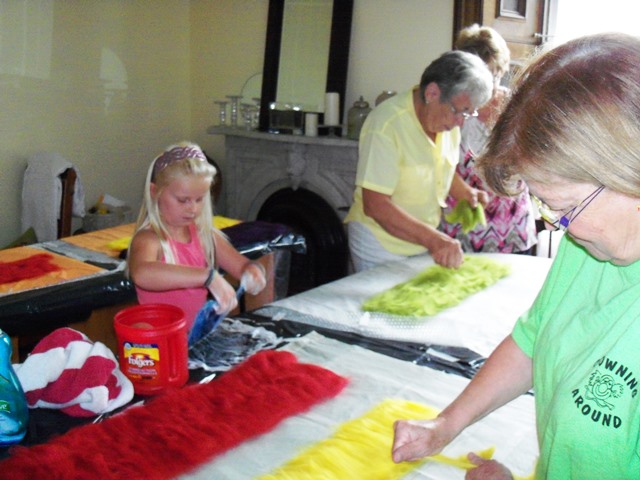
 My sister Margaret helped me by moving the pieces of pool cover so I could move from section to section. The compactor did work fairly well for getting the felt to hold together a bit better. However, it just was not getting hard at all. The temperature outdoors certainly didn’t help as it was about 40 degrees F and we only had the rental for four hours. So I finally just got down on my hands and knees and fulled the piece by hand. If you’ve never tried fulling a piece of felt this big, be prepared for a workout! I have some repair work to do on this piece because it just didn’t felt well. It has thin spots and holes. I’m not certain that this is the same breed of wool that I used for the rest of the walls and I think that might have been part of the issue. But I’ll worry about that next spring. Now on to the raising.
 We had about 20 people come over to help with the raising. We started with the tono on the ladder and then made a circle with 8 roof poles.
 This gives a template so that the walls will be in a circle. You are supposed to get it as exact as possible so that the roof poles will fit correctly when you get to that step.
 We then put up the four lattice walls (khana) and tied the sections together. The sections overlap and “weave” together. The “weaving” part is a bit tricky to figure out.
 I’m on the opposite side on this photo tying the two adjacent walls together. We then ran a steel cable around the wall attaching it to each side of the door frame.
 Once the walls were up, we started on the roof poles (uni). We started with four at right angles and then filled in from there. You attach the roof poles at the bottom with a cord wrapped around the top of one of the wall rods. There was much skepticism that this would work on the part of our guests.
 But we persevered and tied them all down. You can see the cable just below my hands in this photo.
 Once the roof poles were all attached to the walls and stuck into the tono holes, we lowered the ladder. And it worked! It all stayed together – our guests were betting on whether or not it would all fall on our heads.
 The next step is to “seat” the tono. That means you are supposed to hang on it to pull it down on to the roof poles securely. We started with Kostya since he was the lightest. He could hang off it with no problem.
 So then I tried it but I just pulled down, I never really hung off of it.
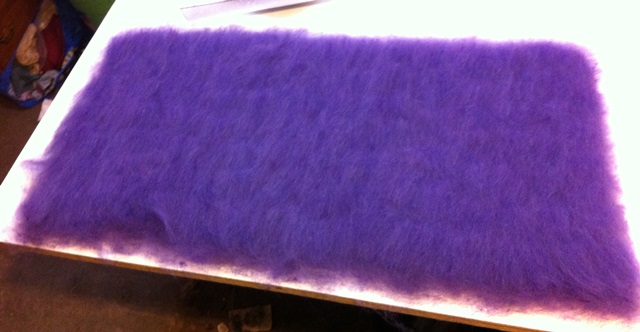
 The next step was to wrap the frame with felt. Here’s the felt pieces ready to be attached.
 We used several pieces of rope to tie the wall panels in place. We only used two this time but normally, three would be used. But the wall felt is still in place as I write this after four days.
 The next step was to add the roof panels. Kostya is helping to pull the felt up over the roof with a rope tied to the top edge.
 Barb used a stick to help adjust the roof pieces once they were up on the rafters.
 And then we had a yurt! There are still some adjustments to make because of the door. Yurt doors are not usually standard height so our door is taller than it should be. The roof panels were big enough to cover the yurt if the door wasn’t so high. But because of that extra height, I will be making another rectangular panel to cover the area of the roof behind the door. Kostya thought it was great fun to stand on the ladder and stick his head out of the top of the tono.

All the party goers thought it would be a good idea if Dennis carried me over the threshold. I didn’t think it was such a wonderful idea but Dennis was game.
 And then they wanted photos with me sticking my head out of the top.
 Here’s an inside view. I really love how the orange looks against the wool.
 It’s fairly dark inside but the tono gives a lot of light. Our plan is to cover this with plastic or plexiglass. One section will have the stove-pipe going through. We already have a small wood burning stove. That section of the tono will be covered with metal that will have a hole for the stove-pipe. As you can see, the roof panels are not quite big enough but with the extra panel, it will have plenty of overlap.

Here’s a view of the roof. Surprisingly, you can walk fairly close to the edge of the yurt since the angle is fairly steep. Traditionally, the furniture would be against the walls anyways, so there is plenty of head room.
 And here’s a photo from the back. We did later tie down the roof panels. You can see the scale as the building to the right is our garage with the house behind it. We did take some videos but somehow I can’t seem to get the video off the camera and downloaded on to the computer. Plus it will need a lot of editing because it is really long and boring right now. So I’ll have to post the video another day. Thanks to everyone who came to the yurt raising and helped us out. It was great fun and it was so rewarding to see it all together after such hard work over the summer. I hope you all have enjoyed the yurt saga. It was a great experience and I have learned so much about making large felt.
Like this:
Like Loading...