Browsed by
Tag: felt pouch

3rd quarter challenge and Pinhey’s Point

3rd quarter challenge and Pinhey’s Point

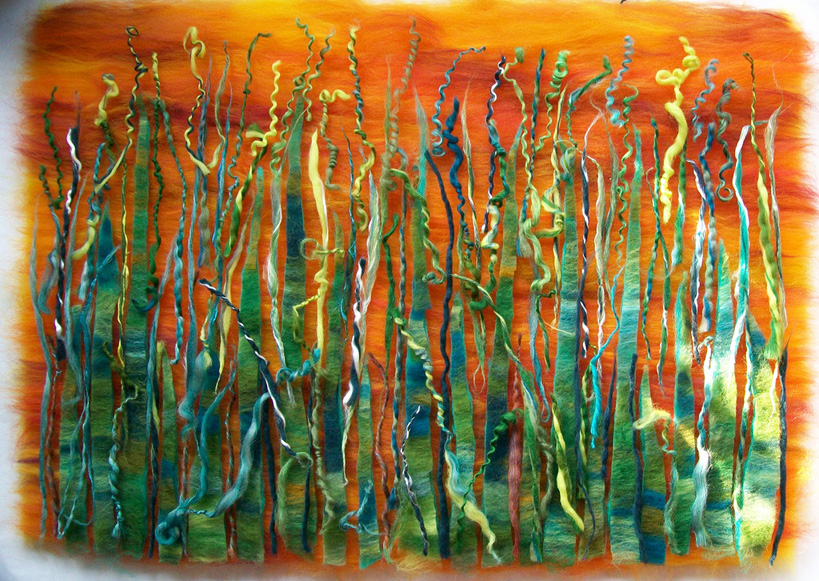
I will start with the third quarter challenge.  Onf the challenges is to make something about where you live. I remembered this piece I made. It has a wet felted background, needle felted water and significant roads and stitched secondary roads.  It is about 6×6 inches or 15×15 cm. It was a fun piece to make. It just needs framing, like so many pieces.


I did a little bit of wet felting at a demo we did a few weeks ago at a historical site near Ottawa called Pinhey’s Point Historic Site. https://pinheyspoint.ca/visit-pinheys-point/

I made this little bag for my purse. I will add a few snaps.  One to keep the flap closed and 2 more in the top pouch part so I can keep something in there without it falling out every time I open it.  It is for keeping a power pack and my square point of sale device mostly. I forgot to take pictures during lay out but here it is on the resist to show the shrinkage. I will probably add some stitching at some point. the finished size is 7 1/2 inches x almost 5 inches   or 19cm x 12cm


I did take some pictures of the group spinning and showing how the tapestry and 4-shaft table looms work. these are definitely candid shots that I only just remembered to take so I wouldn’t be in hot water with Jan.   It was a quiet demo with there being a lot of smoke in the air from the fires in Quebec. You can see in the background the faint outline of some hills. That is about 1/2 a kilometre away across the Ottawa River to Quebec.  You couldn’t see that much when we arrived about 10 am to set up.  It was nice to spend time with friends and to chat with the few people that dropped by to see what we were doing.

This slideshow requires JavaScript.

That’s about all I have been up to other than a little spinning on my drop spindle. I will try to get some pictures of my little balls of yarn for next time.

Finally Finished and Playing with Rocks

Finally Finished and Playing with Rocks

I have finally finished my pouch. Yay! I am not sure how big I want the individual spaces in the bag to be so I have just basted the divisions for now. If they are working fine I will sew them in permanently.


Here it is full of things. and some things that didn’t make it in. As you can see it’s not dedicated to one kind of thing. It’s a way to keep all the smallish stuff from filtering down to the bottom of the basket where they are hard to find.


and all rolled up.


Here is the basket. First I put the liner in. It’s a thick, fairly stiff fake silk scarf. I can’t imagine it was nice to wear which is probably why it was in the secondhand clothing store in the first place. It’s great for this job.


Adding everything into and onto the basket.

This slideshow requires JavaScript.


There was even room left to add my guild library books when I got back to the house.

I am sure you are all as tired f hearing about the basket organizer as I am so it is now time for something new and more colourful. I have been seeing felted rocks popping up on Facebook a lot. I figured they looked like a pretty obvious and easy thing to make, so I will give it ago. The first one I did use floor underlay resists.  I started with a pebble. I covered it completely in wool.


I cut out a resist a bit bigger than the wool covered pebble and then added the top put the resist on the top of the rock and folded the wool around. then I cut a bigger resist and did it again and marked the top. It was a bit awkward. I should have worked the other way up but where’s the challenge in that. LOL.


It fulled down quite fast.

time to start cutting, I rubbed each cut to heal it before doing the next cuts. I don’t think you can see it but the bottom of each layer is fully attached to the one below it.


I sat it on a green lid to dry, looks really striking there.


That worked quite well. Now for a different way.

For this one, I used plastic wrap to keep the layers separate. I cut a small hole in the underside so the layer would be attached to each other.


wool wrapped pebble


first layer wrapped in plastic


3rd layer

I wrapped the last layer in plastic I just rubbed it and rolled it around in my hands as if I was making a felt ball. I did it longer to make sure the inside layers were felted as well. While wrapping I lost track of the top and bottom. Naturally, I picked the wrong side to mark. I cut the first hole and it was attached to the one below so I kept cutting down to the pebble. I planned to stretch each layer, but with it being quite small there wasn’t much stretch or even room to get anything in between the layers to try and stretch.  so In the end I just fulled it tight around the rock.


Here is how they compared in size before felting


And how they compare with my hand to show the sizes


See Lyn, not felted rocks but felted rocks. Ha Ha Ha :O)

A Couple of Felted Pouches

A Couple of Felted Pouches

This week I decided to make a new pouch for my business cards. The one I am using now is getting  a little ratty looking from being in my purse for several years.

I didn’t take any in progress photos. I wasn’t really thinking about it, just enjoying the process of making something.

This is the first one, front and back and closed. It turned out well but I tiny bit smaller than I wanted.  Not bad considering I didn’t do any measuring I just cut out a resist and started.

Here it is on the resist so you can see the shrinkage

And a pictures of the nuno felt designs.

I made the second pouch bigger. I wanted some ruffles along the sides so added extra fiber there sticking out from the side. I didn’t make the extra wide enough and it almost disappeared. It is a tiny bit ruffled but not great.

and on the resist.

And a close up of the silk roses, I think I will shave them, they are a bit fuzzy.

Finally both of them with a ruler to give you an idea of size. one is about 6 and the other about 8 inches

I have a thought of making them to sell. I thought maybe I would put a grommet in the back with a carabineer clip in it. I am just not sure they will sell at a decent price. Do you like the idea? What do you think people would pay for them?


Bits and Bobs

Bits and Bobs

I made a couple of felt pieces to use as lampshade covers not so long ago, one of them wasn’t nice at all, it looked okay, but it was made with Shetland, and what I think is Corriedale (from a bag of Botany Lap Waste) and now I understand why people shiver at wool! I used that one for the shade, but couldn’t get a decent photo. The other piece I made is going to be a removable ‘skirt’ when I think of how to attach it. It’s a bit crinkled because it ended up under a pile of things!

A while ago we made pouches using resists at the well being centre. I think I might rewet this and reshape it as a bottle cover:

We’re going to start learning some techniques for making felt landscape pictures at the Well Being Centre. After we were talking about it I showed the group the picture Tracey blogged about not so long ago:

I also showed some of Marion/Blyth Whimsies gorgeous floral pieces: https://www.flickr.com/photos/24232165@N03/albums/72157681820827174 I don’t think we’ll be making anything on that scale though! To get started we made some really simple landscapes, I like doing these, they’re usually around postcard size:

I made it clear that landscapes aren’t something I’m particularly good at or experienced with, Mine are usually simple like that above or very abstract like this:

But, I know fibres and effects and techniques, so we’re going to start with those and build up the skills to make more adventurous pieces. We’re going to start with making simple things like wool strands and twists:

Wool kebabs … I recently read something that when small rolags (usually of cotton) are made, they’re called ‘punis’. But I think these are even smaller, and I’ve been calling them ‘kebabs’ – because they’re rolled around a kebab stick-for so long it’s just stuck now!

Handspun yarn, singles, plied, mixed with fibres or commercial yarns etc:

Coils and Spirals:

We’re probably going to buy some prefelt, but we’ll make our own too:

And combine all the things:

And add things like leaves and flowers, nepps, fibres etc. And hopefully, we’ll all be landscape experts before long! Luckily, we have a group member who is amazing at hand-stitching and embroidery and our very own Free Motion Embroidery expert so we can embellish on the sewing machines too 🙂