I was looking through some of the simpler backgrounds I had on hand to jump-start my summer tree. I did this agt our guild social so I was too busy chatting to get you a picture before I started.
I decided to use some more of the pencil roving I have. It is sold as Buffilo roving or Brigs and Little Country Roving. It comes as 5 strands of thin pencil roving wound into a cake. It looks to me like it has been prepared to go through a spinning frame and then be plied into usable yarn. Why else wind 5 strands together? https://briggsandlittle.com/product/country-roving/
This is the brown I am using but not a solid colour so it has more depth. I wound off 2 strands to pop into my felting bag.
When I am not sure of my artistic ability ( most of the time), I tend to go small. If it’s little it is harder to see it’s not very good. However, trying to make a small tree in the distance did not go well. It looks more like some sort of demented scarecrow. You can see it’s quite a nice background though.
So I ripped it off and started a much bigger tree in the foreground. You can see how using the pencil roving makes it easier to make branches as you lay them in for the trunk.
I tidied that up top and bottom and that is as far as I have made it.
I like the way the pencil roving forms the tree but I think I need to add a little lighter ( and maybe darker) colour to help define it more. I am not happy with the blob in the top middle of the trunk. I think I will have to open it into the branches more. I will have to do some searching for pictures of winter trees to see how that part looks. It may not matter once I add the leaves. Isn’t it funny how you know exactly how a tree looks until you come to make one? I also have to work out what I want for the rest of the picture. Maybe some rocks, sheep are always popular, a fence?
The only other thing I did this week was to make some felted balls for my goddaughter, for her cats. Again, too much talking and not enough picture taking. they are small styrofoam balls with a bell pushed into them.
This title made me chuckle. 🤭 It sounds like I’m going to lecture, about good hygiene. But no, my post is about felting soaps, as take-away gifts, for my niece Lauren’s bridal shower. The shower was in Phoenix, this past weekend. I declined my invitation, knowing I would surely melt in July’s hot temperatures – never dreaming there would be a triple digit heatwave. However, as her only aunt, I wanted to send something special, to help with the shower. Felted soaps are always appreciated, by any recipient I give them to…so I asked her mother what she thought? I explained they are lovely, and useful, pieces of hand made art. With a few questions, about colors and theme, I was ready to tackle the job.
The theme: Petals and Prosecco.
The first 21 bars felted, using assorted carded batts.
I taught soap felting classes, at a fiber show, and a couple fiber retreats. In doing so, I developed a descriptive narrative, to help people understand the process. I experienced many pitfalls, in my learning process. I like to share my mistakes, to prevent my students from experiencing the fate. Felting soap, while not hard to do, can humble any experienced Felter. [Truthfully I had 2 bars fail this time.] Sometimes it just happens!
Generally, the following method works pretty well for beginners. This recitation, is close to what I usually say to my students, as we felt our soap together. I have inserted photos as illustration, where necessary.
1. Use wool that felts well! – For my batts, I try to blend dyed merino, with another easily feltable wool. Add fancy fibers, like silks and angelina, sparingly. I tend to add those fibers to the top of my batts; that allows me to pull small amounts of the add-ins, as decoration. Always try to add a thin web of wool fiber, on top of your silks and fancy fibers. It helps them felt in better.
Photo #2 demonstrates peeling all sharp edges from soap, with a vegetable peeler. Remaining photos, all #3, demonstrates amount of fiber, and wrapping technique.
2. Use a vegetable peeler to remove all 90 degree, or pointy edges of your soap.My best advice – use less wool than you think. Lay out 3 very thin layers of fiber; only enough to cover the area of your bar of soap, with a small overlap. (Photos)
3. Wrap bar of soap, being mindful to cover corners of the bar. This is where you can add wool yarn embellishments, if you choose.
I wrapped this bar with boucle yarn, and what I thought was wool yarn. It didn’t felt, so must’ve been super wash wool. So I pulled it off and kept right on going.
4. Carefully wrap in a nylon knee high stocking. Better yet, use cheap nylon footies – ones you use to try on shoes with. [Amazon sells them – $8 for 144.] Grab the wool wrapped bar, with your socked hand, and carefully pull it over.
5. Add luke warm water to a 2 quart bowl. Wet wrapped bar – dipping quickly. Pull wrapped bar out of water, and begin pressing air out of the wool. (You will hear the air leaving the wool – sounding like little farts.) Press sides, press edges, press ends…keep pressing as the air continues to bubble out. Do this for a minute or two. As you press, soap suds begin to form. Some soaps foam more than others.
6. Quick dip in water again, begin pressing the fiber as before. Keep pressing. You should be able to feel all of the contours of the bar of soap. The wool should feel so tight, on the bar, you almost don’t feel it present.
*Only after about 5 minutes of pressing and pressing, around the bar…should you attempt to start rubbing. ***This is where the felting problems happen. Ask me how I know this?? When I am in a hurry, and rush the process, the wool says “No, no, no!”
7. When you do rub, imagine your bar of soap is a new-born baby. You wouldn’t rub your baby roughly…start by rubbing very very gently. After a minute or two, your baby is 1-2 months old, so add a little more rubbing for a minute. Rub all the edges and ends too. Now, your baby is older and you can begin building up the rubbing. [Wipe your soapy hands off with a towel – don’t add more water unless you absolutely have to. Trust me!]
8. You can peel your stocking/footie back, to make sure the wool is tight to the soap, and not sticking to the nylon. If still sticking, you need more rubbing, so wrap it back up and rub some more. Otherwise, remove the stocking, and rub all over some more.
9. Here if you feel the need to felt a bit more, you can rub the soap bar on bubble wrap, or something with a little texture. Make sure every edge is tight to the bar, and you’re pretty much done.
10. Start running some warm water, in your kitchen sink. Rinse your hands off, and quickly like before rinse the bar. Press all the water out, dry outside of bar with paper towel, then set aside to dry.
I generally stop at this point feeling satisfied with the beauty of this simple look. But for the shower, I planned to try something different. I decided to use bits of fiber and felted scraps, to needle felt a loose flower shape. I didn’t take pictures of that process, but I did think to photograph my leaf process:
I dug in my bin of felted pieces and off cuts. I found a lightly felted bit of prefelt, in various shades green. Perfect for leaves.
Leaf shape cut from a piece of lightly felted green piece.I placed the cut shape in one hand, and rolled it back and forth, to round and felt the cut edges a bit.
I placed my rough flower shape on the bar of soap. For this example, imagine a round piece of felt/fiber. I divided the round shape by eye into petals. Then at a petals edge, I grabbed it with my felting needle tip, and pushed toward the center of said flower. I did this 2 or 3 times around the flower. As shown in the photos above, I cut leaf shapes from the green prefelt and rolled it between my hands a couple times. Whenever my leaf rolled on itself, I flattened it out, and kept on going. (Note: that could work well for another project) For the stems, I used a US-E hook and green yarn to crochet a chain of about 10 stitches. Each of these flowers, stems, and leaves were totally different. I let the colors and fibers determine their own destiny.
This photo shows the best way I found to needle felt (applique) pieces to the felted bar surface. Catching the edge and running it between the felt and soap
This close up shows how this blob of wool and silk reminded me of a flower. I simply added some tucks from the edges to make petals
I broke 4 felting needles, on this project, before I figured out my mistake. I watched a YouTube video that said to “needle felt directly into the soap.” I beg to differ with them, unless they have an endless supply of felting needles. I found keeping my felting needle between the felt and the bar of soap worked fine. (See the edge of the leaf, photo above.)
While I am sharing tips with you, I should warn you, these soaps took a good bit of time. For these, I chose to use organic, specialty bars of soap, because they were for my niece’s family and friends. If you ever try selling them, as I have in the past, don’t bother using good soap. While purchasers enjoy, good quality soap, they rarely believe you have used it. I did a fiber show in Mississippi, and used “free” 2oz soaps, we got when traveling. I sold them for $5 ea, and they were gone in 40 minutes. I used a better quality, organic soap in my next batch, and couldn’t get people to part with $7.50. As I sit here writing this up, I don’t see these as money makers at all! But, if you have the supplies, and a bunch of soaps hanging around, they make pretty nice gifts, or stocking stuffers. And…they look so pretty on the tables at a shower.
I was looking around my studio wondering what to write about in this blog. I was remembered Ruth Lane’s recent comment in her blog here about using up supplies. I have a carded batt of merino / A grade mulberry silk from World of Wool that’s been kicking around for a while. I can’t remember if I bought it for something specific that didn’t get made or if I bought it on spec. I was interested to find out how it felted and what I might do with it so I decided to make a small test vessel.
I cut out a circular resist using a small mat as a template then started laying out the fibre outwards towards the edge. Apologies that these pictures are mostly white on light colours – I was thinking more about the making than the photography. I laid the second layer in a circular pattern before flipping it over to smooth the overlap onto side 2. After 2 layers on the second side, I flipped back and laid 2 more layers on side 1, followed by 2 more on side 2.
The resist & its templateFirst layer side 1 startFirst layer side 1 completedLayers 1 & 2 side 14 layers each side, ready for wetting out
After wetting it down I spent a lot of my time working the edge by pulling the voile over the edge so I wouldn’t get a ridge around the middle of the finished vessel. It felted quickly and I was soon able to start fulling – initially without removing the resist.
Working the edges FullingWorking the felt
Once I’d cut out the resist I found, in my vast collection of miscellaneous wooden objects, that the handle of a wooden pestle (as in mortar & pestle) was the perfect size for getting inside the vessel and working it from the inside.
I spent a while fulling it as I wanted it to be smooth and very firm.
Wooden pestle handle for fullingPacked & dryingvessel on original templateThinking about the green colour insideFinished merino / mulberry test vessel
I packed the vessel with strips of recycled bubble wrap that I keep for this purpose – you can see it green inside. Looking at this green bubble wrap made me wonder if I could make a vessel with a coloured interior but retaining the pale colour outside. I thought maybe if I used silk rather than wool to add colour I’d get less colour transfer, so I thought I’d give it a go.
While pondering this, I decided to try using the same resist as the test vessel but to make 2 small bowls rather than one vessel: so, cutting it in two around the middle rather than making a hole at the top to remove the resist. I dipped into my big boxes full of second-hand silk scarves bought in charity shops and chose a plain turquoise and a patterned blue one.
Carded merino / mulberry silk batt & two silk scarves ready for recycling
I put a circle of silk on the resist and decided to run a small line of coloured merino tops around the edge: partly as I was interested to see how it would look and partly as I thought I might not know where to cut when I was ready to remove the resist and separate the little bowls – I’ve made that mistake before!
I put a circle of the blue patterned silk on the second side. The merino and silk fibre layout was the same as the previous vessel. This time I also remembered to do the circular layer first followed by the radiating layer – I’ve learned that one before and obviously temporarily forgot for the previous vessel. It makes following the resist with the circular layers much easier and I prefer to try not to overlap that layer if possible – again it reduces potential ridges and produces a better join if you only overlap the radiating layer, in my opinion. I’m sure some of you will disagree but that’s one of the many things I love about wet felting: with experience everyone works out the techniques and tools that work best for them.
Process shots of the bowls
I was interested that I could see quite a lot of the inner colour throughout. I quickly began to suspect this was more about the amount of dye bleeding from the turquoise silk as about seeing the silk through the wool. I was getting a lot of turquoise in the felting water.
Again, I fulled them thoroughly. During the fulling, I decided I liked the silk on the outside better than the inside so here they are, still wet.
Bowl insidesBowl outsidesThe finished small bowls
And here are the 3 items. You can see how green the wool of the little bowls is compared with the vessel. I’m pleased with the bowls’ blue rims – I like this effect – but the vessel is my favourite. In each of the test pieces the fibre has felted beautifully: it’s very firm and extremely light – it has an almost papery quality about it that I find really appealing.
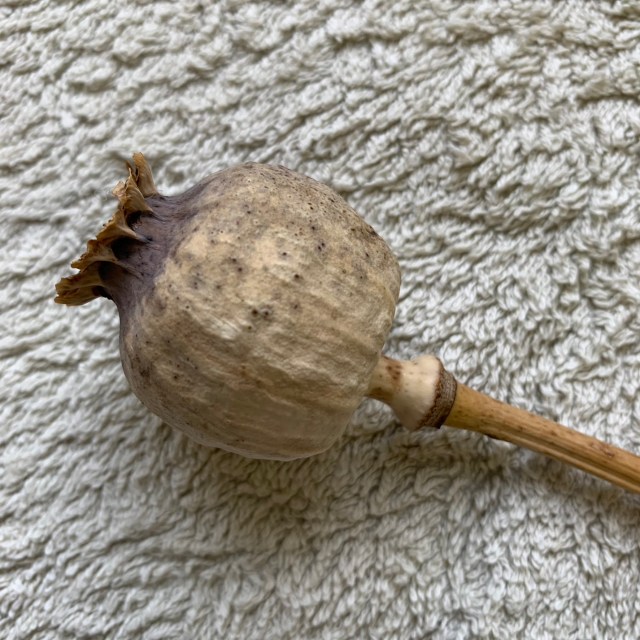
My imagination is now firing about what I could make next with this fibre. I have a dried poppy seed head sitting in a vase next to my desk. The felt reminded me of the texture and colour of the seed head. I’ve felted poppy seed heads before – one of my favourites. Another thing I have in the studio is some vintage cotton lace I was unable to resist when I saw it in a local second-hand shop.
Dried poppy seed headVintage cotton lace
I thought maybe that the lace would add a subtle surface texture so why not have a try? This time I made a small square sample using just 2 layers of the wool / silk mix batt with strips of lace in parallel lines.
Layout: fibre and laceFinished squareClose up of surfaceTest square of the batt with strips of vintage lace
Although it’s subtle, I really like the effect. As you can see in the close up shot, the batt has quite a bit of vegetable matter which in this case adds some interesting specks, enhancing the natural look.
I was running out of time but decide to start the poppy seed head. The merino fibre length in the batt is very short which makes the layout quite slow but very precise. In the first photo you can just see the strands of lace which I’ve laid out on top of 4 layers on the under side and are waiting for me to finish the final 2 layers on the top side before bringing them over.
The second photo shows how far I got yesterday before I had to stop. This is a multi-resist piece that will take a while to make. I’ll show it finished in my next blog.
I enjoyed letting the fibre lead my imagination in what I might do next. I’ve done mostly production felting recently – making multiples of things for shops and sales – so it was great just to see where things led me and enjoy felt-making for the sheer fun of it. I’m looking forward to getting back into the studio soon to finish the poppy seed head.
In my last post I mentioned a few of the projects I was working on with the “Making Waves” theme, along with other members of the Waltham Windmill Textile Group. I’d begun work on a 50cm x 90cm felted wallhanging inspired by the markings on large stone slabs on the beach at Seahouses in Northumberland.
Having recently bought myself a drum carder I carded a variety of left over bits of fibre, mainly blues, greens, yellows and neutrals, to make my background and laid them out with off cuts of hand dyed silk fabric, scrim and large nepps. On the left is how it looked after felting and on the right is where it’s at right now. I’ve added synthetic sheers, machine wrapped cords, hand and free motion stitch and in some areas I’ve heavily machine stitched to push them back and encourage the adjacent areas to stand out. The original bottom left section wasn’t working with those silk circles so they were pulled off and replaced with some stiffened, rust dyed fabric circles, recycled from another piece of work. I’m calling it Going With The Flow because a) it’s inspired by a trip to the beach b) it has flowing lines and c) like most of my work its design wasn’t preplanned. It’s evolving as I work on it, adding bits in and taking bits off until it feels right. It’s got a way to go yet before I can call it done.
One of the other challenges within the Making Waves theme is to make a 3D fish and my immediate thought was to create what many would regard as an ugly fish but which I prefer to think of as a fish with shedloads of character……..one that would get noticed amongst a group of pretty fish!
AnglerfishTasseled ScorpionfishOyster Toadfish
Having typed “ugly fish” into Google I lost many hours over the next few weeks looking at images and some incredible videos of life deep in the depths of the oceans. Each new search revealed yet another fascinating species of fish, some quite honestly didn’t look real while some, like the Tasseled Scorpionfish were strangely beautiful. One of the weirdest I discovered has to be the Red Lipped Batfish. If ever there was proof we descended from the oceans this red lipped, whiskered fish that “walks” on its specially adapted fins has to be it!
Red Lipped Batfish
Last month the Waltham group had a day making felted fish, some are finished, others are still work in progress.
Lucy made a wonderful wet felted Puffer Fish adding recycled plastics, including pipette tips, wine bottle netting and glass beads with recycling symbols underneath, to highlight the plight of our oceans.
Sue is very new to wet felting but she’s taken to it like a fish to water (couldn’t resist!) and has made “Angry Fish”. I think he looks more sulky than angry but he’s terrific!
Barbara’s felted fish is still work in progress but looking great, as is her sketch book and fabric fish purse!
Originally I had intended to wet felt my ugly fish but, after all those hours of studying them and getting excited about what I was going to make, for some reason when I took out my carded Corriedale fibres I found myself felting a cartoon version of an Angelfish…….I didn’t see that coming! Her name is TroutPout and she’s approximately 33cm x 36cm excluding her fins.
I’ve been enjoying teaching 3D Seed Pod workshops recently using wire wrapped with Tyvek fabric so decided to make my Anglerfish from wire rather than fibre. It was only when I’d got the 60cm x 33cm framework made that I sat back and realised I’d gone past the stage where I had meant to start adding my fabric! Time for plan B…..maybe I could use wire mesh to give it “body”?
I looked for some online but hesitated as I wasn’t sure how flexible or suitable the mesh would be. Having put the fish to one side, a few days later I joined the Lincolnshire Textile group and at my first meeting I was offered a piece of silver coloured Sinamay. Sinamay is one of the most popular hat-making foundations. It’s woven from the processed stalks of the abaca tree, a type of banana native to the Philippines. I couldn’t believe my luck……..being silver coloured this off cut looked like wire mesh but wasn’t and if I sprayed it lightly with water I could easily shape it to fit and stitch it with aluminium wire to my framework. So this is how far I’ve got. I’m going to add a few more wire spirals and do something more interesting with the eyes. He should have menacing teeth but I might not go that far!
Wire frame Anglerfish
Another feature of next years Making Waves exhibition will be an Octopus’s Garden so once the fish are done it’s straight on to making lots of coral and a few Octopus. I’m loving this theme and could quite happily continue with it way beyond our event next year…….it has to be the most interesting and enjoyable we’ve had so far!
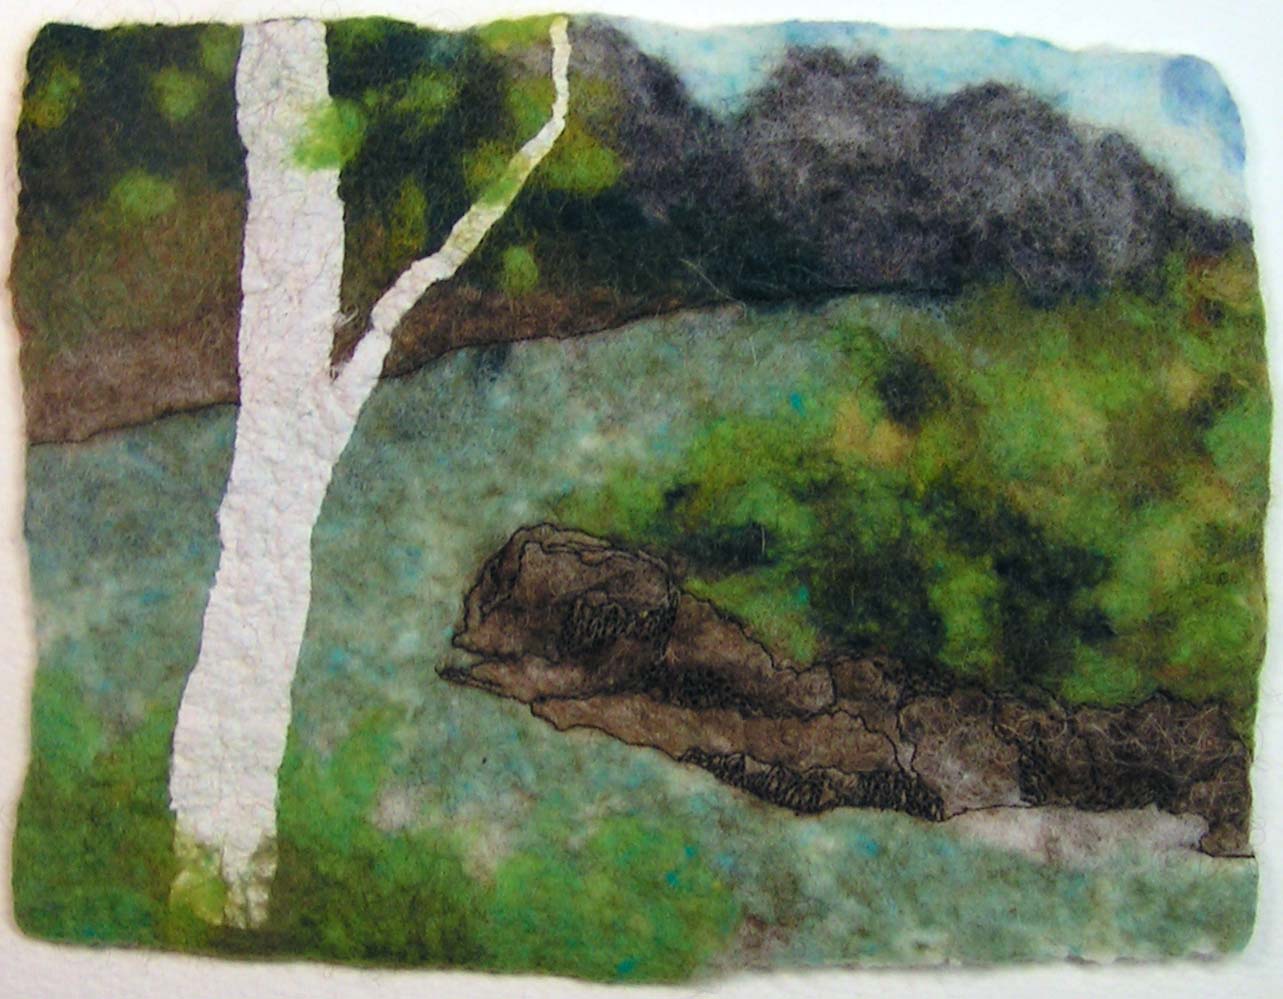
I added free motion machine stitching to the distant shore. Whenever I start FME on a landscape, I always think that the first few areas where I have stitched look like it’s too much. But I keep going and usually, once more stitching is added, the initial lines don’t feel excessive.
The next step was to stitch the rocks across from the tree. I considered adding some stitching into the foliage above the rocks but decided to leave it as is.
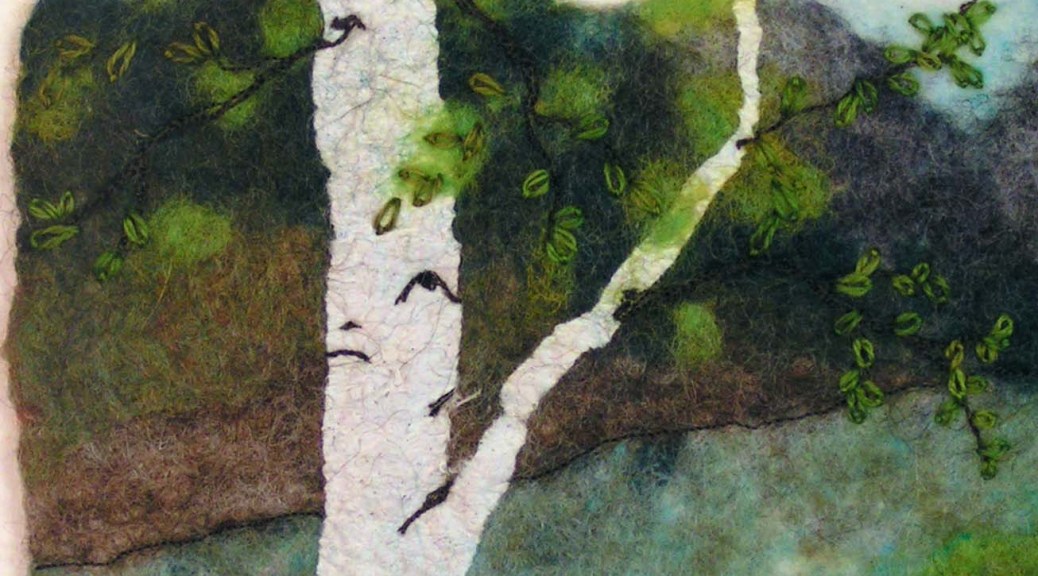
Then on to stitching the tree. I added the dark bits to the trunk and stitching through the felted paper was a breeze, no problems at all either by machine or by hand. The dark branches were added next and then decision time on how to add a few more leaves. I considered needle felting some smaller leaves on the dark branches but then decided I would hand stitch the leaves.
I then hand stitched leaves on to the dark branches using hand dyed lace weight wool thread and detached chain stitch. I added a few bits of grass at the bottom of the trunk as well.
The miracle is that I found a backing fabric, stitched the felt to that and then wrapped/laced the piece around matte board so it’s ready to frame. Since the piece is small (matte size 8″ x 10″), it went quickly and now I have two pieces ready to take to the framers. This piece counts for the year long tree challenge for spring. I have to think about the summer one as it wouldn’t really look different than spring, a few more leaves perhaps?
The winter birch piece is also ready for framing. I used a darker gray hand dyed fabric for the winter birch as it felt “colder” that way. Now on to the next landscape as the gallery wants me to replace the one that sold last month. (Doing a little happy dance!)
This is the piece that sold called Remembrance. Yay!
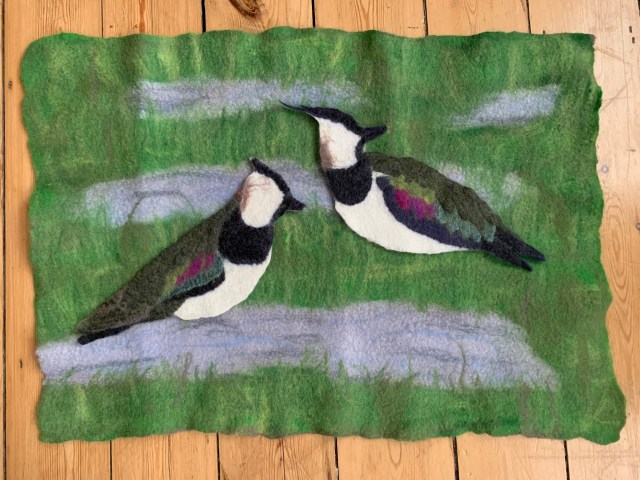
I’ve recently made a new felt picture of lapwings so I thought I’d show you how I went about it.
As you’ll know, if you’ve read my other blogs here, I live on the East Kent coast in the UK and am particularly fond of the local birds. I’ve seen some beautiful flocks of lapwings including at a small nature reserve just along the coast at Oare. I’ve not attempted lapwings before though they are really beautiful birds, so I thought I should have a go.
I’ve only seen lapwings in quite large flocks – I’ve never seen one on its own – so I thought I should have at least 2 birds in the picture. I did a quick sketch to help me decide on the size and stance of the birds
I started with the background. The birds at Oare were on the wet, grassy edges of a lake, very near the sea. Here’s the background laid out & ready to start felting.
I spent a while thinking about how to represent the lapwings’ lovely iridescent feathers and decided on lots of prefelt.
I had some blended greenish wool that was perfect for the main feathers though I had no idea where it came from or what it was. As I made some prefelt I tested out the shrinkage – mostly just to be sure it would felt rather than getting a specific shrinkage.
Then I set about prefelt for all the other lovely colours. The dark green sections are scraps of recycled silk from my favourite source: a charity shop scarf. The others are mixtures of different merino wool colours. I was particularly pleased with the dark section on the right which was a bottom layer of blue and top layer of charcoal grey. It was just the effect I was hoping for. With hindsight I should have used silk for the light green & pink / purple too as that would have given me more shine.
Here’s the prefelt cut up & arranged in a bird shape.
And here are the 2 birds once fully felted but still wet
And here I am deciding how to position the birds on their background.
I needle felted the birds into the background then added eyes, other face details, legs (using recycled tapestry wool) & head plumes. If you look closely you can see I also fiddled a little with the background: needling in extra strands of grass to soften the edges of the water.
The lapwings went straight into an exhibition with 4 other big pictures plus some smaller pieces at my local gallery: the wonderful Horsebridge Community Arts Centre in Whitstable. Here’s my display (not a great photo, sorry).
And I’ll finish with a quick shot of a beautiful painting I bought at that exhibition.I’ve been looking for something to hang over my bed for ages and I thought this was perfect.
Painted by my friend, the artist Josephine Harvatt. The title “When you wake up it’s a new morning”is particularly apt for over the bed. I love it. If you want to see more of Josephine’s beautiful work, here’s an Instagram link.
Teri wrote a post a while back about making mushrooms. She inspired me to give it a try. I already had a small circle resist (7 inch diameter) and just needed to add the stem. I cut a rectangular piece of floor underlayment (6.5 inches x 2.5 inches) to add to the circle.
Here it is after I duct taped it together. Now ready for wool. I wanted the process to be fairly quick so I chose some colors from my selection of short fiber merino which felts very quickly.
I decided to ad a few pieces of pre-yarn in brown to the base. I should have put these on the outside layer but I covered with more yellow before wetting down.
Here you can see both sides of the mushroom resist covered with four layers of wool and wet down. Then on to rubbing and making sure the edges were taken care of so I wouldn’t end up with a ridge around the resist.
Here’s the mushroom before I removed the resist.
Once it was partially felted, had a good skin and starting to shrink, I removed the resist. Then on to working the cut edges and begin more aggressive felting, fulling and shaping.
And here’s the finished mushroom on a plastic base with a rod in the center to hold the mushroom erect. I didn’t quite get the bottom even enough for it to stand on it’s own. This was a fun, quick project and I plan on making a few more with a bit more surface design next time. Thanks for the inspiration Teri!
Our local art group made some Joomchi a couple of months ago and since that time, I have been thinking about adding paper to the surface of felt. I realize that there is a well known online course about how to do this, but I have not taken the class and these are my experiments on adding paper to felt. If you haven’t heard of Joomchi before, it is made from layers of mulberry paper that are wet down and agitated. Essentially, wet felting layers of mulberry paper together. If you search online for it, you will find YouTube instructional videos and some beautiful artwork made with the technique.
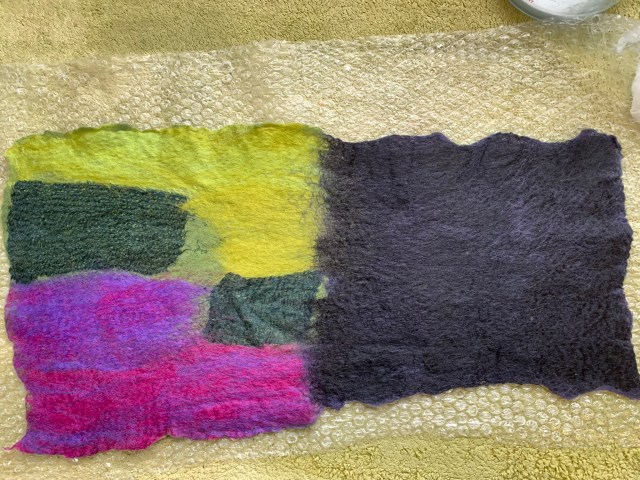
I have a variety of mulberry papers in my stash that I used. I cut a 2 inch square from the different papers and laid these out on a couple layers of short fiber merino batt. I figured that the pinks and reds would probably run from leftover dye in the paper but that didn’t concern me. I just wanted to see how the paper would felt in.
I covered the wool and paper with a synthetic sheer curtain on both sides and wet down with cold water. This seemed like nuno felting to me, so I followed my routine for nuno felting. I treated the piece gently, used cold water until the fulling process and rubbed over the surface of the paper pieces to encourage the wool to migrate through the paper. I fulled mainly by rolling but did do more aggressive fulling in hot water once the paper was holding in place.
Here is the result. All the paper types felted in very well. You can see that the red paper shared it’s dye with a couple of the white pieces of mulberry paper.
The close ups show that the paper does crinkle a bit but it is adhered well to the wool. I like the use of inclusions in the paper and the surface is interesting.
The fibers in the top pink paper almost look like a silk but I don’t think they are. It’s probably that the fibers take the dye differently than the paper pulp.
As you can see on the red piece, the “tinsel” or whatever the gold strands are, migrated almost completely out of the paper. If you pull on the gold strands, you can pull them right out.
Now on to the Joomchi. Most of my mulberry paper is red and pink. I used about 5 layers of paper, wetting down each layer as it was placed on a corrugated rubber surface. I then used a piece of pvc pipe and rolled over the papers. I kept turning the paper at right angles and also flipping over to the other side. Once the papers began holding together, I crumpled them in my hands, then gently pulled them back out flat and continued to crumple them. I thought the texture that developed due to the fibers of the paper beginning to break down was very organic and beautiful. The process also causes shrinkage of the papers, another similarity to felting.
Here’s the piece that I made with our art group. I borrowed other paper colors so I didn’t have to use pink/red again. You can see a bit of my red at the bottom left corner.
It was fun experimenting and I’m happy with my samples. Now to consider how I can use this in my work. Have you done any experiments lately? We’d love to see or hear about them, you can upload a photo here.
After our move to The Exchange, as mentioned in my first post there followed several years’ worth of productions in which I was not called upon for costume assistance although I regularly helped my artist friend who designed and painted the Panto scenery, and assisted with makeup. I once got the chance to make a giant beanstalk for our “Boy and Some Beans” Panto, after which I quite often was given the “head gardener” position whenever the scenery needed “vegetation” in addition to the painted sort.
In the mean time, and for several years running, SNADS were asked to put on some form of Haunting for the Halloween weekend at the local ruined mediaeval Wardour Castle.
Wardour Castle
Each year we wrote a short play, the various scenes of which took place in different spaces within and around the castle and it’s stone grotto, and 2 or 3 performances would take place each night over the nearest weekend to Halloween. This was great fun, even if decidedly cold and/or damp on occasion, and we actually got paid for doing it! It enabled me to expand my special effects makeup, which I had learned about at a theatrical summer school. It was there that I learned of the amazing things you can do with gelatine and porridge oats!
I always liked to be a witch or a ’orrible ’ag as this gave me greater scope for doing ’orrible makeup and practicing my witch’s cackle!
Porridge anyone?
Me and a Friend (that’s me on the right)
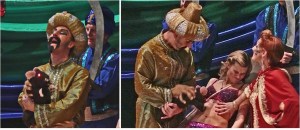
I was tasked with making a prop for our 2010 Panto Arabian Nights. The Sultan had a tame rat, which I was asked to produce as a hand puppet so that it could open and shut it’s mouth and wave it’s paws in a menacing way, and it was to have eyes that would light up red. This of course I made in felt (wet and needle) and my husband provided the tiny red lights for the eyes from his model railway stock. To make it more believable I needled a false hand onto the back of the rat and the section of arm extending from that hand covered the actor’s own arm as it disappeared inside his sleeve. From the auditorium it was not really clear that the hand holding the rat was not the actor’s own, except that it was not the quite same colour as his real hand – which should have been made up but wasn’t.
The Sultan’s pet rat
For the same Panto I was asked to make up the Genie. Here he is with a camel. (I didn’t have anything to do with either costume though.)
Camel and Genie
I was actually the front legs of this camel in our 2017 panto Ali Baba – great fun but tiring because my head was in his front hump and my arms were up his neck, holding up the head with one hand and using the other to poke out his tongue! This is the least tiring two person panto animal we have, at least for the back legs actor, because s/he is able to stand up with his/her head inside the second hump (it’s a dromedary).
In June 2013 the Society obtained permission to perform Terry Pratchett’s Monstrous Regiment. This is the one which is (loosely) based on the story of “Sweet Polly Oliver”, as she is called in the old folk song. She joined the British Army, dressed as a man, to try to find her brother, who she had looked after as a boy. (The “Monstrous Regiment” of the title comes from a pamphlet written by John Knox in the 16th Century – a “gentleman” who I think would have felt quite at home in today’s Afghanistan in regard to his attitude to women.) In addition to the Company’s enlisted “men” – all women pretending to be men – the Company boasted a (female) vampire and a mountain troll (also female, but it is difficult to tell the gender in the case of trolls).
I was cast as the troll – Carborundum by name. Mountain trolls are actually living rocks and I thought that I could do something with the costume for that. I had, a few years earlier, needle felted some bas relief gargoyles/water spouts using mixed bats of Jacob fleece, which actually looked like stone – as long as you didn’t get close enough to see that it was hairy, I should have borrowed my husband’s razor!
Corner Gargoyle/Water Spout – The original of this water spout is attached to the corner of a church tower in Hinton St Mary, the village just up the road from where I live.
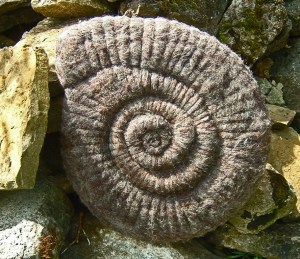
So I thought I could use felt, but what to attach it to so that it looked like rock and not clothing? Well, a couple of years previously my Guild (Weavers Spinners & Dyers) held a special exhibition as part of the Dorset Arts and Crafts Association annual show, which was entitled Dorset Coast and Country – or something like that. We had a whole room to ourselves and we filled it with exhibits depicting the county. The Dorset coast is actually part of the Jurassic Coast – a World Heritage Site – and runs from Orcombe Point in Exmouth, Devon, extending east for 95 miles to Old Harry Rock, near Swanage in Dorset. Therefore we had to include some exhibits around this. I made a giant ammonite in needle felt and it was formed on a base of foam pipe insulation.
Ammonite
So I knew that if I could find some grey foam I could make the troll’s costume out of that with felted embellishments. Now I wonder where I got the foam from – silly question, as a needle felter I had been collecting foam in various sizes and thicknesses for ages. Anyway, I put together a rocky costume, complete with some “moss” and embroidered lichen. I made up my face to be more flat planes than chubby me and this is the result.
Carborundum
Front row: Troll, female vampire trooper, Back row, officer and sergeant “baddies”
Terry Pratchett himself actually came to our Saturday night performance and obviously enjoyed it – he gave us a standing ovation.
Carborundum chatting to Terry Pratchett
I got to wear the costume at the Haunting of Wardour Castle that year and actually managed to frighten some of the punters when a chunk of the grotto turned round and glared at them!
Watch out for Act 2 Scene 2 sometime soon, when I might actually get as far as telling you about the Wicked Queen in the title image.
Four Ravens Gallery in Missoula, MT (USA) is holding a garden themed exhibition in May. I have several pieces that will be included in the show. I decided to make another felted vase cover to fit a glass vase that is 4″ diameter and 6″ tall.
I wanted a mixture of greens but didn’t want to take the time to card a batt. So I laid out different colors of green wool for each layer. Here’s the first layer, so that’s the inside of the vase cover.
Then I added a second layer which is much more neutralized green.
The third layer was a mix of greens that I had hand carded and was left over from another project.
Then comes the fun layer. I added a variety of green wool, yellow silk noil, red mixed wool in tufts and burnt orange locks. There are also a couple of pieces of bright green cheesecloth under there somewhere. Then the felting and fulling process (no photos) happened.
And here’s the vase. The photos show it from different angles. In the center photo, you can just see a small piece of the bright green cheesecloth. It’s a bright and cheery piece and reminds me of spring in the garden. If you’re in the Missoula area, you should check out the gallery as there are some wonderful artists represented there.











 Wardour Castle
 Porridge anyone?
 Me and a Friend (that’s me on the right)
 The Sultan’s pet rat
 Camel and Genie
 Corner Gargoyle/Water Spout – The original of this water spout is attached to the corner of a church tower in Hinton St Mary, the village just up the road from where I live.
 Ammonite
 Carborundum
 Front row: Troll, female vampire trooper, Back row, officer and sergeant “baddies”
 Carborundum chatting to Terry Pratchett


