Browsed by
Category: Samples

Surface Control – looking at Hair Spray and styling gel, initial investigation.

Surface Control – looking at Hair Spray and styling gel, initial investigation.

Like Ann, I have been having a  busy time since the last post. I was all set to head to Oakville then my trip was postponed to next week. So I am packed, but still need to find the camping cots we bought years ago to sleep on. They are nowhere to be found so we went out to Canadian Tire and bought a new one. I have been refining my notes on the chickadee as I made another armature. (well you just saw that so I don’t think you will be much interested in seeing a second bird so much like the one Mom got and liked! But I fear Ann’s Cookies may have been more appreciated!) The bird is now living in her living room by the window. I did have something I wanted to investigate further and now might be the right time to get part one started. This will have a time component so I will not make a full report now.

Surface Control – looking at Hair Spray and styling gel, initial investigation.

Last week I was wondering about how to reduce the flyaway fuzziness of Mom’s Chickadee. I eventually took matters in hand with a pair of fine sharp pointed scissors. This did quite a respectable job, but I had considered other options. Spray fixatives were used with pastels at school and being cheap art students we often bot inexpensive hair spray rather than proper artist fixative.  Will hair spray work on wool? Let’s Investigate!!

When considering fixatives/ hair spray there are a number of factors to investigate.

  • Does it hold the fuzz in check when initially applied (I was using the product instruction for distance for spraying.)
  • Dose the hold lasts more than a few hours or days?
  • Does it discolour the wool?
  • Are there any other changes in the wool that is noticeable at the time of spraying, or over time?

Off to the Dollerama to find cheap hairspray!  On previous visits, I had seen hair spray and hair gel (Glenn uses it to keep his hair neatly in a ponytail for work.) I found two hairsprays that looked interesting.

 1 the subjects of investigation.

 The “Blue sample” was Finesse – Superior hold Firm Unscented Hairspray, it boasted a weightless, dry finish.  The instructions are shake can then hold 20-30 cm away from hair (in my case wool)

The “Pink Sample” Was Salon Selective all day Volumizing Stay Put, Extreme Hold, enriched with argan oil from Morocco. ( I have no idea what that is but it sounds impressive!) The instructions are to shake the can and hold 20 to 25 cm away from hair/wool.

The “Black Sample” was AXE Styling Adrenaline Spiked-Up Look Extreme Hold Gel. Instructions, use a fingertip amount mix vigorously then style through hair.

The “None Sample” was Core wool from World of Wool in the UK,  just the wool covered by a piece of card stock to keep the sun off.

What I have learned so far: hairsprays have long names and seem slightly pompous in their extremeness. (No Hair products were harmed in this experiment and all hairspray will go to Glenn at the completion of this investigation.)


Next, I made the test felt pieces using the World of wool Core wool that I had hand carded. I made a sample 7 inches long and about 3 inches wide. I used a bit of light blue merino yarn to mark off the sections.

 2 making the needle felted wool sample

3 dividing the sample into sections for each application and a control or None section.

I masked off the sections that were not getting the spray treatment to reduce cross-contamination of the samples.

 4 Prep to spray the blue sample

 5 Blue spay applied

 6 parted off the excess and tried to compress the wool. Wax paper may have been a better choice, next time!

The Blue sample is unscented (mostly) and it gave a good light coverage at 30cm.

Next cover that sample and on the pink spray.

 7 pink sample was much wetter than the blue spray.

This gave a lot more wetness both on the surface and into the wool but it was also held at the suggested 20-25cm for this product.

Next up was the black sample

 8 I borrowed Glenn’s hair gel from the bathroom.

For this one, since I had to apply it to the surface I made little finger circles on the top half and stroked the felt in one direction on the bottom. It took a couple of fingers’ worth of gel to get the surfaced covered. The circular motions loosened up a few strands of wool but seemed to have stuck the surface down. It remained damp long after both Blue and Pink were dry.

 9 On the back of each sample I sewed on a tag saying which sample it was.

Then I covered the thin “None” sample on the right so it would not be in the sun.

10 the sample

Hum, maybe I should change that to half in the sun half out of the sun so we can see if the plain wool will change colour in the light…. Give me a moment I will fix that.

11 the upgraded sample

OK, now we can check if wool left in a window will change colour in the sun. (It may lighten I suspect, but let’s see if my hypothesis is correct.)

12  L to R; Pink, Blue and Black

Sample fuzz check at application Will the  hold last Is there any discolouration  at the application Is there any discolouration  over time other changes noticeable when applied or over time
None 4th fuzziest N/A N/A N/A N/A
Black Least fuzzy * see other Slightly shiny or more reflective Surface is compacted more than other samples also has the firmest surface
Blue Second least fuzzy Not noticeable Closest to None sample
Pink 3rd fuzziest Not noticeable 2nd firmest surface

13 table

Now we have gathered all the data to begin this experiment. We will have to return to this in a few weeks or a couple of months and see if we can see a change. By then I may have finally cleaned up my desk again, how does it get so messy?

Next week I will be off in Oakville likely working on the project I have started for Glenn. He has had only had one picture felted for him so far so I think he needs a sculpture. Here is the fabric that I hope will be part of his accessories (the sculpture, not Glenn).

14 it’s not the plaid I was looking for but it may work.

Have fun and keep felting!


Canadian Arcott Ram #2 Part 2

Canadian Arcott Ram #2 Part 2

In an earlier post we found out that 3 breeds of sheep were created by Agriculture Canada mixing existing breeds to create a sheep that would give; multiple births, fast-growing lambs and ewe’s with good mothering instincts. At first, their goal was to make a breed of sheep for research purposes but as the project continued they developed into 3 separate breeds; the Rideau Arcott, the Outaouais Arcott and the Canadian Arcott.   Since they have been bred mostly for their meat, the fleeces around here are variable often strikingly different between individuals in the same flock. The Rideau Arcott’s fleeces I have worked with before, on my highly technical scale, have ranged from OOOOH! all the way to Ick!

This being the first Canadian Arcott fleeces I have worked with I am testing their qualities and seeing what they may be best for. If you find a Canadian Arcott, it will likely be more lustrous than the Rideau Arcotts, and less variability between individual fleeces. (This is a strong rumour and your Canadian may vary a bit from the breed standard. It’s always best to look at each fleece as an individual)

Last post I tested Ram #2 (it’s ram number two because he was the second one out of the bag.) His ewes are employed as lawn maintenance specialists at a local solar farm.

We found that the fleece worked well with both combing and carding preparations producing a niece yarn from each. I had kept the combing waste and had carded up extra fibre to try the next set of experiments with it. So let’s see what I found out next!!

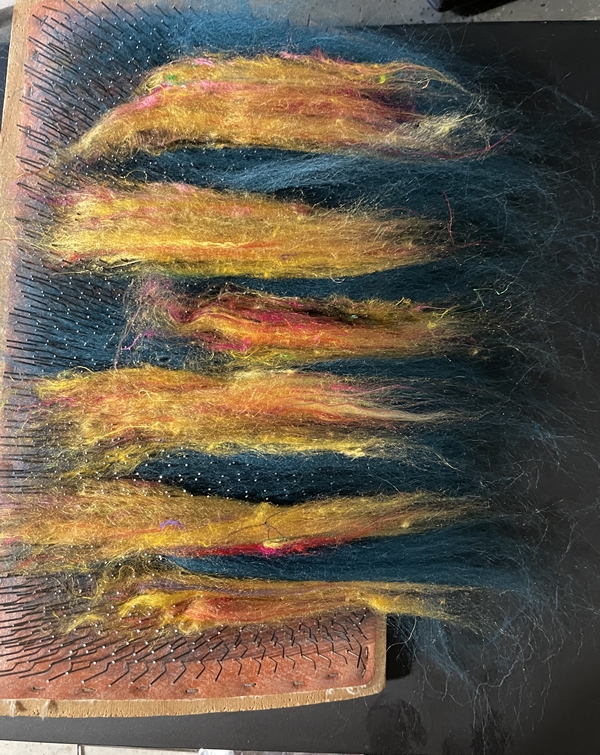
Comb waist needle felting test

Let’s see what the comb waist is like for felting (I have had very good results from some of Bernadette’s Combing waste fibre for both core and outer layers) she has very good fibre so even the waste is good!!

Ram 2, even in this relatively clean section I have sampled, had some VM (Vegetable Matter) which the combs separated brilliantly. This meant my sample section had VM amongst the fibre short bits and naps. This will be a good test of some of the lesser quality fibre from this fleece.

33 test with comb wast

This is not as fast to needle felt as a Shetland but it has springiness and lustre. For an understructure that needs to be relatively firm but have some give that springs back, it might be perfect. (A belly perhaps?)

34 close up of needle felted ball-ish shape.

I was using a courser needle I think it was one of the T-36’s for this sample. It created a slightly dented surface but if I had switched to a T-40 or paid more attention to how I was poking, I think it would have been able to make it a bit smoother but it was quite acceptable for an underlayer. I did notice a bit of a very fine halo that is more visible in the shadowed areas.

_________________________________________________________

Wet Felting with Carded wool

Now the last consideration, can it be wet felted. I have a feeling it may not be good since it shows signs of stubbornness with the lovely fine crimp. But let’s see.  There is always hope until it is crushed mercilessly.


So let’s try the carded fibre and layout a sample. To give it the best chance for felting I laid thin wispy layers in alternating directions North /south then east /west. I repeated until I had a puffy pile about an inch thick.

35 approximately 2.5 inches square

I had received a number of small bubble wrap bags with the larger needle felting tools (the 3 needle holders were all very poorly packed and had no bubble wrap)


36 bubble wrap bag that needle felting tool cam in.

I found one of the smaller pouches and placed the layered fleece inside with the bubble facing in. now to add soap and water. Hmm, maybe I better try and start it first in my hand then put it into the bubble wrap.

First, this wool is not a sponge. I used a lot of soap and warm water to wet the fibres, some of which collected in the bottom of the bubble wrap bag. I also discovered bubbles do not make good waterproof bags, they drip. So I put it into an extra-large sandwich bag to contain the wetness.

37 Ooops this bag leaks in the corners!!! need better waterproofing!!!

38 XL sandwich bag!! that will make felting safe!!

I started with gentle caresses across the bubble wrap then moved to gently rubbing it between my hands. I focused on working in both vertical and horizontal directions. The wool has spread out but doesn’t feel like it’s grabbing yet. Let me find a video to watch and I will keep going.

39-40 taking a quick peek

41 cant see what I’m doing too many bubbles!!!

As the soap built up I went and rinsed some of it out.

42 43  There does seem to be adhesion! But let’s see if I can get a bit more. I put it back into the bubble wrap bag and put that into the sandwich bag.  Now, to add more enthusiasm to the rubbing!

44 Now off for a rinse and see what we have and is it felt?

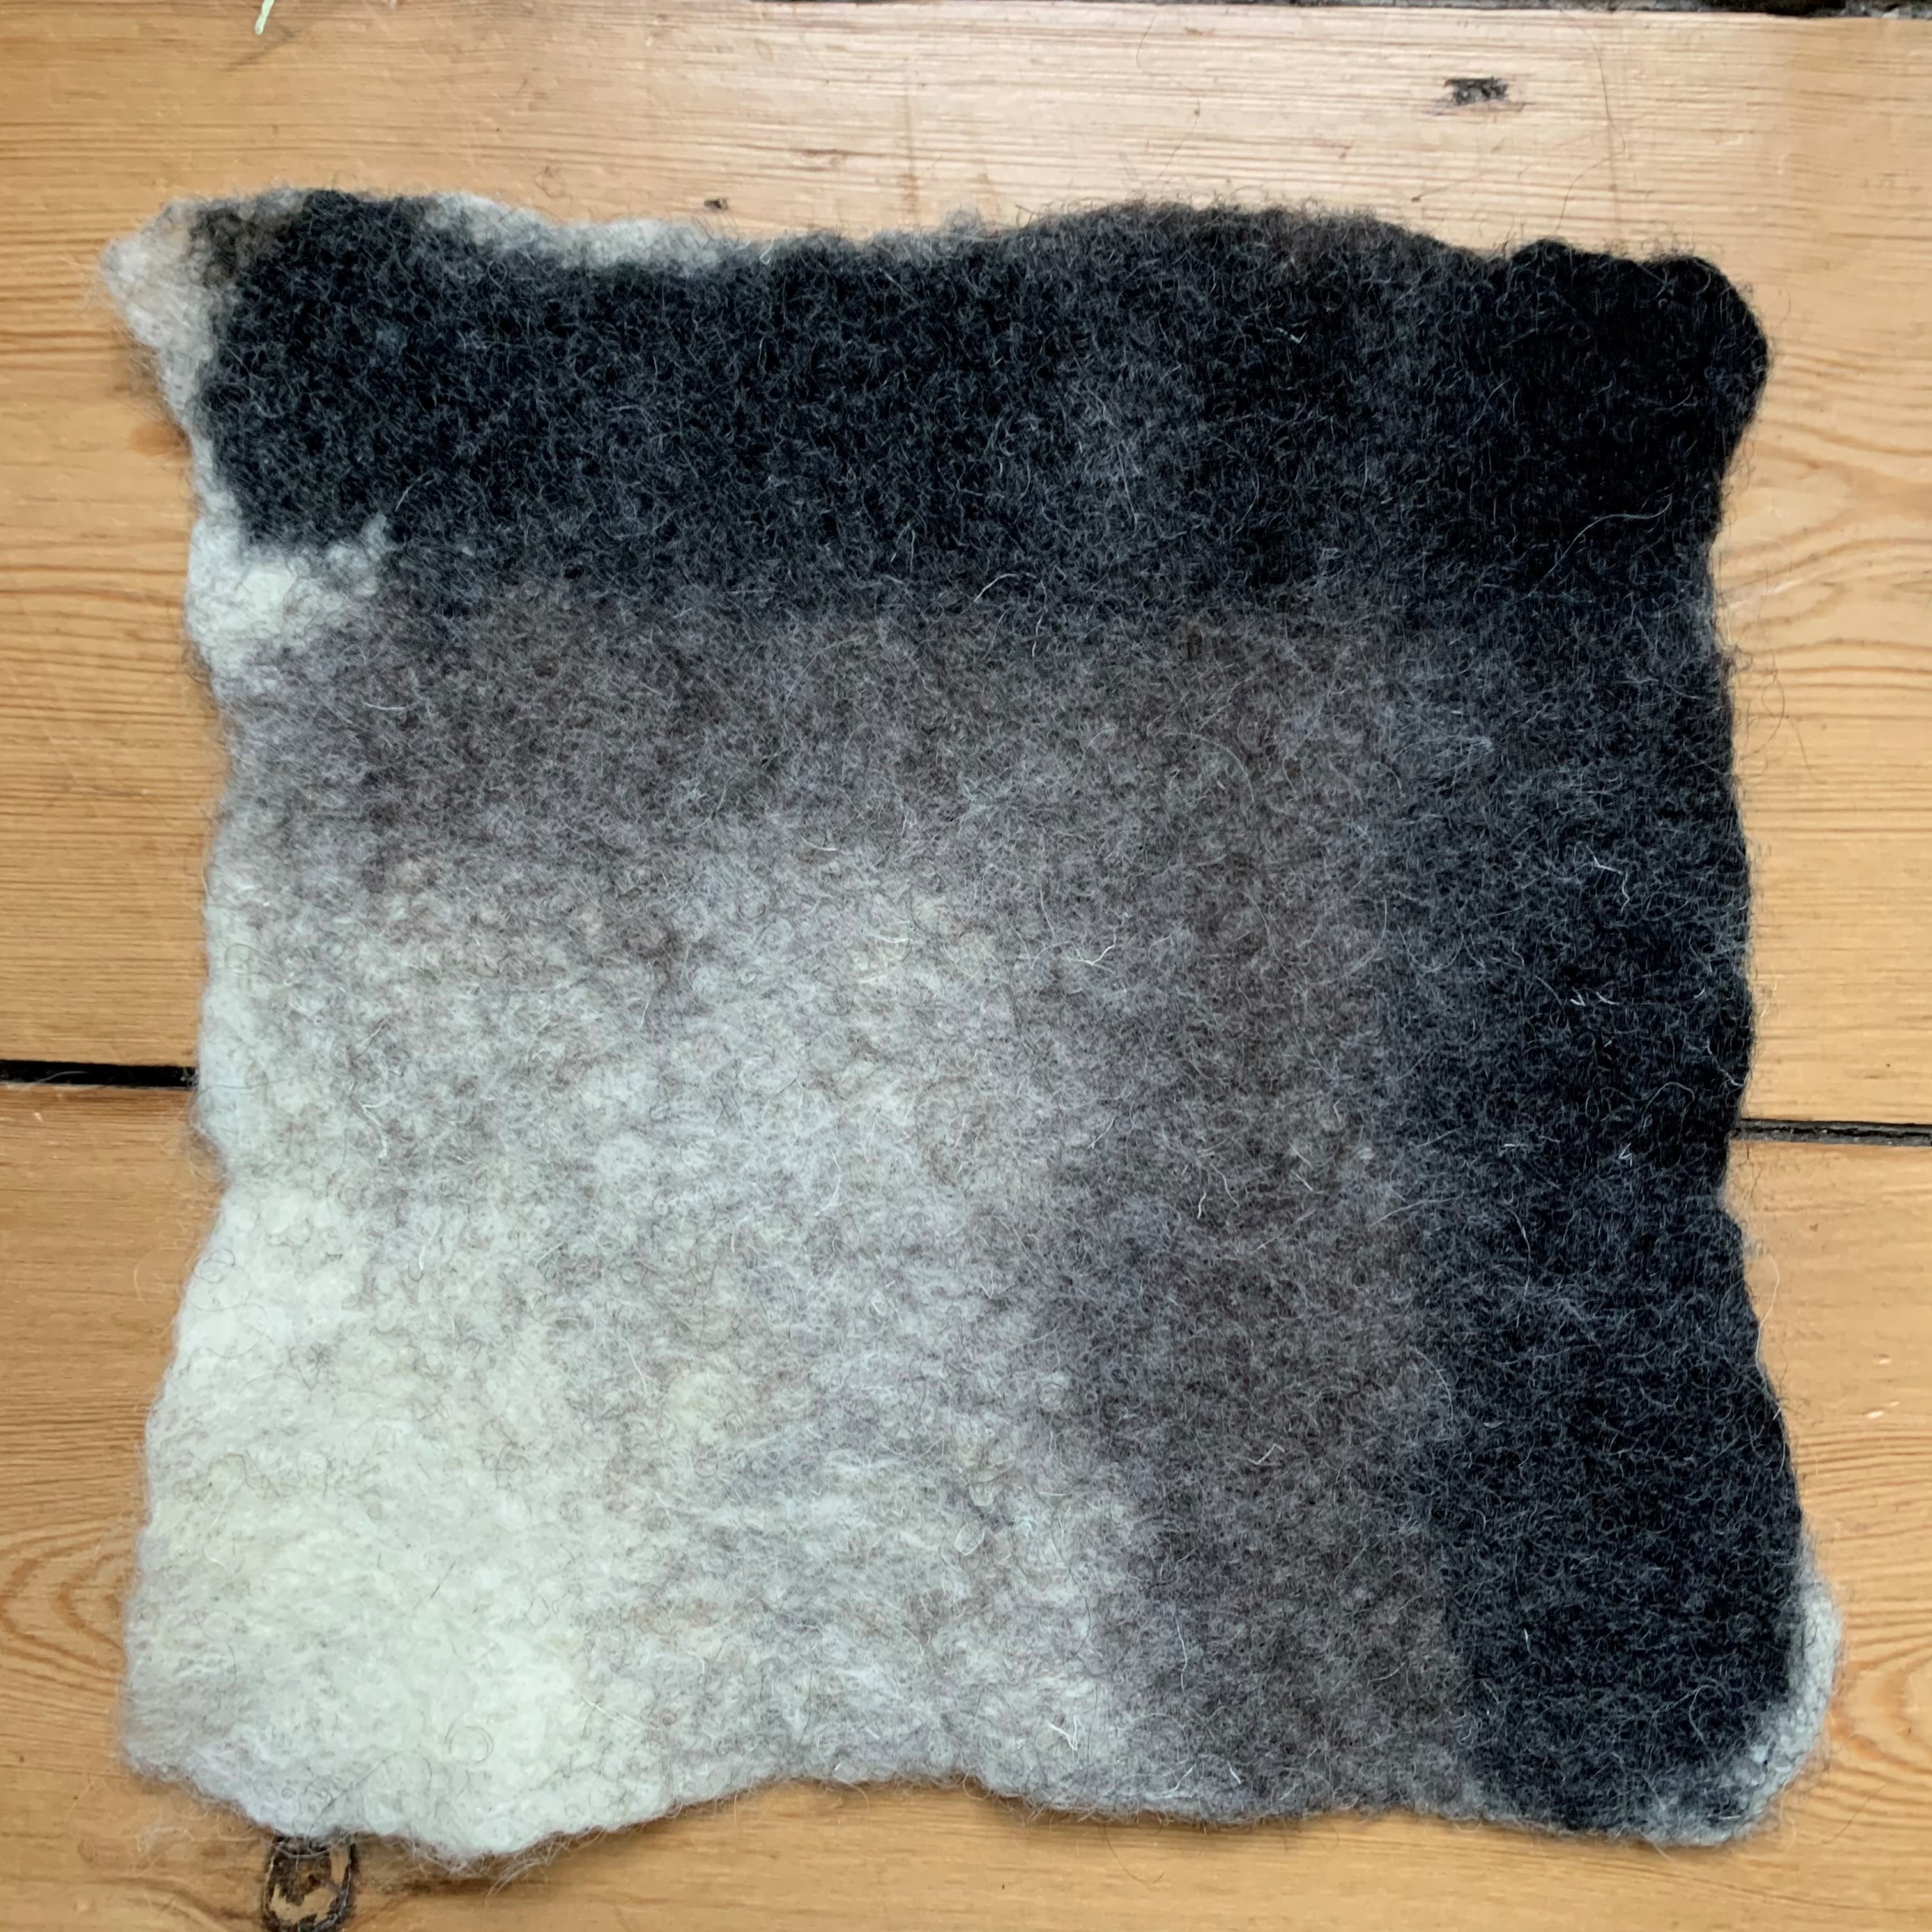
45 Drying, look how thin it is. There was some shrinkage as well as some migration at the edges.

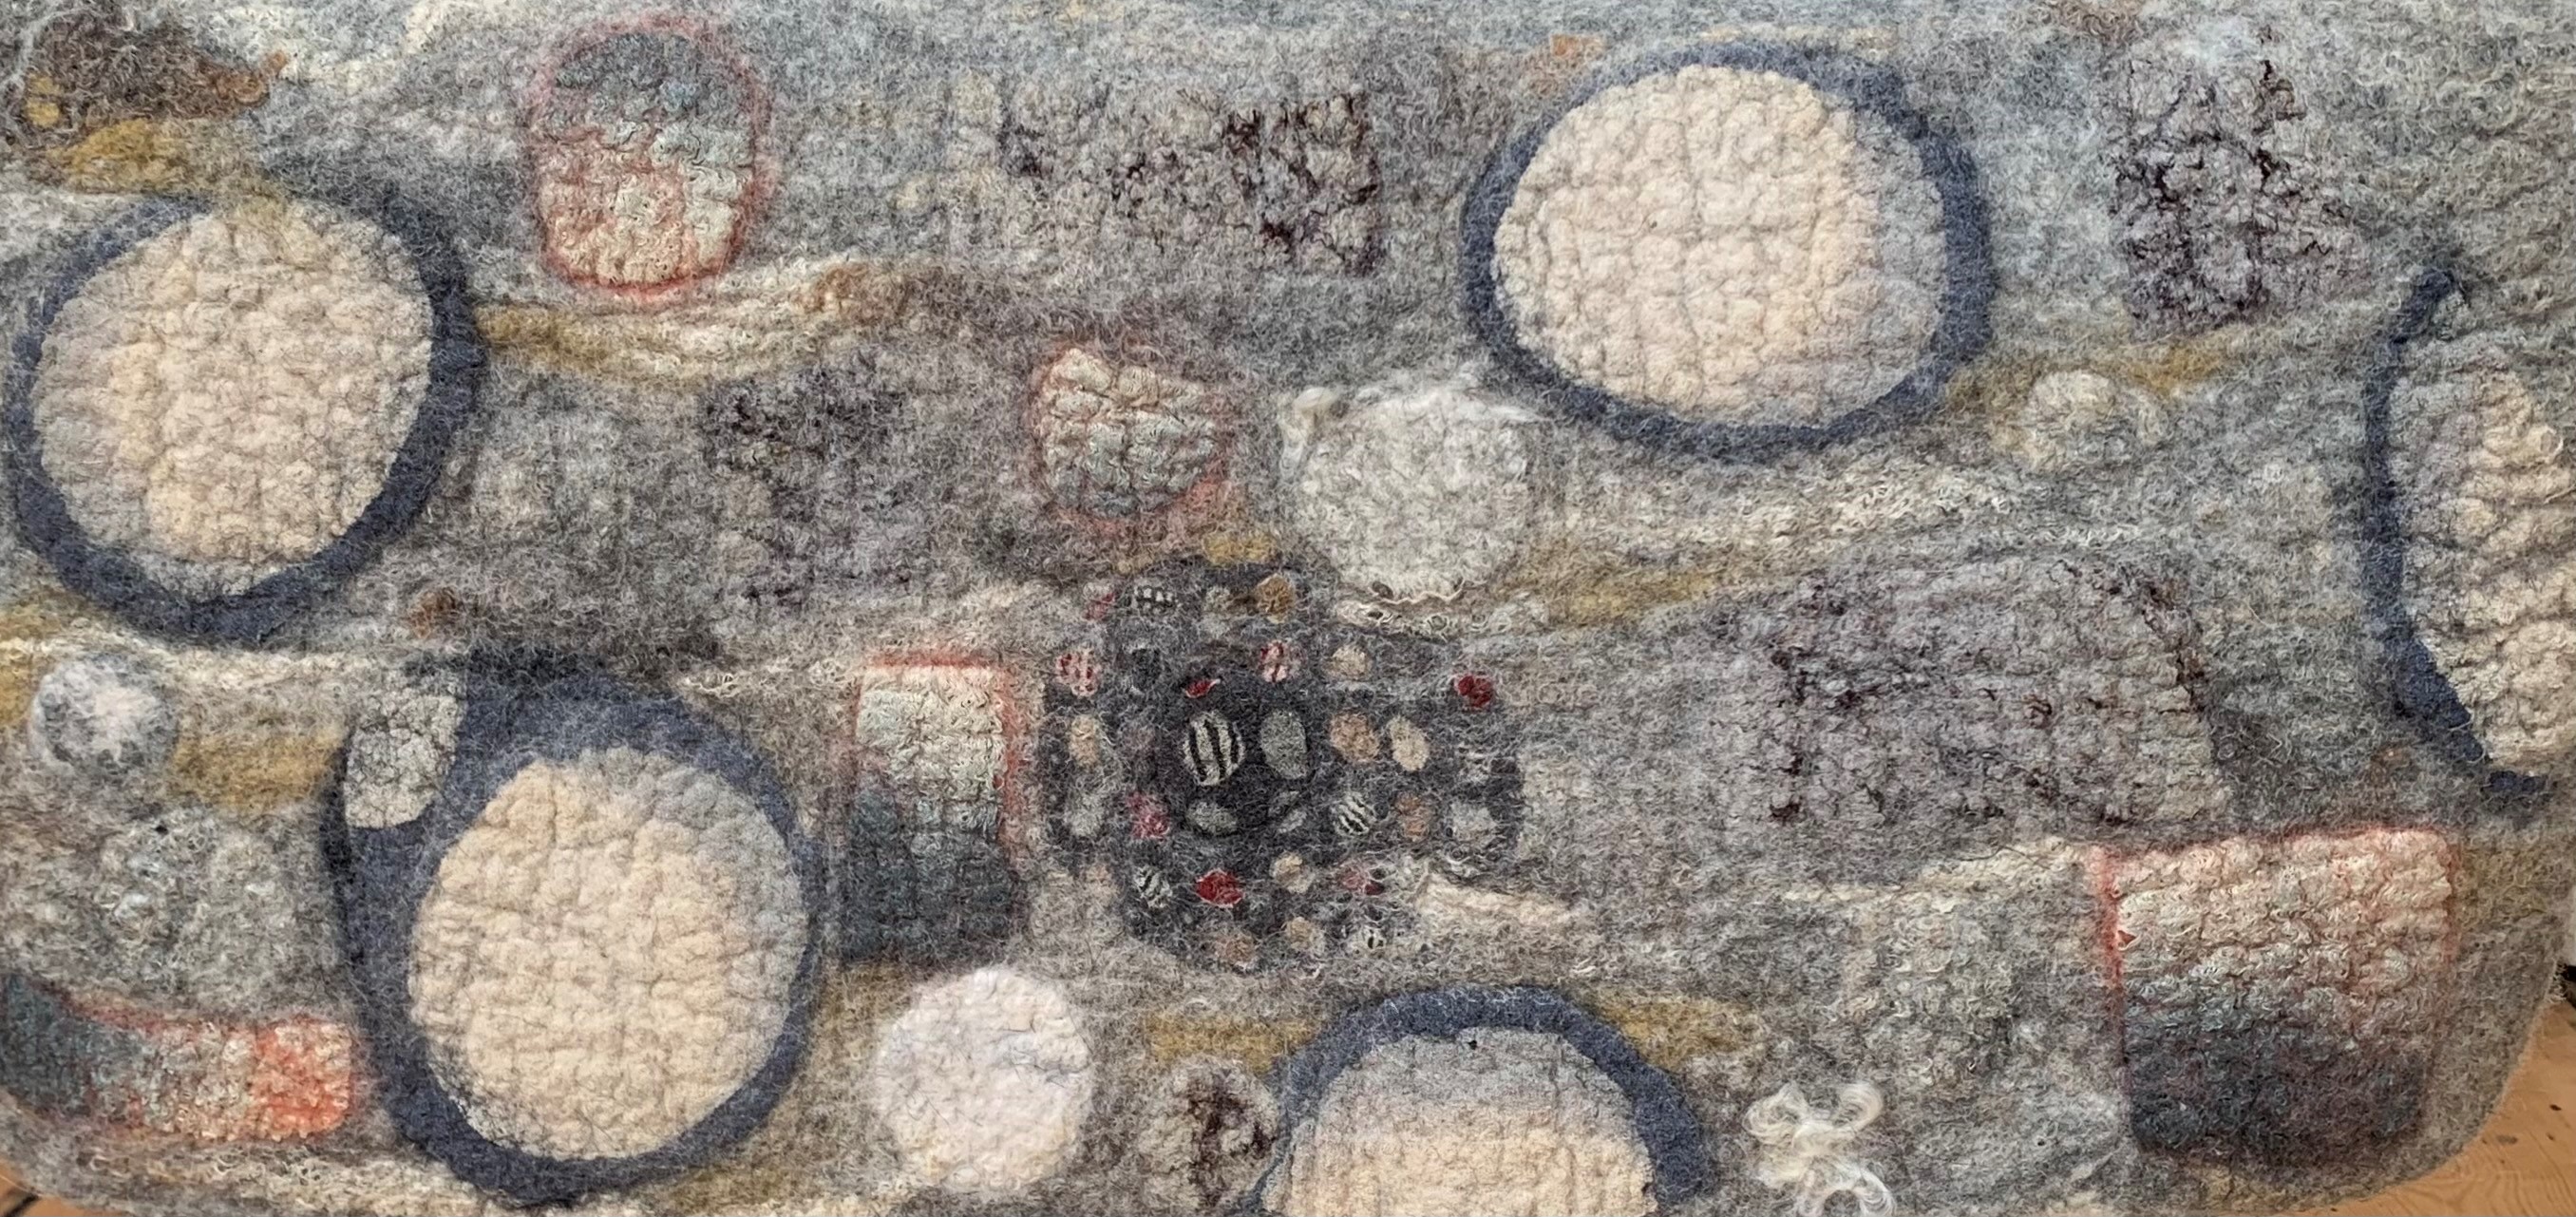
46 Yes, that is defiantly felt! with the lateral migration, it is very thin.

47 no longer the about 2.5inch square I started with.

47 it certainly isn’t an inch thick anymore!

Ann wanted to know “Did it shrink at all? When I have felted some of the “nonfelting” wool before it didn’t shrink. It did stick together but as you say, you could pull it apart. It would make good sheets of batting to go in a quilt

I don’t think it would be a good one for quilting it flattened too much. I think it may have shrunk but it also spread so I think it spread about an inch but it is also a lot thinner than it started. It did shrink if you consider it vertically even with the displacement into extra width.

This might be effective when mixed with some more enthusiastically felting sheep and then used for a super thin light summer scarf or shawl.  It may be a good base to build up from. I may have to do another sample to see how it reacts with different sheep and other fibre

it is softer in texture than the spun yarn. I could probably tear it apart if I really tugged a bit.  It is holding to the pinch test but again if I was more aggressive I could likely pull off the uppermost layer.  So a bit more aggressive felting might have helped its cohesiveness. Even with that stated it is at the stage that it is definitely felt and not fibre. It kind of reminds me of cookie dough that looked thick as it went in the oven but when cooked spread into a puddle

I think this would not be a top choice for most wet felting projects but some of its properties may be useful. I think this may be more of a fleece to look at for weaving. Its low elasticity would defiantly be a plus when making a warp!

PS just got my second covid shot yesterday and it may be bright and sunny out but I think it’s time for bed. this time I got the Phyzer version and it’s much nicer than the AZ (i feel like I was kicked in the arm by a small mule then climbed a large mountain.) if I can avoid getting covid it will all be worth it!! have fun felting and I will chat more when I wake up.


A Wet Felt Study Group

A Wet Felt Study Group

With workshops on hold, my guild decided we could run some study groups online. I will be leading a wet felt group. The plan is to felt a standard size square using different wools. https://www.ovwsg.com/events/event/2103-wet-felted-fibre-study-group/

We will compare how they felt at different stages, ease of felting and possible uses. We will all do Merino and Corriedale so we can compare how we all felt the same thing and then move on to different wools. We don’t all have to have the same wools. It would be nice to have and many different breeds as possible depending on what people already have on hand and or want to order. Some mixed fibre would be interesting too.


The group starts April 21st. We will meet on zoom once every 2 weeks and meet on a Discord server ( a place to share photos, chat and ask questions between zooming). Discord was chosen because some people don’t like Facebook or are not on Facebook. We didn’t want to exclude anyone.   Or if everyone is on Facebook we could make a private group there if that is what people want.

Everyone will get a worksheet to record information on so we are all gathering the same information to share.

I am based in Ottawa Canada, (GMT-4hrs.) I think that makes our Zoom meetings 9 am the next day in Sydney Australia. I hope you can join us and learn something while having some wet woolly fun.

Here is the link again.  https://www.ovwsg.com/events/event/2103-wet-felted-fibre-study-group/

Armature experiment 2; Adhesion and Rotation of the wool on wire

Armature experiment 2; Adhesion and Rotation of the wool on wire

While making samples for the study group investigation of wire for armatures I have noticed that there have been differences in getting the wool to adhere to the wire and sometimes this seems to be leading to rotational movement of the wool on the armature.

While the rotational movement of upper quads on many of the leg samples would be reduced if a pelvis/hips had been added. I was still interested in investigating further.  Since there may be a shape I would like to make that does not terminate with a hand or foot.  Maybe a tentacle or spout?

The underlying problem may be adhesion to the wire. When twisted there is a bit of improvement in wool adhesion over the single untwisted wire.  This could be improved by adding a pipe cleaner (now called “Chenille Stems” since there are fewer pipe smokers who need to clean their pipes) which allows the wool something to grip as it is wrapped.

Sample 1; Untwisted 6ga aluminum wire with pipe cleaner on the loop half of the sample and Floral tape on the second half.

1 Pipe Cleaner wrapped 6ga aluminum.

One of our study group had been instructed to add tape to specific areas of her armature. I had at first thought this may be for added strength or stiffness to that section. Then, wondered if it was for improved adhesion to use the wool to strengthen the section with tape. I did a sample of a single 6ga/4mm wire with pipe cleaner on half the length and floral tape on the other half to compare adhesion. I had the upper quads on the leg sample to use as a bare wire sample.

Floral tape is a strange thing to work with. It is dry and a bit wrinkly until you give it a gentle tug, then it turns sticky especially when wrapped over itself. I did discover the stickiness does not last forever or even very long. So, only wrap the section you will be working on.

2-4  Pipe cleaner and Floral tape over a single wire

In sample 1; 6ga aluminum ½ Pipe Cleaner (loop end) and ½ floral tape.

Rotation is present, greater in the pipe cleaner section than in the floral tape.

Flexion test;     – both sections will make a sharp bend but are vary stiff due to the gauge.

I am also curious to see if with a weaker gauge wire if a duct tape or gorilla tape may give restrictions to bending in the section where applied. I may try a sample with the floral tape over the top since I suspect the adhesion will not be enhanced with duct or similar tapes.

5 Duct Tape and Gorilla tape. (Gorilla tape is an extra sticky extra strong version of Duct tape.)

I sampled with 18ga aluminum so it would show flexibility more than the 6ga I had been using. Note that the aluminum I have presently at this gauge is intended as picture wire and it is not coated. If you are selecting aluminum, try to perches the coated wire since it will not leave dirty marks on your fingers.

6-7 Residue from uncoated aluminum and what was on the empty plate (in case you were curious).

The two wire samples were about 10 inches long, which I divided into approximately 3rds. 2/3rds I twisted together and one-third was left single.  I put a small open loop on the single end and the fold on the other end created a longer loop. I wrapped as tightly as I could the middle section with gorilla tape. This covered about half of both single and double twisted 18ga wire.

8-9 bare wire and gorilla tape and sample covered in wool for flexibility test

In sample 2; 18ga aluminum ½ single/ ½ Doubled with center 1/3rd wrapped in Gorilla tape.

Rotation is present and seems equal in all sections.

Flexion test;       –  single could make a sharp bend

                            –  Taped section could make a curved bend

                            –  Doubled could make a sharp bend


For sample 3, I used 18ga aluminum as before,  ½ single/ ½ Doubled with center 1/3rd wrapped in Gorilla tape. This time I added floral tape over all sections in hopes to increase adhesion

10-11 Bare-wire, wire with tape added (about 6 wraps)

12 Test bending with tape to see how the tape was resisting making a sharp bend.

13 covering wire and tape with Floral tape with the hopes of increasing adhesion and decreasing the rotational movement of the wool around the wire.


In sample 3; 18ga aluminum ½ single/ ½ Doubled with center 1/3rd wrapped in Gorilla tape. Floral tape over all sections in hopes to increase adhesion.

Rotation is minimal to not noticed across all sections.

Flexion test;        – single could make a sharp bend

                             – Taped section could make a curved bend

                             – Doubled could make a sharp bend


14 Sample 3 with wool, checking flexibility in all test sections.

The use of tape may be helpful in spots where you want to allow a curve but not a sharp bend. The amount of tape (number of wraps) will change the amount of flexion in the wire. If you want to use tape to restrict a sharp bend, more sampling may be required. While the gorilla tape adhered to the wire and itself, the wool did not adhere well to it without the addition of the floral tape. The use of the two tapes together may have merit in a particular application.


The Rotational movement component may not be a problem when working on a large or thick figure or object but may be more problematic on fine legs or other skinny appendages. In this case, the assist of floral wire may be very helpful.  Another future investigation for thin appendages would be to investigate the use of waxes to assist adhesion.  Wax has also been used to create surface smoothing as seen in some felters’ bird legs. Although that may partly get beyond the parameters of wire, it may be well worth further investigation. unfortunately, I will leave that for another day.

PS; while Glenn was spellchecking (if there are more spelling errors blame me I think I have broken his spelling), he suggested I try the sticky cloth medical tape it may give an improved adhesion over the bare wire. I suspect it would likely have a bit more flexibility than gorilla tape and be a bit more expensive than floral wire. (Drat now I have to go look and see if we have any medical tape!!)


Investigation of 6.5mm and 7mm aluminum wire (the heavy stuff)

Investigation of 6.5mm and 7mm aluminum wire (the heavy stuff)

I have been working on more samples for the study group, I hoped you might like to see some of my investigation of the heaviest gauge of aluminum wire (6ga/7mm) we were looking at. It has come to my attention that it is also Palm Sunday. (I am glad I had included Palms in my samples!)

1 Part of the 7mm samples

I know most of us will not be making armatures that would require this gauge, but if you are wanting to make something quite large or you need it to have very strong legs this may be an option for you.

For both the 6.5mm and 7mm wire, I found it helped to wrap the foot loop wire with a layer of wool before I started to build up the foot itself.

The twisting of the 7mm wire required anchoring with the large welding pliers. (These were a fabulous find at Princess Auto. Yes, in the welding section. Did they not know they are well suited to make ninety-degree corners in armatures so should have been in the felt section? Oh right they don’t have a felt section yet.)

Here are photos of the 6.5mm wire is being wrapped to form the support to attach the rest of the wool for the foot.

This slideshow requires JavaScript.

4-9 foot development leads to a leg.

With the 6.5mm I used the wire untwisted with no augmentation or secondary wire. While I did not find this particularly challenging I do see that some felters may find the lack of grip on the wire a bit annoying. While the gastroc (calves) at this size were very stable and quite firmly felted the quads did have the ability to rotate slightly. This I did find annoying. I suspect this would not be as much of an issue if this appendage had a pelvis. So if you are making a shape that ends in a cylinder shape you may want to investigate other options than a plain wire.

I would investigate Sara’s wax products to give a bit more stickiness to the wire or try tacky craft glue. Other possibilities to investigate would be Pipe cleaners possibly paired with floral tape if the pipe cleaner was not gripping to the wire itself. I have not investigated the life expectancy of floral tape so I can’t guarantee its longevity.

For the 7mm sample, instead of the open foot loop, I folded back the lower section to make it doubled to the patella (knee). This made me thread the short section of roving I was working with through the foot loop to cover the wire. It was a bit fiddly but was worth it to have a base from which to build the foot.

The lower leg to knee was very easy to wrap. Remember when you are adding the wool in thin layers to make sure that when you start to get close to the end of the fibre spread it out so it’s quite thin and work back over what you have already applied. When you get to the end of the fibre keep turning the appendage as if you were adding more fibre while rubbing and smoothing the fibre you had just laid down. If your application is firm and built up in thin layers you will have very little needle felting needed to get this under layer to stick to itself. The preparation of the fibre will also make a difference, stripped batts work better than top but top will work.  it’s just a bit harder for this particular application.

When I had completed the appendage, I found that there was even greater rotation in the larger gauge wire. This may have been due to the under layer being a bit looser than I could have wrapped it. I did a second sample and yes the quad still had a bit of rotation but not as much as the first sample. So I suspect part of the rotation is a looser under layer.  I have made a sample with a pipe cleaner wrapped around half of the appendage and will see if that reduces rotation but I will get back to that one later.

12-13 next sample to address the problem in quad movement

Leaving the legs for a moment, I went on to the next sample, which was a hand with wool. This I consulted the bare wire samples I had taken for each gauge. After consideration, I started with the 20ga hardware wire (steel) from Dollarama for the fingers and 6ga for the palm and forearm. Unfortunately, that sample made like the hand from the Adams family and the thing crawled off. (I am sure IT will return the Thing shortly).

14-15 consulting the wire samples

To make the fingers I used Sara’s “Digit widget”. I have previously used my tapered mettle seed planting measuring guide for little fingers on my mice and the mettle ruler for the fingers on the Mer’s.

My second ample was 20ga aluminum from AliExpress for the fingers and 6ga for the palm and forearm.

This slideshow requires JavaScript.

At this point, the weather outside had stopped raining and we had a break. During which I rushed (ok, slow shuffle) outside to attend to the overflow for the rain barrel that had come adrift as well as fill the bird feeders. (I got scolded by a chickadee as soon as I stepped out of the door!!!) . I got three tomato pots and one tree moved from the front garden, where the pots over winter, to the driveway.  Then my back said, Are you nuts? Did you just move a potted poplar tree? Well, we are not moving the next one!! We are not doing anything that requires sitting or standing for at least the next day!!! If we don’t decide to yell at you longer so I crawled back into the house took off my boots, by this point that was a big accomplishment and crawled into bed with a hand, one needle and a small baggie of wool. So, I apologize for not grabbing the camera, so it would be in reach to document the finger creating. Thus there is a bit of a jump in photos while I am adding wool to the fingers, palm and then to the wrist.

This slideshow requires JavaScript.

19-21 (the Palms of Sunday) the wrist still needs a bit more work, but the palm is close

I am not quite happy with the hand yet. I think I would be having an easier time with scale if I had been building from the arm down as I usually do with full figure sculptures. This way I am trying to guess the forearm thickness to match the hand to. I found the aluminum is a bit soft but may be able to stiffen it a bit more by more felting. There is enough grip strength to hold the felting pen without dropping it. But I would like it to be just a bit stiffer. Therefore, I may investigate shifting to a stronger type of wire or a heavier gauge of aluminum since the fingers are still quite thin at 20ga aluminum. I will find the 18ga aluminum and try that next.

We had a quick trip out to Rona to look for pot saucers (no luck) and while there, I checked out their wire selection. I picked up a brass and a copper as well as another un-coated aluminum. The new wire seems to be hiding in the car may be under the big bag of potting dirt Glenn put in the back. Once I find them, I will make samples and add them to the collection.

The 6.5 and 7mm would be a gauge to investigate if you were building a 3D picture that needed a supportive tree trunk or branch something would be hung from. You will need reasonably strong hands to work with it especially if you are working with it doubled. If you have a desperate need, you may consider a bench vice and substantial pliers to assist you in the wire twisting (no wimpy pliers for this gauge!). Glenn has a cool blacksmithing tool called a bending fork but I do not think I want to stick the aluminum in the forge! He also has a couple of jigs for bending “S” hooks which might be fun to play with. There is also a large leg vice sitting by the “small” anvil.  I will let you know if I sneak out and play with his tools.

On a different topic, I just heard that “littlelaurelfibre” on Instagram, has tried to heat the bee-combs from Princess Auto that I was telling you about in a previous blog  https://feltingandfiberstudio.com/2019/10/15/a-cheap-alternative-to-wool-combs/ .  instead of an Oven, as was used in making plastic armour, she used a heat gun. (she has a great photo of the before and after on Instagram https://www.instagram.com/p/CM5ToLnJw37/?igshid=duidf6r2yckg&fbclid=IwAR1Qj3-1gKu5GURshhce-DGhGl0F5ZUBAw7kNqByQZXYJ0E0RymCKhXdDG8 . The Heat gun did the trick perfectly! She was able to adjust the angle from the handle to the tines so it would better suit our needs (instead of the bees).  Now I will have to send Glenn to the “room of tools” in the basement and see if he can find the heat gun. I was sure we had one!

Have fun and keep felting!!


Online Learning: the new and the unexpected

Online Learning: the new and the unexpected

The last time I posted here (in January) I described my plan to take various online felting classes. With all my sales and exhibitions cancelled or on hold I thought this would be a good way to keep me focused and motivated during our 3rd pandemic lockdown. Here’s the link in case you want to look back to January’s post.

https://feltingandfiberstudio.com/2021/01/21/finding-focus/

This time I’m talking about my online learning since then, including how it has led me in some unexpected directions.

I was part-way through Teri Berry’s bag making class, which was great. I made my third bag, a backpack, and am very pleased with it. I’d definitely recommend Teri’s class. The instructions were clear and comprehensive and Teri was very responsive to my many questions, thoughts and comments. I learned a lot about bag making techniques, which is exactly what I was looking for.

Corriedale Backpack with Canvas Straps

Because two of the bags I made are large, relatively thick, and have to be fulled very hard, I admit bag-making was rather harder work than I’d anticipated. I rent a studio in an old industrial building that is largely unheated so maybe mid-winter isn’t the best time to be working so much heavy, cold, wet wool, but it’s a minor point. I had to use plastic gloves for the first time as my hands became so shredded and I often went home with sleeves wet to the armpit!

I’d planned to take 3 classes over January to March but was irresistibly drawn to a 4th: a 2-session live international felt-along by Aniko Boros (Baribon.Hu) learning to make her beautiful felted tulip pendant with pebble inclusions. Having signed up I realised it was going to be difficult to find the colourful 14 micron merino wool I needed. I only had white. I’ve never dyed my own wool before but I thought, why not have a go?

I already had some acid dyes so I started off with some 21 micron merino before going on to the finer and more expensive 14 micron. Then I tried silk hankies, Corriedale tops, mohair tops, silk fabric, alpaca & nylon …. nothing was safe. I had a blast. I had no idea how much fun dying would be.

Then it snowed and I thought ‘ooh, I could try snow dying’. That turned out to be great fun too. On the right are just a few of the snow dyed fabrics.

I had several colour choices of dyed 14 micron merino by the time Aniko’s workshop came around. The workshop itself was really interesting. A clear and detailed PDF was sent in advance and turned out to be very helpful on the first day when the sound or picture dropped out occasionally. It meant I could see what I needed to do next so was able to keep up. I’m pleased with my pendant (although I still have to add a fastener) including how the dyed wool worked, and feel I’ve learned techniques I will be able to use to make my own designs. Also, it led me into the entirely unexpected joy of dyeing.

Hand dyed 14 micron merino pendant with pebbles: Aniko Boros’ workshop

In the meantime I’d started Fiona Duthie’s online class Ink + Cloth. We practiced adding ink at various stages of feltmaking with loads of potential for using these techniques in future projects.

Above are samples of adding dye / ink before felting (on silk fabric) and on prefelt

These are samples of ink added in different ways to finished nuno felt with cotton and two types of silk. I’d found an image in the V&A museum online catalogue (a fantastic resource) of an early 20th century furnishing fabric with this style of lollipop trees that I was thinking of using for the 1st quarter challenge …but that’s a story for another time.

At the end of this I decided to combine various things I’d learned: to dye my own Corriedale wool tops for a bag and maybe to decorate it with inked or dyed pieces. This is still work in progress as I am not completely happy with it. I decided to let it dry and have a think before doing the last bit of fulling. After I’d laid out the wool I dithered over whether to add silk and prefelt pieces or not as I quite liked the wool as it was. At the last minute I added all sorts of bits and pieces without properly thinking through the design. I fear it betrays its history. A colleague who saw me rinsing it at the studio casually commented it was very ‘hippie, trippy summer-of-love’ which is absolutely not the look I was going for! I will come back to it soon. I included the strap in the photo to give an idea of what it will look like finished.

Now I’m part way through another class with Fiona Duthie: Fibre + Paper. It’s a fascinating process of combining specialist paper with wool. We started by making lots of samples: paper and felt, paper relief, extreme paper relief and paper with prefelt.

Above are samples showing different amounts of paper felted into 21 micron merino wool and bottom right combines prefelt and paper. They feel lovely and there seems to be so much potential to use paper with felt in different ways.

This week I made a vessel with paper embedded into the surface. It’s not perfect: I got a bit over-confident near the end and tore some of the surface (you can just see it bottom left, between the two ribs). I’ve been interested in shell shapes for a couple of years so I shall enjoy making more 3D paper & felt shell-inspired objects.

Paper felt shell-inspired vessel

In the coming week I will be trying out adding colour and surface designs with ink and paint plus making samples with some different papers. Fiona’s classes have been really enjoyable with excellent PDFs, photos and videos and lots of class interaction.

All the online classes I’ve taken have been great fun and very inspiring. They have given me lots of new skills and techniques that I will be able to use in my work. And they have definitely achieved my other objective: they have been really helpful in keeping me learning, focussed and motivated during what could otherwise have been quite a bleak time.

Finding Focus

Finding Focus

It’s the new year and here we are in England with what I’m calling the ‘new abnormal’: all non-essential shops closed; travel only if necessary; people working from home wherever possible and, for many of us, very limited direct contact with people outside our household.

If you’d asked me a year ago if I’d have liked a long stretch of time with few commitments that I could dedicate to felt-making, I’d have jumped at the chance.  Be careful what you wish for. 

Towards the end of 2020 I had several events to aim for so was able to focus on making things for those. Here are a few of my favourites: a succulent holder, nuno felt vase (with glass interior) and needle felted mince pie.

I have plenty of sales and exhibitions booked throughout 2021 but no way of knowing whether and when they will take place. I have notebooks full of ideas but feel I need to find some focus to direct my efforts and get the creative energy flowing. 

I really enjoy learning new skills and developing my felt-making in different directions. So, I decided at the turn of the year to sign up for some online workshops. I’m mostly self-taught as a felt maker but now I’m asking myself ‘why do I want to reinvent so many wheels?’.  I’ve long wanted to take Fiona Duthie’s workshop ‘Fibre + Paper’ so when I saw she was running the workshop in March 2021, I eagerly signed up.  I then find myself tapping my toes impatiently and thinking ‘I don’t want to wait ‘till March!’.

Fortunately, in February Fiona is offering another class I’d like to take ‘Ink on Cloth’.  Yep, I’m in for that too.  Still the toe-tapping: ‘what about January?’. 

The Felting and Fiber Studio to the rescue: Teri Berry was offering her bag making class starting 7 January.  Perfect! I’m in for another class.  Well, you can’t say I lack enthusiasm!

While I’m waiting for the class to begin (yep, still with the toe-tapping) I decide now is the time to retire an old friend.  One of the first things I felted for myself about 9 years ago is an iPad cover. I carry my iPad mini with me everywhere and the cover is worn out.  It has done a great job – it even outlasted the first iPad – but the corners have rubbed away and it’s looking very shabby.

I may have mentioned before (more than once) that I’m an avid charity / thrift / op shop enthusiast and have built up an impressive collection of second-hand fabric, mostly scarves and mostly silk. I have a dig around and fish out a very fine small silk chiffon scarf with leaf prints. Left – front, right – back, middle – action shot! I’ve carefully controlled the shrinkage so it fits snugly: it slides out when I want it to and not when I don’t.

I enjoyed working with the silk so decide to make some more samples.  One issue with fabric of unknown origin (and often even with fabric of know origin) is that you can’t be sure how it will felt. Here’s the ‘before’ and ‘after’ of each sample.

Some kind of velvet devore?

A woven cotton or linen?

A silk and cotton mix – I assume the background is silk and the slub lines are cotton

Definitely 100% silk (it still had the label in)

All are interesting. I chose a similar wool colour to the background silk colour as I want to focus on texture and print.  I particularly like the leaf print one and will definitely use that at some point. 

Next, my patience (!) has been rewarded and the bag class is starting.  First is an animal theme phone or glasses case.  I consult the interweb for animals that have big tongues and decide on a gecko.  I’m rather fond of geckos, though I’m not sure I’ve ever met one. 

I’m pleased with the result, although admit it looks rather more like a frog or an alien.  I was going to trim the tongue but decided to leave it as it is. I’ve taken to calling it my alien frog bag.  I made it to fit my phone but it’s actually a bit big so I’ve now added a thin green leather strap with some Chicago screws. Next time I’m invited to a ‘BYO alien frog bag’ event, I will be all prepared. 

On to the next, bigger bag, with integrated straps and internal pockets.  I have a fair quantity of nice natural grey Corriedale top and decide I’ll use that for the outside.  I’m on a roll with recycling the silk scarves so select a few with similar colours.  I’m not sure grey will be the best background so, in an unusual fit of sensibleness, decide to make some samples. 

I prefer the lighter colour behind them. The bag will be fulled very hard and I think I may completely lose the silk.  Little lightbulb moment: why not prefelt the silks with a light colour wool to help preserve some of their colour?

I prefelted some pieces of silk.  I even got a bit jazzy with the one with large spots, with fawn Corriedale and charcoal Merino.

On the left: the bag laid out with (nearly) all the surface decoration ready for wetting down. I did move things around a little afterwards but forgot to take a photo. On the right: the flap detail of the final bag

Finished bag

It’s not perfect (eg I put 2 pockets inside but they are on the front wall of the bag instead of the back and it’s a bit wider than I intended) but I do like it and will enjoy using it.

So, what next? The third bag is a backpack.  I’m wrestling with myself over whether to use wool I already have or wait for some I’ve ordered to arrive.  I have a studio full of wool but want to use a medium or coarse wool for durability and don’t have much of any colour or breed in sufficient quantity.  I made a sample yesterday of potential wool candidates but am a bit underwhelmed. There’s a black dyed Perendale batt, grey/brown Finnish top, light grey Swaledale top and natural white batt (can’t remember the breed) but I’d have to mix them and that’s a lot to have going on.

I decided too to make a paper template of the finished bag to help me work out the resist and stop making bags bigger than I intend. Ha, ha, I do hope I don’t start calling this my toilet seat backpack.  And that brings me right up to date.

All being well, I will have the backpack done to show you in my next blog spot in March, along with some makes from the Ink on Cloth workshop.

I’m enjoying the learning and Teri’s class is excellent.  The instructions are clear and detailed. She has been positive and encouraging and very quick and generous in responding to my extensive questions about clasps, straps, bag design, wool breeds….

Are you struggling to find focus, or maybe finding new ways to learn and different things to try?  I hope you’re able to do a little fibre work and I wish everyone a peaceful, happy and creative 2021.

Reflections and New Beginnings

Reflections and New Beginnings

Here we are in January 2021, with Covid vaccines being approved and hope for brighter, more normal days just over the horizon. January is traditionally a month for reflection and making plans for the future. This year more than ever and I have an additional reason to be focussed on the year ahead….. my partner has accepted a job offer from Aukland University, so we will be moving to New Zealand in March / April.

Part of me thinks, the middle of a pandemic has to be the worst time to make such a drastic move but then, is there ever a good time? At least New Zealand is one of the few countries in the world who have a managed to control the virus on their shores and, consequently, are leading a relatively normal existence.

We made the decision to move in November and have been decluttering ever since, I am horrified by how much STUFF we have accumulated in our 10 years in this house. In many ways it has been a lovely trip down memory lane, finding trinkets and photos that have languished in a cupboard or box for 10, 20, even 30+ years.

While my felt samples aren’t quite that old (the oldest might be around 10 years old) they did bring back many happy memories as I was sorting through them, trying to decide which ones to keep.

Some of them document some interesting ideas, techniques and experiments that I thought might be of interest to you too….

Colour blending techniques:

When we felt, we are encouraging the fibres to mix and mingle, so when we apply layers of wool in different colours, the colours also migrate and mix, a little bit like mixing paint. This first technique is something I try to get my bag class students to incorporate as it makes for an easy way to achieve subtle tint / tone graduation on the outside of the bag:

The front with colours yellow through burnt orange running left to right
The reverse side with black (tone) and white (tint)

The more this piece is fulled the greater the effect the black and white fibres will have on the colours on the front. By adding a mid-grey between the black and white you can achieve a more subtle change of tone to the coloured side of the felt.

Mixing different colours is also possible and this is so much fun for anyone interested in colour-theory. For this next sample I laid out 2 fine layers of different colours of merino over a green base. Up close (if you click on the image it should enlarge), you can still see the distinct colours in a random marbled pattern but from a distance the colours blend and because I have used colours on the opposite side of the colour wheel, the resulting blends are dulling the top colours and edging them towards greys and browns.

Devore

This sample was made by nuno-felting some hand-dyed cotton muslin to merino wool. Then painting on devore paste, leaving it work its magic for a few minutes before washing the paste out. The paste dissolves / etches away the plant-based fibre (cotton) but leaves the animal fibres (wool) in tact, the grey wool can be seen where the violet / red cotton has been removed.

Layering different materials / fibres

This next sample is one of my favourites although the technique is nothing particularly ground-breaking, it is strips of hand-dyed prefelt, laid over hand dyed habouti silk on a merino base.

This is the back, I really like the way the prefelts on the front have created a subtle, embossed effect on the back.

Adding locks for texture

When most of us think of adding locks to a piece, it is to add lots of fluffy texture with the locks only attached to the base felt at their base but on a workshop I took with Heidi Grebb we explored laying out locks much as you would a final layer of tops….

The bolero jacket that resulted from the “lock texture” samples.

Fake tweed

By laying different coloured yarns (ideally different weights too), it is possible to create felt that looks a lot like tweed. If you use yarns with a high wool content, they will felt into the wool base on their own. If using yarns with a higher synthetic content you will need to add a very fine layer of wool fibre over the top to help anchor the yarns into place.

Inclusions

This last sample is my favourite, perhaps I should stop calling it a sample and think of it as a mini work of art instead… It is three, silk cocoons felted between several layers of Bergschaff.

I hope you found these samples / techniques interesting, if you have any questions about them, please ask!

As part of my mammoth clear-out I have a couple of items listed on Ebay that UK residents might be interested in:

A vintage, fedora / trilby style wooden hat block: https://www.ebay.co.uk/itm/333849774234

whole Wensleydale fleece, I am gutted to be leaving this behind but I know NZ border biosecurity will incinerate it on sight and that would be even more heart-breaking: https://www.ebay.co.uk/itm/333851163732

Felt Samples Notebook

Felt Samples Notebook

Recently, Jan posted about the documentation being done in her guild about weaving. When I commented that I had created a felt sample notebook while writing the book The Complete Photo Guide to Felting, Jan asked that I share the notebook. So here it is!

I want to thank all the people and companies that donated to this effort as I had asked for samples of different breeds of wool, other fiber that felts and different embellishments. That’s how I got a wider selection of fiber. For each sample, I documented the type of fiber, the type of processing (batt, roving, raw wool etc.), how long it took to felt, the amount of shrinkage and any comments about the felt that I thought were good to remember. Each sample started with the same size layout and were all felted in the same way. I guess I should have documented exactly what I did but this was in 2011 and now I can’t remember exactly how they were felted or fulled.

I put all the samples on black construction paper with a small piece of double stick tape and a label beside each piece. These were put into plastic sleeves and stored in a large loose leaf notebook. You can easily slip the pages out of the sleeve to be able to touch the samples and look more closely. Most of the felt samples (without embellishments) are the natural color of the fiber. You can click on any of the photos to get a closer look and be able to read my documentation about each fiber.

Pelsull/C1 Blend and Dorset

Blue Faced Leicester and Corriedale

Falkland and Finn

Gotland and Icelandic

Merino and Norwegian C1

Pelsull and Polwarth

Romney and Wensleydale

Alpaca and Angora Goat

Angora Rabbit (smaller sample due to limited amount of fiber) and Bison Down

Camel and Cashmere

Llama and Yak Down

The second part of the notebook is about embellishments. I used a merino wool and applied the embellishments to the surface. I didn’t do much documentation on these except to state what the embellishment fiber is.

Silk Top and Silk Cap

Silk Throwsters Waste and Silk Hankie

Silk Carrier Rods and Silk Noil

Rainbow Nylon and Angelina Fiber

Fake Cashmere and Tencel (viscose)

Banana Fiber and Sea Cell Fiber

Flax and Wool Nepps

Wool Slubs and Wool Locks (flat on surface)

Wool Locks (ends loose) and Pre Yarn

Specialty/Novelty Yarns and Cotton Fiber

Soy Bean Fiber

I have always been an advocate of doing samples before starting a project. I think it really saves effort, time and money so that you have an idea how something will work before doing a larger project. Do you make samples? Do you document the results? We’d love for you to share your sample process over on the forum.

If you have any questions about the samples above or about using a specific fiber, feel free to ask in the comments below.


%d bloggers like this: