Browsed by
Category: Finishing/Framing

Felted Knitting Bag

Felted Knitting Bag

I was asking people on face book what they make to sell in warm weather. One suggestion was a knitting bag.

I used the flat resist method and cut the handle and flap form the top of the resist.

yarn bag

After cutting the handle and flap I blew up a balloon inside it and wrapped it up and let it bounce around the dryer for a while.

yarn bag ready for a tumble

Next I cut the J. Thinking of the bag like a portable knitting bowl. Then another tumble.

yarn bowl J cut yarn bowl another tumble

I wanted to bind the edge. I tried leather but that wouldn’t work at all. Then I tried some bias tape. That worked better but not great. It was ugly but part of that is the bad sewing too.

yarn bowl binding attempt

I took that off and used a blanket stitch. that worked much better.

yarn bowl  finnished

I don’t like the way the jay effects the shape or the way it hangs open. Not bad for a first design. I will make some changes in the next one. I will make the handle longer so I have a bigger flap. I will make a smaller slit for the yarn to come out of the bag.  I realised with the bag having a flap over the top to stop the ball bouncing out I don’t need to make a J at all. I did see a bag with a grommet in the back near the bottom that looked very neat and tidy but if you use a hole you can’t take the yarn out of the bag without breaking the yarn. Ideally a little U shaped metal frame that could be squeezed shut around the felt (similar to when you put snaps onto a bag) would be best but I haven’t found anything like that. Purse frames work like that; you slide the felt into the channel of the frame and squeeze it shut and it grabs the felt or in some cases you sew the frame on. The problem is I just want a small U shaped piece. I always seem to be looking for things that don’t exist


Autumn is Coming

Autumn is Coming

Last fall our challenge was Autumn.  I created my autumn piece which is just shy of 16″ x 20″ (40.64 cm x 50.8 cm) with organic edges.  I’ve played with different framing options on an off and finally decided it was time to take it seriously.

Here is the original.

autumn org

I tried different colored mats.

black mat orange mat


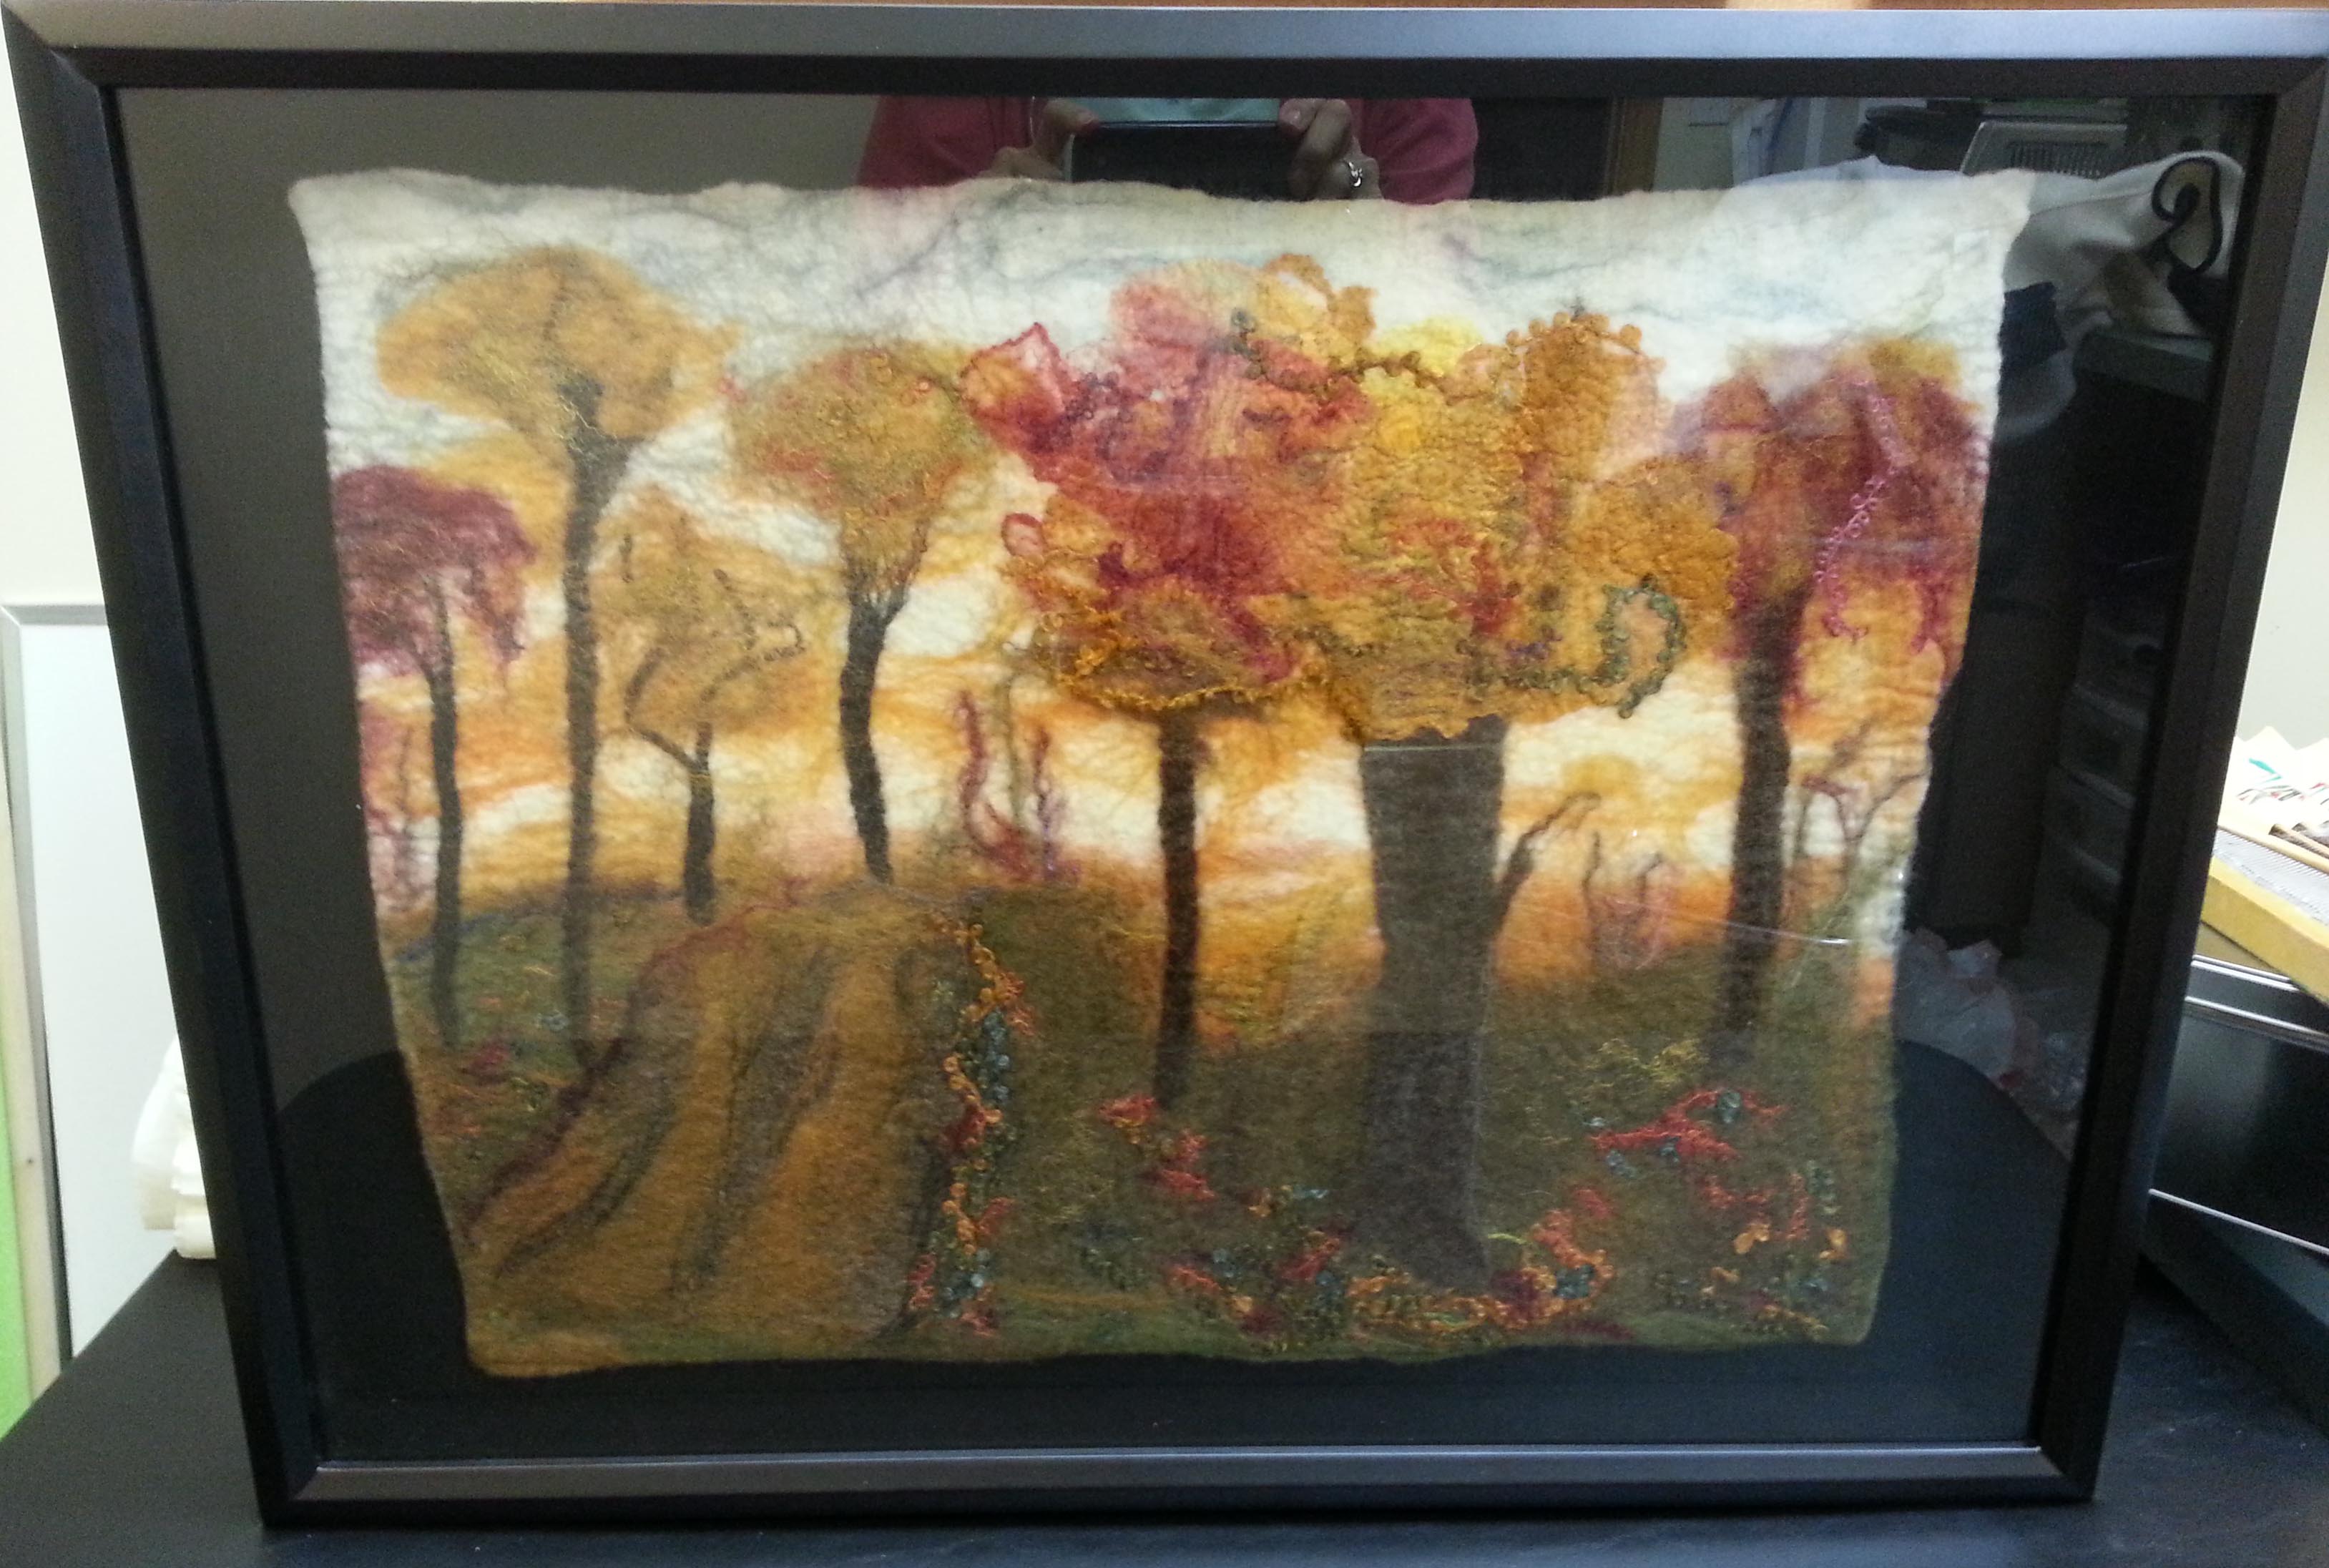
Then I bought a shadow box, but unbeknownst to me the glass didn’t come out.  Its not a very good picture because I was trying to take the picture without the frame falling and the picture falling out.  I intended to return it so I didn’t want to fiddle with it too much.

shadow box

I found another frame that supposedly had a 16 x20″ inset for a canvas.  However, when I put the canvas with picture on it there was a gap all around.  I decided to cover it with prefelt and attach the picture.   There was still a gap. This would probably be perfect for a thick felt piece wrapped around the canvas.

recessed frame

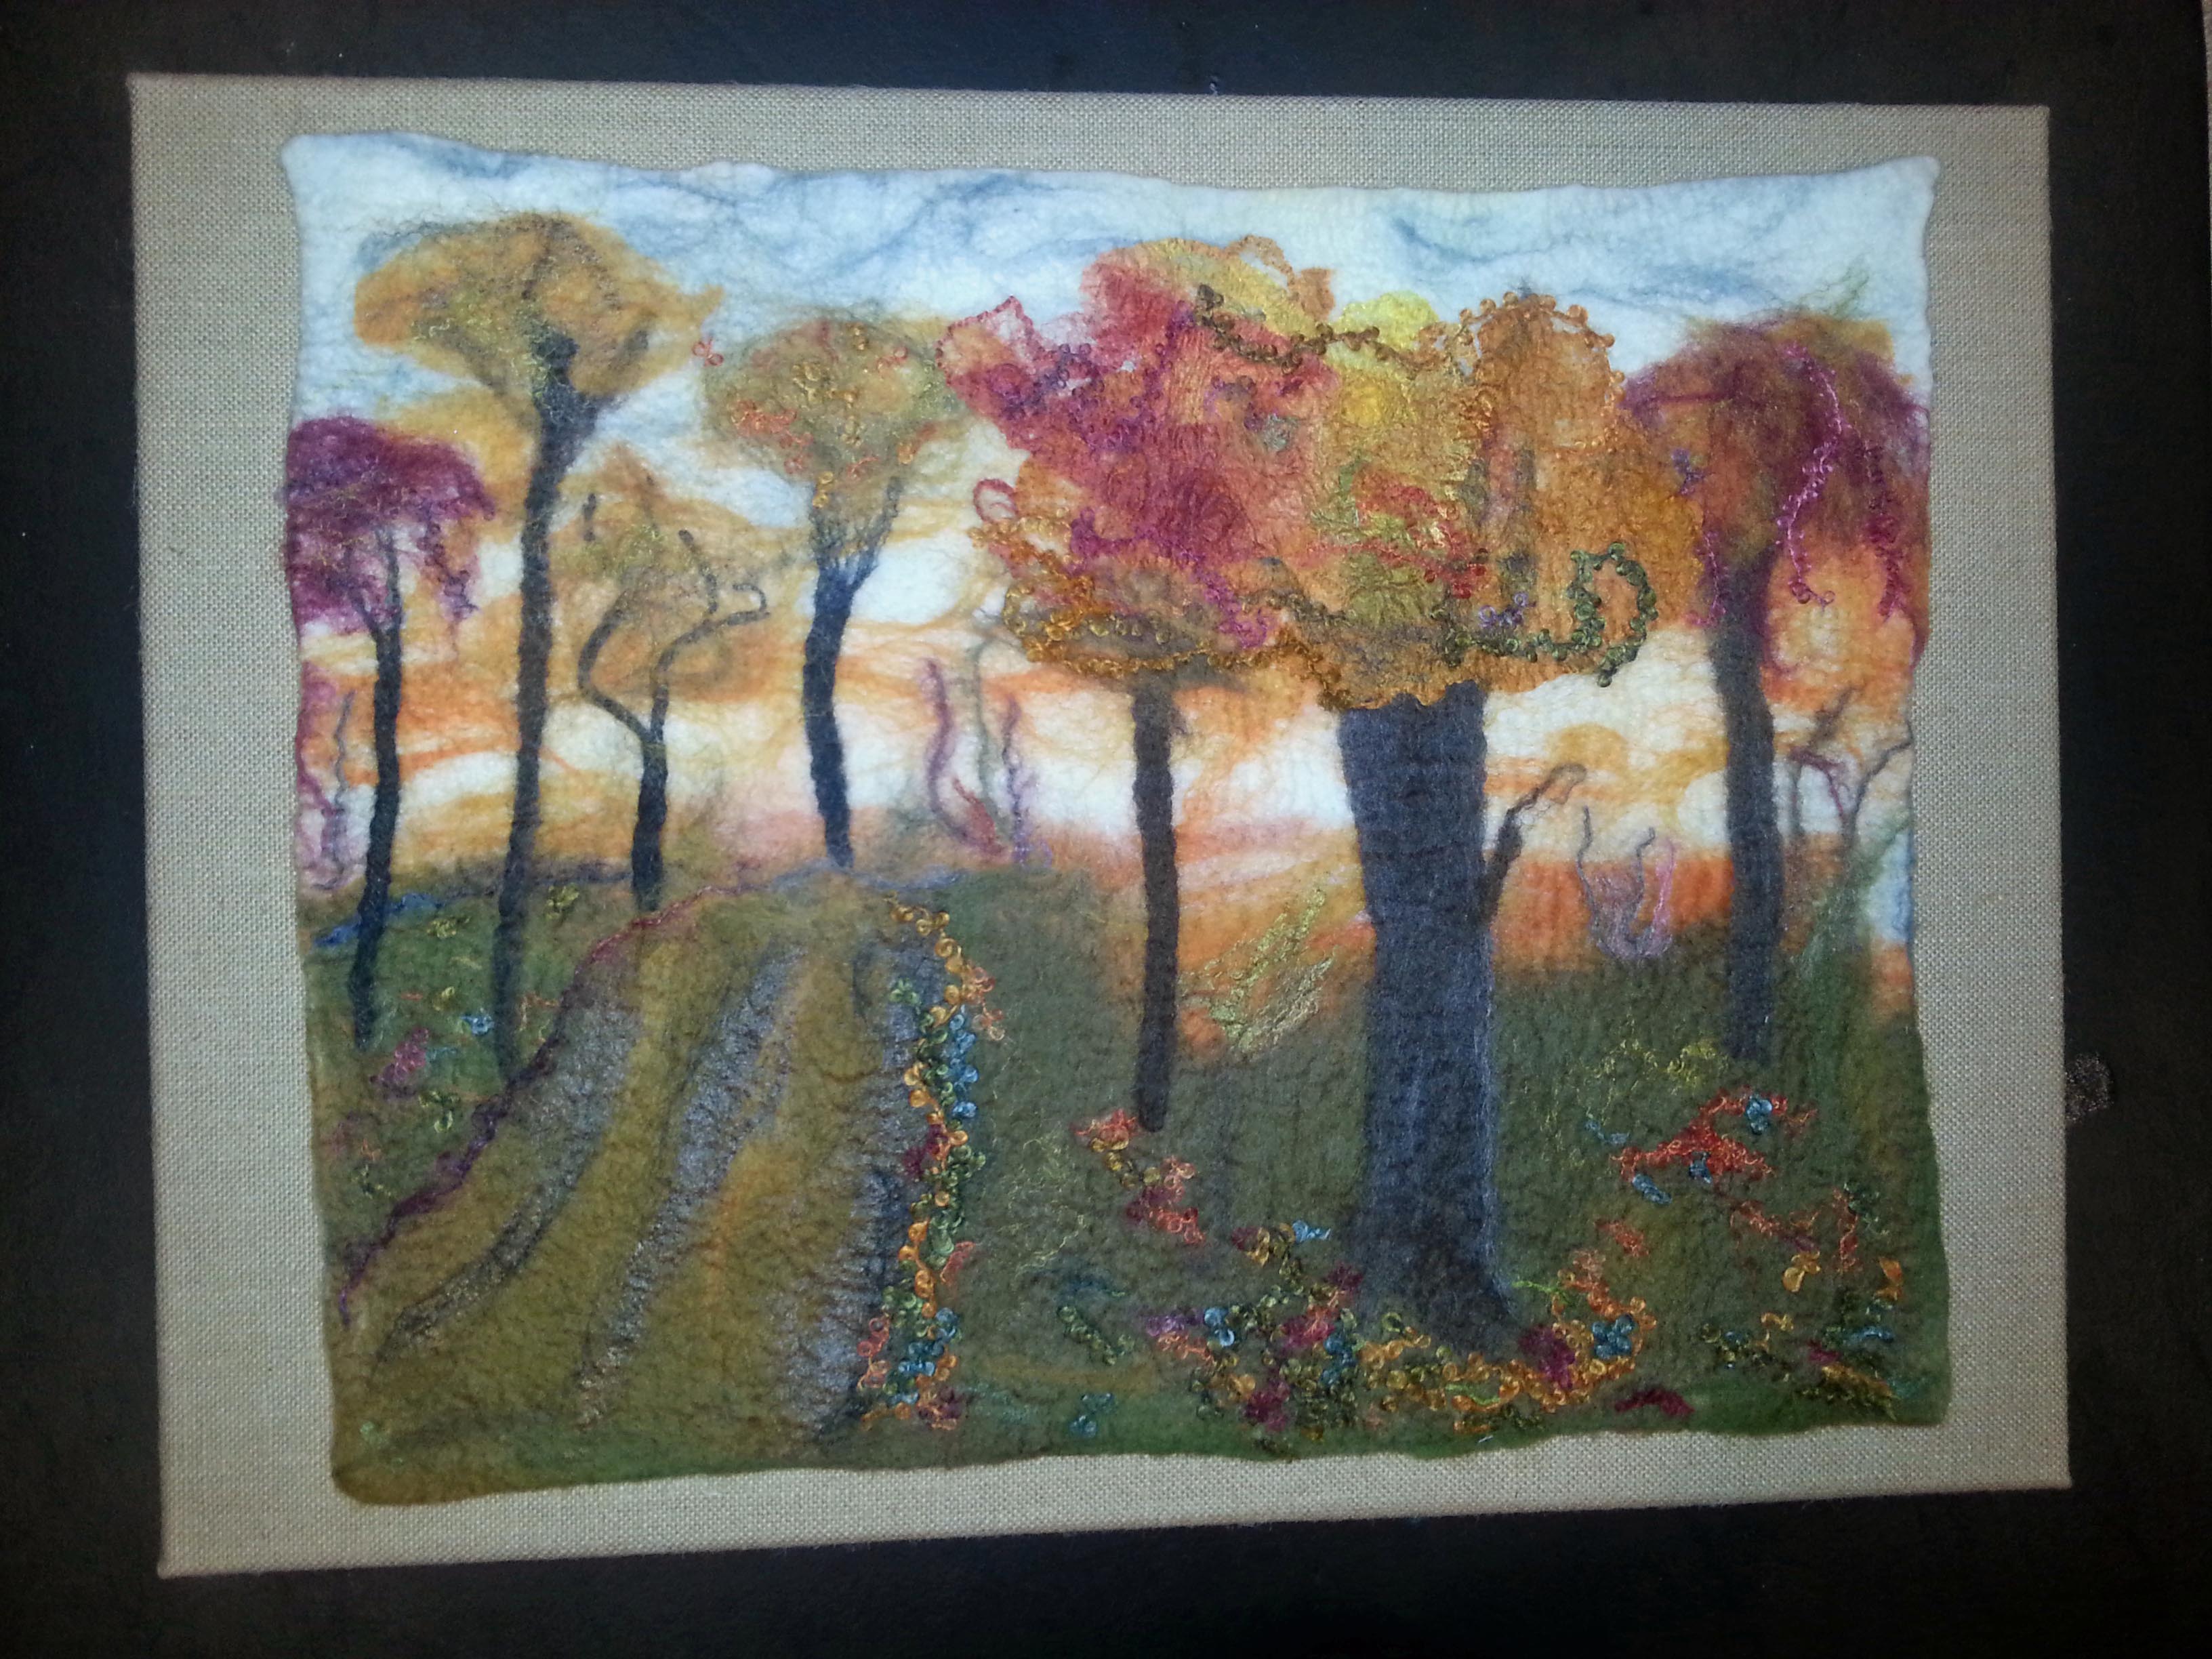
When Michaels had a sale on canvas and frames, I looked again and found this burlap canvas. (On a black table)

burlap

But when I put it on a dark bronze wall it made a big difference.

on green wall I haven’t mounted it yet since after jiggling it around  and trying to stretch out a little I have to make a few repairs.  I’m amazed at how my felting has improved this past year. I can even make straight edges if I want.  If I decide to start selling or gifting my artwork, I may have them professionally mounted and framed.

Which one do you like?

Felt Pictures Ready

Felt Pictures Ready

My felt pictures that will go on display next week are framed and mounted now. They look so much better Framed.  I had them proficiently done.  he covered the back in paper, put the hangers on and even little clear feet on the bottom corners so they will hang strait.  You will have to excuse the quality of the pictures. My husband had to hold them up for me to take the pictures.

This is the biggest one. I used wide extra strong Velcro along the top and small Velcro squares on the bottom corners and half way along the sides and bottom.

cityscape


The two smaller ones that are much lighter and brighter I gave the mottles silver and gold frames that look much nicer in person. They match the summery feel of the 2 pictures. I used Velcro the same way for these pictures as well. They end up looking like they are hovering just in front of the canvas.

summer fun beach hotel

I will get better pictures when they are hung at the gallery.


Felting Along

Felting Along

I am felting along. I do not have anything much to show for it yet but I am plugging away at several things.

I am almost finished the instructions for a nuno felt bracelet kit I plan on selling. I have all the instructions for the felting done but still need to do the finishing, adding buttons and button holes. It takes so much longer to do than you think it will.

Pull the wool roll

check fit again

I have been working on finishing some other bracelets. This is the one I am working on at the moment.

bracelet in progress

I have been spinning on a new drop spindle made by my friend Judy.

spindle 2

Have you been tackling big jobs or small ones so far this summer?


Choosing A Color For Matting and Framing

Choosing A Color For Matting and Framing

Last week, I showed you the process I used for determining the value of the matting/framing for my Stewart Stephenson challenge piece. For those of you that asked, I chose value #3. The next thing I needed to do was choose a color. I could have gone with gray and I think it would have looked OK. But I decided I wanted to try some different colors to see which I liked best. I used some painted papers that I already had and I painted a few.

I tried mixing black and deep cerulean blue (middle row, 1st on the left) and I mixed blue and orange to try to get a color close to the darkest color in the actual piece. But I ended up with purple (middle row, 1st on the right). The remaining colors are ones that I already had painted. The orange wasn’t bad, but I really liked the blue green (middle row, middle photo) but it wasn’t a dark enough value.

I then decided to use paint colors straight out of the bottle because then I wouldn’t have to mix the color to cover the canvas. The one on the left is Cobalt Turquoise and the one on the right is Deep Cerulean Blue. I decided I liked the Deep Cerulean Blue the best.

MINOLTA DIGITAL CAMERA

So I painted the canvas and this is the result. It looks better in person. But I’m considering adding a glaze to the top to make it slightly darker.

MINOLTA DIGITAL CAMERA

This photo shows the true color of the canvas a little better. It isn’t quite as dark as the value #3 card. So I think I will mix a little black with the deep cerulean blue and then add some gloss medium to glaze the surface and see if I like that better. It has been really difficult getting the photos to show you the process as the colors have not stayed true. But I guess I’ll get this framed eventually.

Happy Fourth of July to all of our US readers!

Second Quarter Challenge Finally Done.

Second Quarter Challenge Finally Done.

That’s right I have it done and with days to spare. 12 whole days at that! Here are the details of the challenge if you missed them.  Challenge

I have know what I was going to do for ages I just hadn’t done it. I like Stephenson’s mirror pieces but I also liked the flower pieces so I decided to combine them.

stevenson 1  stevenson 2

I used a thin piece of black prefelt I had and doubled it up for the back ground. I then used my own handspun for the stems. I added silk throwers waste for the flowers and then more hand spun for the spirals. I wasn’t sure how everything would stick. There was not a lot of fuzzy about any of it. It worked out fine though.

I forgot to take a picture of it before felting but here it is finished. I like it a lot more than I thought I was going to.

stepnenson picture

I found this frame on my front porch ( have no idea why it was there) and laid it over the picture and I like it even more.

stepnenson picture frame

If you haven’t done a piece, go ahead and give it a try, you still have time.

Don’t for get to visit the Forum to see how others have interpreted the theme.  Challenge

Finishing and Framing

Finishing and Framing

Many times after people begin felting and make several flat pieces that are to be wall hangings, they start wondering how to hang or frame their pieces. There are as many ways to hang and frame a piece as there are to felt a piece. So these are just a few ideas of how I have framed pieces in the past. I have found that if you are making a piece specifically to hang on the wall, that it is a good practice to think about how you are going to hang it before you start. That way, if you want a specific size or need an edge that is different in some way, you can plan that in advance. Of course, if I followed this advice more often, I wouldn’t be making up new ways to finish or frame a piece 🙂

One way to hang a piece without a frame is to use a stick or branch to hang the fiber art piece. I think this works best with pieces that are not square and have an organic edge to them. I usually just stitch around the branch and then stitch into the back of the felt piece, making sure that I am not stitching all the way through the felt.

MINOLTA DIGITAL CAMERAIn this piece which is quite large, I made a frame of sticks lashed together and then used leather cording to attach the felt to the frame.
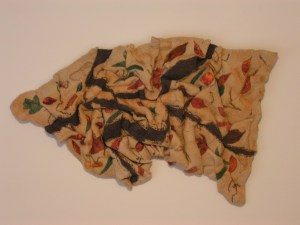
Rhythm of AutumnThis is another large piece called the Rhythm of Autumn. It is also fairly heavy for felt as it is very wrinkled and multi-layered. Plus, I couldn’t decide whether I liked it to hang horizontally as it is shown or vertically.

Stitched Felt BackingSo I cut a piece of commercial felt to fit the back, stitched two sleeves on it and then hand stitched the entire piece by hand to the back of the felt. You can see that I added a label. This was a slightly heavier paper that I printed and then fused to the commercial felt before stitching it on. I use a dowel rod with two D rings on each end to hang this piece on the wall.

Two Quilt SleevesHere you can see the dowel rod and the D ring and that you can hang this in either direction because of the two sleeves.
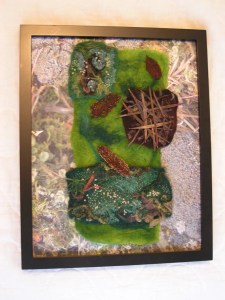
Framed with Photo Matting

When I frame a piece, usually I use a matte board behind the felt piece, put a couple of holes in the matte board behind each corner of the felt so that the holes won’t show. Then I stitch the piece to the matte board making sure that I don’t stitch through the front of the felt. For this piece, I decided to use photos as the matte. I don’t particularly like the result because it seemed much too busy.

Framed Iris‘Iris’ was framed the same way with a white matte behind it. Much better in my opinion.

Small Stitched SampleIf you have a very small piece, this embroidery is only 2″ x 4″, you can make your own matte with a piece of card stock. You cut the hole out of the center (measuring carefully) and then this was sprayed with spray paints to match the thread colors. Then this could be framed to give it more presence.

Stitched BearTo have this grizzly “float” on the wall, I used a piece of board across the back at the top. I drilled holes in the board and stitched the felt to the board.

Wooden Bar with HangerIt hangs very well and the board helps to keep the piece flat without drooping.

Tree StoriesThis piece also “floats” on the wall but is hung with a quilt sleeve.

Quilt SleeveIf you have made many quilts to hang on the wall, you’ve probably made a quilt sleeve. There are lots of tutorials on the web as to how to make them. But it’s easy if you’re using felt. Just stitch the edges of a strip of felt to the back and you can run a rod through for hanging. You can cut a hole in the center of the felt sleeve so you only need to use one nail to hang or you can hang from both ends of the rod. Here I used a piece of heavy wire and bent the end into a ring.

Sixties QuiltAnother way to hang light pieces that won’t sag is to use little plastic rings on each top corner. I don’t particularly like this method but it works and it’s easy.

Plastic RingYou can find these little rings at craft stores and you just hand stitch them on. If the piece is wide you may need more than two and that makes it a little difficult to hang easily.

All of these pieces are embroidered either by hand or machine and they have been laced to matte board. This method would also work with a felt piece. But you need to remember to make the felt piece about 4″ bigger around so that there will be enough felt to stretch around the matte board and lace to hold tight. I find this method really effective for embroidery because it generally needs the stretching to keep it from sagging. Then once the piece has been laced, you can easily put a matte board behind it and frame it.

Needle Felted Yeti in FrameThis needle felted Yeti was actually laced to the background and then put in the frame. He is so exuberant you can barely see the frame.

Glued to BoardThese pieces I planned the finishing from the start. I wanted to make mixed media stitched work to adhere to the boards. After stitching, I painted gel medium on the fabric so it became stiff and then glued them on to the boards with more gel medium.

Canvas with Felt - Off Center

One way of “framing” that is fairly simple is to paint a canvas to complement the fiber art and stitch the fiber art to the painted canvas. You will need to poke holes in the canvas so you can stitch the piece to the canvas. Larger pieces will need more holes and more stitching to prevent sagging. As you can see in this felted river rock piece, you don’t have to place the artwork right in the center of the canvas.

Felt on CanvasI did a mottled paint on the background but even just plain black is great for a lot of artwork.

Ice FlowersAnother way to finish a piece is how I did Ice Flowers above. I stitched the red flower center to a background heavy fabric that has been dyed and then wrapped the green fabric around stretcher bars. Stretcher bars are not really expensive and come in a variety of sizes. But pre-planning helps to give you a nice border that looks like matting.

Stretcher Bars on Ice FlowersYou put the stretcher bars together. The center bars are extra support to keep the rectangle squared up.

Ice Flowers Stapled to Stretcher BarsThen you wrap the stretcher bars and staple the fabric down to the bars. I found several good tutorials on how to do this on YouTube. I am going to cover the back with a piece of commercial black felt and apply a hanging device like you use for most pictures.

Stitched LabelInstead of using a label, I just stitched my signature and the name of the piece on the lower right corner of the backing felt.

Book CoverAnd if nothing else comes to mind, you can always turn a flat piece of felt into a notebook cover, right Zed? 🙂

How do you finish your pieces? We’d love to hear your favorite way to frame or finish your fiber art.