Browsed by
Category: Dyeing

Inspiration, etc.

Inspiration, etc.

Usually, I find inspiration in nature or another artists work.  But recently I saw an ad in a department store flyer for a bedspread that caught my eye.   I kept going back to it until I finally I cut the picture out and laid it on my work table.

It stayed there for a while and I kept asking myself what about it that kept drawing me back to it.  I didn’t need a bedspread, but there was something about the colors and design I found intriguing. The design looked as if the colors were painted with a brush and there were uneven lines like paint dripping down the wall.

I was in the process of trying to come up with a design for a book cover and thought I’d use the design elements I liked in the ad for that.

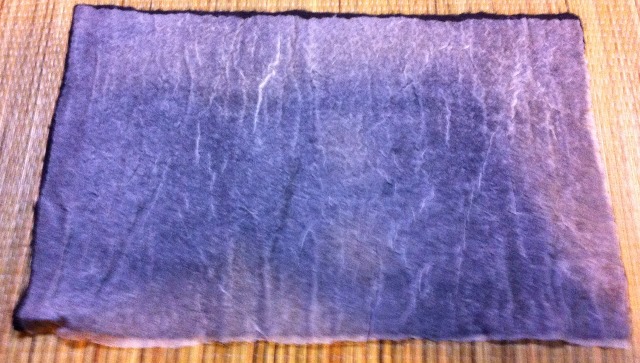
I measured meticulously for the the book cover allowing for fold over sides, shrinkage, straps, etc.  With my template finished, I laid out my design.  I really wanted to emulate that brush feel, so I even used a comb to separate the fibers.  For the paint squiggles, I used mohair yarn I had dyed.

white cover layoutHowever, once it was done I realized I couldn’t use it for the cover.  I would distort the design to cut the straps.  So, plan B — a pillow.  I had a pillow form that would work just fine.   The felted piece was a little too large so I wet it and threw it in the dryer.  Perfect. But now I needed a back.

The white wool I used was more of a light cream color, so I didn’t want to make a white back.  I had enough dark blue.  Again, I wanted to try to recreate that brush stroke.   I made a smaller template and proceeded to lay out the second side.

side by sideSince the finished piece was the right size, I didn’t have to put it in the dryer.  Consequently, it is smoother than the white side which is fine.  I sewed the pieces together and now I have a reversible pillow with two different textures and looks!

pillow front


pillow back


The brush stroke design wasn’t exactly what I wanted. The felting process tightened up all my careful combing, but I learned a lot and will try again.

I really liked the dark blue color and  wanted to dye some new thick and thin yarn I purchased to use on another project.

Of course, even though I have a variety of thick and thin yarns this dark blue wasn’t one of them.  I found this new Ashland Bay yarn and just love the texture and novelty of the twist.

undyed thick and shinThe Midnight Blue acid dye on my shelf was just what I wanted.  I thought.  Next to the dark blue it looks purple.  The silk cocoons I threw into the dye pot turned a light purple and the wool batting is a medium purple.  It’s a good thing I like purple as well.

midnight blueNow back to the drawing board!


Dyed in the Wool

Dyed in the Wool

I have heard the expression “dyed in the wool” many times but I thought I’d look it up. According to Wikipedia, the expression “dyed in the wool” refers to a state of steadfastness, especially with respect to one’s political, religious or social beliefs. The expression comes from the fact that fabric can be dyed in a number of ways. The woven fabric may be dyed after it is complete, or the threads may be dyed before they are woven. When a color is “dyed in the wool,” the wool itself is dyed before being spun into threads, so the color is least likely to fade or change.

So that’s exactly what I have been doing this week, dyeing wool for my upcoming felting class for high school students. The class is Saturday so I’ll write about that next week. I have at the least 30 students in three classes and perhaps a few more late sign ups. So I needed to make sure that I had enough wool for all of them to make a phone case. The phone case takes about 2 ounces of wool (56.7 grams).

Wool Before Dyeing

The first thing I did was to separate out 8 ounce (226.8 grams) sections that would fit into my dye pots easily. I decided a total of 80 ounces would be enough as that would take care of 40 students. So I separated out 10 sections. The wool I am using is “Mixed 56’s” from RH Lindsay.

Dye Pots on the Stove

I put two pots of water on the stove and heated them up. I then added a ‘glug’ of vinegar from the jar and added 3 teaspoons of dye powder to each pot. I know that a ‘glug’ is not a scientific measurement but I added some vinegar and didn’t measure it. After stirring, I added the wool roving. It works best if you don’t wad up all the roving and shove it in the pot. Just start feeding one end of the roving into the dye bath and it sinks right in. Towards the end of this process, I used the dye spoon to get all the wool to sink into the dye bath. After that point, I don’t stir the wool at all.

A Peak Inside

Here’s a peek into one of the dye pots. I used blue, black and purples as the cell phone cases are to be “cosmic” and the main color will be the sky color. You can see the timer going on the stove. I steamed these for 20 minutes each.

Wool Snakes in the Bathroom

After I steamed them, I pulled them from the pot with a spoon and rinsed gently and then spun them out in the washing machine. Here are all the colors hanging on the shower rod in the bathroom. Dennis came out of the bathroom later and said “I was attacked by wool snakes in the bathroom, there were thousands of them.”

Dyed Silk Noil

I also dyed some silk noil. I shouldn’t have put it in the pot at the same time as it did get a bit stuck in places to the wool but since it will be used as an embellishment, I don’t think it will hurt to have some already in the wool.

Charcoal Grey

This one is charcoal grey. I used the black exhaust bath to make this one. I just added more vinegar to the black dye bath after dyeing the black wool and added this wool to it.

Deep Purple

This one is a very dark purple, almost black in places. I did not make a fresh dye bath for each batch, I just kept adding vinegar and dye to what I already had in the pot. I couldn’t reproduce these colors but that’s OK with me.

Black

And this is the black one. I thought maybe if I had young men in the class, they wouldn’t want a purple cell phone case. So maybe they will think black and grey are more manly. Who knows?

Red Violets and Violet

These are in the red violet family. I thought these were more “girly” colors.

Blues

And then I made a set of blues from lighter to dark.

Blue Violet

And the last one is blue violet. I am going to make up packets for each of the students with 2 ounces of background wool and then 5-6 pieces of a variety of colors for embellishing and making planets and “cosmic” stuff. I will also include small amounts of silk noil.

A Large Pile of Dyed Wool

Here’s the entire pile of wool. I really like the range of colors. I hope the students will like them too.

A Handful

I thought that some of you might like to see how big 8 ounces of wool is. That is my thumb in the bottom left of the photo. So on to making packets for the class and we’ll see how high school students do with 1 hour and 45 minutes to make a felted phone case. Hopefully, their teacher won’t lose it 🙂

Felting with friends: scarves, dying and more bags.

Felting with friends: scarves, dying and more bags.

On our felting week end Maureen decided to do scarves. She wanted to try out some 50/50 merino silk that she had.  She laid out the wool quite thin and rubbed it into prefelt.

maureen felting thin scarf

Once it was prefelt  she spun the water out of it and started cutting it. She made slits that she then stretched out and started fulling.  You stretch and full, stretch and full and end up with great holes.

maureens cut scarf 2

Next was into the dye pot. Although the scarf turned out great, it did not show off the silk. Usually the silk and wool take the dye a little differently, with this blend I was all one. We decided that it was because the it was to well blended.

maureens cut scarf

Maureen did 2 more scarves one in the same style and one solid. Sorry the pictures of them did not turn out.

Diane hasn’t done a lot of dying so Diane and Maureen dyed some silk chiffon.  The silk was twisted and dyed with several colors.

dyed fiber dyed fiber.

On the last afternoon I decided to make a bag for my mothers birthday.

moms bag startThe inside of the bag will have a red stripe. I used a combination of commercial prefelt and top. I also added some Blue Faced Lester wool to add some strength and stiffen it.

moms bag ready to felt  This is the outside. There is black next to the resist and the white on top. I wanted the black to migrate through the white and make a light gray. This is the finished bag. its reversible.

gray felt bag gray felt bag reversed

Diane decided she wanted a new shopping bag. She started out huge and did many layers of prefelt and wool.

dianes giant bag

Here she is fulling it

dianes giant bag fulling dianes giant bag fulling more

You can see it did shrink but just after this she gave up and said she will put it in the washer at home to see if she can shrink it more. At this point it is a large sturdy basket.

This is our group shot. We were very busy. You can see Maureen’s two scarves on the left.

fruits of our labour

The one on the right was one Maureen had made recently, added just the balance the picture. And finally that was the end of the weekend. We needed to go home and rest.


Breakdown Screen Printing Party

Breakdown Screen Printing Party

Breakdown screen printing has been around in the surface design world for a while now. I have discussed it on my personal blog but thought everyone here might be interested in the process too. My local group got together yesterday for another session of breakdown screen printing.

Print Paste Powder

What you need to start is some print paste. Essentially, you use this to thicken fiber reactive dyes and you screen print with the thickened dyes. It only takes about a quarter cup of print paste powder to add to 2 cups of water. We used 4 cups of print paste for our “party”.

Making Print Paste

You can just stir the print paste into the water but it works really well if you use a blender because otherwise it gets lumpy. As Lyn told me, you don’t want to use the same blender that you make milkshakes in – use a blender that is just used for the studio.

Black Dye Added to Print Paste

Then you add dye powder to the print paste. This one has black dye in it. Then you squeegee some thickened dye on to the screen while you have the screen on something textured. You can use things like bubble wrap, texture plates or anything relatively flat that will press against the screen and give it different textures.

Screen with Dried Black Print Paste

This is one of the screens where I used the black dye over texture plates. The textured part that sticks up a bit, keeps the thickened dye from filling that part of the screen.

Close Up Dye Texture

So you get a textured screen that looks like this. Then you let the screen dry completely. I always do this step about a week ahead of time.

Carole and Louise

Here is Carole and Louise getting ready to print a screen. You can use clear print paste (with soda ash added) or you can use a colored print paste where you have added dye. The dried dye in the screen starts breaking down as you apply the print paste and you never know how it will turn out.

Screening with Print Paste

Louise is adding clear print paste and a little bit of blue print paste. She is using a squeegee to force it through the screen.

Louise's Screen

Using the fiber reactive dyes, you can print on cotton fabric or silk. The added soda ash causes the dye to set in the fabric. This screen that Louise is using is one she made using strips of Pellon Vinyl Fuse Matte. She fused the strips to the organza and then added green print paste to the screen.

Louise's Screen on Paper

This is one of my sketchbook pages that I printed with Louise’s screen.

Black Dyed Screen with Circles

Here is another screen that has black dye.

Circles Breakdown Screened

And the resulting print on yellow fabric. Each print is different from the next one as the dried print paste continues to break down. Bunny printed this one.

Breakdown Print on Paper


Here’s a sketchbook page printed from the same screen.


Embroidery Hoop with Organza

This is a screen that I made from a 6″ embroidery hoop, nylon organza and duct tape.

Circle Breakdowns

This is the print from the circle screen above. I used a fabric that was already dyed and clear print paste with this one.

Black and Green Dyed Screen

Here’s another screen that I mixed black and green dye and let it dry.

Breakdown Screen Printed Fabric

This isn’t a very good photo but here’s a portion of the printed cloth from the screen above.

Green Dyed Screen

This is another screen that I used green print paste and let it dry. The squiggly bits are just stains from a previous experiment with blue glue.

Orange Breakdown PrintThis is the resultant 4-5 prints from the green screen above. The green barely shows at all and just mixed in with the orange print paste. Most of my fabrics already had prior printing on them from previous experiments. Most were quite ugly so I thought I would try to improve them.

Another Breakdown Print on Paper

This is another sketchbook page from a screen that was mostly broken down. I did several of these and they reminded me of photo negatives.

Screening with Paper Scraps

This piece of fabric was printed over paper scraps out of a paper shredder. You just sprinkle the shredded paper over the fabric and then use a blank screen and screen colored print paste through it. You keep moving the screen and some of the paper bits move with the screen. These always look different after being washed out because there are still bits of paper stuck all over it. Hopefully, I’ll be able to get a photo of the finished fabric but it belongs to Carole so if I remember…

I have printed on wool before with this technique. You just need to use acid dyes and vinegar in place of the fiber reactive dyes and soda ash. You do have to steam the pieces afterwards but the process works well. Once I get these fabric and papers rinsed, I will post them on the forum. You do lose some color but they are always one of a kind prints. Breakdown screen printing is a fun process, messy but fun!


Edit: See final results here.


Jackson Pollock Piece Finally Finished.

Jackson Pollock Piece Finally Finished.

I started my first quarter challenge back at the beginning of February. I made a piece of nuno felt using black wool prefelt and white silk to make a canvas.

beginning beginning felted

Finally the other day I decided to try out my idea on how to paint the canvas. I thickened some die with arrowroot powder. I was aiming for a paint like texture. I had never thickened dye before and I didn’t want to spend any money ordering something special. I looked up thickeners and arrowroot was the one recommended for acidic things.  It is a very fine powder.

thickened dye

I added a little to each small batch of acid dye and heated it a little. The first one I heated too much and it was like vulcanised rubber in the bottom of the cup. lesson learned less powder and less heat.

I started with yellow.It wasn’t dribbling how I wanted so I thinned it down. I didn’t like that either it  spread out too much. For the next 3 colours I poured it from the cups and moved them across the canvas quickly. That worked really well. Then I heated it in the microwave.

dye applied 1 into the microwave 1

While I was doing this I realised I had not put any vinegar in the dye. I heated up some water and put it in a basin and when the canvas come out of the microwave I put it into the acidified water and heated it in the microwave a bit and let it cool. having to put it in the water bath blurred the lines a bit but the arrowroot made it stay put for the most part. as you can see the thickened yellow is what moved in to the water the most.

after microwave vinigar bath 1

When I rinsed it and it felt really slimy. I thought I rinsed it well but it was harsh and stiff feeling when dry so I gave it a good wash with some shampoo. This is the finished piece. I think its very Pollock like.

finished pollock

I haven’t ironed it yet but I think I will and use the heat and steam to square it up.

Another Shibori Scarf and Hand Dyed Threads

Another Shibori Scarf and Hand Dyed Threads

Since my first attempt at a shibori scarf was successful, I decided to stitch another one that was an eco-dyed failure. This scarf was hand-made felt so it was significantly thicker than the last scarf I dyed with this method.

Beginning to Tie and KnotHere’s the scarf after all the stitching was complete and pulling the threads to tie off had started. The bright blue-green color came from commercially dyed eucalyptus leaves.

Tighter?I really worked at getting this one tied tighter than the last one. I think I was more successful but the felt was much thicker so it was easier to get it tight.

Shibori ScarfI put the tied scarf into a pot of acid dye that was a combination of black and red. I think it improves the scarf, don’t you?

Shibori Scarf - closer viewThere are still spots of the blue-green but now they are just accents as opposed to big blobs of ugliness.

Dyed ThreadsI also dyed a bunch of cotton and wool threads the same day I dyed the scarf. I ‘needed’ more blue violets and red violets in my stash of threads. I used #5, #8 and #12 perle cottons, regular embroidery floss and wool lace weight thread. The wool is all on the right side of the photo. It got thrown in the pot with the scarf and is a really dark, deep red.

Cotton ThreadsI really love how hand dyed threads are variable. I was working on getting a range of values in the same colors. I added a few green threads in too to make a nice color combination.

Wool ThreadHere’s a closer view of the wool thread. It has sections of brighter red in between the really dark portions. I’m not sure how I’m going to use these threads. I have tons of threads that I dyed for my stitch class but it always seems like I just don’t have the ‘right’ color when I need it.  Does that happen to you?

All of us here at The Felting and Fiber Studio would like to wish you a Merry Christmas (or whatever holiday you celebrate) and hope that your holidays are safe and happy! Thanks for stopping by, we appreciate your comments and love to hear from each and every one of you. 🙂

Shibori Scarf

Shibori Scarf

I was inspired by Kim Winter’s post about shibori and indigo recently so I thought I would stitch, tie and over dye one of my “failed” eco dyed scarves. Kim had suggested that the indigo color goes well with the eco dyed fabrics, so even though I didn’t have indigo, I combined blue and black acid dyes to achieve a dark indigo look.

Stitched ScarfFirst I folded the scarf in half, stitched running stitch about every 1/4 – 1/2″ across the scarf. The scarf is a combination of wool and silk that I got from Dharma Trading.

Close Up Before Dyeing

I didn’t have any specific instructions but knew the general idea of how it was supposed to work. Sew a running stitch, pull it tight and tie a knot.

Tied TightHere it is after I tightened up all the strings and tied knots.

Close Up Tied ScarfI had some difficulty holding it tight when I was tying the knots. I don’t think I really got it as tight as I should have.

Shibori ScarfHere’s the finished scarf. It is really hard to get a photo of this color as it tends to looks just black. But it is a really deep blue.

Close Up Shibori ScarfYou can see the patterning much better in this photo. I haven’t ironed it out so it has a nice texture from the shibori tying as well. I think I’ll just leave it as it is and I was happy with the results. Thanks Kim, for the inspiration!

Button on Phone Case

I also added a button to my new phone case that I showed you earlier. This is one of Zed’s polymer clay buttons. You can learn how to make these from her e-book. The button matches perfectly – Thanks Zed!

Pile of Dyed Roving

And just so you don’t think I’m a slacker, here is the wool roving I dyed last week. 🙂

Indigo and Shibori by Kim Winter

Indigo and Shibori by Kim Winter

Today’s post is by Kim Winter of Flextiles. Kim lives in London, UK and has been blogging about her textile experiments since 2011 after taking creative and experimental textiles at Morley College. I follow Kim’s blog and have found it very interesting so I asked her to write an article for us.

Type “tie dye” into Google and a mosaic of fluorescent spirals and sunbursts leaps out of the screen.

tie dye - Google Search

But try “shibori”, and the results are more subtle, largely (but not entirely) blue and white.

shibori - Google Search

Yet both are similar techniques – folding, binding, twisting or compressing the cloth so that parts of it are not exposed when it is dyed, resulting in very distinctive patterns.

shibori-close-up-001

The Japanese, as with so many craft forms, have developed the techniques even further, wrapping the fabric around poles before binding, using special devices for looping the thread around the cloth, or pulling up rows of stitching very tightly to resist the dye. And the dye often linked with shibori is indigo, which explains the dominance of blue and white designs.

“Like old men’s pee”

I was introduced to shibori and indigo dyeing at my local adult education college in London when I signed up for evening classes in textiles a few years ago. It was a great course, providing an introduction to different techniques over three terms, including wet felting, hand and machine embroidery, and soft basketry.

In the summer term our tutor heaved a large black plastic vat into the room, removed the lid, and I got my first glimpse of an oily, shimmering surface with flecks of froth. It didn’t appeal to everyone – one student described it as “smelling like old men’s pee”. But after a couple of dips, I was hooked.

I’m not going to go into the detailed chemistry here, but a well-maintained indigo vat is not blue – it’s greenish-yellow. Indigo turns blue only when it is exposed to oxygen, so when you remove a piece of fabric from the vat, it changes colour from green to blue before your eyes. It’s quite magical – and very addictive!

It also has the advantage that you don’t need a mordant, so it’s relatively quick compared with some other forms of dyeing. However, to build up colour fastness it’s best to dip several times and leave the fabric to oxidise well between dips.

Shibori obsession

I started off with conventional shibori techniques:

• stitching (nui shibori)

screen-shibori-010-resized

shibori cushion 001

• binding (kumo shibori)

shibori samples 003

• pole wrapping (arashi shibori)

shibori samples 013

• clamping with a resist (itajime shibori)

cd-itajime

And pretty soon I became obsessed – the experiments in a Kilner jar by the kitchen sink graduated to an increasing number of blue-stained buckets and bowls cluttering up the garden and kitchen, provoking gripes from (otherwise) Ever Supportive Partner!

home-indigo-001

oct2013 scarves4

Then I started experimenting with shibori in other processes.

• Shibori and screenprinting – stitching the fabric before screenprinting over it, then opening the stitching.

screen-shibori-007-resized

shibori-screenprints-large-translucent

moon-print-open

• Shibori and felting – binding or wrapping the felt or nuno felt before shrinking in a washing machine or steaming it.

marble-flask-tied

marble-flask-after

nuno-net-shawl-flowers-front

• Shibori on paper – taping the paper to a pipe, wrapping string around the paper, dipping, then adding more string and dipping again.

shibori-bound-paper

• Shibori in a heat press – stitching a pattern in synthetic fabric, then putting it with a sheet of disperse dye paper in the heat press.

heat-shibori-003

I also signed up for shibori indigo courses with specialists – an online course with Shibori Girl and a summer school in Norfolk with Jane Callender – where I learnt an incredible amount.

But, as with most textile techniques, there is still so much to learn and experiment with – one day I hope to grow indigo from seed, and produce a naturally fermented indigo vat (not easy in a cold London house). And ultimately I would like to spend some time in Japan, learning more about the whole culture and tradition that surrounds this entrancing dye.

Sustainable scarves

In the meantime, I’ve taken to upcycling scarves from charity shops and vintage sales using shibori and indigo dyeing. This has several advantages:

• It’s more interesting for me, as each scarf is different (colour, size, fabric, pattern) – so I don’t get bored.

• It’s obviously more sustainable – around 500,000 tonnes of clothes get sent to landfill every year in the UK alone, yet many of them are perfectly wearable.

• Because the cost of my raw materials is lower, the price buyers pay is lower too – whether the scarf is made of silk or cashmere. What’s not to like? 🙂

oct2013-scarves1

Some of these scarves are available from my Etsy shop; others I sell at various markets around London.

I’ve also started experimenting with natural dyes such as onion skins, coffee and tea.

onion-scarf2

But I think that indigo will always be my first love. It can be a bit temperamental to work with – the alkalinity has to be quite high, and you mustn’t slosh it around too much in the vat or the dye will oxidise and you have to recharge it too frequently.

Yet every time I unstitch, unclamp or unbind a new piece is like the first time – the sense of wonder at the range of blues I can get from a single vat, the colours changing and developing in front of me.

I even like the smell! 😉

fq-spiral-angleKim Winters

You can find Kim at her blog Flextiles or at her Etsy shop. Thanks for sharing with us Kim!

A Try at Eco Leaf Printing

A Try at Eco Leaf Printing

I have had one previous try at eco printing which didn’t turn out very well. But after Terriea’s recent post, I thought I would give it another go. You can see the process I followed on this post on my personal blog. I did some prints on paper as well, which you can see here. We used a variety of leaves. We did not have the correct kind of eucalyptus so the kind we used is the dried kind that must be artificially dyed. Where you see the bright blue green color on the fabric, it is from that kind of eucalyptus.

bundlesHere are the bundles that I rolled up with the leaves and cooked in the dye pot. I did one piece of silk, two felted scarves and one scarf that is a wool and silk blend. I also dyed several pieces of cotton too.

just opened fabricThese are the scarves after I opened them up and pulled off the leaves. So I did get some color but the leaf prints were still very vague. I was disappointed that you couldn’t see a leaf impression. The paper did much better than the fabric.

leaf impressionHere is a print that almost looks like a leaf. This is silk habotai.

The gallery above shows different portions of the silk. The silk seemed to work best with the leaf prints and took in the most color. I am planning on using this piece of silk for a nuno scarf.

These are photos of the cotton pieces. I didn’t do any leaf prints with these, just threw them into the different dye baths. I have to say that Zed made a comment a while back about some of the natural dye processes just leaving the fabric looking dirty and I agree that some of these fabrics look like dirty dish rags. But perhaps I will find that they will be the perfect background for a project.

And these last photos are of the wool items. The wool did get some color but again, I wasn’t really happy with the “prints”. My plan now is to add free motion machine stitching to the felted scarves in patterns of leaves with fall colored thread. Hopefully, that will make them a bit more attractive. 🙂

Refelting and Redying

Refelting and Redying

I had a scarf and a wrap that where not selling and well where really not that great looking. Both had to much open space. The green one in particular. They were also not great colours. The pinky one is very coral and the wool was faded looking even though it was just the way it dyed. You can see the original wool on the top half of the picture it is much paler than the new dark wool on the bottom.

green scarf before pink scarf before

Originally the green one just had the  felt squares so I flipped it over and added  long winding strips in the same colour and with the same yarn.  Now there is texture and colour on both sides. On the pinky one I flipped it over and added a wiggly line between the ones that where already on the other side.

I don’t like the silk colour on the green one and I don’t like the silk or pale wool on the pinky one. They had to be redyed.  The pink one went into a pumpkin spice acid dye bath.

orange scarf in dye

the green one I didn’t want the wool to change colour so I  used MX dye. I soaked the scarf in water and PH up (soda ash) and then into  a darker green dye bath.  green scarf in the dye

This is the finished product.

orange scarf after dye green scarf after dye

The pinky one is a nice rich deep orange now and the green is more of an olive shade now that goes better with the wool.

When I took the orange one out of the dye bath there was still dye in the water so I put a piece of silk and some washed but not carded wool into the bath and this is what I got out.

orange exhaust bath dry orange exhaust bath scarf  dry

The wool and the silk were in the dye bath at the same time and for the same length of time. Silk really sucks up the dye, fast.