Browsed by
Category: Dyeing

Playing With ‘Natural’ Dyes

Playing With ‘Natural’ Dyes

Have you tried ‘natural dyeing’ or dyeing with things you commonly find around the house such as tea, beetroot or food dyes? I had a bit of a dabble this week. I made some camera cases out of felt which was made with natural white/cream coloured wools and fibres. I wanted to blanket stitch them with natural thread, but only had enough for one case and didn’t feel like spinning any more up. The white cotton perle 5 thread and white embroidery floss I had was super bright white. This is the Perle cotton with my handspun natural thread.

OLYMPUS DIGITAL CAMERAI had lots of white embroidery floss, so I thought I’d see if I could colour them with what I had available. The first thing I tried was tea, I put a couple of used tea bags in a tub with boiling water and put the thread in. It looked too pinky, I rinsed out as much as possible but it wasn’t right. The next thing I tried was coffee, I left some ground coffee ‘brewing’ in hot water for a few minutes, then sieved out the grounds.  I just left the thread in a short time and rinsed well, it was more of a beige, but still on the pinkish side. The Coffee is on the left and the tea on the right, with a bright white for comparison.

OLYMPUS DIGITAL CAMERAI left another skein of floss in coffee for longer then tried some onion skins. I’ve been saving red onion skins for a while so I thought I’d give them a try since I was making a mess anyway 🙂 I broke up some of the papery skins and added hot water, I put the thread in and left it while the skins ‘stewed’ for a while. It turned out a nice light pink. The onion skins is on the left and coffee on the right.

OLYMPUS DIGITAL CAMERAI also left a skein of yellow in the brewed coffee for a while, to take some of the brightness off. There’s a skein of the original colour for comparison.

OLYMPUS DIGITAL CAMERAThe next thing I tried was turmeric. I know from making curries and dahls that turmeric stains plastic containers, so hoped a small amount would tint my thread. I sprinkled a small amount in a tub and added hot water, it seemed to dark, so I added more. And more. I dipped the end of some cotton perle 5 into the tub and rinsed immediately, but even this quick in-and-out stained it a bright yellow. I put the whole lot in and  left about 30 seconds and rinsed.

OLYMPUS DIGITAL CAMERAThe turmeric was a gorgeous colour, nice and bright, but much more natural than the dyed bright yellow, the turmeric is on the top, the bottom is the bought dyed yellow:

OLYMPUS DIGITAL CAMERAI don’t know what to try next. I tried bleach on a cotton thread the colour of sweetcorn silks, but it didn’t change. I might just have to get the spindle out, but does anyone have any ideas for what I could try? Actually, any tips at all for ‘natural’ dyeing would be great, it’d be nice to be able to make some custom colours now and again 🙂

Coming up on Monday we have a guest article from rosiepink about what running a small fibre business entails.

Wool for Sheep

Wool for Sheep

In my last post I talked about getting some felted body parts ready for making sheep pins. http://wp.me/p1WEqk-1o2  The other thing the sheep need so they will not be naked is wool.

First I had to pick curls out of a Blue Faced Leicester Sheep fleece I have. After having done this you appreciate why buying prepared curls costs so much. It takes for ever to pull the little curls out.  This is something you do chatting with friends or watching TV.

curls fleece

The next part is more fun. My sheep like to have colourful fleeces so they must have their wool dyed pretty colours. I soak the wool while I am picking out dye colours. They take up dye more evenly that way.  Sometimes I do not soak them so they dye unevenly. You get some interesting results that way. Usually they end up 2 tone. I use acid dyes.

curls soaking

I dye the curls in small batches in some small plastic containers I got at the dollar store.

dye in bowl dye in bowl 2

I add the premixed dye and then some extra water to just cover the wool. Then into the microwave for a minuet or two. When it comes out I transfer the wool and dye to a zip lock baggy to sit until it is cool.

dye in bag

I do it this way because when I have tried putting a zip lock bag in the microwave sometimes it get too hot in just one spot and a hole melts in the bag. This way is a little more work but no holes in the bags.

I also over dyed some locks I had done earlier. I think they were done with onion skins. They where a horrible yellow shade I wouldn’t use for anything. The don’t look to bad in the picture but in person, yuck.

curls soaking yellow

I decided on brown and black. I already had lots of green and some orange. They both came out brown. I could do the black again to make it go black but the brown is a nice shade so I will leave it. They are the two at the bottom of the picture. Sorry about the quality of the picture but it was too windy to go outside for a picture.

dyed curls done

Now all I have to do is put all the parts and the curls together.


Nuno Challenge Experiment One

Nuno Challenge Experiment One

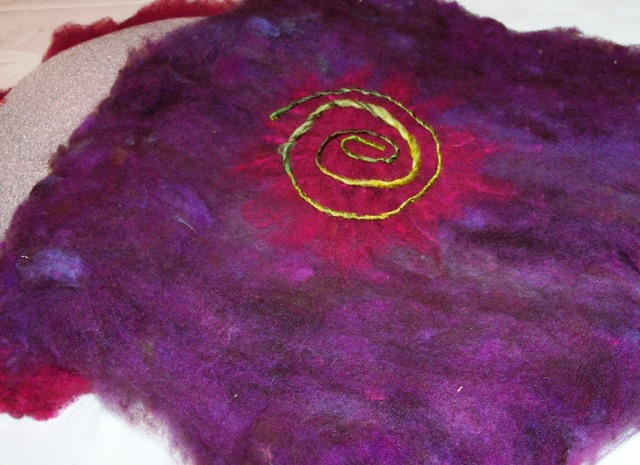
The second quarter challenge over on the http://feltandfiberstudio.proboards.com/ is mine but I have yet to start. Today I started. Months ago I made a shrug jacket and then died it blue. It would not stop bleeding. I rinsed it for days. Changing the water several times a day. I reheated it in vinegar water and still it bleeds, so I gave up. with all the work  it has great texture.

blue experriment 2 blue experriment

To get the great texture it shrank a lot. It will no longer fit anyone.

blue experriment 3

Next I unpicked the sewing. Not an easy task. The stitching was really sunk into the felt. Next it was into the washer. I have a front loader. I hope it works well it isn’t as aggressive as at top loader. I have shrunk a sweater down from an extra-large to a child’s small in it so I had high hopes.

Here is the finished twice washed piece. The red piece is the original finished sized before all the rinsing and  washing. The coke can is for size reference.

blue experriment 4

Here are the close-ups. The texture is much tighter and the piece is much stiffer.

blue experriment 5 blue experriment 6

The biggest surprise was that there are definite lines of wool on the silk side. I am imagine it’s where each rows of wool overlapped. I only laid the wool in one direction for this piece.


Ice Dyeing – A Quick How To

Ice Dyeing – A Quick How To

My local fiber art group did some ice dyeing yesterday and I thought you might like to try it. It’s a simple process, doesn’t take long and gets great results.

MINOLTA DIGITAL CAMERA


The supplies needed are ice, cotton or silk fabrics, fiber reactive dye powders, soda ash, water, a container for the soda ash liquid, a container about gallon (3785 grams) sized to dye in, dust mask, gloves and a spoon to apply dyes. I have not tried this method with acid dyes but it would probably work. You would just need to steam the fabric before rinsing it out.

The first step is to mix 1 cup of soda ash with a gallon of water, stir until dissolved. Place all your fabric in the soda ash water and soak for at least 30 minutes. Take your gallon container, glass jars work really well for this, and place a layer of ice on the bottom of the jar. Put one piece of fabric on top of the ice and just squash it down into the jar. Put more ice on top of the fabric. With your gloves and dust mask on, sprinkle about 1/4 to 1/2 teaspoon of dye powder over the ice. We used 2-3 colors per layer.

ice dyeing 4


Place another piece of fabric on top of the dye powder layer. Put more ice on top of that fabric and sprinkle more dye powder on top. Keep layering fabric, ice and dye powder until the jar is full. I used reds, blues and blacks in the jar seen in the photo above. You can use any colors that you wish.

ice dyeing 3


You can see Carole layering her fabric, ice and dye powders.

ice dyeing 2


Bunny used a large dye pot to work in and it worked just as well as the glass jars. Plus it holds more fabric so you could do larger pieces easily this way.

ice dyeing 7


Once your jar is filled to the top, do a last layer of ice and dye powder and then close with a lid. If you don’t have a lid, use plastic wrap over the top. Then set the container aside for 24 hours. The ice will melt and the dye powders will mix with the melting ice and dye the fabric with fantastic patterns.

MINOLTA DIGITAL CAMERA


Here are my two jars after melting for 24 hours. The hardest part is not disturbing the fabric. Pour out the excess dye liquid and then rinse the fabric. I rinsed three times in cold water in the sink and then put the fabric in the washing machine with a small amount of Synthropol and washed with a regular wash cycle. Then iron the fabric. 

MINOLTA DIGITAL CAMERA


This is one of the pieces of fabric that was at the very bottom of the red and blue glass jar. It’s very dark but I think it will be really nice with stitching using a light-colored thread on top.

MINOLTA DIGITAL CAMERA


I used a variety of small pieces of cotton of various weights that I had handy. 

MINOLTA DIGITAL CAMERAThis is 90# cheesecloth and this is just a small portion of it. It dyed beautifully. You could also put cotton thread in the dyeing jar but I didn’t have any white thread to try. You can also over dye fabrics this way so if you have a fabric that you don’t particularly like, try over dyeing it with this method.

MINOLTA DIGITAL CAMERA


I loved this one. It was on the very top of the red/blue jar.

MINOLTA DIGITAL CAMERA


This was some cotton muslin that was stitched together prior to dyeing. It reminds me of sunlight through the tree tops.

MINOLTA DIGITAL CAMERA


The ice melting really gets different reactions of the dye with the fabric than you can get in other methods. This works with snow too but for those of you that rarely get snow, ice is simple and gives good results.

MINOLTA DIGITAL CAMERAThe colors will be lighter if you use less dye powder and darker with more dye powder. You can mix a variety of colors or not. The results will always be different and you won’t be able to duplicate your results but that to me is the best thing about this method. Each piece of fabric will be unique. I didn’t have any silk but this will work with silk as well. I think this method would be really good to use on silk that will then be nuno felted. 

If you try out ice dyeing, please post photos on the forum or on our Flickr group, we’d love to see how it worked for you.


Dyeing for Class

Dyeing for Class

This weekend and next I am teaching nuno felt scarves. I had to dye silk for bases and wool so there would be a good variety to work with.

For the scarves I used the scrunch method in mason jars. To do this you use fiber reactive dyes. You have to pack you scarf blanks tightly into a container. Next use 2 colours, pouring one then the other over the silk so that it is covered. After 10 min to an hour you pour the sodium carbonate over the whole thing.  Then leave it for at least an hour but really can leave it till tomorrow if you need to. When you rinse you get great mixed patterns. For complete instructions go to Paula Burch’s amazing dye site. http://www.pburch.net/dyeing/lowwaterimmersion.shtml

scarves 1 scarves 2 scarves 3

I also renewed dyed wool supply. I spent 2 days with a large pot dying in 100 gram lots.  this is two thirds. of the wool I split one third off each ball and fluffed them out for the students to use.

dyed wool

There are a couple of colours that are from using up the dye left in the pot after doing a colour. I hope my student like the colours I picked.

Bird Houses are Moving Along

Bird Houses are Moving Along

Bird houses are moving along. After I cut the holes I rolled them a little I put them in to some pantyhose tops for a trip through the dryer to get some of the fulling done.

bird houses in pantyhose They have balloons inside them.

They tumble for about 20 minuets without any heat. Then it’s back to hand fulling to finish them. I did some with merino and some with romney. Here you can see the shrinkage difference between the wool. The merino ones are on top.

shrinkage comparison 2 shrinkage comparison

Next is they get rinsed and more balloons inside to get them to dry the right shape.

drying with balloons for shape

You will notice that the green ones are not in this picture, this is why:

bird houses bleeding

This is their 10th soak so the next step is to boil them to see if that stops the bleeding.

I will do the finishing work on the bird houses this weekend. Why is the finishing always the hardest part. I will add the hanging sting and hang them up for one final picture for  you.


Bird House Time

Bird House Time

Spring is on the way and its time to start thinking about birdhouses. I have an Easter show. Not much in the way of felt really sells at this sale, it’s mostly about food. Bird houses are the exception. Here they are ready to put to the decorations on and then be put together for felting.

bird houses ready to decorate

This one has its decorations started

start decorating

That is as far as I made it. they have been sitting there for most of the week waiting for me to get back to them. I have hopes for this weekend and when they are done I will show them to you.

the wool I used I died myself. It is sold as washed gray Romney but it is really brown and white. If you card it without dying it, it does end up looking gray.

Undied ronmney

Here is what it looks like if you dye magenta, purple and chartreuse.

dyed romney 2

I love the way the “gray” wools dyes. all the mixed shades you end up with. A spinner friend says its called depth of colour, so it’s not flat.  I wish I could find other breads of wool that were that varied in colour to dye.


around the web

around the web

felting around the web 5 small 400

http://www.peaceindustry.com/page.php

Recycled Knits and Fabrics combined with Felt Scarf by Sassafras Design

Heather’s Red and Yellow Scarves

http://mjuliarossi.blogspot.ca/

Have you been following Liz’s journey with her students for Holocaust Memorial Day?

http://www.feltinhand.com/gallery.htm

http://woollove-functional-fiberart.blogspot.ca/2013/01/under-big-top-scarf-part-1-of-2.html

knitting around the web

http://vimeo.com/54243073

stitching around the web

http://www.wendyfeldberg.ca/galleries.html

Nell’s Textile Art Gallery

mixed media around the web

Simple Directions for Covering a Lamp Shade with Felt

Acrylic Leaf Printing for your Art Journal Pages

Shrunken Books Tutorial from Maggie Grey

http://cornit-felt.blogspot.ca/2012/06/about-our-roses.html

dyeing around the web

http://wendyfe.wordpress.com/2013/01/10/eco-prints-to-start-the-year/

Dyeing Some Waste

Dyeing Some Waste

Dyeing some waste.  Throwsters waste that is and I suppose it must have been trash at some point or they wouldn’t call it that. Throwing is was they call reeling silk for thread and this is the left over little bits.  I have a batch of white and needed some colours for a project.  The pictures of wet silk an bags did not turn out but I have some nice pictures of the end.

I dyed small amounts in plastic sandwich bags. First I placed each blob of waste  in a bag and added some soapy water to get it wet. I let it sit to soak while I got the dye ready. I used MX dye as it would be the fastest and easiest. I poured of the extra water out then poured in the dye,  just enough to get it all wet. I squished it around in the bag to make sure it all got dye.  No worries about felting the silk, a nice change from dyeing wool.  I did the same for all the colours and let them sit for 10 min. I added a solution of PH up and water. Buying the pool chemical is the cheapest way to buy Sodium Carbonate, especially at the end of the season.

I made a solution and poured in enough to cover the silk. I let it sit for about half an hour then drained and rinsed the silk. Here is what it looks like drying on my front porch.

Throwsters Waste Drying

Not so great looking. I had squeezed all the extra water out of them. However after they were dry I fluffed them up and they look like this.

Fluffed up
Second Half All Fluffed Up

As you can see fluffed up they barely fit on the same drying rack in 2 batches. My project didn’t work out, the waste I used  on the surface sank into the courser wool I was using and disappeared so I have nothing to show you right now. I am planing to use some more on hats so I will do a post with them later.


Colourful Sheep

Colourful Sheep

Just a quit little post to show you the sheep I have been working on for my Christmas sales. They do stand up so you can use them as a decoration but they will all have a pin on one side so you can wear them.

Colourful Sheep

They are made with a combination of wet felting and needle felting. The ears are cut from a wet felted piece of fabric and I wet felt the snakes I cut for the legs.  The body and head are needle felted. The ears, eyes and all the curls are added with needle felting.  I hand dyed the curls. They are Border Leicester or Blue Faced Leicester I can’t remember.