Browsed by
Category: Community

Member’s Studios – Messy, Chaotic or Clean?

Member’s Studios – Messy, Chaotic or Clean?

Recently I posted a photo of my messy studio room on my personal blog Permutations in Fiber.  One of our regular forum members and a guest blogger here, Karen L., suggested that she would love to see a post about other forum members work areas. She thought it would be great to see how others used their spaces and whether or not they worked in a chaotic mode like I do or kept things nice and neat. I also think that most of the studio photos you see in magazines and online are really not the way most studios look. These types of photos look like “House Beautiful” or “Architectural Digest”. Do people really work in these studios? So this post is about real, working creative spaces. Maybe it isn’t a studio but just a corner in the house or wherever has worked out for creating fiber art. You can click on most of the photos to enlarge and see all the details.

Here’s the photo of my studio (actually when I look at it looks pretty tidy for me). I am working on a variety of paper collages here. There are several in various stages of completion.

And here are two more photos that show various stages of chaos when I’m creating. I do clean up occasionally but most of the time, I have stuff all over the place. And the room is pretty filled to capacity. I need a bigger space but then I end up using the living room, the kitchen, outside when it’s nice…

This photo is Ann’s (shepherdess) creative space. It actually looks pretty clean to me but she says it is messy. Ann wrote a post about her new space in 2015. You can see more of her studio in that post here. 

Marilyn (Pandagirl) has several different spaces that she uses for creating. Her work table is on the left, upstairs storage in the center and her “paper” room on the right.

This is Tracey’s space with supplies set up for stitching. And look at those yummy colors of roving hanging up behind her machine.

And here is Lyn’s work space. She wasn’t going to send any photos at first because she keeps her space neat and she thought I only wanted chaotic photos. She always tidies up after a project so she has a clean slate when she starts a new one. My table has not been that empty in years. Even when I do clean up, there is stuff that lives on the table. I am impressed Lyn 😉

And you might think, like mother, like daughter. But Lyn’s daughter Annie sent this photo of her work table. She said “Here is my current project on the go.  I’m gradually getting more stuff out as I’m testing different fabrics and colours etc on my picture trying to find the right bits.  I reduced the size of my crafting table down to about a third recently but it’s clearly not working.  A bit like getting a smaller handbag but stuffing it full! I will have a big clear up soon though before it gets really messy again during the next projects. I have recently had a big tidy up so the most of the room is not tooooo bad at the mo but it certainly ain’t one of those glossy mag rooms!”

Here’s a photo of Carole’s (akaCraftyWoman) space. Somehow, everyone’s spaces feel much tidier than mine. Even my floor is usually piled with stuff.

Lyndsay kindly sent these photos of her work space. She says it’s a bit cleaner than it normally is and “who knew I had so many pool noodles?”

Last but not least, these are Karen’s photos of her creative work space. So much to look at!

I hope you all enjoyed getting a glimpse into the creative lives and spaces of some of our forum members. I know I did, I want to get an even closer look and peer into all the storage areas to see all the yummy fibers and take a closer look at all the samples, artwork and works in progress. It’s such fun picturing our fiber friends in their spaces creating masterpieces!


Snow and Ice – Guest Post Carole G.

Snow and Ice – Guest Post Carole G.

This is a guest post by Carole G. one of our forum members. You can follow her here: 

https://www.facebook.com/BagsaLicious/

https://craftybeetle.wordpress.com/

During a recent very cold winter with thick ice and deep snow, I was inspired by the start of the melting process on a stream – the ground was frozen, the rocks covered in snow but little by little patches of water were starting to appear under the thick ice and white snow. It was the magic of the slow melt that influenced this piece of felt work.

I started off with a blue layer of felt and built on it in white, my fibres included merino and silks. As I wanted patches of blue to show through I let the background blue peep through in places and added runs of blue into to the top layer of white.

Here is a close up of the fibres showing how the silk adds a new dimension.

I partially felted the piece then stitched buttons in by pulling the loosely felted fabric over the buttons and sewing them in at the back of the fabric. I continued wet felting until I was happy that the button shapes were sturdy and then removed the buttons to leave stone like shapes in the piece.

And this is how it looked as a whole piece.

Although happy with the effect I felt the piece needed sparkle it needed the magic of the snow and ice so I embellished with beads both matte and sparkly and added stitch to create this ice and snow piece.

You can follow my creative meanderings on both:

https://www.facebook.com/craftywomanScotland/

https://craftybeetle.wordpress.com/

Guest Blog Post – The Bird And His Breakfast

Guest Blog Post – The Bird And His Breakfast

This is a guest post by Lyn of Rosiepink. She created a wonderful piece for the Second Quarter Challenge. Thanks Lyn!

The second quarter challenge is to use fabric as a surface design instead of a base, so
out came my boxes of fabric! Spring has come to my garden and it’s a welcome sight after the winter, so what better place to find inspiration for my challenge piece – the bird and his breakfast.

First I drew a bird. It’s not accurate, anatomically speaking, but I like its quirkiness.

After a lengthy rummage through my fabric stash – and finding lovely pieces I’d
forgotten all about – I chose two very open weave fabrics for the background and the
bird so that the nuno felt would end up flat rather than ruched…

…then I made two pieces of nuno felt using four fine layers of white merino wool under
each piece of fabric.

The brightly coloured fabric was a triangle, so I cut it in half and placed the two pieces
together to make a square to make the felting easier – you can see the cut in the photo
above.

Both pieces of nuno felt needed a light shave to remove the superfluous white fluff from
the surface to reveal the bright colours. You can see the white fluff obscuring the colours in this angled shot…

…and here’s a close up of pre and post shave – quite a
difference.

The bird has 12 distinct shapes within its form, so I used the drawing as a pattern to cut
12 shapes from the brightly coloured felt when it was dry.

Using the side of a dark blue ‘Sharpie’ pen point, I touched along the edges of every
shape to give a little definition. I coloured in the eye, using the same pen, then added
three small white stitches for the eye-glint.

I needle felted the pieces into place – it was a bit like doing a jig-saw! I didn’t go too
close to the edges of the nuno felt shapes because I thought it might disturb the surface
too much. I needle felted gently so that the shapes adhered to the background but didn’t flatten, so the bird is in relief.

The worm is wool yarn needle felted into place. The piece of worm going from the
ground to the beak is thin compared to the bit hanging from the bird’s beak to show how
stretchy worms can be!

Great post, thanks Lyn!

Hat workshop with Sarah Waters

Hat workshop with Sarah Waters

Although I’ve made a lot of 3D felt, I’ve never made a hat (I’ve made berets, but they don’t really count). This is because:

  1. I don’t wear hats (unless it’s extremely hot or extremely cold, neither of which happens much in the UK)
  2. I’ve never found a hat that suits me (which may be related to point 1)
  3. I don’t have a hat block.

However, when the London branch of the International Feltmakers Association announced a hat workshop with Sarah Waters in March, I signed up. I’d seen Sarah’s magnificent Stone exhibition at the Knitting and Stitching Show last October – wonderful textured work on a huge scale – so thought it would be good to learn from her.

Thankfully, the hats we made were on a smaller scale! Sarah had brought along examples of various styles for us to try on to decide which suited us.

After a lot of umming and ahhing I decided to go for the cloche hat because the height and the brim were more flattering to my rather round face.

We started by making some samples to assess shrinkage rates and also experiment with different colours and textures. Sarah had generously brought along lots of offcuts of prefelt and fabrics for us to play with, in addition to our own considerable stashes!

These are my three samples, of three, five and seven layers of fibre. Although most people used three layers, I ended up using seven, because I wanted my hat to be very firm!

After measuring our heads and making some mathematical calculations, we got on with drawing out our resists and laying out.

Here is the inside of my cloche (Sarah reminded me that the inside of the brim would show, so I added some fabric along the bottom).

This is the outside.

Please note here the spots of gold-coloured fabric. This was a silk chiffon that was dark blue on one side and gold on the other. I’d used it in one of my samples and it worked quite well when felted, giving a subtle sheen (it’s the triangular shape at the top of the left-hand sample). Here I’d laid it on top of some thick circles of leftover pink prefelt.

However, when I got to the fulling stage, I decided the shape wasn’t really working. The hat was too tall – it hadn’t shrunk enough because I’d used so many layers. So rather than trim off the excess at the bottom, I reshaped it into more of a pork pie hat, with a partly upturned brim and a flatter crown. It actually suited me much better!

But remember the gold fabric? Well, the gold colour completely disappeared in the final hat, leaving much subtler blue circles, which was a bit disappointing.

This is a perfect example of what I like to call AFOT EUWA (aim for one thing, end up with another!).

Here are some of the other lovely creations made in the workshop by Emily, Nina and Sue.

And a final group shot!

How often do you aim for one thing but end up with another? 🙂


Nuno Felting

Nuno Felting

When I read this week that the second quarter challenge is to be Nuno Felting I thought I would share the first of the few Nuno projects I have done so far.  I say “few” because although I trawl the charity shops for silk and chiffon scarves on a regular basis most of them still reside in the plastic box under my table!  I’ve actually done very little with them so this next challenge should see some of these lovely fabrics being put to good use!

My introduction to Nuno Felting was in 2016 when I attended a workshop at Artvango with a lovely feltmaker called Clare Bullock.  Rather than taking the easy route (silk, muslin etc) we had been encouraged to try a wide variety of fabrics, some of which were going to need a lot of coaxing to get the fibres to migrate through.  Clare kept a watchful eye on us to ensure we weren’t taking any shortcuts which meant everyone’s samples were successful.  By the end of the workshop I took home five pieces of work incorporating a variety of fabrics including fine cottons, viscose, silks, wool and polyester.

Fabrics prior to fulling
Fulling complete


It seemed a lot of work at the time but there was something magical about seeing the textures emerging as the wool shrinks and I just loved the texture from the green woollen shawl…pity I didn’t get a “before” picture of the green/blue fabrics.

I came across the orange and the green/blue samples again when I was having a tidy up last year and decided, rather than putting them back in the drawer, to add some very simple stitching and frame them as landscapes.

Since then I’ve made several Nuno scarves but not really taken the time to be experimental with Nuno……this next challenge should provide the inspiration I need to have a play!

Two Dimensional Needle Felting and Wool Varieties

Two Dimensional Needle Felting and Wool Varieties

I love all things fibery.  So much so that I opened a store, Big Sky Fiber Arts.  It feeds my fiber addiction, and allows me to experiment with textures, colors, and types.   Customers  who are new to felting often feel a bit overwhelmed by the variety of fibers that can be used in felting.  With this in mind, I would like to share some of my thoughts on different wool types for two-dimensional needle felting in particular.  This post will mostly be of interest to those who are new to needle felting, but perhaps some of the information will be handy to people who want to experiment a bit more.  I thought I would use a few examples of my own two dimensional work to illustrate key points.

When I make a decision about which wool to use, I think about:

  • Color
  • Staple Length
  • Micron count

Staple length refers to the length of the fibers.  Micron count describes the thickness of the individual wool fibers.  Wools with lower micron counts are finer (thinner), and wools with higher micron counts are coarser.  For example, extra fine merino is typically 18-19 microns. It is quite fine. Given this, it is great for nuno felting as you want the thin fibers to interweave with the silk. Some people like higher micron fibers for needle felting as the needle marks are less likely to show. However, you can achieve a lovely painterly effect by needle felting with fine carded merino on felt, linen, and other surfaces (2 D needle felting).

A handy reference for wool types and their micron counts was made by Pat Sparks. You can see it here:

http://members.peak.org/~spark/feltingwools.html

The length of the fibers is important in needle felting. If you want to create 3-D fur, long fibers going in the same direction (combed top) is helpful.   But, if you want a relatively smooth surface, you will likely find that wool made into batts with short fibers is easier to use.  The short fibers can be felted into place more readily than the long fibers found in roving.

3-10-2018 4-04-54 PM

In the wolf piece above, I used Maori (carded Corriedale and Coopsworth) wool.  It comes in a batt, and it has short fibers that go in all directions.  I needle felted it over yarns and locks for the background.  For the eyes and parts of the nose, I also used Maori.  The coat of the wolf is made with Shetland, Corriedale, Romney, and Tasmanian Polwarth combed top.   I carded the wools together to get shades I liked. These wools have a micron count of around 27. The Polwarth is a little lower. The staple length is around 4 inches or so with the Shetland being the longest.   I added a little sparkle to the coat with some nylon (synthetic) roving.

To enhance the 3 D effect, I used core wool first.  For core wool, you want a malleable wool that holds its shape well and felts quickly. I needle felted the core wool with a short fiber length over the nose.

IMG_0344.JPG

I made the fur by stretching out a piece of roving at the appropriate angle and needling a line down the center.  I then flipped the piece on the left onto the piece on the right. I worked from the bottom and side of the piece up to the face so that I could blend in the hair.

I used a similar approach in this needle felted ram.

SONY DSC

I used core wool first to build up the ram’s antlers and nose. The tree is made from extra fine merino combed top.  I carded it into a batt, choosing cinnamon, bark, black, and coffee.  Carded Maori is used in the background.  The ram’s coat is made from Corriedale and Shetland combed top.  I used some lovely rare Asen locks from Sweden for the chest of the ram.  You can’t see it too well in this photo, but I felted in locks in the foreground. Maori is used on the face of the ram and on his antlers.

Sometimes it can be fun to work with fiber that has a short staple length and is quite fine.  I’ve recently begun experimenting with camel and yak roving and down (like a batt) for just this reason. Camel and yak come in nice natural colors that are suitable for a variety of critters. The micron count is 17-19, and it felts quickly. It is quite soft.

rabbit

Camel and yak are wonderful to work with for two-dimensional needle felting because the fibers are so short — just 2 inches!  This bunny was a bit more golden than my camel roving so I mixed it in with some lovely chestnut Romney.  In order to make the short fur, I cut up the Romney into shorter pieces.  To make the ends look more natural, I took the piece of Romney in my hands, pulled it apart, and re-laid the fibers on topic of each other. This prevents all the cut ends from being on the same side.

It is great fun to use locks and fleece for texture.  In this picture, I used Leicester locks.  They are thin, long, and grass like.  The purple locks are mohair.  Wensleydale locks also work well and look quite similar.

It is also enjoyable to needle felt two dimensional pieces with short fiber merino. Merino in batt form typically has a short staple length.  Because the fibers are short and fine, it is easier to to control, and you can achieve a rather painterly look.

Half the fun in felting, in my opinion, is opening yourself up to the variety of wools out there and experimenting!  Happy felting!

Karen@bigskyfiberarts.com

BigSkyFiberArts.com

Green Man – Guest Post by Carole G.

Green Man – Guest Post by Carole G.

This is a guest post by Carole G. one of our forum members. You can follow her here: 

https://www.facebook.com/BagsaLicious/

https://craftybeetle.wordpress.com/

I love forests, the magical paths that lead you through oaks, birch, beech and ash and the faces, there are always faces to be seen in tree trunks.

It is this imaginary along with my curiosity about the ‘Greenman’ and the many ways he is depicted that has taken me along a path of my own. A path of experimenting with leaves, print, shapes to eventually create my own ‘Greenman’.

Part of this journey including using paints, hand dyed fabric, freehand machine stitch, trapping fabrics together with stitch, I even tried trapunto, my final attempt was using merino and bits of fabric with stitch then cutting out shapes. I’m not particularly happy with the final piece but I adored the journey and will revisit this in the future.

First of all I decided to paint paper and print leaf shapes on to it.

Then I decided to use sun dyes to create leaf shapes on fabric ( I haven’t tried this on felt but I think it would work the same way) and highlight the shapes using a freehand machine stitch technique called trapunto.

My next leg of the journey was to explore ways using freehand stitch and trapped merino and other fibres to create leaf like images.

Moving on I decided on the trapped fibre approach and made up a few leaves before trying them out as a Greenman face.

Moving on I needed a backing for this man of the woods, so I painted up some burlap to keep a rustic feel going and hung him from a branch.

You can follow my creative meanderings on both:

https://www.facebook.com/BagsaLicious/

https://craftybeetle.wordpress.com/


A Sweater Story…..Can You Help?

A Sweater Story…..Can You Help?

At the start of February last year I posted that I had had a go at felting a sweater with designs on turning it into a bag.  I had purchased it in a charity shop for the princely sum of £1.  It had a lovely cable pattern to it, and it reminded me of the sweaters my Mom used to knit for people for some extra money.  I remember being in awe that she could complete a sweater within a week,  not being a knitter I assume now that this is not really an awe inspiring thing after all……..the wonderful innocence of youth!  When they were finished she would put them under the seat cushions on the sofa for us to sit on and ‘press’.  She tried to teach me to knit but I don’t know whether it just didn’t sink in or I was too young to be bothered, I think it was probably the latter…….

The sweater went in on a 40 degree wash, just to be cautious, and it didn’t felt enough, so I did a second wash at 60, still not good enough, so it went in again at 90, luckily it had felted sufficiently at that point as I didn’t really have anywhere to go from there!

So then I had a felted sweater and I couldn’t figure out how to re-figure it into a bag shape.  Luckily I have a friend who is more of a sewer than me and she helped at this point, by cutting it in the correct places to maintain the pattern in a symmetrical way, and sewing it up using un-ravelled wool from the arms.  She also made a clever deep internal pocket by utilising one of the cuffs.  I am sure I would have just hacked at it randomly, she thinks deeper and in a more practical way than me.

20180124_142655

I wanted the bag to be an over the shoulder, sitting on your hip type of length and unfortunately the arms were of no use for this.  I came up with the idea of a bead/felted ball type of handle and sourced these lovely wooden beads online, and made forty felted balls, I think I used Corriedale wool.

BEADS AND BALLS

I had made the balls pretty tight, so it was a bit of a struggle to push a long, strong needle through them all, using wool salvaged from the sweater.  I didn’t line it as I wanted to see the cable pattern on the inside too.  Here is the outcome.

20170201_083442

Or I should say, it was the outcome for a short while…………I used it a couple of times then one day I had just arrived at a car park, I put the bag over my shoulder and SNAP! one of the lengths of wool sewing all the beads and balls together broke, and there I was scuttling around the car park trying to retrieve my wooden beads that were rolling in every direction! laugh? nearly!!

Now this is a sweater that has felted beautifully and I do want it to live life as a bag so Plan B is necessary.

I did like the felted balls with the addition of the beads.  However, if I am being really honest, the design didn’t sit the best on my shoulder……I really wanted a handle to compliment the soft, natural colour and pattern of the bag.

I thought maybe of producing a length of felt and encasing it in a pretty fabric, as I did here for my flower meadow bag that I made a while back.

20180124_140711

20180124_140732

Or perhaps I could use a twisted cord such as these but in a much better colour.  These examples are white with a blue fleck, black and a nice cobalt blue.  Or maybe two twisted together for thickness ?

20180124_142103

If I could knit, one solution would be to buy more wool and create some handles that way,  but this is not an option unfortunately as I do not have the desire to learn.

Those are the only ideas that I have come up with this far, so it’s over to you please, do you have any bright ideas to make my ex-bag into a loved bag again?

What would you do?

Felting with old sweaters

Felting with old sweaters

I’m a great recycler, as I suspect many textile lovers are. Much of my business is based on scouring charity shops and jumble sales for items that other people have discarded and transforming them back into desirable objects. Some old scarves get used for nuno felt; others are overdyed with indigo or overprinted.

Recently I had a go at darning an old sweater, after being inspired by an exhibition for a craft prize. But some of my sweaters have gone waaaay past the darning stage – so I thought I would try felting with them, using them as a kind of prefelt.

For the first sample I cut out circles and felted them on to two layers of white superfine merino. As they were 100% wool, they felted in really easily. I forgot to take any photos before felting, but the picture below shows the finished sample.

flextiles sample of felt with sweater circles

The circles on the left were covered with another two layers of superfine merino, as I wasn’t sure whether the base of two layers would be enough to support the circles. Obviously this felt was much thicker and you can hardly see the colour of the circles through the top layers.

The sweaters were knitted in stocking stitch, and the circles on the middle were laid out with the right side up, while those on the left were reverse side up. They looked quite different before they were felted, but after felting there was very little difference.

As you can see from the photo the superfine merino shrank a lot (around 50%) so there was very little space between the circles in the final piece. So in the next tiger stripe sample I left more room between the stripes.

flextiles felt tiger stripe sample before felting

You can clearly see the texture of the sweater before felting; after felting you can just about see the vertical rows of knitting.

flextiles felt tiger stripe sample

Although the stripes are also wool, they have not shrunk as much as the merino they are attached to. This leads to a pleasing texture of ridges, where the stripes are much higher than the base layers of merino. I’ve tried to show this more clearly in the photo below.

flextiles felt tiger stripe sample close up

After I made this sample I realised that white, green and purple were the colours of the Women’s Social and Political Union, which campaigned for women’s right to vote in the UK. White symbolised purity, green hope and purple dignity.

So to celebrate the centenary this year of some women in the UK getting the vote, I made a small suffragette neckpiece. 🙂

flextiles felt suffragette neckpiece

I really like using old sweaters this way – it saves me having to make prefelt!

What’s your favourite upcycling tip?


Polar bear for the 150th Anniversary Art show

Polar bear for the 150th Anniversary Art show

Another exiting felting post by Jan Scott

This is the Guilds display for the 2017 Ottawa Valley Farm Show in March of 2017. Lynda is hiding behind her loom, Ann is about to spend the day making felted beads with the kids, and Merilyn is spinning beside the empty chair where I was working. We do put on an interesting demo!

The Farm show is a huge display of farm equipment, seeds, antique display, farm oriented venders, trappers, government department’s booths, the wool growers co-op, and various breed and rare breed associations. It is really a huge event drawing people not only form the Ottawa Valley but the rest of eastern Ontario. It’s always early March so weather can be an issue. We had a blizzard the second day of the show.

I was getting lots of interest in the pieces I had already completed for the 150th Art Show.
It was time to start the next project. So before the demo it was time to decide what to do next. After much debate between Moose bison and polar Bear I decided to continue with the arctic theme.

By now you are likely starting to guess my working process. So yes it was back to the internet to find reference photos and work out a composition likely from a composite of pictures. Working with a square is a lot more challenging. The eye naturally is drawn to shapes that feel comfortable, shapes that follow the golden mean or Fibonacci to figure out stripe progressions (Rectangles). Shape that have proportions you find in nature. Squares are definitely more of a challenge. But I’m use to a good challenge, you should see my un-spell-checked spelling!

So the quest was on find an image I could made square. but not be too static. So either intensity or dynamic composition was what I was looking for. So find images that cought my eye, then crop to square.

As I perused the inspirational options I thought about the talk Robert Bateman had given at Halliburton last summer. He spent some time discussing some of his earlier work mentioning his frustration painting a polar bear in a snow storm then the next painting was a black timber wolf at night in a dark forest. He had mentioned that white wasn’t just white. So to look carefully and not assume you know your subject just because it’s “white”.

This slideshow requires JavaScript.

Some images were very interesting but just didn’t want to be square.

Then I spotted this one. The intensity of the look was amazing. The shapes were simple but if I could get the eyes it would work really well. The image dew you in, there was such contemplation and stillness. It was like looking a momentary paws in the action. I liked it! Ok I had my inspiration.

Day one demo
I brought my large foam pad, core wool (Rideau Arcott), and various shades of white grey browns yellow red and blue. (I as optimistic but didn’t think I would get the understructure done in one day.) I got dropped off around 7ish, parking can be very crowded so it was better to get there unusually early and I could set up and get started. Glenn had over time so it was a late pick up as well so I was there for over 12 hours. I got a lot done.

I had premade my background felt layer at home using my wicked 10 needles in a row tool. It was again impressive how well it worked on flat felting.

For the understructure I mostly worked upside down to help get the general proportions correct. I could have made a graph over the photo to make a more exact copy but I wanted the photo to be more an inspiration than an exact likeness.

I was explaining the backing layer that the understructure would be attached to.

I got a lot of “what are you making” in the morning, then by afternoon it was “is that a dog?”
Most said they would come back later to see what I had accomplished on their way out.

A couple more quick shots of the demo in progress before we go on to day 2.

This is a very cool loom from around the 1970’s. It was fascinating to see it working.

Ann had a lot of help making felted beads using pencils. She is really amazing!!

Merylin was busy spinning some of her Sheep’s wool she had dyed herself. She has a beautiful painted wheel.

Day 2 demoing
I had booked off 2 of the 3 days of the demo. So again I got there unreasonably early, got help to get the display set up again.

Today we had Gord with one of his great wheels (he has several)

I had the understructure to my liking and started working from the top down
Amada was spinning on her Hitchhiker wheel. She dose amazing natural dyeing some of which was on display.


As you can see in the foreground of the picture I had progressed to adding colour to my under structure. By the time I hit the eyebrows I was starting to get comments of “is that a polar Bear?”
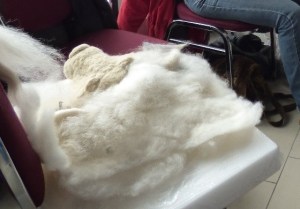
I chose blue face Lester since my memories of my Grandmothers Polar Bear rug is still vivid in my memory. Since I think the last time I slept on it was over 40 years ago it really did make an impression. It had a yellow tint to the white fur, the fur was stiff but not really course. It was smooth if you patted it in the direction the fur grew. It was a wonderful polar bear I don’t know what happened to it. I hope it is still being loved by small children sleeping on it.

This is the progress at about ¾ of the way through day 2. I was definitely felting faster on this one.

Day 3 of the Farm show demo.
I had a short day of work so rushed back for the final day of the demo. We had a pretty full demo team and the weather was a bit better than the previous days’ blizzard.

Laurie and Julie are Weaving, Merylin was spinning and I was still felting.

I got a lot more of the face done. But it was slow going due to hand blending each section I was working on. I was still finding the hand blending less uniform, which was what I wanted, than using the carders. Also with the different lengths of fibre I was blending with the blue face Lester it was a lot easier to work with it just by hand. I wound up with alpaca as well as wool to get the colours I had wanted.

I had a couple more evenings of touching up the colour and the Polar Bear was complete.

The pieces made another appearance at the demo for Dickenson day in Manotick Ontario.


This is my show and tell the meeting before the show.

Here are all the pieces I did for the 150th anniversary show.

While I was making Polar Bear I thought about my western Grandmother and about my brother who has done most of his work in the North so I am giving this piece to my brother Dave. This is his Bio so you will see why I was thinking of him.
(Dr. David J. Scott is the Executive Director of the Canadian Polar Commission in Ottawa. Prior to his current post Dr. Scott had a long career with the Geological Survey of Canada (GSC), finishing as Director, Northern Canada Division.
At the GSC he also served as acting Director General, Planning and Operations Branch, and led the GSC’s Gas Hydrates and Northern Resources Development programs. From 1999-2003, he was based in Iqaluit, Nunavut, as the founding Chief Geologist of the Canada-Nunavut Geoscience Office.
Dr. Scott holds a Bachelor of Science Degree in Geology (McMaster University, Hamilton, Canada) and a PhD in Geological Sciences (Queen’s University, Kingston, Canada) where his thesis research investigated the tectonic origin of two-billion year old oceanic crust in Arctic Quebec. He was a Research Associate in uranium-lead geochronology at the GEOTOP laboratories of the University of Quebec at Montreal. He has published and presented over 80 technical papers.
I am very proud of his many accomplishments. I wonder if he will put it in his northern office his southern office or keep it at home. Where ever he puts it I hope he enjoys it.

I have a PS to this Post Jan won the peoples choice award for her Polar Bear at our Canada 150 Show.