A short bit more about felting surfaces
As you may remember from my last post, I wanted to look at some of the types of felt pads but had not yet got my hands on them. Well, this week 2 examples have arrived! I hope you won’t mind and will join me as I investigate.
The felt pads from the descriptions and images seem to come in 2 main types.
Thick felt pad; the photos look like industrial Felt, which is made with hot pressed steam rather than a felting machine. (Photos can be deceptive!)
Felt pillow; which looked like an outer felt layer stuffed with something, hopefully, wool.
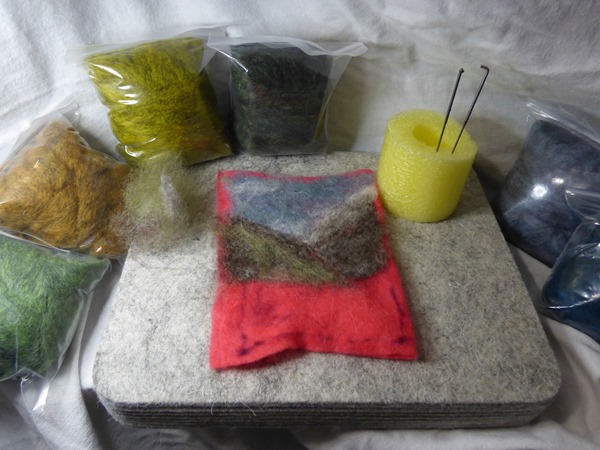
Testing tools.
For this test, I used two thin layers of commercial red craft felt. It is a cheap, not 100% wool felt and is very thin like a pre-felt which stretches easily. It is not as nice as the real wool felt but also not as unpleasant as some of the acrylic felt that seems to be shredded fibre (and possibly dryer lint) held together partly by glue. For needles, I am trying a single T36 and the fake clover tool with T40s, the fibre is from my stash, some are from Bernadette’s Batts, some was Galaxy Melange (died grey wool) from the World of Wool (UK) and a bit of died core wool from Sarafina fibre arts. (Just in case anything looked particularly appealing and you desperately needed a bit for yourself.)
 1 craft felt – has the thickness of very thin prefelt
Test subject #1:
 2 Comes in a nice cardboard box with a wooden needle holder just like the ones I have been ordering from China.
 3 Close up of felt pillow showing value-added felting tool.
Let’s start with the smaller pad, 7.08 x 7.87 x 1.57 inches (with a nice 3 needle wooden needle holder).
Its described as “Thick and sturdy: Our gray needle felting mat is thicker than ordinary felt, and it is not easy to scratch the tabletop. Felting needles is made of soft felt and dense sponge. The needle felting mat has the best density. It is also equipped with felting needle supplies, allowing you to get a better needle felt experience.” The Cost was CDN$ 16.99 (Not cheap but it did come with the expensive wooden 3 needle holder I was already familiar with. The needle holder has a bit of a wobble as you unscrew the handle but doesn’t rub or catch, so is not one of the factory seconds I had purchased directly from china). The description left me a bit confused but still curious enough to get it.
The cover felt layer is approximately 1/8” thickness with a sewn seam connecting the two layers. The interior feels like a piece of foam or firm sponge. The edges look like it has had heat applied to them. The way the edge of the felt layers has bits of melted fibres suggests that the felt has a lower wool component so likely a higher component of synthetic than wool.
 4 edge of the felt outer layer with a firm melted edge.
The feel of the needle entering the top layer of the pad feels like the short stapled acrylic felt that is partly held together with glue. There is a noticeable resistance to the needle penetrating into the felt layer of the pad. This is less noticeable as I add more wool to the little picture I am working on. This may not be an issue when working on a thicker ground layer to the picture than it would be with such a thin one.
 5 Starting with a bit of sky
 6 Adding some hills,
Pushing the needle through the felt had resistance, similar to that found in the cheap craft felt that has a glue component to it. It requires the piece you are working on to be lifted regularly so it won’t cling to the felt cover. Once the needle had penetrated the felt the feel of the sponge or foam inside is comfortable. There does not seem to be shifting between the foam and the outer felt so I don’t think there will be any added worry about lateral movement and broken needles. I suspect this is not a felting surface I will use frequently although the wooden needle holder is always a nice addition to my collection. This pad will likely be put aside for students to look at during workshops.
After working with the pad for about an hour I noticed that I could see a red tint of fibres from the felt base I was using. A firmer base felt for my picture may not have left as much residue.
 7 Red residue left from the back of my felted picture
Test Subject #2
 8 the second felt pad, came with 9 needles in 2 lengths
“Needle Felting Pad made of pure wool dimensions 10 x 8 x 1.2 inches, Needles and leather finger pads included.” The cost was CDN$ 13.99.
As I opened the taped closed plastic sleeve that the pad was in, I inadvertently did a sniff test. Ummm…. Well, that is an odd aroma…. Slightly like, petroleum? Ann took a sniff when she was over, she may have a better description. The smell decreased to barely-there over the last 2 days. I suspect the smell may dissipate if left sitting outside in the sun… for a while.
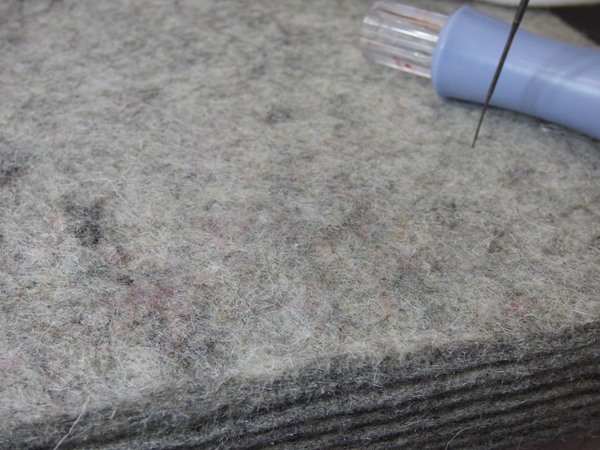
The second felt pad defiantly is made of wool that has a lot of kemp in it. The edges look like it is made in layers or it may have been the implement that cut the felt has left bands and groves. The close-up photos hopefully makes the kemp easy to see. if you look closely you can see fibres (Kemp) descending from one layer into a lower layer. This makes me suspect that this has been made in a needle felting machine. From the original photos, I had expected this to be the hard industrial felt used in ironing pads but this has some give to the surface.
 9 Note the kemp which there is a lot of.
(Video testing firmness) P1790339 10 checking squishiness
I added more wool to the picture to test how the pad feels when used. Not bad. The surface is soft and the needle has much less resistance on entering the pad. I like this one better than the last one.
 11 Testing felt pad 2
 12 Adding World of Wool fibre.
 13 Shortening the hills, adding foreground and water. This makes me think of the north.
Ok, that is working well, let’s see what else I can try. I had meant to make the picture 3×5 but I am interested to see where the water is going. (you can’t trust the sneaky wet stuff, it’s likely trying to escape the picture and make a run for it.) Let us change the size of the picture and make it a 5×7. So I need to add both length and width to the picture. I added fibre around the edges of the picture building up the size to what I wanted. I found lifting frequently kept the fibre from sticking.
 14 Here is the front of the picture
 15 You can see how the original rectangle has expanded with the added fibre. (What a mess! I will not frame this one with double glass!)
I did find that there was some transfer of the kemp from the pad to the back of the piece. I do not know if this will lessen as I use the pad. I suspect it may.
 16 Kemp transferring from the mat to the back of the piece.
 17 There was a small amount of red f transferred from the back of the picture to the mat.
This mat I would use again. It has improved in smell, it is comfortable to use, and it can hold a 5×7 or a bit larger picture.
We have a new game to play!
Today was our local guilds Library day. I had been into the studio last week pulling requested books and getting everything ready for today. Ann had seen and smelled the second pad right after it arrived, (when it was at its stinky-est). Today I brought the finished piece and the mat to have a few brave people try the fun new game “what is that smell?” After some careful sniffing, we have come to two suggestions from a number of players. One was it was “ode de Mutton Urine” or possibly “ode de petroleum product”. The suspicions were that the wool may not have been as clean as we normally deal with or the lubricants used in the carding process had gotten in the wool giving it the odd aroma.
 18 The new game “What is that smell?”
 19 “Sniff”
 20 “Oh my! Ode de Sheep Urine?”
 21 Testing it with a needle
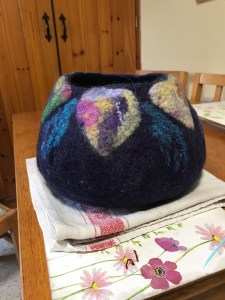
 22 Admiring the little test picture
The original wool may have been a lower grade or kempy carpet wool (not a bad wool just more ideal for hard-wearing carpets than soft woolly underwear. There are many types of sheep and many uses for each of their different type of wool)
I hope that gives you a couple more options for taking out your more violent stabby tendencies. I may still try to make my own pad using a felt outer layer and wool core. I am suspecting there may be less compacting of the inner core of wool if I use something that is more like hair than something with a lot of crimps. I wonder if I can find some unwanted Tog (I have been collecting tog for an Icelandic blanket project but may need to find more!) if I don’t want to waste good tog, I can always take a quick trip to Carlton Place and visit the Wool Growers Co-Op and see what they have in there carpet wool box! That sounds like a reason for a road trip!!!
On another topic, Signs of spring!
I am sure I will soon be out in my garden side yard studio. I know this since I have seen signs that the first of my trees have migrated to their summer location! (Spring tree migration time!!) Spring must be getting close!! I hope you are enjoying spring or can see it coming (keep an eye out for those migrating trees!) and I hope you are having fun felting.
 23 The day-old tell-tail-tracks of tree migration
 24 The tracks end here where we find the noble wandering trees (their poplars) I am sure the rest will follow their lead in the next week or two! (yes I have a small portable forest)
Like this:
Like Loading...