Recycled Coffee Capsules
It doesn’t seem all that long ago when life was simple and the only decisions we needed to make regarding our daily fix of caffeine were “instant or percolated”, “black or white”, “with or without sugar”?
How times have changed! Nowadays we have a dazzling array of flavours and styles to chose from when visiting our favourite Barista. I did once try a cinnamon and syrup latte in M&S and have never forgotten how vile that was…..give me a straight forward, simple latte every time! On the other hand, if you like your coffee more exotic, there are plenty of rather weird (and probably not so wonderful?) tastes to explore. The Farm Girl Cafe in Portobello Road could be the place to visit if you fancy a black charcoal latte made with activated charcoal, date syrup and cashew milk. Or how about their blue Butterfly Matcha made with organic blue matcha powder (now there’s an interesting ingredient to look up) with almond milk or their most famous creation, the rose latte (a double shot with rose water infused milk and petals)….there is obviously a market for it but personally I think I’ll pass!
Of course we no longer have to go out to get our fix of posh coffee thanks to the popularity of the domestic barista machines and the single use coffee capsule. Although many of these are said to be recyclable, according to Nestle, only around one third of their capsules (Nespresso, Dolce Gusto, Tassimo) were being returned to the manufacturer for recycling in 2020. The rest were ending up in landfill where it’s predicted they will take 500 years to breakdown!

A “not for profit” organisation in the UK called Podback are now working with local councils and other organisations to make it easier and more convenient to recycle our capsules with roadside collections alongside other household recycling. Consumers also have the option of leaving them at over 6,500 Yodel drop off points and we should soon (if it’s not happening already) have them collected by supermarkets when they drop off our online shopping.
That’s all sounding good but many of us are finding more creative ways to recycle our coffee pods, albeit on a far smaller scale. One use is to add them as interesting, textural ‘inclusions’ to a felting project. The first time I saw this done was in 2018 when I attended a Felted jewellery workshop with the wonderful German tutor Ricarda Assmann. Although we were working with fabrics, not capsules, three of the necklaces Ricarda brought as workshop samples had the aluminium crushed pods in them. At that time I didn’t have any capsules but the contrast between the hard texture of the metal and the soft feel of the fibres really appealed to me.


Another fabulous feltmaker, Judit Pocs, created this enormous “Gate” wallhanging in response to a commission from the Feltmakers Association. It is something like 2mtrs tall and studded with crushed capsules in a multitude of colours. Judit also makes beautiful rings with them and teaches the technique for making these in her online workshop.


The year before I attended Ricarda’s jewellery workshop I had the idea to recycle my collection of Tektura acrylic wallpaper samples as inclusions in my pendants (I never throw away anything that might have a use in the future!) It’s a simple process but very effective, wet felting the “waterproof” paper discs between pieces of prefelt. Four years on, and with those papers almost depleted, I’m now starting to use coffee capsules instead. Being thin aluminium they can be crushed by hand (that’s how I did the gold one in the ring) or they will flatten more easily with a little persuasion from a hammer, in which case I find it best to cover them with fabric first to avoid the hammer scratching off the colour. I’ve also started using them in some of my brooches.


I’m sure some of our readers will have tried Felting with capsules and I know Ann did some experimenting with them which you can see here, has anyone else tried this? They could look great in 3D pieces such as bags, sculptures, etc. I did a google search and didn’t find any other images of felt with capsules but I’m sure there’s lots out there somewhere. I did find zillions of “non felted” ideas for recycling on Pinterest, Etsy, YouTube, etc and websites including ecogreenlove.com, these are just a few…..


There are so many inventive ways to create with coffee capsules and with Christmas fast approaching they could be used for decorations or even nativity scenes like these found on Pinterest…….


I will leave you with one of the most impressive uses I came across which was the stunning 2017 catwalk collection by Birmingham designer Rhys Ellis. Rhys studied Fashion Design at Birmingham University and, as part of his course, he spent a year in Italy studying at the Politecnico di Milano design school alongside world-renowned tailor, Guiltiero Fornetti.
“It was while I was in one of the markets that I saw a lady making very simple jewellery from these coffee pods and something just clicked and I knew that I could create dresses this way.“ “I also liked the idea of using material that would otherwise be thrown away.”

I won’t be making anything that dramatic but I am planning to make lots more pendants and brooches. I might just add some capsules to my next felted bag too. If you’ve done anything with them we would love to hear about your projects in the “comments” and you could always post them on the Forum.
 1 Mary’s Living room Chickadee keeps an eye on the nuts
 2 Look I found in the Napkin basket
 3 eggs!

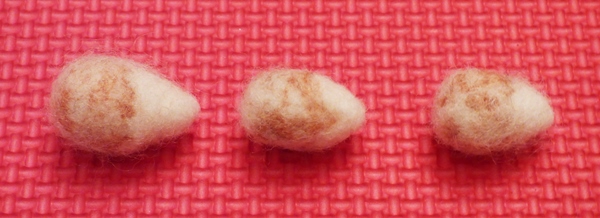 4 – 6 Egg close-ups