Yurt Beginnings
We finally purchased the wood to begin making the yurt frame. I can’t begin felting until the side walls are made so I know the correct size to felt the cover. The yurt frame is made up of 4 lattice sections (think baby gate here) and then the roof poles attach to the top of the lattice and insert into a round piece called the tono at the top of the yurt. We are following instructions from a book by Paul King. If you click on the link, you can see what a professionally built yurt looks like. Hopefully, ours will be close.
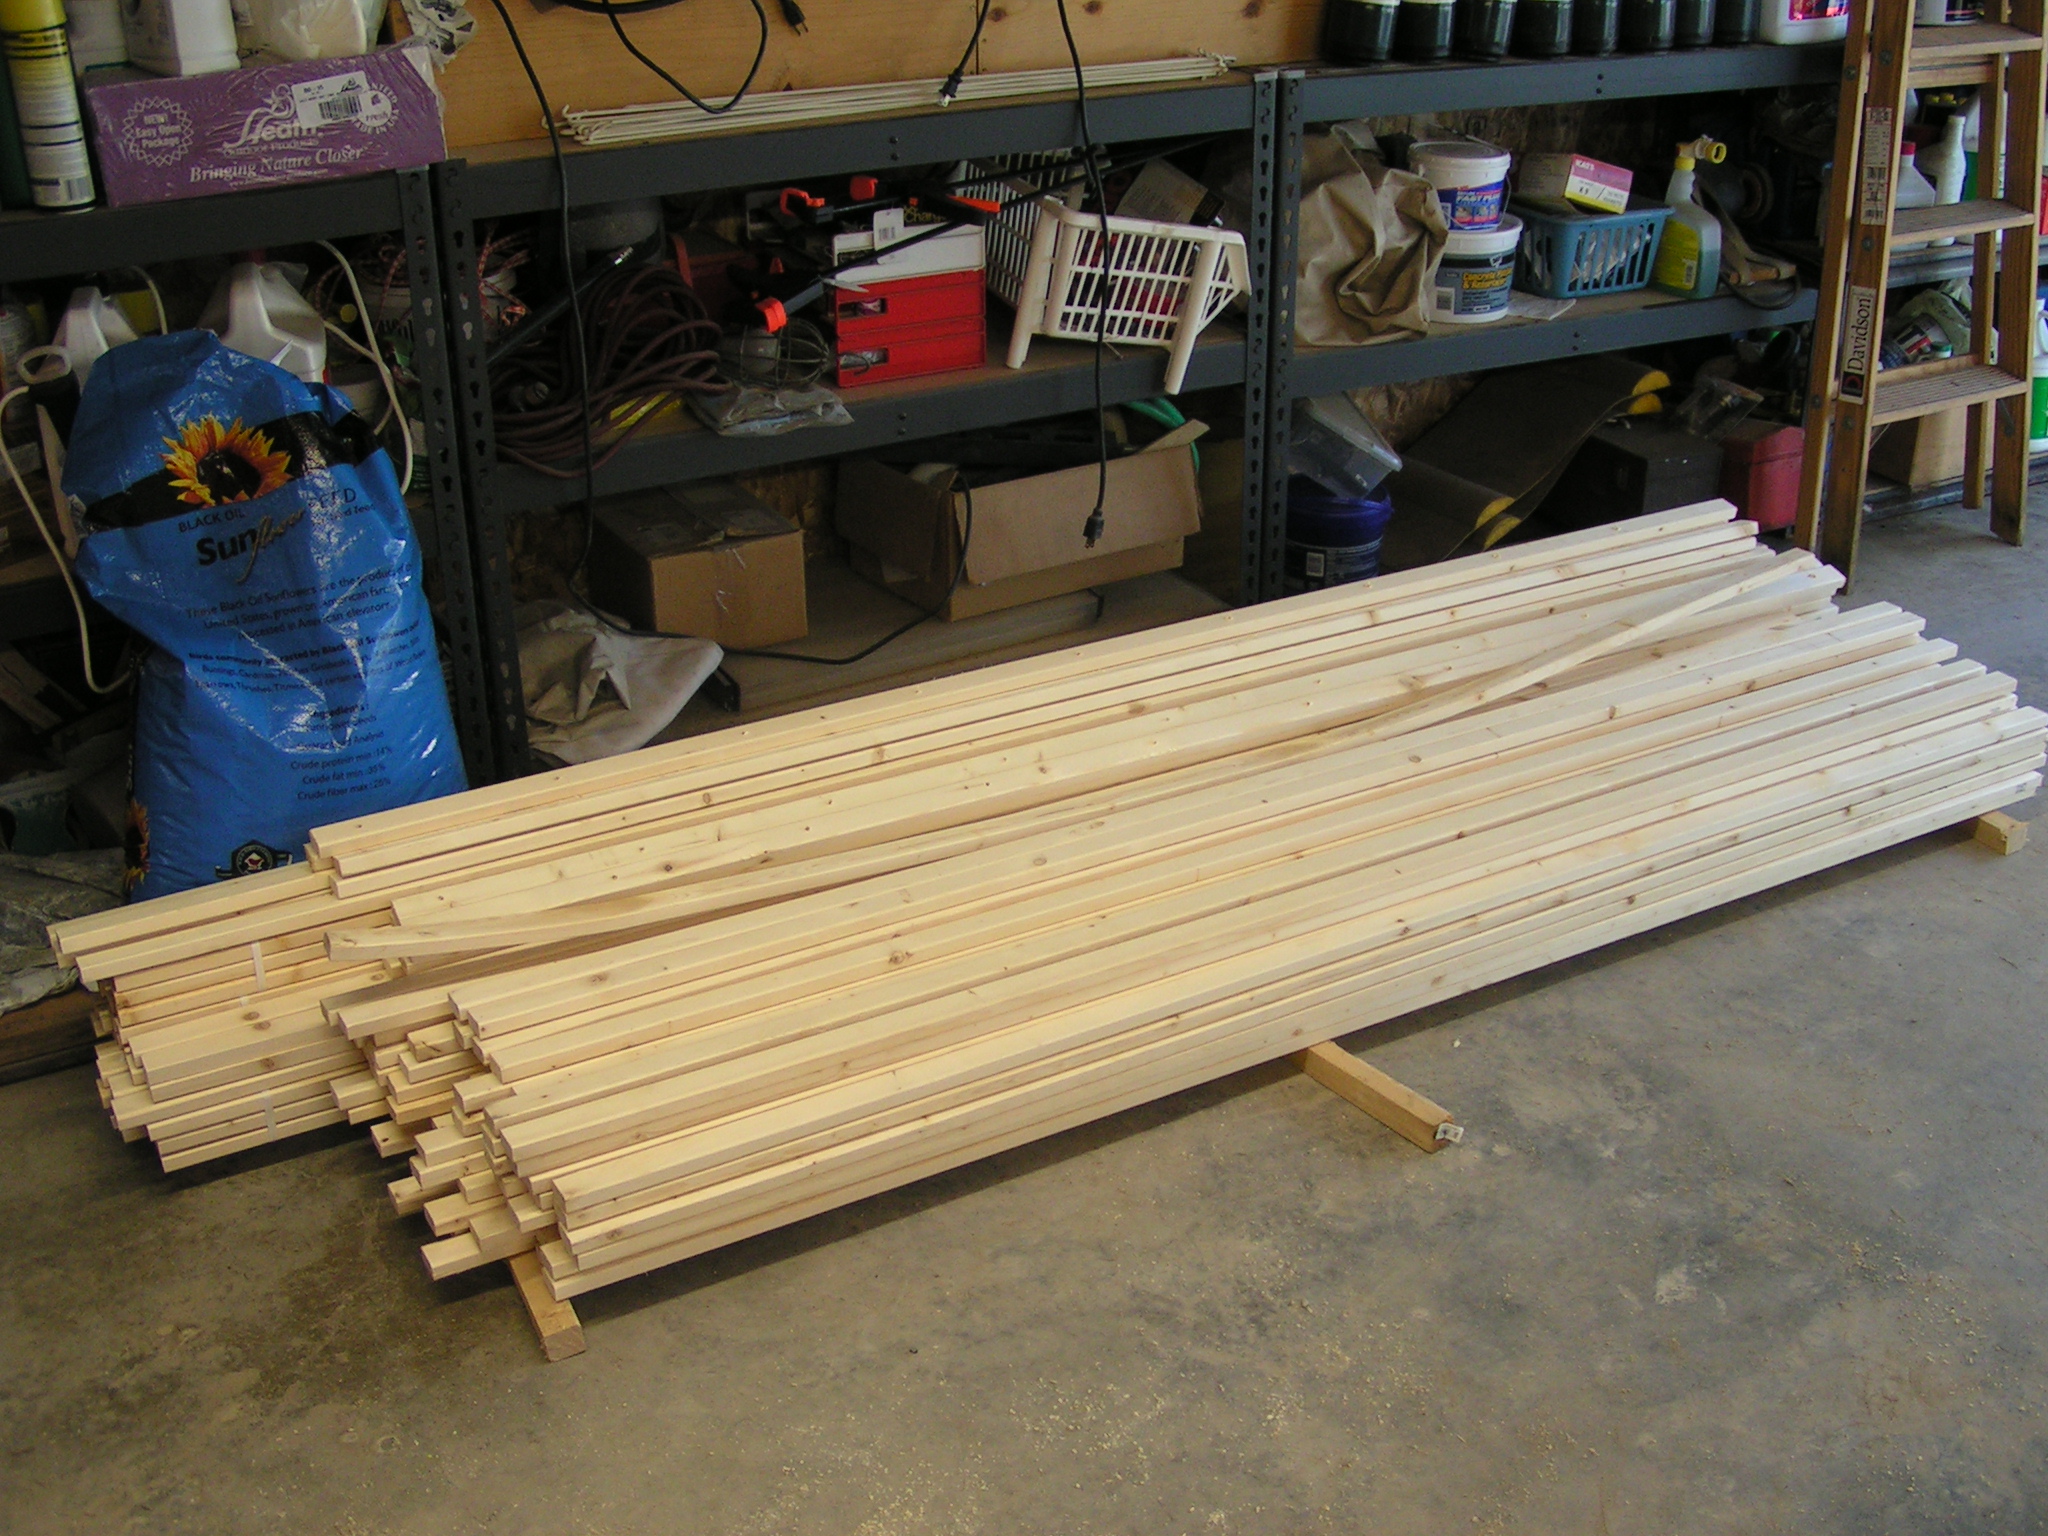 Our plan is for a 16′ diameter yurt made in the Mongolian style. We bought 162 1″x 2″ x 8′ pieces of wood. 110 of these are for the side walls and 52 for the roof poles. The side wall pieces needed to be 7′ long so I cut off a foot with the table saw. Do you see that pesky warped piece. It didn’t look like that when we bought it but without any pressure from other boards, it warped like that in about 30 minutes. That will be a short piece for sure.
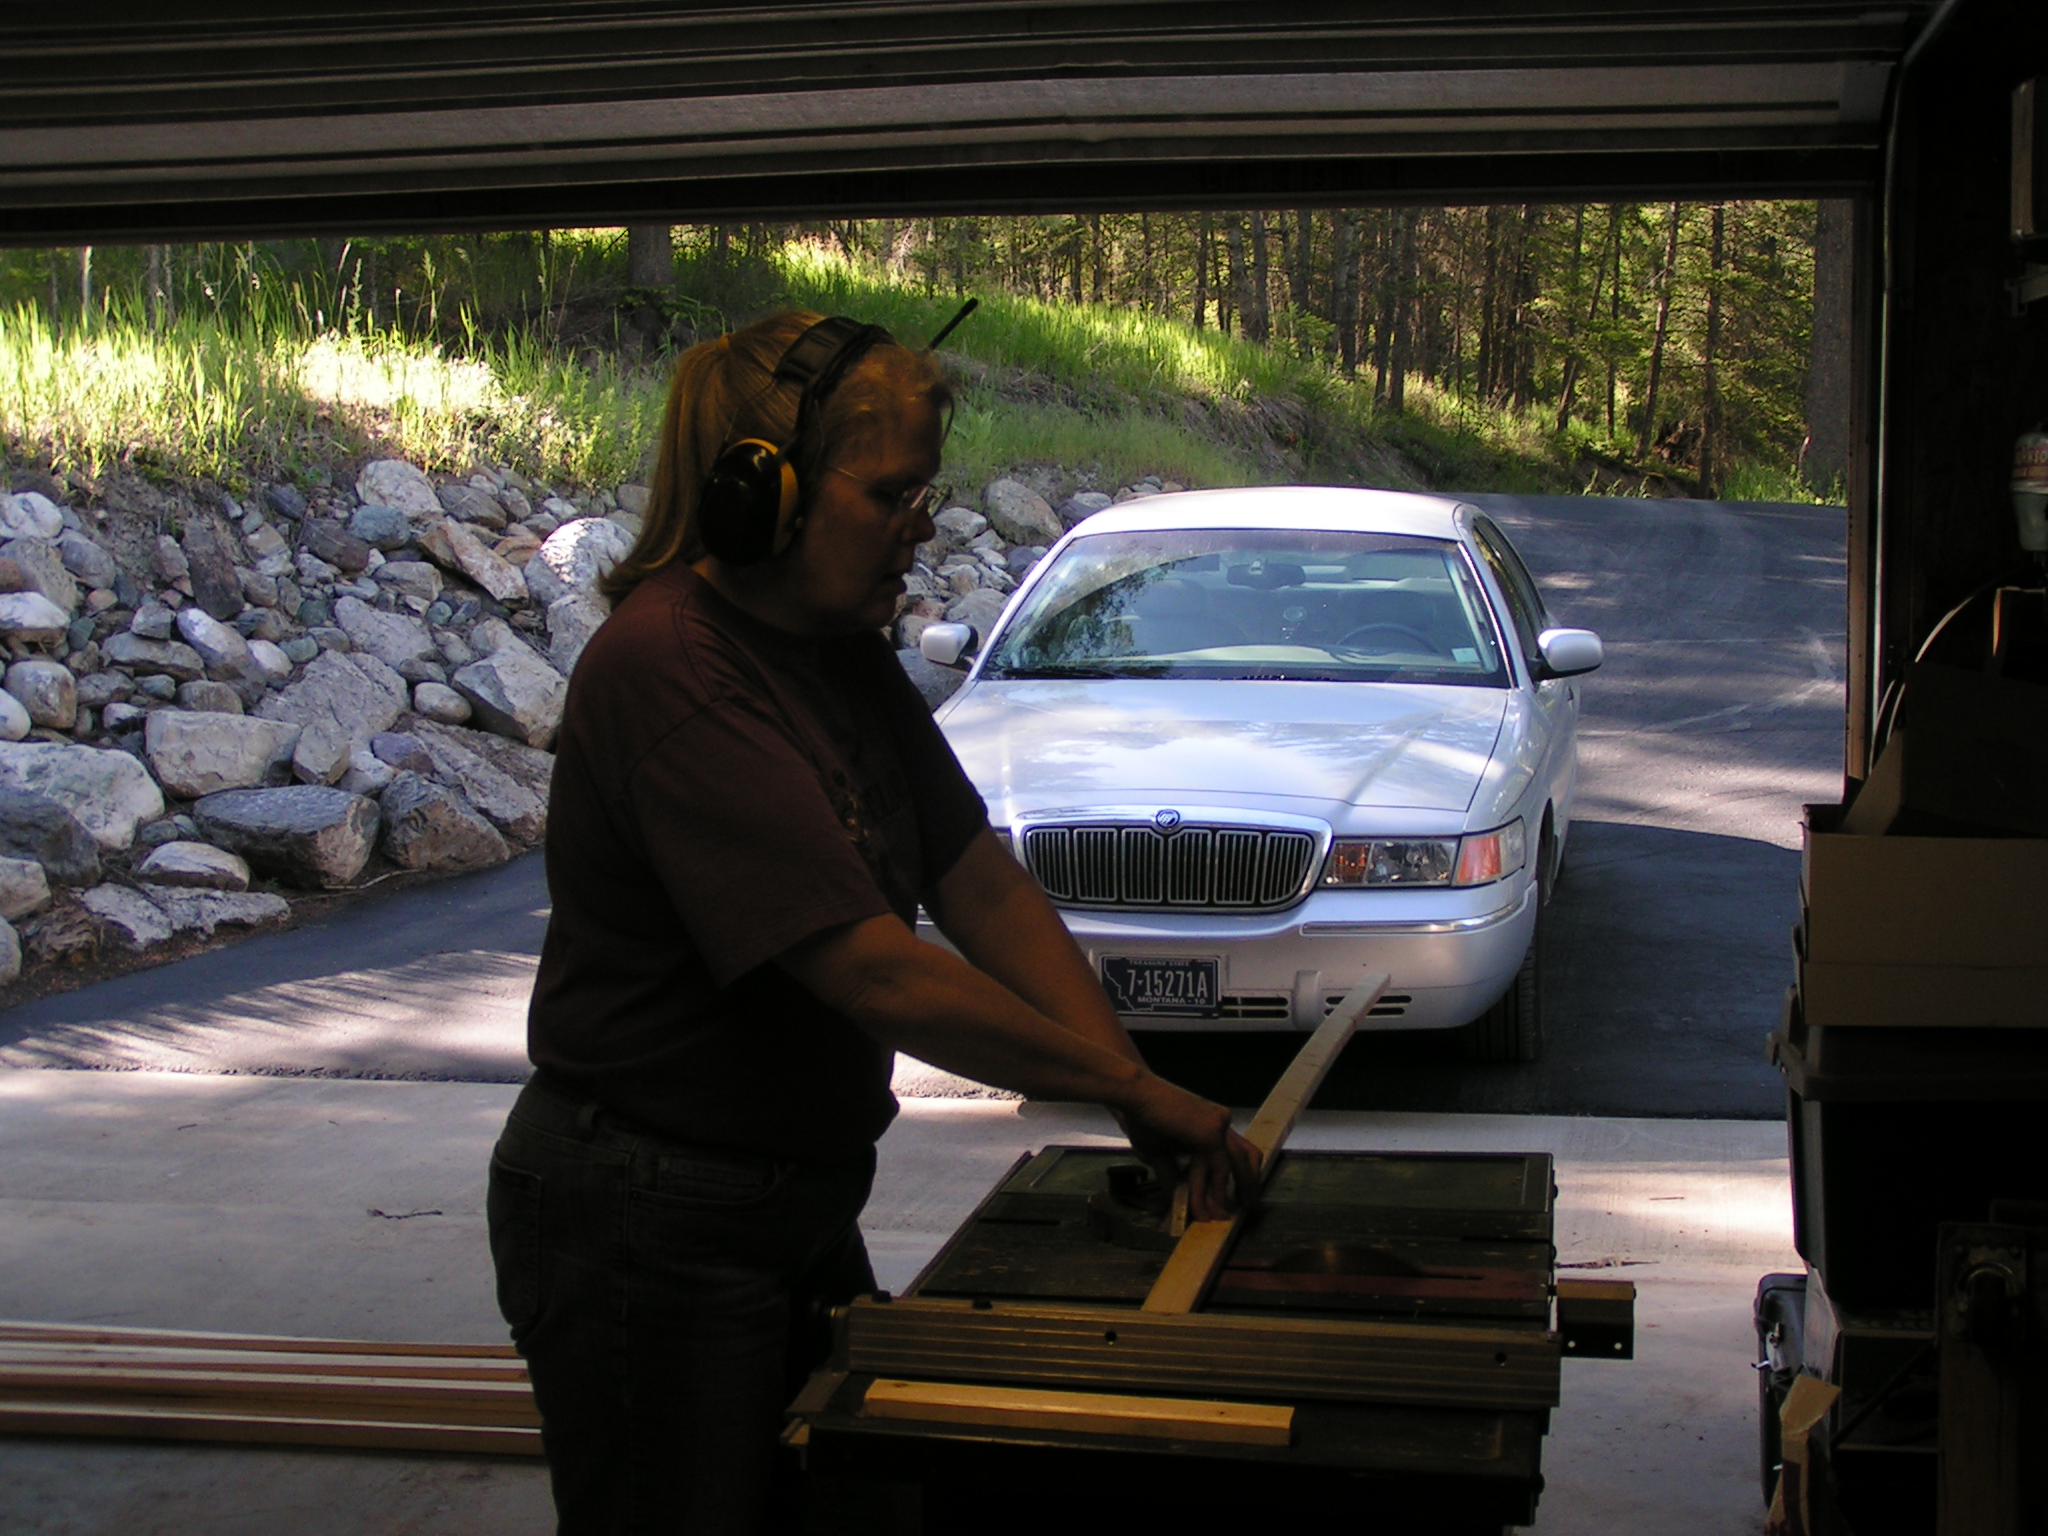 This isn’t the best photo but here I am sawing away. I did take shop class in high school but it’s been a while since I’ve used power tools. The ripping fence kept moving and I sawed several pieces too short. Luckily, we need 44 pieces that will be shorter than 7′ long for the ends of the lattice. Dennis finally figured out how to attach the fence properly and I got all the pieces down to the required seven-foot length.

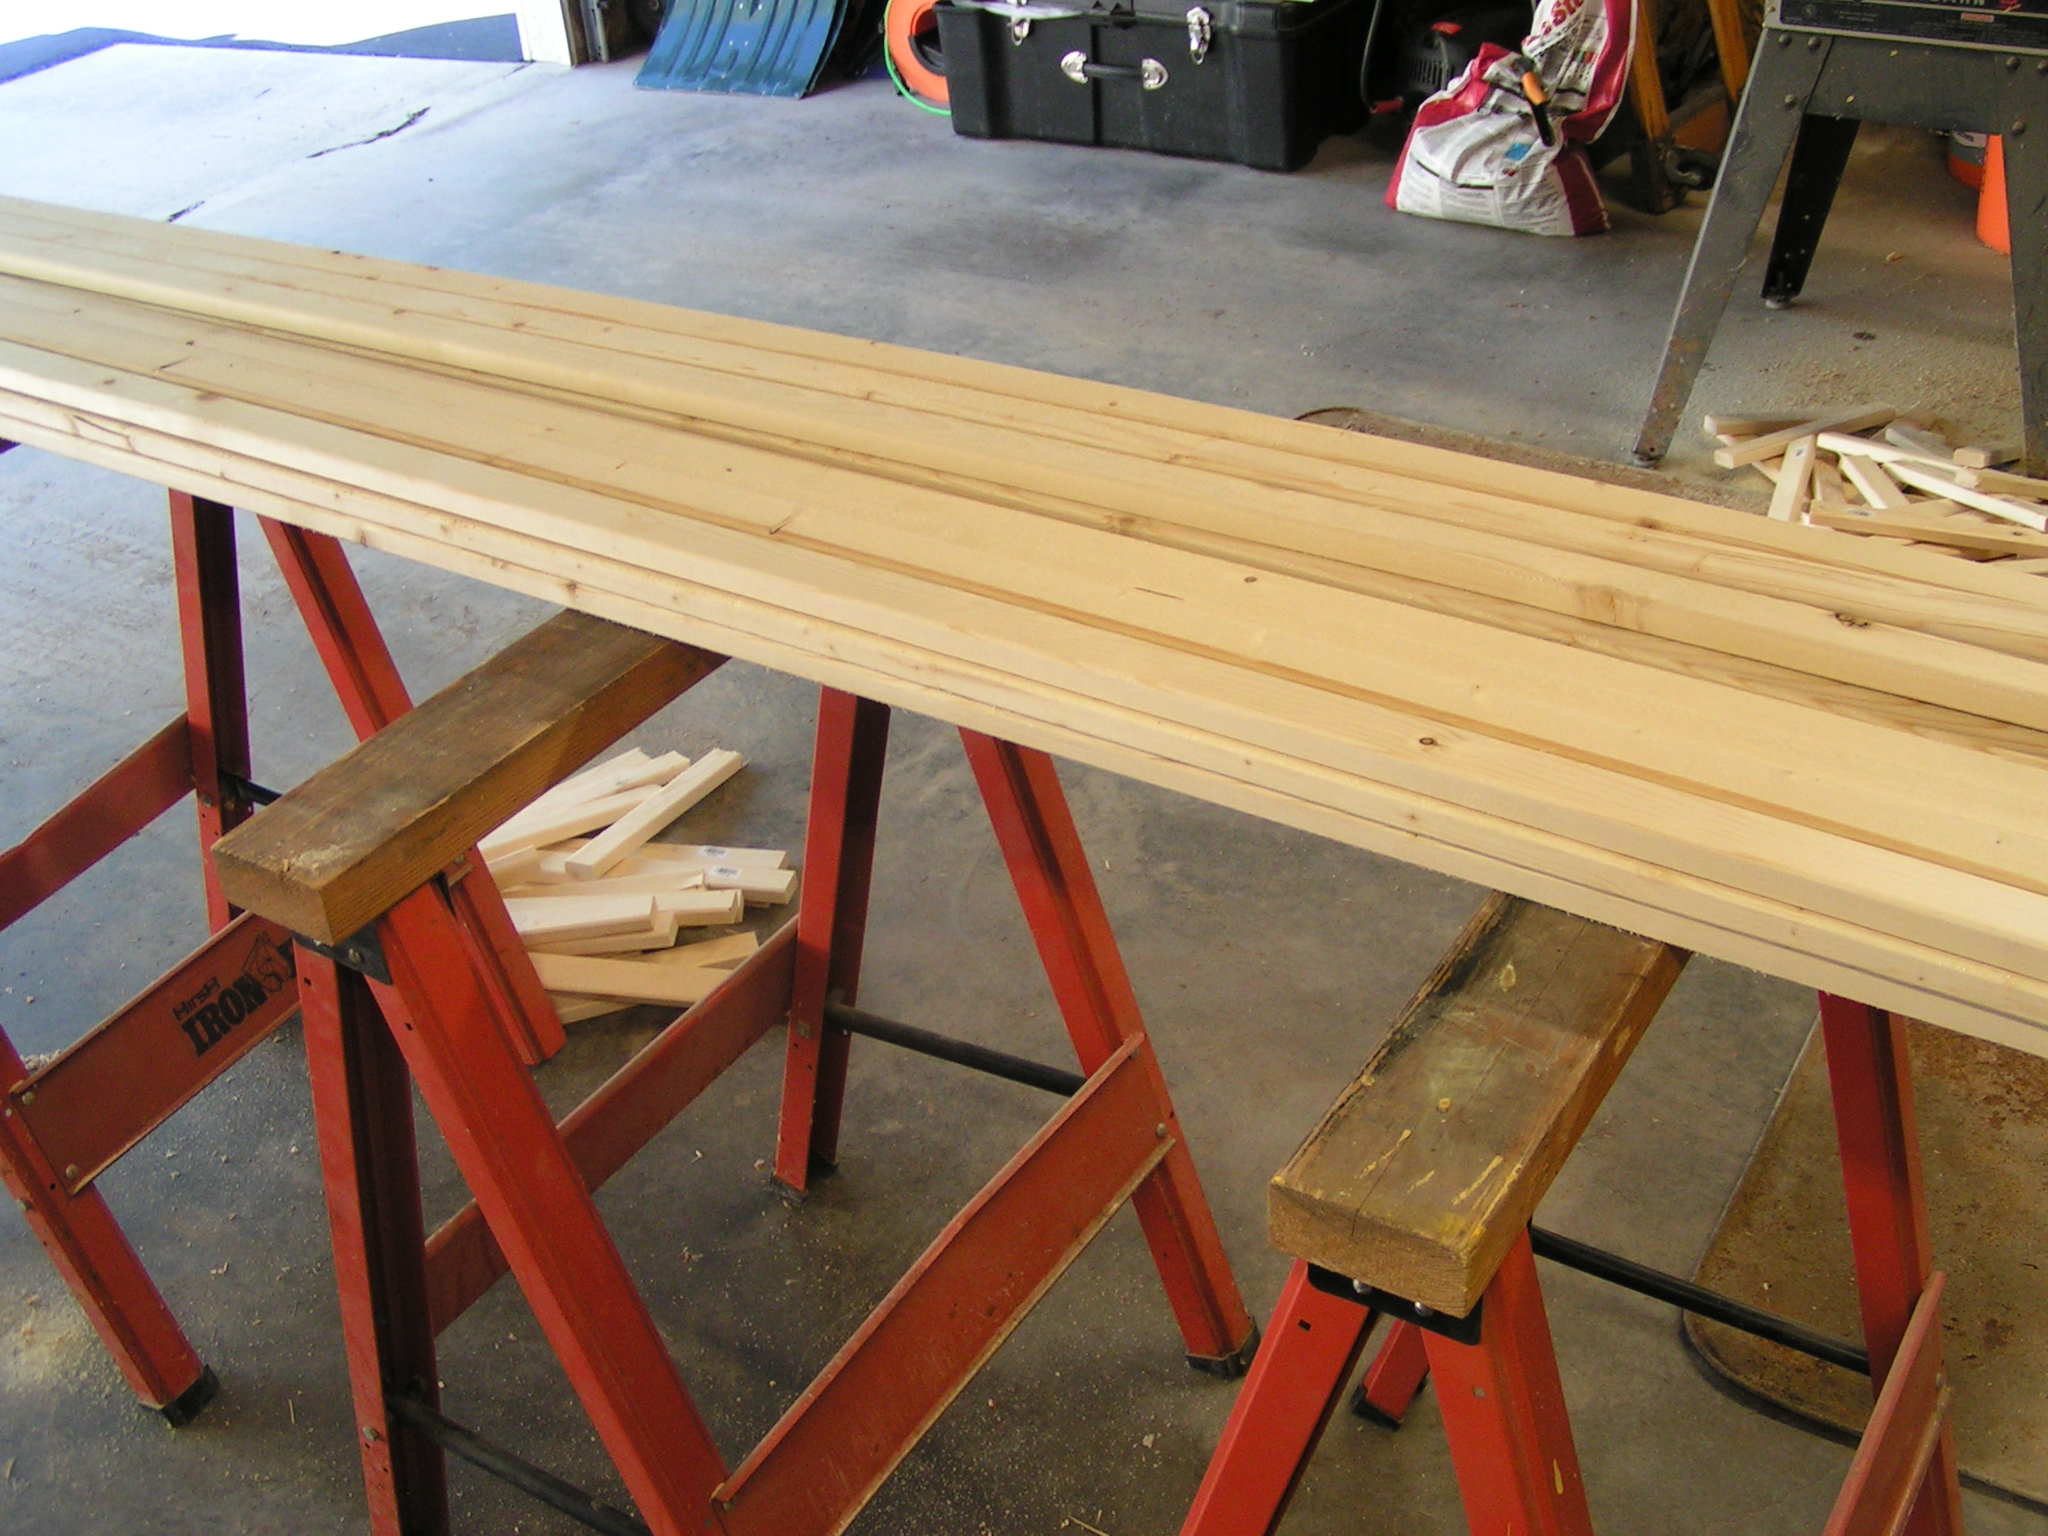
Here’s the pile of ends after sawing. I’m not sure what we’ll do with these scraps but I’m sure we’ll think of something.
 We had to separate out all those short pieces and then figure out what sizes they need to be to fit on the ends of the lattice where you don’t need a full piece. There’s something about counting the holes; we need two 8 up lengths and two 8 down, four 6 up and four 6 down etc. I have read that part of the book three times and I’m still not sure what he means exactly. I think we’ll have to lay out one lattice section and see exactly where we’re supposed to cut as we really don’t want to have to go back and buy more wood.
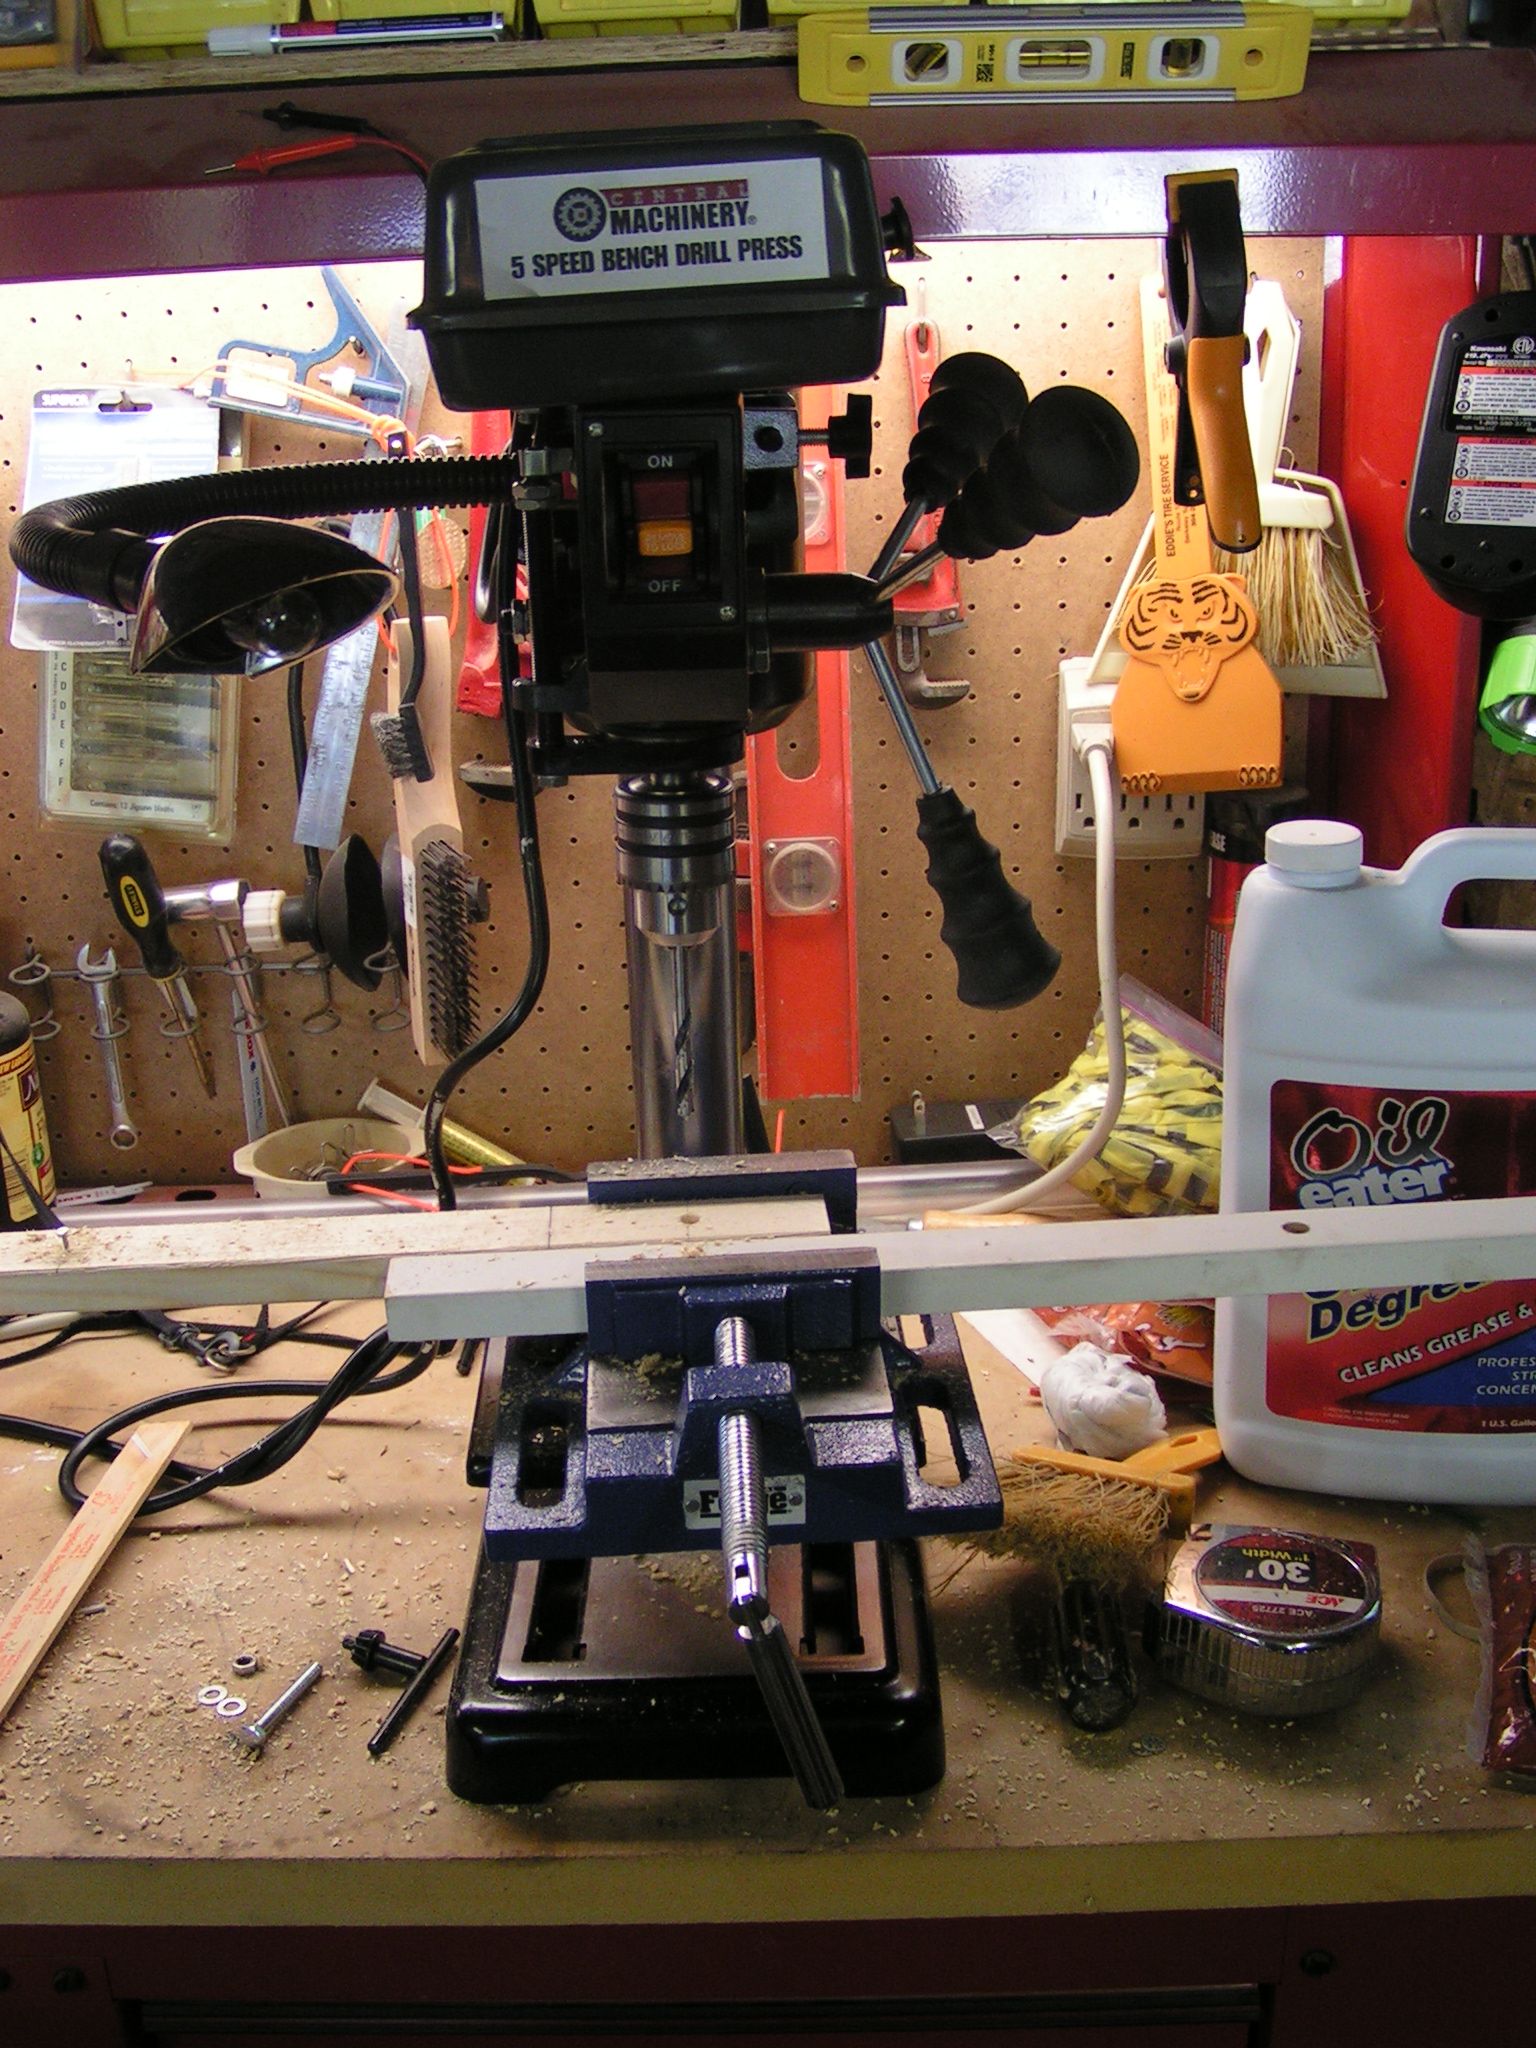 Next up was the drilling process. The lattice has to be connected together at all the crossing points on those 7′ long boards. So each board needs to have 10 holes drilled into it. 10 holes in 110 boards or 1,100 holes drilled. Exactly 9″ apart and then holes need to be vertical or the lattice won’t operate properly. Thus the need for a drill press. In the instructions, Mr. King kindly explains how to make a little jig or pattern to follow. The first hole is drilled at 2″ and then each hole after that is 9″ apart.
 Here’s the jig we devised from his instructions. The mark to the left of the drill hole is 2″ so you line up your board and drill the first hole. Then further over to the left, you’ll see a nail. Once your first hole is drilled, you lift up the board, put the hole you just drilled over the nail and then drill the next hole. The nail is exactly 9″ from where the drill bit goes in. And then you just keep moving your board down and putting the hole you just drilled over the nail until you reach the end of the board and have drilled 10 holes.
 Here’s the nail; I did end up marking the side of the board where the nail is so I could move a little faster. After drilling a few of these though, you really get used to where 9″ is.
 Here is a board being drilled. I drilled for about 4 hours on Sunday and Dennis drilled for another hour or so. We are about 1/3 of the way through our 110 boards. Then they’ll need to be sanded and we’ll have to figure out the cutting of the short pieces. Some have to be cut square and others at a 45 degree angle. The ones cut at the 45 degree angle go by the door frame. I did buy a 5 gallon container of orange paint to paint all the wood. That should brighten up the inside. So I’ll keep you posted on our progress. We’re going out of town next week but I hope to get all the boards drilled before we leave.
P.S. I still have all my fingers! 🙂
P.S.S. If you’d like to see an update on the umbrella tree, see my post on Permutations in Fiber.
27 thoughts on “Yurt Beginnings”
oh wow, i’ll be excited to see this progressing. I stayed in a real traditional ger in Mongolia (yurt is actually the word the Russians use, its real name is a ger), I could dig out some photos if you’re interested? Luckily, it didn’t have a dung-fired stove, it was wood fired, as I’ve heard the dung ones really stink!
Thanks Wendy – I’d love to see the photos of the ger where you stayed. I do know the word ger but most people don’t know that word at all so I just commonly use yurt. I was actually going to explain about the differences in a later post but I’d love to hear about your personal experience and see the photos. You can post them on our Flickr group or on the forum.
I hadn’t considered that you would have to build a frame for your felt yurt! That’s a lot of woodwork and I’m impressed (I don’t know one end of a power tool from the other).
Yurts have become very popular in the UK for holiday accommodation – people are choosing them instead of static caravans.
Could you use your leftover wood in a woodburning stove?
It would be nice if we could just get someone to build it for us but that’s a little pricey so…
The book I am using is by Paul King and he’s from the UK. The yurts are getting more popular in the US too.
We haven’t considered yet whether we are putting a stove in the yurt. It depends on if we will leave it up during the winter.
Wow, what an impressive project. I can see how this would be so superior to just a tent. You could actually live in this.
Thanks Judy – yes, you can live in them and ours will be big enough to sleep four I think. So all the guests can stay in the yurt 🙂
Definitely ambitious. I’ve seen pictures so it will be interesting to watch your progress. I’m glad you kept all your fingers! Happy building and felting!
Thanks Marilyn – I’m glad I kept my fingers too 🙂
I think I imagined a circle of poles, curved towards the top and meeting in the middle 🙂
That’s a lot of work you’ve done, was your hand buzzing the day after?
That looks like nice wood, it’d make nice picture frames or small display racks.
That would be more like a tee-pee Zed. They do make a lot of those around here as we have a large native American population. Yes, all those power tools are tough on you. I only did a little at a time so I wouldn’t give myself some repetitive stress injury. The wood is pretty nice and I’m sure I’ll find a use for it. We never throw anything out around here 🙂
Wow that is a lot of holes. Do you have a stationary belt sander ? I would think it would speed up the sanding. They are growing in popularity here too. the 2 national parks closest to me both have yurts for rent. Cheaper to put up than cabins. will you put it right on the ground or on a platform? I have seen both in historical pictures.
We have belt sanders but not stationary ones. Our plan is for a deck. I’m not sure we’ll get that done this year so it will probably be on the ground for a while.
I there is a jig you can get to hold the sander upside down and stationary so you can run the wool over the sander rather then the sander over the wood. It is a lot easier on the hands and arm.
good idea Ann – I’ll see what we can rig up.
Ruth —do you have a pic of what the final yurt will look like
—or what your goal structure will look like? Deb
Deb – click on Paul King link and you’ll see the various yurts. We’re doing the Mongolian one.
You looked natural behind the saw. Know where we will find you this summer.
I will put it on my resume – natural at sawing 🙂
I enjoyed hearing about your latest project. I am glad you have all of your fingers! But did Dennis keep his phone clear from all the tools?
Thanks Jami! His phone was safely on his belt in his handy holder. 🙂
Wow Ruth, this is so exciting and its going to look amazing, guess i’ll be staying out back if I visit lol
Thanks Karen Karen! 😉
why it says karenkaren I do not know lol
You are doubly important!
Rely nice work I am abwet to bild one to I need some help
It’s a lot of work, having help would be a good thing for sure. 🙂