
2024 Photo shoot!! New Tools, Ann and Jan get new toys!
Just before Christmas, Ann and I were chatting about photo shoots for things we had made from felting.
I had been using my, by now quite old, camera (Lumix DMC-FZ70 by Panasonic) and an older Flannelette half sheet as my backdrop. The sheet is attached to bulldog clips, which are hooked on S-hooks. This has worked but I can only set it up directly in front of my computer, so conveniently located but not portable. It also is limited in colour, white. I guess I could get another sheet colour…
 1) sheet clips and ring light
 2) Close-up of bulldog clip hooked over a large S hook.
 3) using this set-up for a photo of Moose bag #3
The sheet is working OK, but I think I can do better.
Ann and I had looked at full-size photo backdrop set-ups, but they require a lot of floor space, which neither of us has extra of. (if you have floor space why are you not adding more wool?) We had looked at the smaller photo boxes but they work for small things, so would not work well with a felt hat or Mer-person.
Then we spotted a tabletop version of the large photo backdrop, which looked like it may work. It has a tripod base with an extendable upright, which supports a crossbar. It came in a few size variations, and after looking both, at those available through Amazon.ca and Aliexpress I selected this one. I ordered it from Amazon and let Ann know when it arrived.
4.1-4.3) 2.2ft Wide 2.6ft High (adjustable height from 1.5ft to 2.6ft)
This is one of the smaller tabletop versions. It has a sturdy wide base and comes apart to fit in a small bag. There are other models, which are both higher and with a longer cross arm. After considering what projects Ann or I would likely want to photograph, the smaller tabletop version should work for most of the projects.
 5) Un-assembled stand and clips. In the background, you can see the white styrofoam that the backdrops were warped around for shipping.
 6) all the parts fit in a bag for easy storage and transport.
I could use the flannelette sheet attached to the crossbar with the clips provided, but I would like more options as a background. The size that seemed to be the best option for backgrounds was 57cm by 87cm. As I investigated the options I found that there are 2-sided options (with different images or colours) as well as lots with the same colour on both sides.
I found some I liked at Aliexpress and ordered two options which arrived much quicker than expected. One was black and white. The other was two mottled tones of rose and grey, which I suspected would be a more versatile option.

 7.1-7.2) The first two PVC sheets I ordered cost C$7.24 each.
I had taken Photography as one of the practical art options at university, but it was more focused on experimental composition and darkroom work. I am now working with digital photography, the darkroom work has changed to mostly adjusting the colour balance and a bit of cropping. While I didn’t study studio photography, I have a rough understanding of the concepts. It will be fun to explore this further.
The local guild Ann and I belong to was having a last social/spin-in of the year on Dec. 30th, from 1-4 pm. We decided to come in early, so she could see the stand and the backgrounds that had arrived. I brought the two Moose bags and Ann brought the samples for her Valentine’s Day workshop (No peeking, she will be showing you shortly).
The 2 background options had been rolled tightly around a Styrofoam core. then wrapped in packing foam and plastic which did protect them during their travels. It feels like a stiff plasticized paper and is described as “PVC Double sides printing Waterproof Photo Studio Photography”. Whatever it is, it left them not inclined to stop curling immediately after unwrapping. I think they will stop curling if I can store them flat rather than rolled. With a bit of sneaky persuasion (some mettle book ends, a clip and a magnet), we were able to proceed with the photo shoot.
 8) mettle book end with extendable handled magnet, usually used to pick up fallen needles.
 9) Ann and her phone taking pictures she will show you later.
Ann tried both sides with her bags but I only used the mottled grey. I had a bit of trouble with deciding how to display the handles of the moose bag while shooting Moose bag #1, Glenn’s Moose.
10.1-10.4) Moose #1, Glenn’s Moose
 11) Moose #2 Jetta’s Moose
With moose 2, Jetta’s moose, I figured out I could have the handles looped over the top bar wing-nut to keep them out of the way.
As you can see the hole set up is not large, easily fitting on a 6×2 foot fold-up table, but it is large enough to photograph a large project bag. Since the backdrop is only clipped on, if you needed more width, you can position it horizontally rather than vertically. When set up vertically you can use the curve of the PVC to not get a distinct edge as you would find looking at a backsplash and kitchen counter. If you want to have that hard edge change, You can use a second background as a ground to position your subject on.
 12) 2 backgrounds, one is used as the background and one as the surface the item sits on.
The third way to use the PVC photo backdrop paper is as a surface to place your item and shoot directly down. When Ann shows you her photos you will see her doing this.
Since we had fun with this photo shoot, when I got home I continued looking at PVC backdrops and ordered a few more options. I hope you will get to see them for some upcoming blog posts.
13.1-13.5) This second group was from a different seller and should arrived Jan 18. The cost was $6.65each
If you are photographing your felting and fibre arts, having a stand and a few backgrounds would be fun. Consider what size most of your work is, to decide what will work best for you. I would suggest considering the double-sided PVC sheets since they give you more options than the single-colour options. If you decide on the PVC versions, they can be used with wet felting, while it is still wet! (this would not work out the same with cloth or paper).
That said, You don’t have to invest a lot of money to photograph your work. you can still do a lot with a couple of bulldog clips, a couple of S-hooks, an old sheet and a couple of ring lights or even a couple of flashlights or a window. My last frugal idea was some heavy-weight Christmas wrapping paper. Although it is not as sturdy as the PVC sheets, it will work for a single or a few photo shoots. The wrapping paper comes in lots of interesting patterns. Some are double-sided, so don’t forget to consider the back too. Even better it’s on sale just after Xmas!
 14) Christmas wrapping paper Moose with hat and copper snowflake
If you are looking for something in between the PVC and wrapping paper for backdrops, I can think of 2 other frugal options. First, as I originally started my fibre journey as a weaver, I have a few rolls of cheap wallpaper stored with the table looms. I went for the ugliest, cheapest, rolls of wallpaper from a second-hand store. You could keep an eye out for the slightly less hideous patterns than I have, as possible backgrounds. And lastly, I have various weights of canvas left over from painting which can be dyed or have washes of paint added to it to make a backdrop. lightweight canvas drop cloths are large and could be cut up into many pieces. Oddly, I still look at something and see that it could be used in some other way. I am not sure I will ever outgrow the frugal “starving art student brain” setting.
I know we haven’t chatted yet about lighting options. You can see one of my 2 mid-size ring lights in photo #1 (ring light from Dollerama and the stand is an articulating desk stand from amazon.ca). Your lighting choices will depend on what you are photographing, where you are set up and whether you want a diffuses or more raking light source. The topic of lighting options can wander off into a big blog on its own, maybe a chat for another day.
Do you have favourite photo shoot equipment you use or cool tips for photographing your work?

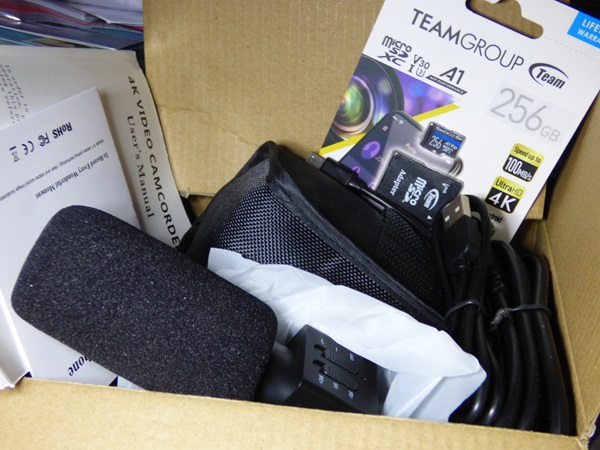
 1-2 Xmas present

 3-5 I think Dragon is a bit of a Ham!


 6 -10 Shots from Oakville in 2016 (There was snow!)
 1
1 2
2 3,
3,  4
4 5
5 6
6 7
7 8
8 9
9 10
10 11
11 12
12  13
13  14
14  15
15


