Browsed by
Tag: felted vessel

Felt Vessel Workshop

Felt Vessel Workshop

I had my first workshop of the fall season last weekend. It was a fun one, Vessels. I like vessels because they do not have to fit anyone when they are done. They can go completely sideways from the original idea and still turn out great.

I had 5 lovely ladies for the day. They had a great time( or seemed to at least) and I had fun too. I love to see people marvelling at the magic of felting and go from very sceptical to amazed at what they have made.

In this class, they all started with the same round resist. Everyone always asks about size. In this case a good sized dinner plate. Very technical.

On to the pictures

Laying out the wool. I like to teach laying out 2 sides without wetting and then go back to do the wetting and wrapping. I don’t know that there is any great difference but I don’t like laying out wool on a wet resist of wet wool.

here they are wrapping one side of the wool around the resist. For those whose layouts grew a lot, we feather the wool towards the middle so it will be more even. You can see the second side waiting to be placed on top, wet down and then wrapped around.

Next, were the embellishments. This part is fun for them and me. I love to see how diverse the ideas are. I usually bring wool, handspun yarn, silk tops, throwsters waist, trilobal nylon, sari silk waist, silk hankies and locks for people to use. I seem to be missing one pot.

Then, of course, there is all the rubbing and rolling. This is the point where I usually gabb on about wool and felt, the eganomics of making felt and sheep….. and anything else that helps pass the time so there are fewer complaints about how long they have to rub or roll. It is a boring sort of thing to do, I usually listen to an audiobook.

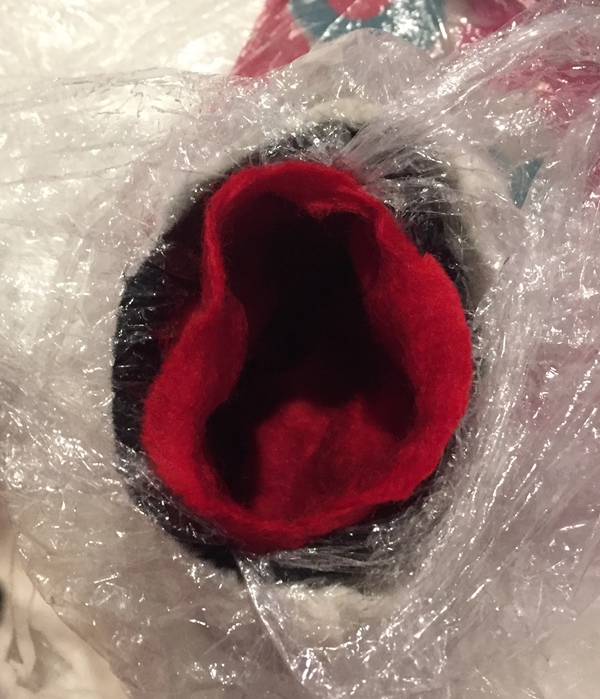
We talked about different ways to cut open your felt to get different types of pots and how shaping can change them. one lady said she wanted a pot more like a fruit bowl shape. I suggested turning her pot into two bowls by cutting across the middle. She decided not to but it inspired 3 others to cut their pots at 1/8, 1/4 and 1/3 to get 2 pots as a set.


I am missing one there Not sure how that happened. Here are some pictures students sent me of the pots dry


Another pot started

Another pot started

In my last post  I talked about making a pot within a pot (https://feltingandfiberstudio.com/2019/01/06/pots-within-pots/) and Lindsey reminded me of another way of doing so I thought I would give  it a try. She shared a couple of pictures here, about half way down the page. felted pot link

I only made a small one as I didn’t have a lot of time. I made the resist about 4 inches across.

I wanted to make a 3 layer pot.  The first layer is red and not wanting to just do a regular pot I added two silk cocoons.

After both sides were covered in red wool I wrapped it in plastic wrap.

After that I wrapped it in black wool more plastic wrap and then white wool. I have no pictures of those as my battery died in the phone. I rubbed it a while and then popped it in my heatless dryer to tumble and went off to work. That was a few days ago and I finally got back to it a bit this morning. I cut open the first layer.

and then the black and red

I left he plastic wrap on the inner layers and blew up a balloon in side it. I wrapped it up in plastic like a Christmas pudding. and popped it back in to the dryer for more tumbling.

Now I have you all exited, I have to say it’s not done. My studio was freezing this morning so I went back to the house to stay warm. I do not like working in the cold with cold wet wool.  I will have to finish it this week and show you next week.  Enjoy the anticipation. LOL It’s supposed to be the best part, isn’t it?  Were you inspired to give a pot in a pot a try after last weeks post? How did it go?


First Quarter Challenge and Giveaway Winner

First Quarter Challenge and Giveaway Winner

I actually got an early start on this quarter’s challenge for a change! In case you missed it, here’s Ruth’s original post: http://feltingandfiberstudio.com/2016/01/02/first-quarter-challenge-2016/  I’ve used flat resists before, mostly for surface design, simple cases, and a few bags. I have made a few 3D items with flat resists: some bird pods, a few hats, and even a supposed seed pod which looked like the rib cage of a dead animal, but I think I’ve only tried a vessel once and it was a bit flimsy. So, I thought I’d try a vessel again. I decided on a flower shape, I can’t find the actual resist, but it was basically a flower shape:

OLYMPUS DIGITAL CAMERAI used some 27 mic coloured Merino batt I bought from wollknoll and used some silk hankies over the top. This is how it looked from above:

OLYMPUS DIGITAL CAMERAHow the underneath looks:

OLYMPUS DIGITAL CAMERAAnd a kind of side view:

OLYMPUS DIGITAL CAMERAThis is where the silk hankie was thicker:

OLYMPUS DIGITAL CAMERAAnd where it was fine:

OLYMPUS DIGITAL CAMERAAnd this is a close up of the batt texture:

OLYMPUS DIGITAL CAMERAIf I did it again, I would make the shape more curvy, where the petal shapes met, it was a sharp V shape and the vessel is too thin there, and in some places little holes. This is looking through the vessel opening at a thin patch:

OLYMPUS DIGITAL CAMERAWell, thanks everybody who entered the fibre giveaway, and thanks for the nice comments, I did read them all! The winner is: Jennifer Ralph! Congratulations, Jennifer. I will email you for your address to send the fibres. Please reply as soon as you can, if I don’t hear from you by Friday night, I’ll re-draw.