We have another Guest Post by Tracey from the Forum today.
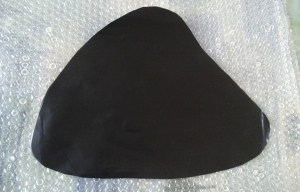
I wanted to carry on exploring how to make different shaped pods by altering the shape of the resists. I thought a stone shape may open up new possibilities regarding the surface design. I have always used pond liner for my resists, I think it is perfect for the job, especially as we had a lot left over from pond construction! Here is the resist, it roughly measures 15.5” x 10.5”.
 As before I placed six layers of Merino wool either side of the resist and here it is wetted down with yellow and orange silk hankies as decoration, the colour of the wool is a lovely rust so I thought how this would compliment it.
 After lots of hard work felting, I cut a cross to take the resist out, it is a small hole, luckily I have small hands to get inside to start the fulling!
 Once it was fulled, I packed it with fabric to help it dry out, by doing this it creates ‘memory’ and hopefully retains the shape you want it to be. When it was dry I had plans to decorate it slightly with some Mother of Pearl nugget shell beads that needed a home, the colour matched perfectly. Here is the finished pod.
 Because by then, I definitely had the bug, I made more.


 When I am layering the wool, I try to lay it neither too thinly or too thickly, but evenly of course. I was putting down six layers of wool each side of the resist as I have mentioned before. However, when I have held my pods I feel that the very bottom ‘gives’ a little, even though I work them until my shoulders and arms ache!, so I was not very happy with this. I decided to go to seven layers, a lot of wool!, but I am far happier with the outcome, much sturdier and thicker of course!
I then decided to change the shape of the resist once again and cut an oval shape, this one measures 16.5” x 13.5”.
 For this design I put down four layers of Merino each side, wetting down each time. I then added two small circles of resist to reveal craters in the end design, with a different colour underneath. Here is the picture, I didn’t realise at the time but it looks like a happy grinning martian! I then continued with the remaining three layers each side.
 I then decorated it with lots of lovely Blue Faced Leicester locks and wool nepps.
 Lots of hard felting and fulling later, here it is, with a little bead detail.


