Browsed by
Tag: dyeing

More Samples with Interesting Results

More Samples with Interesting Results

We’ve been talking on the forum about how important it is to make samples, especially when using new fibers or unknown fabrics.  It’s better to take a little time to make a sample, than to waste a lot of time and fiber.

I still had one fiber from WOW I hadn’t tried.  It was actually a Jacob batt.  The batt was very uneven so I used two layers and still ended it up with a couple of sparse spots.  I only felted the samples to the prefelt stage so I could use them in another project.  The end result of the Jacob was it was very loose and spongy.  I’m tempted to full it to see what happens.  It is very similar to the Black Welsh I featured in a previous post.

20151014_152532

I recently did an experiment with one of Fiona Duthie’s 15 minute projects called Mountains.  It’s lost it’s bowl shape a little, but I really liked the curliness of the base, but couldn’t remember what fiber I used.

20151014_152816

I have been trying to use more of the coarse fibers I have.  But I have been terrible about remembering to write down what I’ve used.  I thought Icelandic was harder to felt.  It has a very long staple, dyes well, and whenever I use it in has to be shaved when finished. So, I decided to make a prefelt of this as well.

20151014_152603

What I discovered is it is soft at this stage, but felted easily.

So, have I been badmouthing the wrong fiber? I have a fair amount of Cheviot so I figured I would experiment with that as well.  The Cheviot had a shorter staple but the resulting prefelt was soft and a little lighter in color than the Icelandic which I thought was a lighter color. Hmmm.

20151014_152701

When I went with Cathy to the Wisconsin Sheep and Wool Festival, I purchased some Navajo Churro which I have never used.  It had a short staple and was coarse to the touch and filled with little knots.  The resulting prefelt was very hairy and much flatter than the others.  It reminded me of Gotland I had made a sample of a while back, but while they look similar, the Gotland was very smooth to the touch. It also had been fulled, so that may make a difference.  The Churro was very hairy.  I have some white Churro I will try dyeing later on.

20151014_154843


20151014_154851

Last but not least, I made a Romney prefelt and found my curly fiber.  (its more noticable at the sparser edges. It is rougher to the touch but I like the cobweb wavy type look.  It also has a long staple.

20151014_152626

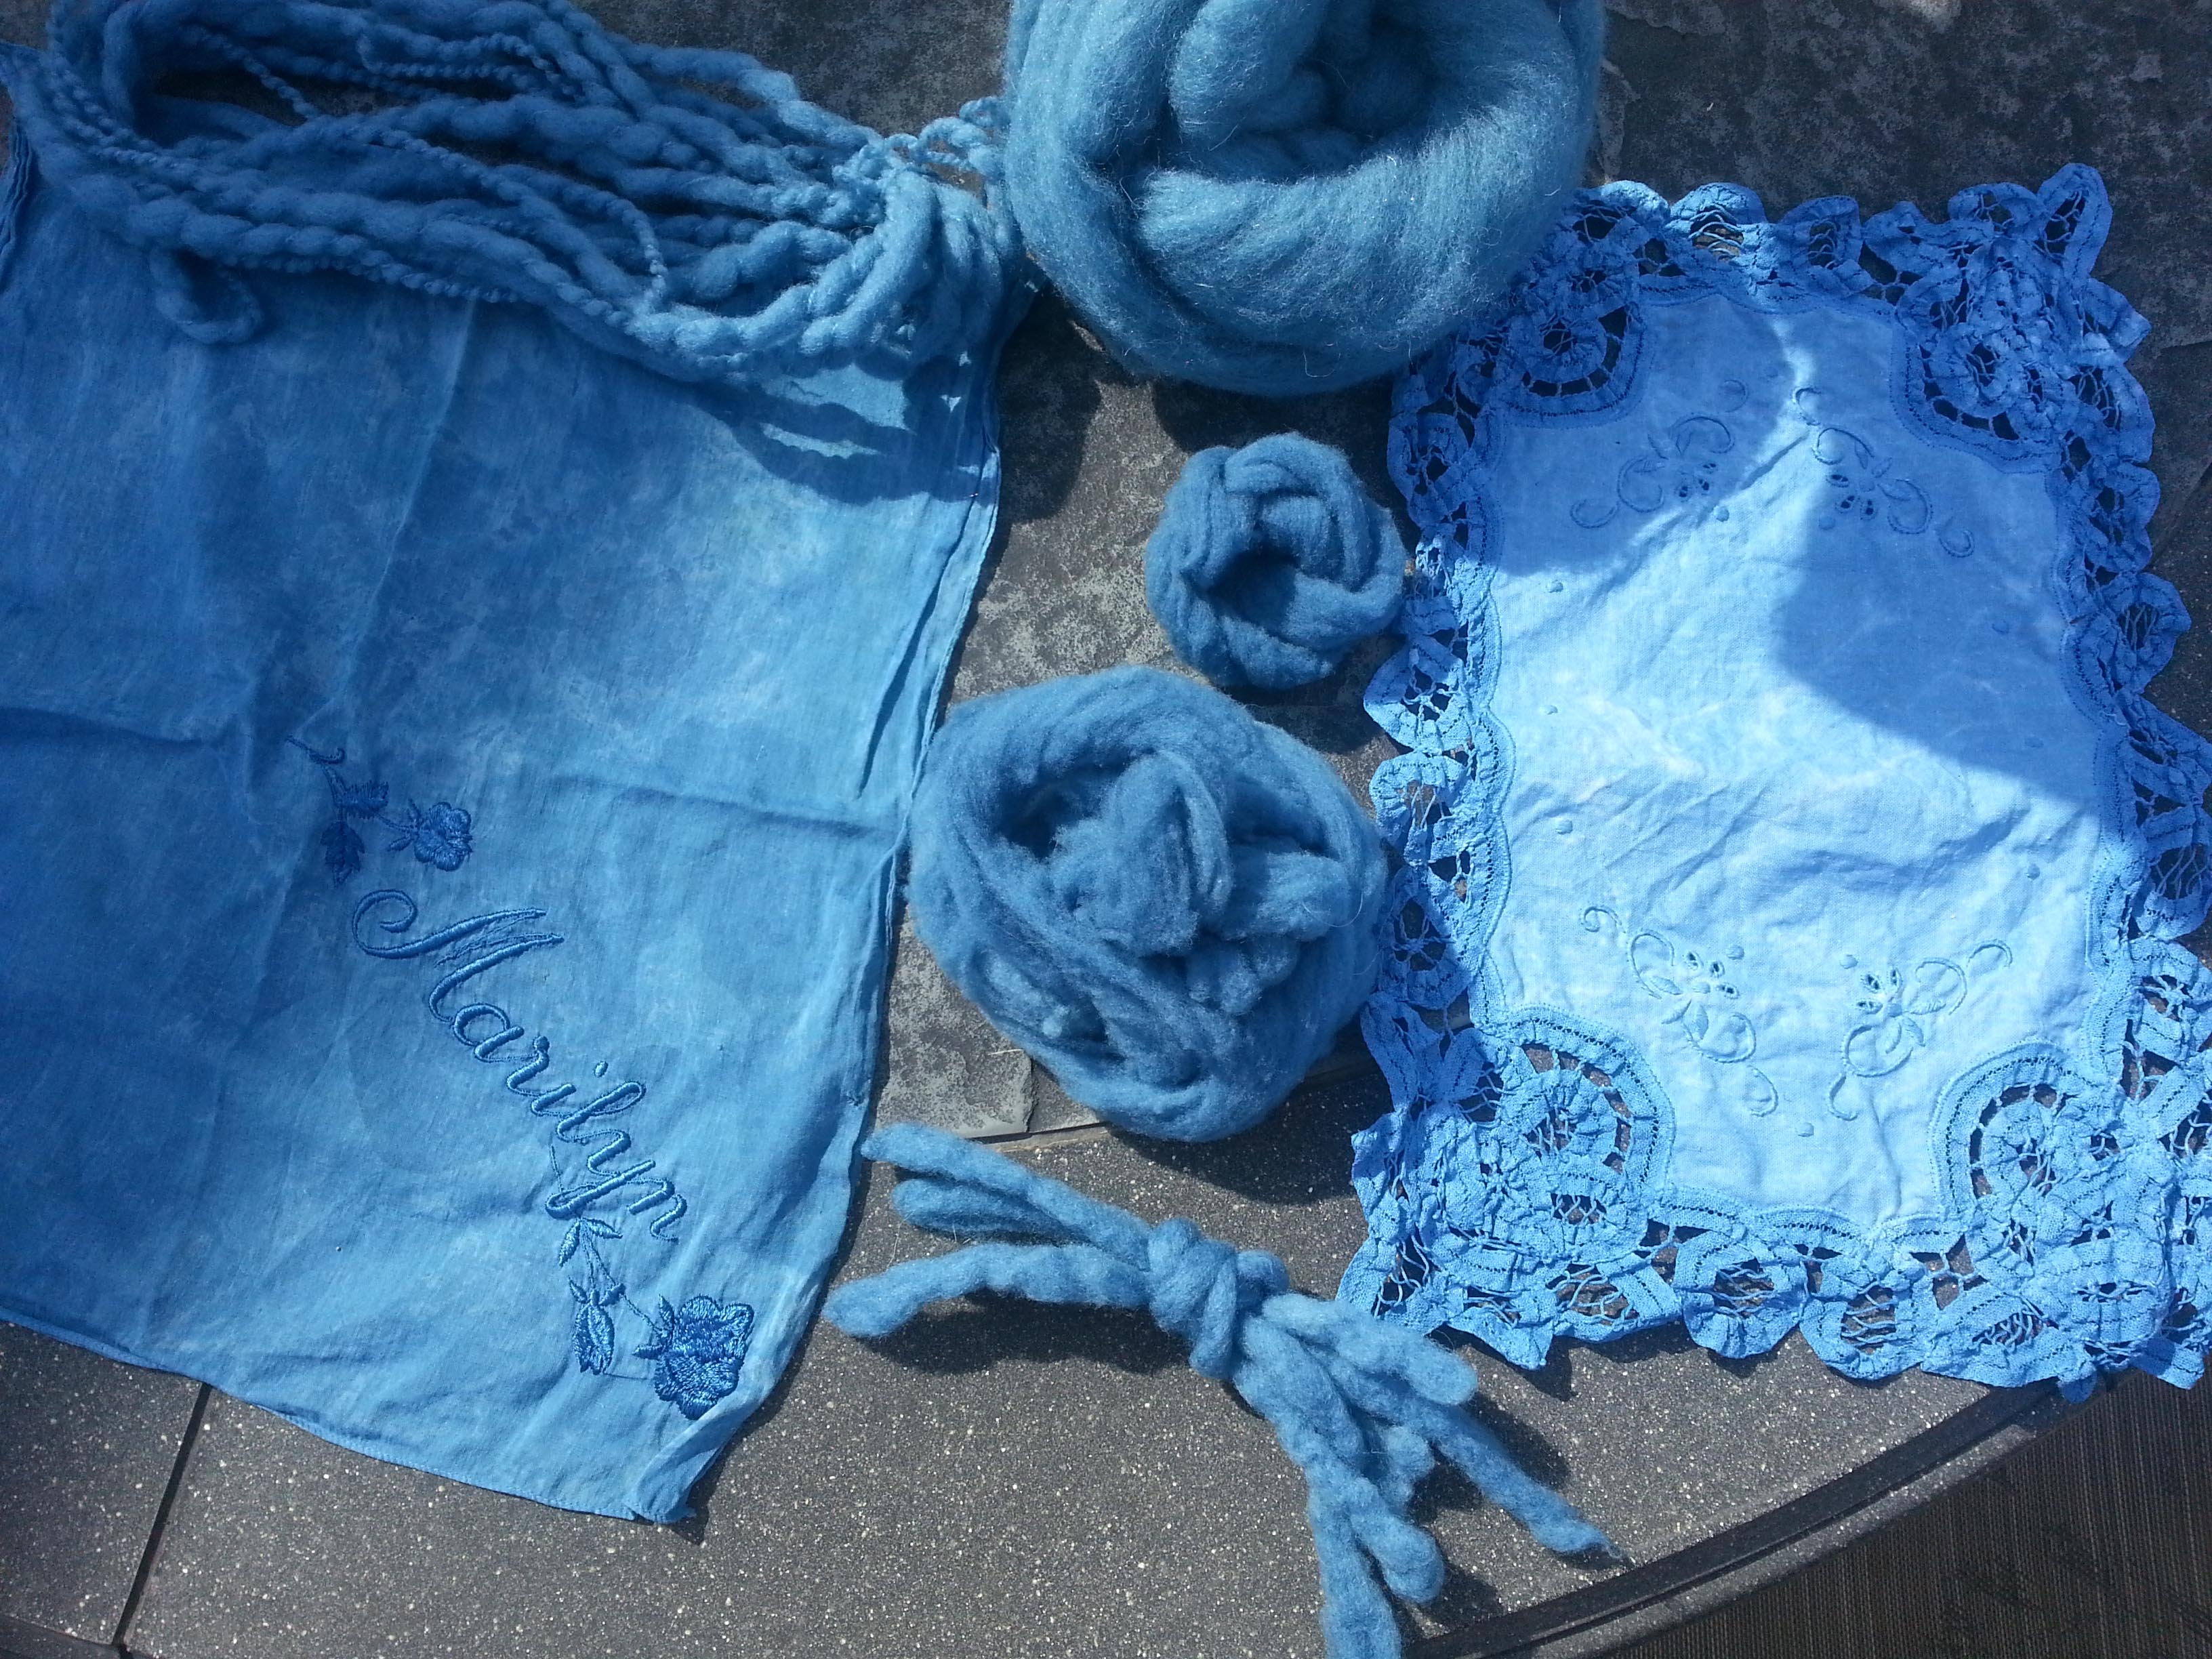
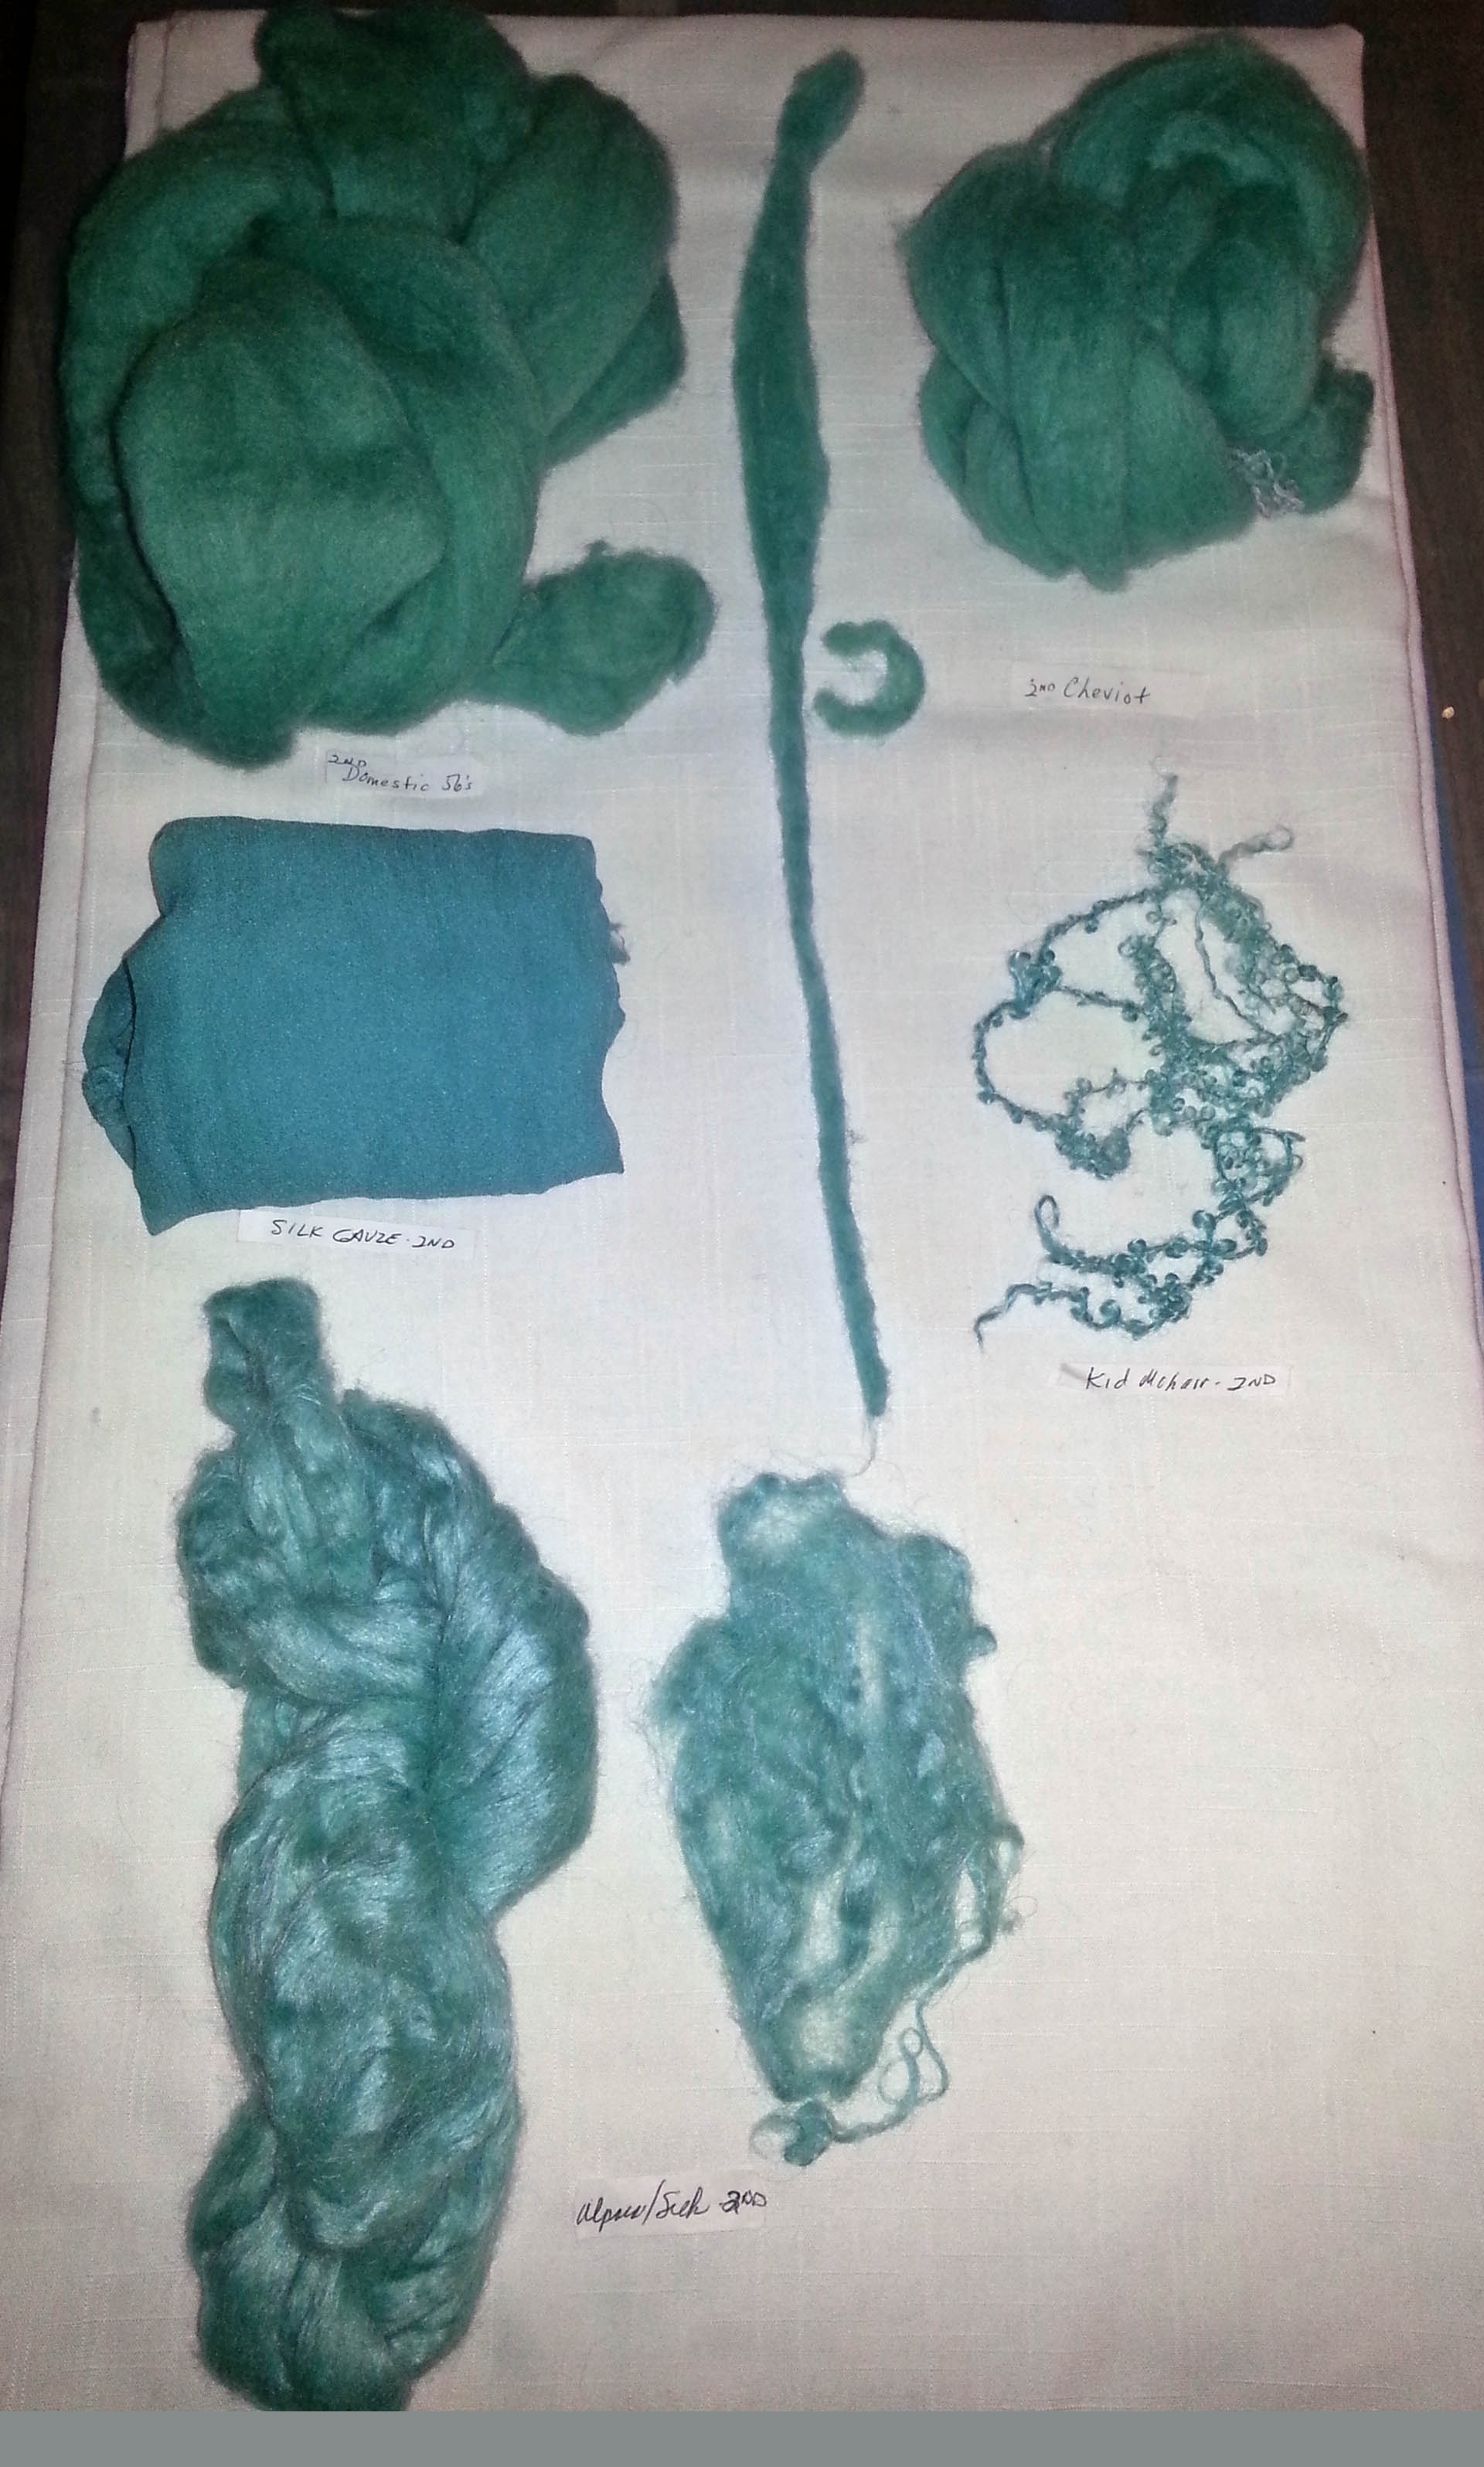
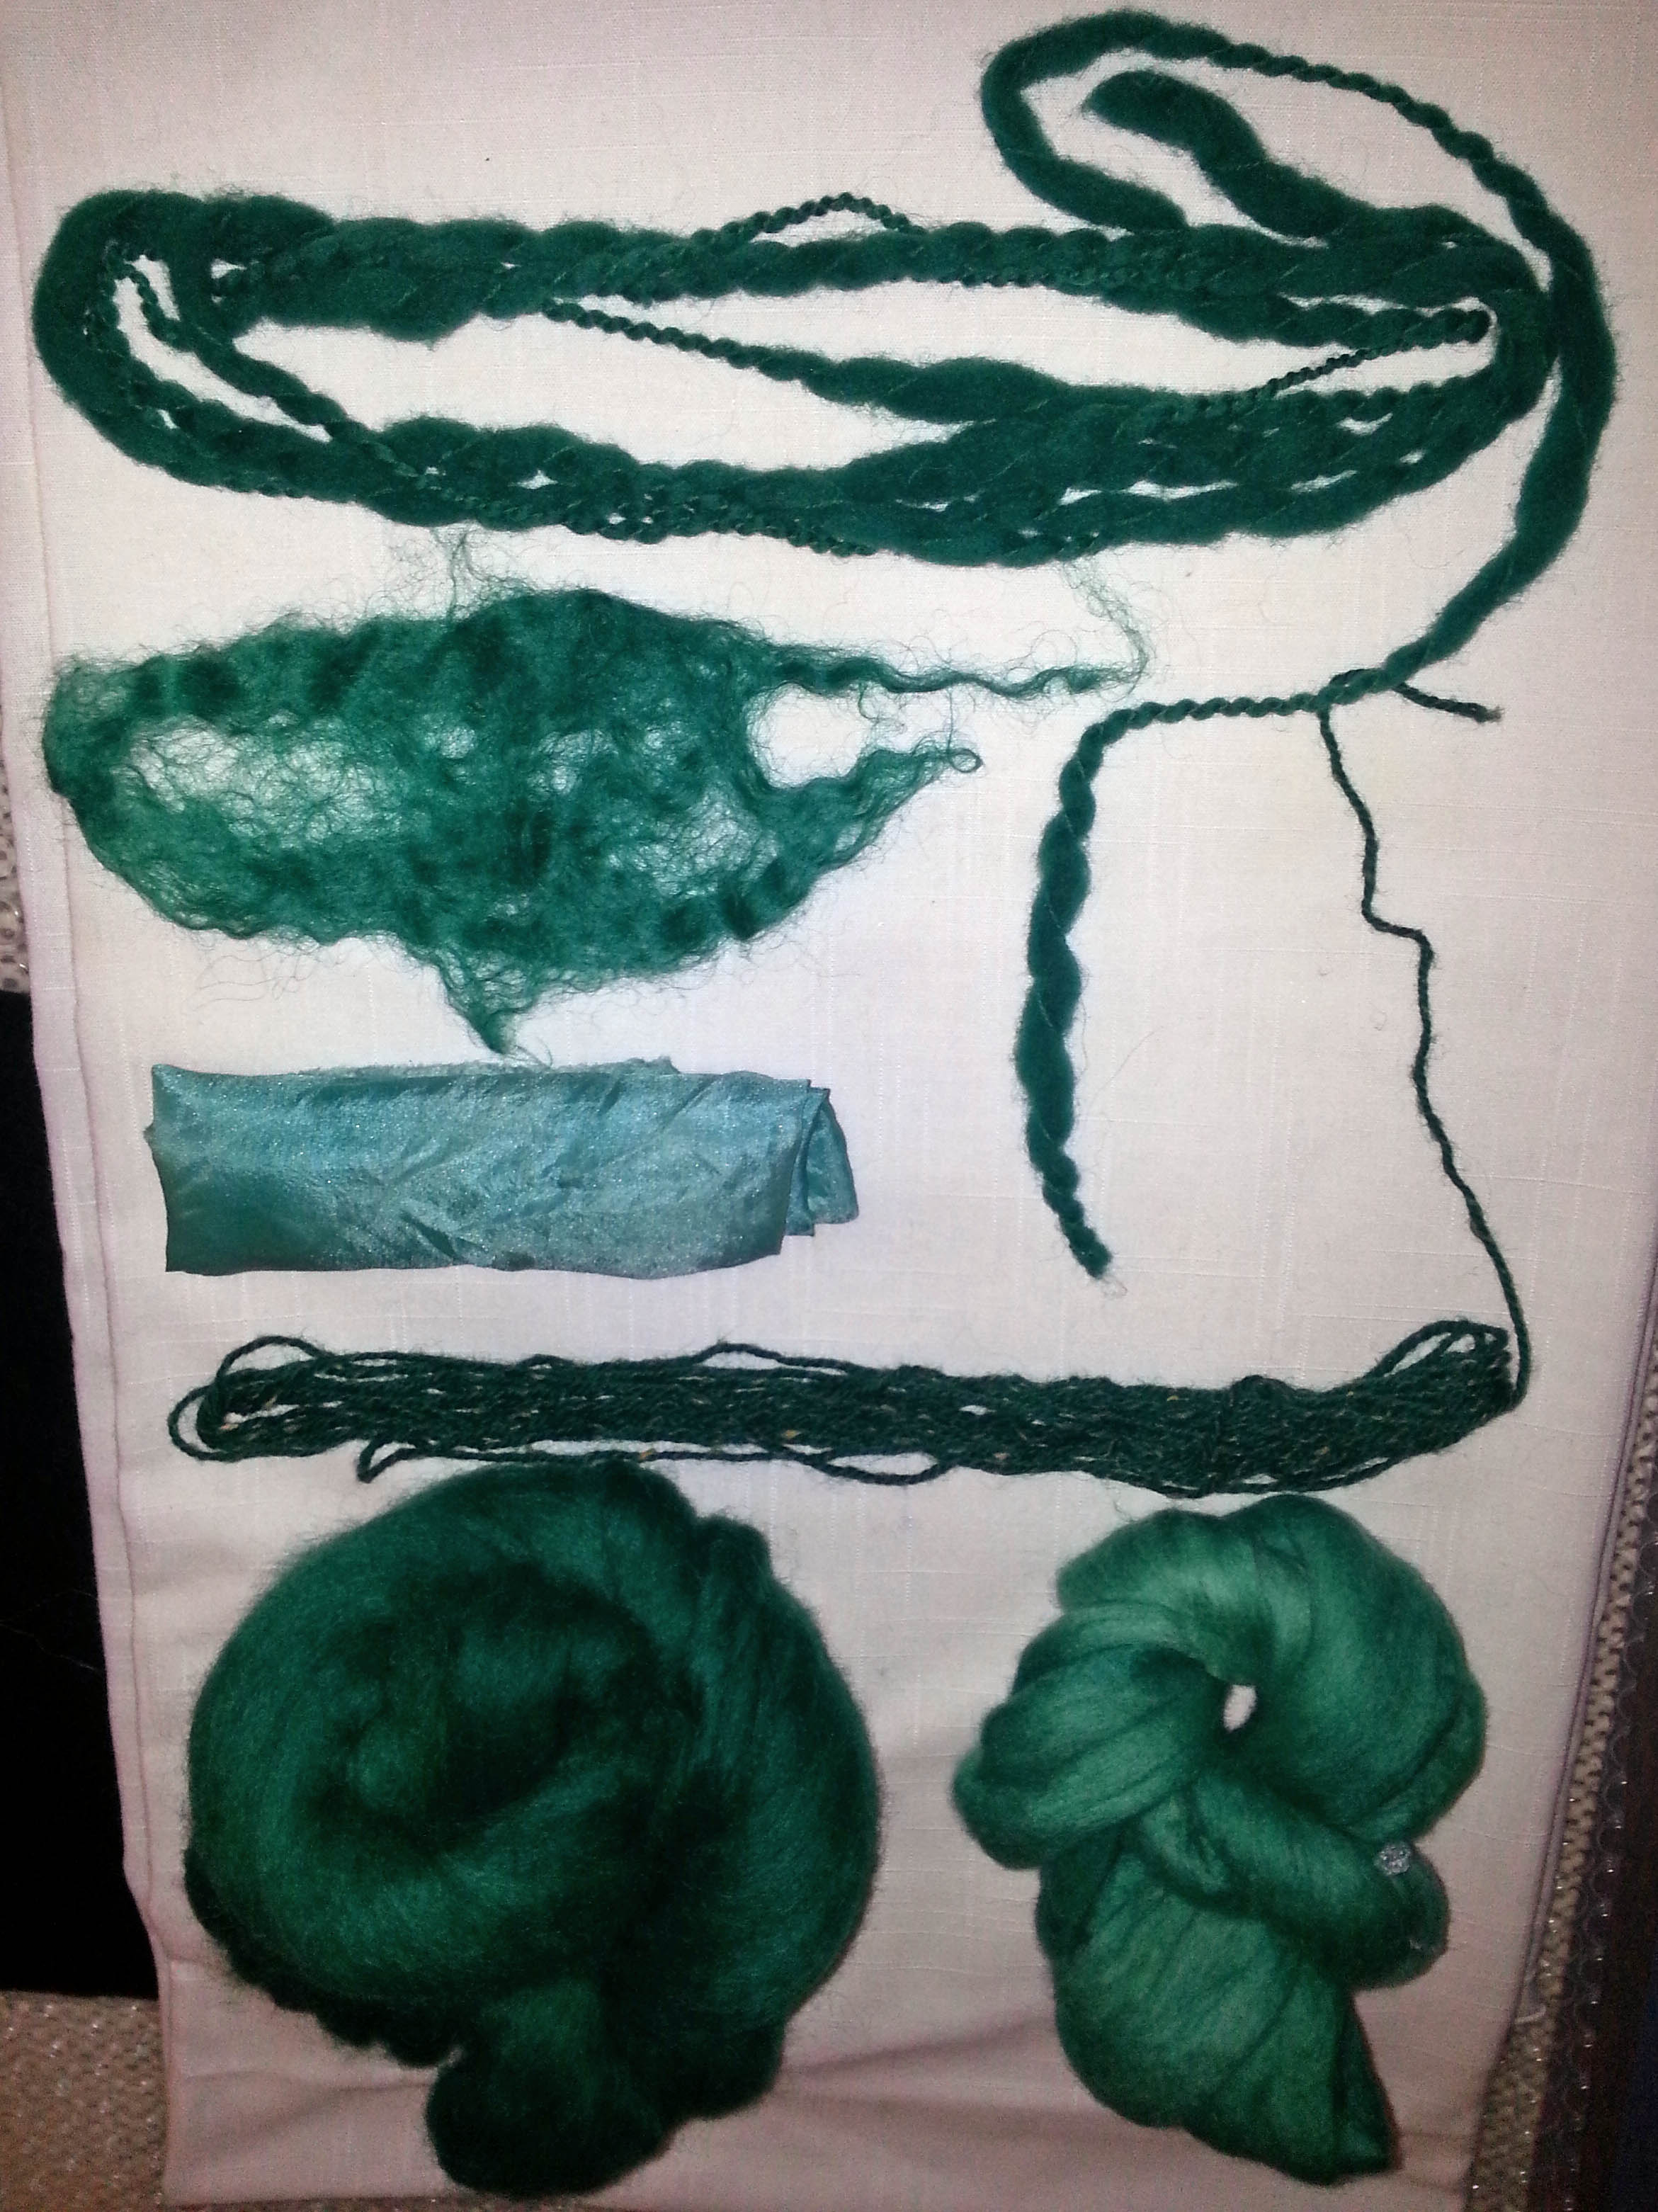
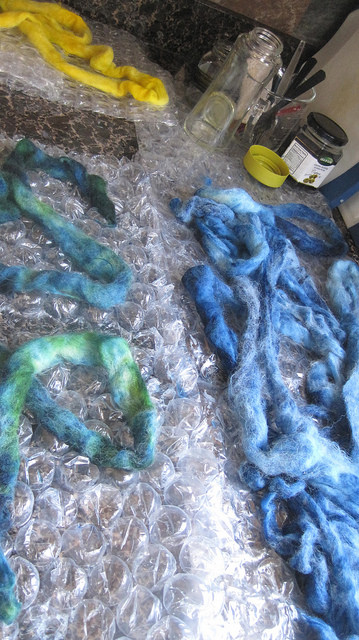
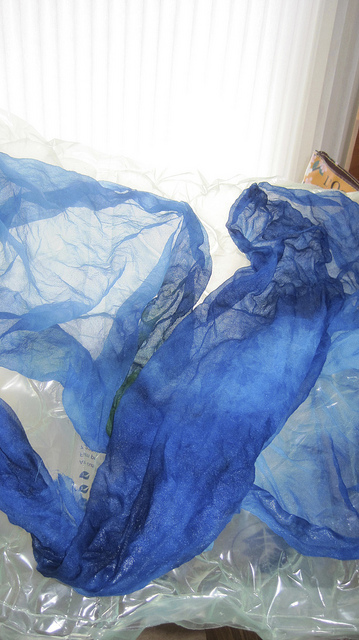
I had done similar samples using habatoi silk, mulberry silk fiber and yarns on each of them a while back, fulled, dyed and then stitched them together. Here is the Four Day Dye Experiment http://feltingandfiberstudio.com/2014/06/15/four-unintentional-days-of-dyeing/

These samples were fully felted and it is hard to tell the difference except to rub my hands over them. The Icelandic and Domestic 56 are coarser to the touch than the Cheviot and the Romney.  Different than at the prefelt stage.  I think in the future I may take a smaller sample to full and compare obviously they are different.

20151014_172228_001

Now as a preview to some more future sampling on a pile of fabric samples to test.

20150718_161317

What is your experience with sampling?


Dyeing for Special Projects

Dyeing for Special Projects

On the Felting and Fiber Forum, I had mentioned doing some dyeing for projects and Zed encouraged me to write about it.

I’ve had a couple projects in mind that I needed specific colors in silk and wool and needed to mix colors to get the shades I needed.

The first one was for my daughter in law for a wall hanging.  More about this next week. This one I used a dye bath for silk gauze, silk roving and merino.  I also threw in some Corriedale to have on hand. I washed the silk gauze in synthropol an soaked it and the silk roving overnight in a vinegar bath.  I soaked the wools in a vinegar bath for about a half hour before dyeing.  I didn’t need too mix colors for this job. It was an Idye mix I had made a couple of years ago.  I wasn’t sure if it would still be ok, but it worked well.

I was pleased with the results and got the exact shade I needed.

20150609_152850

20150609_093921


The second project I wanted to try mixing browns,  greys and a green with acid dyes for another project. Here are a couple of my color tests.  I’m not sure where the rest went I had quite a few formulas I tried.

20150926_130628


I used saran wrap, a squirt bottle and a sponge brush to apply the mixed dyes to the pre-soaked silk pieces.

20150729_160902 2015-07-28 16.16.57


I used merino pre-soaked in vinegar in baggies and steam for this one.  I thought I had saturated the fibers enough and rubbed the acid dye into the fiber.  However, while it was in the steamer and left overnight the dye settled in spots.  I expected the mottling on the silk which was fine.

20150801_162918 20150801_162622 20150731_124308

However, all was not lost.  After running the grays through the drum carder the colors were perfect.

20150926_123929

Stay tuned for more on this project later.  I ended up only using the gray wools, then making prefelt for the project.  I will have to think of another project to use the silks and the browns.  I did use some of the green wool as well which was fine as it was.

I find it interesting to mix colors to get a specific colors, some times it works well, others not so much.  How has your experience been mixing dye colors?


2015 Third Quarter Challenge

2015 Third Quarter Challenge

In keeping with our color theme for the year, this third quarter challenge is related to dyeing and blending from a picture using a color generator, then use the colors in a project.

We’ve had a very wet, cool spring so I chose a picture of a sunset at a Poipu beach on the island of Kauai where it was perfect summer weather. Thinking Spring/Summer!

I tried a few color generators  but settled on these two:  https://color.adobe.com/create/image/ and http://www.palettefx.com/

Here is the original picture:

2015-01-09 18.09.42


Then with the Adobe file:

Sunset Adobe

And the Palettefx view:

Hawaii sunset

I decided to dye some Icelandic roving with the three primary yellow oranges in the Adobe picture.   The colors at each end and in the middle. Let the mixing begin!

2015-06-15 15.58.39

Using a printout of the Adobe pic, I used my acid dyes which were already prepared and mixed each color using what I thought would come closest.  It’s really hard to tell from the color of the mix so I used coffee filters to write my formula and drop a sample at each stage.  It still wasn’t showing a huge difference.  I had already prepared the fiber, soaking it in vinegar water so I was ready to dye and hoped it worked.

I started with the middle color which the generator marked as base, then the color on the right, then the left.

Since I only have an induction stovetop in my work area, I wanted to do all the dyeing at once. So, I used zip bags and steamed them together in a large pot.

2015-06-15 16.14.042015-06-15 16.10.35

After steaming them for 30 minutes, I left the bags overnight to cool. The next morning I opened each one and was surprised that the roving was mottled.

2015-06-16 10.19.092015-06-17 13.48.21

Once the roving was rinsed and dried, I ran each through the drum carder.

2015-06-28 15.45.59

The blended batts weren’t exactly the colors I had wanted, so I took it once step further and started blending the batts with more roving to try to get the colors I needed.

2015-06-28 15.46.44Much better.

2015-06-28 15.49.17You can see the  blended colors were closer to the samples I had made with the dye.  Go figure.  I guess the white filter paper may have lightened them up.

Here is the progression:

2015-06-17 14.30.03 2015-06-17 15.31.14Number 1 (in the center) the formula was one tablespoon each red and orange, one drop blue and 2 drops black in one cup water.

Number 2 (on the right) –3 tablespoons red, 1 yellow, 1 drop black and 15 drops blue.

Number 3 (on the left) 3 tablespoons yellow, 1 red.

When I carded them I added white , black or blue to lighten or darken or mute the color.  I just adding until I thought the color was close enough.  There is no contest here, just satisfy yourself the color is close enough.

I really liked the purple and gray in the PaletteX picture.  I had some merino close to the colors so I carded the purple with white to lighten and black to darken and yellow to mute.  Then I had some steel gray merino that matched the gray.

2015-06-24 16.09.31

Now, what to make?  After a lot of thought, I decided to make an Ipad cover.  I didn’t want to replicate the picture just use these colors to to give the impression of a sunset.

I made the resist using a 30% shrinkage rate, then covered the resist with hand dyed silk habatoi added a later of gold merino I had dyed a couple of weeks ago.  The next layer was white Corriedale.

2015-06-26 11.33.14 2015-06-26 11.55.20 The final layer was the design using the colors I had just dyed and carded.

2015-06-28 15.53.21
Front
2015-06-28 15.53.29
Back
Inside
Inside

The inside ruched nicely and even mirrored the design on the outside.

Then in went the Ipad.

2015-06-28 15.56.05It is slightly larger than the Ipad.  When I calculated the shrinkage, I based it on Merino shrinkage not Icelandic.  But its okay since I can put in a pen and stylus.

So, for the challenge you can pick a picture and decide which colors you’d like to use, then dye/and or blend roving to get your colors.  There is no set number. I just got carried away. Then use them in a project of your choice – wet felting, needle felting, spinning, etc. Whatever, you’re comfortable doing.

This was challenging for me, but I learned  about color mixing and blending and just what the eye sees.  Of course, the printed version and screen version may also be different.  Just have fun with it!

I look forward to seeing your challenge pieces on the forum.


Doing some Dyeing

Doing some Dyeing

I realised I was running out of brighter colours.  I got the dye pot out from under the snow drift it had become to fix the problem. . I like to dye outside but it much to cold so It was in the kitchen. I was nice and used citric acid instead of vinegar in my dye water. I am not a pro at this. I do not measure as I don’t care if I can get the exact colour again. I like that my dye jobs are many times not an eve solid colour. I will recard it and it will have more life and not be so flat.

I started with yellow. I wanted a nice bright sunny yellow. It bled a lot when it was done.

yellow bleeding

After many rinses it was still bleeding. So I recooked it with more acid, that worked.

Here is some purple in the pot and you can see the dye take up was good.

IMG_2430

and this is all the wool done, some nice bright spring colours.

dyed wool

I have finally taken my own advice and got some PH strips. I always tell people having trouble with dye take up or bleeding to make sure the PH is right. Now I just need to find some tome to do some more dyeing so I can try them out.

Pandagirl’s Year in Review

Pandagirl’s Year in Review

I know I’m late to the party, but I’ve been traveling and have several family affairs looming that need my attention.

I started out in 2014 as a forum member and then in March I was a Global Moderator!  This past year has brought many challenges and delightful learning and wonderful outcomes in terms of felting.

My year started with experiments in dyeing.

2014-01-24 16.29.52

I shared my venture into encaustics.

2014-01-16 11.13.59

Tried my hand at painting with wool.

2014-01-12 12.05.33

Experimented with different wools.

2014-02-07 14.53.01

Participated in the quarterly challenges.

Jackson Pollock - Marilyn

Stewart Stephenson - Marilyn
Stewart Stephenson – Marilyn


Monet 2 after felting
Monet 3rd quarter


2014-10-19 13
Land Art 4th Quarter


Tried framing methods.

burlap 2

I broke down to drum carder envy and began my foray into making batts.  Woo hoo!

2014-11-14 15.15

Cathy and I tried indigo dyeing.

silk and thick n thinMy marketing blogs…

addiction biz cards wool side


I know it’s been awhile, but its more fun felting than marketing…  Sorry.


I taught a felting  class.

Toni
Toni and her placemat


There was a period of obsession with pods and vessels.

After rinsing

I ventured into free motion stitching.

moy layout

Then I experimented with embellishments and making a book cover.

finished front

Designing and making a handbag was a huge accomplishment for me.

hanging

I  experimented with 3D felting – grapes and flowers.

finished 2

2014-10-29 12.29


I learned a lot of new techniques in Fiona Duthie’s class.

2014-06-03 11.07.12

It was a busy year visiting farms, mills and fairs.

susan democarder back


I made scarves including a cobweb scarf.

2014-10-17 13.45

A big project was a 3D free motion stitched bowl, oh my!

2014-10-28 12.12

Felting a rooster, I learned to combine wet and needle felting.

2014-11-10 16.24

Our holiday exchange was an experiment of combining beading and felting.

2014-10-29 11.47.04

All in all, it’s been a very productive and inspiring year felting. Of course, there were many more projects that were completed.  It has been a wonderful year.  I want to thank all of you for teaching, inspiring me and encouraging me to do and try more.  Thank you!  A special thanks to my fellow moderators and Luvswool (Cathy),  Leonor at Felt Buddies and Nada for pitching in and contributing to the blog.  It’s been a terrific, fun journey.  I can’t wait to see what 2015 brings and what I learn and try!


A Day in the Life of a Fiber Mill

A Day in the Life of a Fiber Mill

Last Friday, Cathy (Luvswool) and I took a lovely drive out to Belvidere, Illinois to tour the Illinois Wool and Fiber Mill.

Nestled in the midst of farmland, we were surprised to turn into a  homestead driveway. I guess we were expecting a huge factory, but it was a quaint store and small facility crammed with custom made machinery.  The idea for the mill started when Jane Zeien’s family purchased two ewes  for a 4 H project.  The family enjoyed working with the sheep and began raising Cheviot, Hampshire, Shetland and Cotswold sheep. They decided to expand their services to help promote the industry.

The Illinois Wool and Fiber Mill can handle everything from washing fiber, blending, picking, carding, pin drafting, custom dyeing, preparing batts and spinning.  All types of natural fiber are welcome  unwashed or washed.  And no order is too small and each fleece is processed individually.

Jane greeted us and led us into her workspace and into wool heaven.

We were surrounded by fleece waiting to be processed in a variety of  breeds and blends and piles of roving in a potpourri of colors and blends.

The picker has a big enclosed space behind it where the fleece piles up ready for the next step.

PickerThe carder dominated the center of the room.

front of carder carder back


Batts can be made on the carder by changing out the parts on the back of this machine shown here making roving.

This is the pin drafting machine.

pin draftingDepending on the job finishing the wool can be done on the spinning machine, then the skeining machine.

Spinning Skeining machineWhen the tour was over we visited the shop where everything is related to sheep from skins to finished good by Pendleton and Woolrich along with handmade items, books, roving and yarn. If you want to learn more about the mill visit their website http://www.ilwoolfibermill.com/

Of course, we both bought some new wools to play with. One of my treasures was an English Merino wool batt.

Eng Merino batt

Here are Cathy’s new treasures —

Cathy treasures


Summer Blues

Summer Blues

When Cathy (Luvswool) and I went to the Midwest Fiber Fair a couple of weeks ago, in our conversations I mentioned I had an indigo dyeing kit I’d like to try.  With some discussion on the forum about the smell indigo produced, I wanted to try to do it while the weather was still nice outside.  Neither of us had used indigo before, so, I invited Cathy to join me in a day of dyeing.

I didn’t have a plan for what I wanted to dye or any specific projects in mind to use the dyed materials.  But Cathy came well prepared with plenty of roving and fabrics to dye.

To save some time, I had set up the buckets for wetting and indigo along with the plastic coverings before she came. It was an overcast day to begin with with a nice breeze across the yard.

set upWe followed the instructions, mixing the indigo, then the chemicals and stirred it in then let it sit for an hour.  But there was no bloom as described.  We reread the instructions and stirred again; then decided to skim the top and begin.

After the first batch, we returned the runny bloom back to the bucket and let our fabric oxide.  It all looked fine, so we continued the process with the rest. Once the first batch was fully oxidized we tag teamed and I washed and rinsed while she dipped the next batch. Strangely enough after the first batch the bloom began to grow.

With a brief break for lunch, we managed to get everything into the pot we both had to dye along with the breaks for letting the pot sit after stirring.  It was a busy day with the dyeing, rinsing and washing. And the day got hotter and sunnier as we worked.

Cathy had spent the evening before rubber banding a large piece of cotton gauze.

Cathy tied corks

Cathy cork cloth

She also brought along a big pile of Domestic 56s roving, some kid mohair yarn, nettle and lace table cloth, miscellaneous bits and pieces of fabric.

Cathy domestic Cathy yarns rovingcathys laceI dyed two blouses that were old, but stained, a very old handkerchief with my name on it, yarn, mulberry silk, pencil roving, thick and thin yarn, a linen doily, some merino and cheviot roving.

sleeveless blouse


silk and thick n thin stuffI had wadded up some cotton voile and rubber banded it all around.  The end result is the piece draped on the chair.  I like the random patterns it produced.

cotton gauzeCathy brought some corks with her, so I used the corks on a piece of silk gauze.

silk n corksShe also dyed some old thrift store “lace” bedspread pieces, an old linen pillow case, a piece of muslin and a cat mat.  

Since it was getting late in the afternoon and Cathy had a long drive home, we packed up her goodies and she finished rinsing and drying some of her items at home the next day.

We were pleased with the outcome of our “Summer Blues” and the opportunity to give some old items new life and others some pretty blue color.

Cochineal and Indigo Dyeing

Cochineal and Indigo Dyeing

Yesterday my friend Linda and I did some natural dying with cochineal and indigo.  She had purchased a kit with several kinds of natural dye stuffs and instructions. We decided on cochineal and indigo so we could get fuchsia, blue and purple. cochineal is easy enough to prepare you boil it strain it and then reboil what’s left  and strain 4 times to get you dye solution. It was a lovely deep pink. you have to mordant your things to use cochineal. For cotton you have to first soaking in  tannin and in then in alum. For wool you just use alum.

mordenting for dyeing

Here are a couple of the pieces after they came out of the cochineal

cochineal dyed stuff.

The indigo is a little more involved to get ready and it stinks. first you make up a concentrate using the powder and chemicals. Indigo is used in an alkaline solution. You stir it together and then have to let the purple solution turn yellow/green.

indgo solution Then you have to carefully, under the alkaline water in your bucket, pour the solution in. You do not want to add any oxygen to the dye bath. Then you have to wait another 1/2 hour or so for it all to goes completely yellow again.

IMG_1456

When you add your wet articles to dye you have to carefully lower them into the bucket so as not to add any oxygen to the solution.

putin bundles in indigo The magic happens when you take things out of the indigo. Even after just a couple of min in the bucket things will start to go blue when pulled out.

start to change when you take them out after 30 to 40 min you get much better colour. Here is some cotton that was tied in knots so parts would resist the dye.

out of the indigo untieing the clothThe pieces that were in the cochineal where a disappointment. when we added them to the indigo all the red disappeared and only the blue took.  We discovered after doing some research that we were supposed to used the mordent for 24 hours. That would be  2 days of soaking for cotton and one for wool before you can start to dye.  a couple of the cotton gauze pieces did keep a little pink

cotton gauze here are the rest

dryingThese have all been in the indigo once

and these twice. The very dark ones are a natural dark gray Norwegian wool.

multiple dippings

The other thing I tried was my hair it has gotten long enough that it is becoming hard to handle so I am going to get it trimmed soon. So I thought why not have some fun with it first. I stuck it in the cochineal and then in the indigo.

and in cochiniel ann in the indigo

Unfortunately the cochineal washed right out in the indigo and the indigo did not take at all. In the end Linda had some stuff called panic manic that she used to give me the purple I was looking for.

hair dye anns hair

This was a fun day but I think I will go back to my acid and fiber reactive dyes, so much simpler to use and predictable results. If anyone knows why the indigo didn’t work on my hair I would like to know. I though with hair being a protein fiber it should work.

The Four Day Dye Experiment

The Four Day Dye Experiment

I recently read some new instructions for dyeing using citric acid and salt. Well not new,  I took a class a couple of years ago where the instructor used similar instructions. Normally, I use vinegar for dyeing.  But I like to experiment.  I have also been wanting to try some new fibers and have never dyed something I’ve already felted.  So, I decided to combine the experiments.

I made samples using Cheviot, Romney, Icelandic, Texas Mohair locks and Domestic 56’s.  On each sample I put a piece of silk Habatoi, silk gauze, thick and thin yarn, mulberry silk and prefelt. I was going to make a placemat out of them, but they all shrank differently, so I have to rethink what to do with them.

felted samplesAccording to the instructions, I had to weigh the fabric to dye (before soaking in synthrapol).  I had a large pot so I put together some Merino, silk habatoi, wool yarn, and wool thick and thin yarn along with my samples.  All total 128 grams.  Next, into the soak, then on to mixing the citric acid and salt solutions.

After a thorough search, I couldn’t find the citric acid I thought I had. Whoops.  Well, it should still work with vinegar, right?

1 gram of fiber= 1 milliliter of dye.  Then depending on the Depth of Shade desired the amount can be multiplied by 1 through 5 (light to dark.)  When I filled the syringe with 120 ml of dye, it looked like a lot so I decided just one DOS would be enough to start. Normally, I would use a tablespoon of dye.  If I wanted a darker shade, I could add more dye later or overdye it.  I used my own dye stock that I had on hand.  After getting the fiber and dye bath up to temperature (185 degrees), I let it simmer for 30 minutes and checked it.  The water was still very dark.  I added more vinegar and let it simmer for another 15 minutes. No change. Another 15 minutes, then I added more vinegar and turned the heat off and left it until morning expecting it to be exhausted.

day 1 BSurprise!  Beautiful colors, but plenty of dye left.  I removed the fibers, rinsed and rinsed then let them dry.

Back to the dye pot.  I decided I probably didn’t need more teal fiber, so I added a couple of teaspoons of yellow.  Then put in some Domestic 56s, alpaca/silk, kid mohair yarn, Cheviot and silk gauze after soaking in vinegar. I repeated the dye procedure.

day 2Staring at the dye pot the next morning, there was still plenty of color left.  So, on to day 3 with Domestic 56s and Cheviot.

Day 3bOkay, enough, right? Dont laugh. I had to see this through.  Day 4 included thick and thin yarn, wool yarn, a piece of felted Wensleydale, silk habatoi, Romney and Merino. I expected some pastel colors the next morning. No.

Day 4Finally, the dye bath was exhausted and I had the biggest surprise of all. The Romney was darker than the fibers on the first day.  It’s a good thing I like teal.

4 days

I finally realized my mistake — my prepared dye mix  is 1 teaspoon dye powder to 8 ounces of water which is double the concentration than what the instructions were for making the dye solution.  (1 part dye powder to 100 parts water — i.e. 5 gm dye powder to 500 ml of water.)  I didn’t pay attention to the dye solution instructions because I had already had some made.  My bad.

I haven’t given up.  I have citric acid now but will try a much smaller amount of fiber and the right amount of dye solution.  But now on to make some batts and start a new project.


Dyeing Fabric and Fibres – Guest Post

Dyeing Fabric and Fibres – Guest Post

Today we have another guest post from Cathy Wycliff (luvswool) who has recently been experimenting with different dyes.

***

Dyeing is one of the popular topics on the Felt & Fiber Forum, but I admit I was very reluctant to give it a try.  I read about the chemicals involved, the need for rubber gloves and a face mask, and I admit that scared me away.  But after I ordered 10 pounds of white wool (Domestic 56s), I realized I needed to do something, so–being the chicken that I am when it concerns “dangerous chemicals,” I opted for food colors, which are non-toxic and “easy to use.”  The Wilson icing gels I used met both of those criteria, so I happily dyed my wool in the microwave.  However, once I started wet-felting with the wool, I realized the colors bleed, even though I had followed the instructions (vinegar rinse).
That’s what led me to acid dyes, as I witnessed the beautiful results Forum members achieved through their use of acid dyes.  I went ahead and ordered Dharma yellow and blue (figuring I could make my own green), and began my dyeing journey.  I gathered my materials using Ruth Lane’s book “Complete Photo Guide to Felting,” even though Dharma offers instructions on their website.  I just do better with photos. Not pictured are the rubber gloves and mask I wore throughout the process.

5549Preparing to dye, I soaked the wool and silk according to the instructions.

5550While the wool was soaking I laid out the plastic as protection for my kitchen countertops.

5551I mixed the acid dyes according to Dharma instructions on the labels, double-checking with Ruth’s instructions.  I used glass jars, which are fine, but I have since ordered those squirt bottles for easier and more direct application of the liquid dyes.

5554 Here you see the wet wool and silk, ready to be dyed and steamed.

5555I poured the dyes on the wool and silk, first batch, and then repeated for two other colors, mixing the blue and yellow to make green).

5556Each different color of wool was wrapped separately in plastic wrap and stacked in a stainless steel vegetable steamer. Here you see my designated stainless steel large pot, never to be used again for pasta!  I put in an inch of water in the pot and covered.

5557I steamed according to instructions, used a soaking solution again …

5559… and rinsed well — and there you see my first packet of wool (green) laid out on plastic to cool.

5561bI continued the process with the blue and yellow packets of wool.

5563bHere you see all of the dyed, wet wool laid out to dry.

5564Here you see the beautiful blue habotai silk scarf stretched to dry…

5569… and the larger green silk habotai shawl as well.

5570bI now have a good supply of green, blue and yellow standard wool roving and pencil roving, along with a couple of silk pieces ready to be nuno-felted.  Would I do this again?  Absolutely!
Just received my new colors of Dharma dyes, ready to go again!