Browsed by
Tag: book resist

3D Multi Part Resist Workshop Opens for Registration

3D Multi Part Resist Workshop Opens for Registration

Where did time go? It is almost spring. The 3D musti-part resist (book resist) workshop opens for registration today. A Masterclass on Book Resists. You can sign up using this form on the workshops page: 3d-multi-part-resist

The class runs from March 1st to March 29 2026. The instructor is available multiple times a day to answer any questions and give advice, so you can take the workshop from anywhere in the world.

This class is for people who have done some basic felting and used a simple resist and want to try something more challenging, learn some new skills and have some fun with them.

Here are some pictures from the last class.

There is a full class description and registration form here: 3d multi part resist


This and That.

This and That.

It is almost Fall. You can feel it in the air, and a few trees are starting to change. Usually, we like to hang on to summer as long as possible, but I am happy the dry, searing heat of this summer is finally gone. Yes, I am touching some wood as I say that.  It’s been a busy 2 weeks with school starting and the market picking up. Suddenly, we were out of meat pies, and I had to get baking. That doesn’t leave much time to felt. I did manage to get to the Almont Fibre Festival to help with the demonstration.

I put all my sheep key chains together

I am wondering about putting some wax or something on their ears to make them a little flatter and protect them. My thread wax is too hard. I wondered about some of the solid lip balms. It’s mostly wax. I think that might be too soft. I’m not sure what to do. I don’t want to use glue because it will make them too hard, or the PVA (school) glue can take up water and get tacky. Any suggestions?

I am packaging them so they stay neat. I had to get bigger bags for them. The ones that came with the card were not big enough. I have a shrink wrap machine that has a hot wire cutter, so I will cut the bags down so they fit properly.


While searching for some lost samples, the book resist thing I did about 10 years ago surfaced. The idea I had was to weave the ropes into a basket. But not thinking it through, I made 6 lobes and strings. You need an uneven number for the weaving to work. I took it to a social, thinking I had a good idea of a way to weave it. It didn’t work. Partly, it was not cooperative and partly (mostly?) I was impatient. Anyway, everybody had fun looking at it and playing with it. The general consensus was that it wants to be a jellyfish. So, I need to create some long, wavy, ribbony pieces, and possibly some long curls for the middle to hang down inside the long tentacles. I wonder if it will take me another 10 years. LOL


We would love to hear from you. If you would like to leave a comment, the comment button is at the top of this post, just below the title.

Another book resist shape sample

Another book resist shape sample

This is the shape I am currently working on. It started as half circles with a section flattened so I could tape them together the other way around.a resist shape made out of flour underlay

I have a flower shape in my head.

The same resist with green wool wrapped around and wet

I didn’t get very far before life interfered again. We had all the snow I showed you last time melt, and then another dump of snow and melt. Now the scillas are out.

Scilla's blooming in the garden


Sometimes, when I think about the cuts I am planning, I think it will work, and then other times, I think no, that’s not going to work at all. Then, I started thinking about how to figure it out. The best way for me to do that is to write out how to do it. Then I had to sort out what would be the best way to try it out without having to actually make it.

I figured out a good way to model the shapes and wrote that out, but now I have to do a trial run to see if it works and if I missed anything.

paper patten shape

It mostly worked the way I think it will, but I have another idea I am thinking about that may work better. Thinking is as far as I have gotten with that.

So far, I think the online class will be a 3-week class, with several weeks of after-class help access. How long is normal for after-class access?


A little Progress on the Workshop and Some Nice Yarn.

A little Progress on the Workshop and Some Nice Yarn.

I have finished the first draft of the resist workshop. 6 pages, and I haven’t added any pictures yet. I printed it out, and I am working on the first sample. I will add notes to the draft and add in anything I missed. The first sample is a circle resist.

stack of wool resists
All stacked and ready to go
stack of resists and rubbing tool
Time to start rubbing

That is how far I got, one set of all the surfaces rubbed. I am going to have to find my studio microwave and set it up so I can reheat these when I get back to them.


The only other fibery thing I have done lately is spin on my drop spindle. I do this mostly when I go to guild socials. It’s a nice, portable way to work.

Here are some balls I made earlier,


The dark pink has some silk in it, I think it came from Louet a long time ago.  The light blue and purple is from a batt I bought at a fiber show. The other three I made on my blending board. They are meino and sari silk. I like the pops of colour and slight slubbiness it gives the yarn.

Now, I am working on a sample pack from World of Wool. I got it last year. I am just getting to it now. They no longer sell this wool. It is Merino and Stelina (metallic-coated nylon). The Stelina is very sparlkely.


I did the yellow first, mostly for a change. I don’t do much yellow. It is hard to get the sparkle with the camera but there is lots of it.  As usual, I found it stuck to several things when I pulled my laundry out of the dryer. It really does get everywhere.

That’s it for my fiberiness for the last little while. I hope everyone is coming out of the winter blues and into the joys of spring. I am looking forward to being able to sit in the garden, in the sun and enjoy my felting and fibers among the flowers and bird song.

Working on new workshop samples

Working on new workshop samples

When teaching my vessels workshop a few weeks ago, I was showing the class pictures and talking about some more advanced vessels. They expressed an interest in all of them but especially in the book resist vessels. It got me thinking and now I am planning to give an intermediate vessel workshop later in the year, or maybe the new year, depending on scheduling.

At this point, my plan is to make 3 samples. That will help me write down the order and figure out how to teach it. I need to work out the materials list and timing, as well as how to teach it. Making them will also help me think of where things might go wrong.

I know there will have to be a prerequisite of having made at least one item, and preferably 2 or more items over a resist.

I plan on 3 different vessels. The first is a simple 6-sided circle pot.


The second one is more oval shaped vessel, I cut down the paper template from the circle so they will be about the same height when done.

And the last has an “odd” shape, again I used the half circle from the circle to draw the new shape to keep them about the same size.

As with most best laid plans, I discovered all I had for tape was narrow painters tape. So I will have to head to the store for some wide, strong tape that will hopefully stay stuck through the wet process of making a vessel.  In the meantime, I think I will start writing the instruction so I can jot down additions as I go.  I am not sure how long it will take to do all that. If I want to teach it in the fall through my guild, I will need to get the proposal in when the call for workshops goes out in the spring.


Pot Inside a Pot 2

Pot Inside a Pot 2

It was 2 days later that I got back to my pot. After some preliminary rolling in the dryer, I rolled it by hand.

It shrank quite a lot. it is very tight around the resist.  It is time to do some cutting. I cut in the spaces between the fins.

You can see how much the hole grows as you work the edge. The little blob on the left is the piece I cut out.

I didn’t want to pull the resist out through the hole. It is bulkier and less flexible than usual with the duct tape holding on the fins. I cut an X in the bottom of the outside pot. If I had thought about it I would have done it in the bottom of the inside pot so no one would ever have seen it.

This is how much it has shrunk so far.

Next was a vigorous rub down with a rubbing tool. This is one Jan found in the pet section of our Dollar store. It’s for washing your very dirty dog. I covered the pot with some plastic before rubbing. It is too grabby to use directly on the felt.

l

It shrank a little more but now it is al flat and smooth.

Before doing any more I needed to rinse out the soap. It always takes much longer to get all the soap out than I think it should.

I start with hot water and finish with cold. I also want to get more shrinkage during this prosses so I am quite aggressive in getting the water through felt to get the soap out.

This is how much more it shrank. You can see the black lines of where it was before rinsing.

I stuck the yellow inside the red one. It wasn’t too hard because the how where they are joined is not very small.  What was harder was getting the ball in so I could blow it up. I wanted to use a ball because I didn’t think a balloon would be strong enough. I did get this one I but ended up taking it out and switching to a smaller 8-inch ball. the ball is a Linsom ball, they are nonslip, sort of sticky on the outside. They are great balls because they come with a removable plug. I took a vessel class with  Sharon Costello where we used them. I suppose it helped the first layer of wool to stick.  The layout on a ball is very difficult. It was a great class, a lot of fun and we learned a lot but not one I like to use.

and in the dark

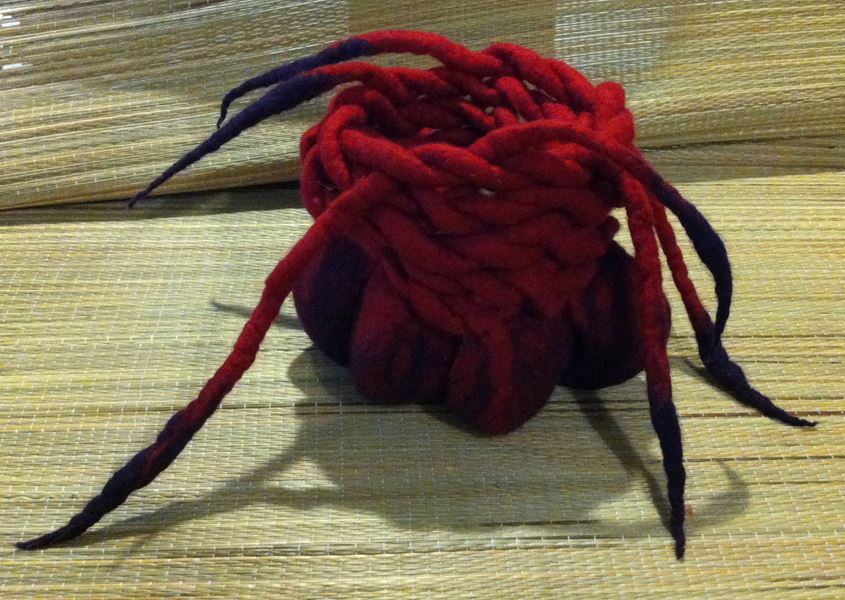
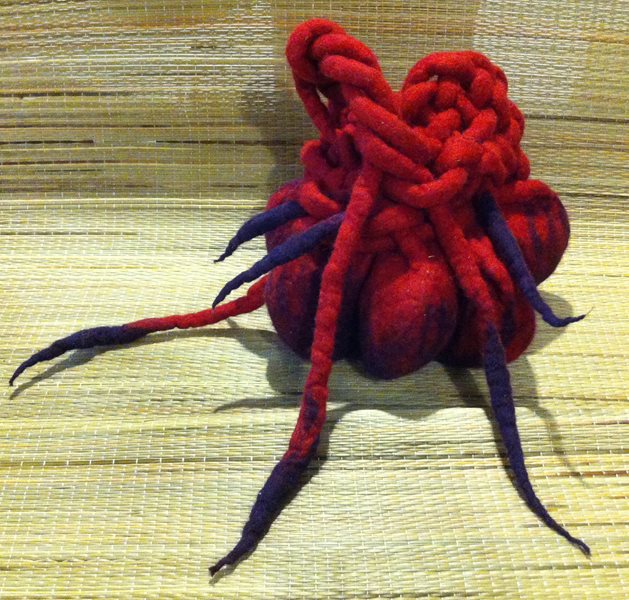
I think it turned out fairly well. If I were to do it again I think I would make the inside pot bigger so it would open up the fins. I may, depending on how ambitious I am, wet it down, blow up a ball inside and them stuff plastic bags in to make the outer pot bigger. I may cut the fins off and then so some stretching so you can see more of the inside pot. I am still thinking. What would you do?

Under Water Again

Under Water Again

I was really fascinated with Teri Berry’s book resist tutorial in January for the first Quarter Challenge. So, I decided to give it a try.

Book Resist Tutorial by Teri Berry

Since my mind has been under the sea lately, I doodled around and came up with a design that reminded me of coral.  I decided to have an odd number of pieces.

20160526_114242

I inverted the copies so the arms would be facing in different directions.  I used an old shower curtain for the resist then sewed them together.

20160509_112943

I soon discovered even though it was a heavy shower curtain it was challenging to get the fibers tight enough around the appendages.  The first layer was Romney which may have been a mistake because it is a long staple.

After I covered all the sides with the Romney, I covered each side with nepps because I wanted a bumpy texture.  Then the second layer were batts which combined natural hand dyed Domestic 56s with Madder that Cathy (Luvswool) had given me from her artist residency in Arkansas. https://feltingandfiberstudio.com/2015/05/09/dyeing-with-plants/  I was a little short so I used some my own hand dyed orange Cheviot mixed in.

It was a large bundle so there was a lot of rubbing before I could do any rolling.

When I finally cut out the resist I had to use my finger to open up the appendages and rub and roll.  My fingers got a real workout!  Because the wool had expanded over the shower curtain resist I had to really work each “finger” to get them to shrink and not felt together.  But the resulting lumpiness was the look I was going for.

Here it is drying.

20160524_141628

It was quite hairy so I had to shave it several times.  Here are the different sides.

20160526_113618 20160526_113822 20160526_113750 20160526_113650 20160526_114123

Here is a view from the top.

20160526_113959

After a few more shaves, I decided it deserved a sea setting.

20160526_155222

Thank you Teri for providing the tutorial and inspiration! And thanks to Cathy for the beautiful natural hand dyed wool!


First Quarter Challenge

First Quarter Challenge

They say great minds think alike. We all seem to have decided on a book resist. I started with 3 stacked circles. I had been going to cut 2 of them in half and attach them with duct tape but after reading Terries tutorial I grabbed a needle and thread and made a few stiches to hold it together.

The first thing I made was long snakes leaving the ends fluffy.

1 snakes

Then I made 6 fiber circles. I used about 2 grams of fiber in each of 3 layers for each circle.

2 circles

then I added them to the  stacked resist. I did remember what everyone said about having a hard time where the resists meet at the top and bottom and paid particular attention to that.

3 wrapping the stacks

next was the long snakes.

4 ready to felt

I put those on near the top of the circles.  The next part is not very interesting. rub, rub  rub,  roll, roll, roll. Then cut the hole in the top. I decided the inside wasn’t felted as much as I wanted so I left the resist in and went back to rolling.

5 cut open

after it was all dry I had planed to weave the long snakes around it in an artistic design. Unfortunately weaving really needs to have a odd number of so that didn’t work. I needed to find a solution.

I did these

solution 1 solution 3

or maybe turn it on its head?

solution 4

Last night I took it in to a guild meeting and challenged them to do something with it.

solution 5b solution 2solution 6

solution 7 solution 8

We had artistic twisting, plant hanger, a fancy bun cover, and a bag. We had a great time and lots of laughs, The conclusion was that had I made a great new party game.