Browsed by
Tag: alpaca

Mystery Fiber – Identify It, Felt It, Take it Further

Mystery Fiber – Identify It, Felt It, Take it Further

Hello all.  My name is Arlene Toth and I am a Fiber Artist.  It sounds like I am owning up to an addiction, and I am.  I am addicted to working with wool.  If you don’t know me already, I have a blog called Adventures in Felt.  I took up needle felting in March 2019 where they were giving a demonstration at my local haberdashers.  The first thing I ever made was a bumble bee from a kit.  From then on I was hooked and it just snowballed from there.  As with any addiction, I eventually got hooked on the hard stuff, wet felting.  The first thing I ever wet felted was a very tiny vessel.  I used to paint for 10 years, but painting hasn’t had a look in for over a year.  I wonder at times how I have lived so long and didn’t know about felting until now.  I feel I have a lot of lost time to make up for.  Starting any new hobby is an adventure and I am always up for one of those.  I love this so much that I have immersed myself in it completely.  I have amassed a library of felting books, watched tons of videos (good and bad), and taken online classes.  I am so grateful to those out there that share their knowledge.  So I blog about what I learned.  As far as I’m concerned, it is all an experiment, and like painting, not everything is going to be a masterpiece.

One of the things I have learned is that making samples is important.  Most of the time I just jump right in, but there is value when making small samples especially if you are unfamiliar with the product you are using or the method you will be felting.  For instance, I bought some Botany Lap Waste from World of Wool.  I ended up with a lot of fiber that I thought was merino as it was so soft and felt like superfine merino, but turned out to be alpaca.  How do I know that?  Well, I initially felted with some of it, but it didn’t felt like the merino.  Fortunately, the item I was making was mostly merino, so this mystery fiber did ultimately felt.  I then decided to make some samples as I had a lot of mystery fiber.

Firstly, you need to identify your fiber if it isn’t labelled.  The first way to check if it is animal hair is to burn it.  Yes, burn it.  I used a fire lighter and took a piece of the fiber and it singed and smelled like burnt hair.  If it does that, it comes from an animal.  It doesn’t matter at this point which animal, but an educated guess reckoned that it was alpaca.  Alpaca is a lovely fiber, but some types will felt and some won’t. I have a lovely knitted alpaca hat I bought in Peru which is so soft and warm.  So either way I am going to be a winner here.

Now that you have determined that your fiber comes from an animal and it isn’t synthetic, you will then need to felt a sample, step two.

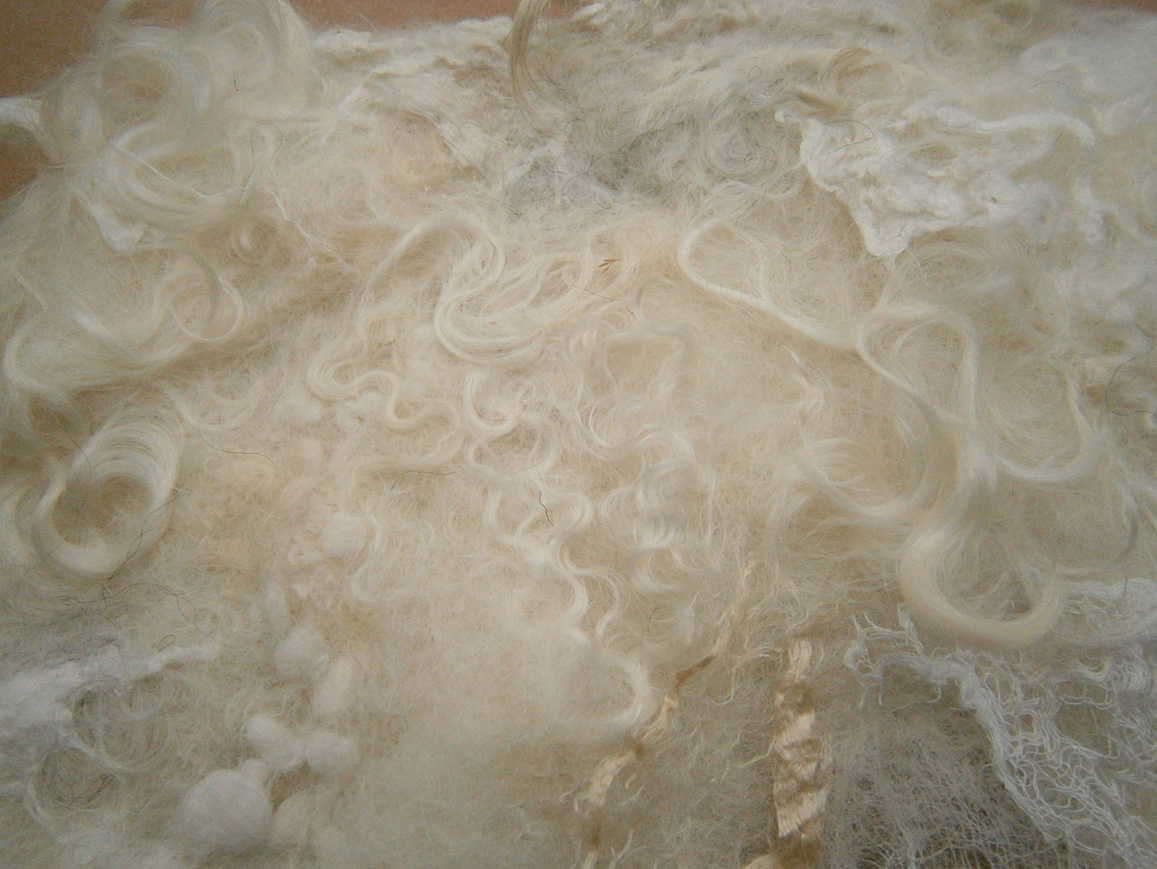
I had three mystery fibers in grey and the black is merino that I used for my control.  I laid them out with two layers.  I wet them out with tepid soapy water and started the felting process by sanding on boths sides, rubbing and rolling.  This is what they looked like.

B was looking as it should for merino, but neither A, C or D passed the pinch test.  I kept working at the samples and I finally got them to do a little something.

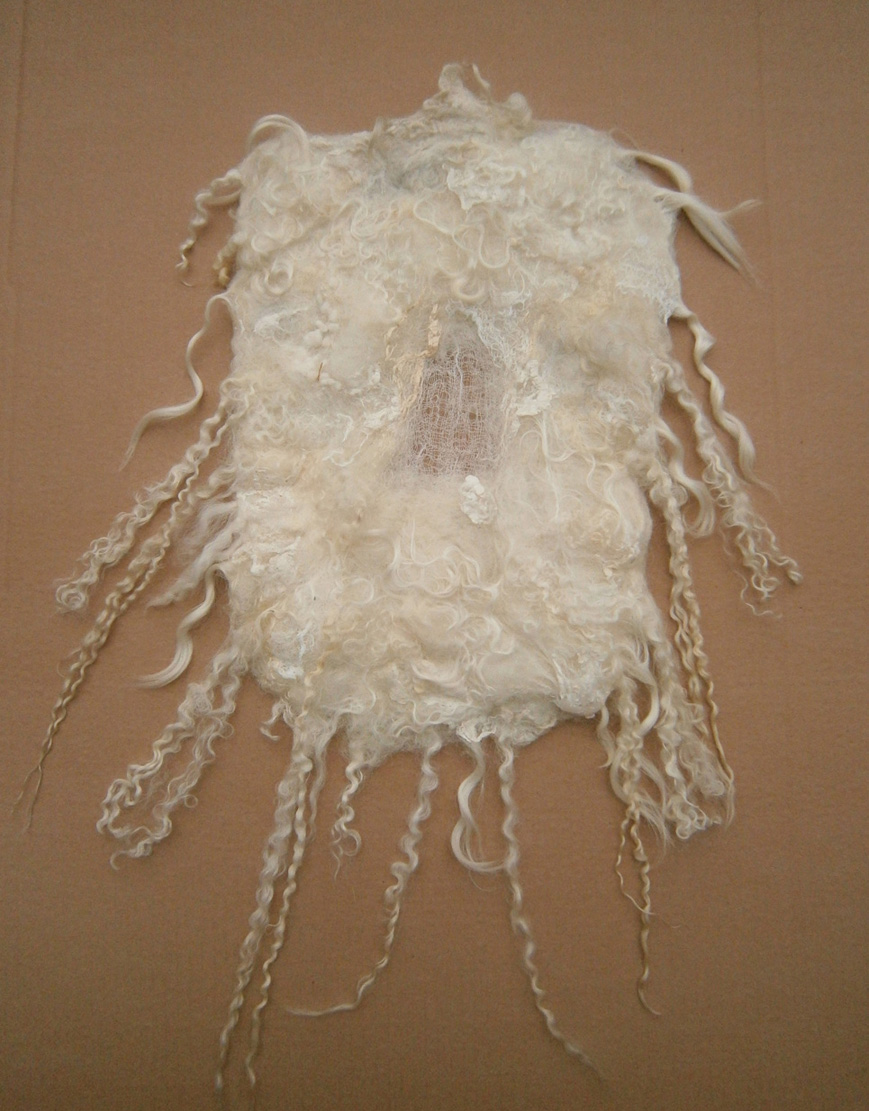
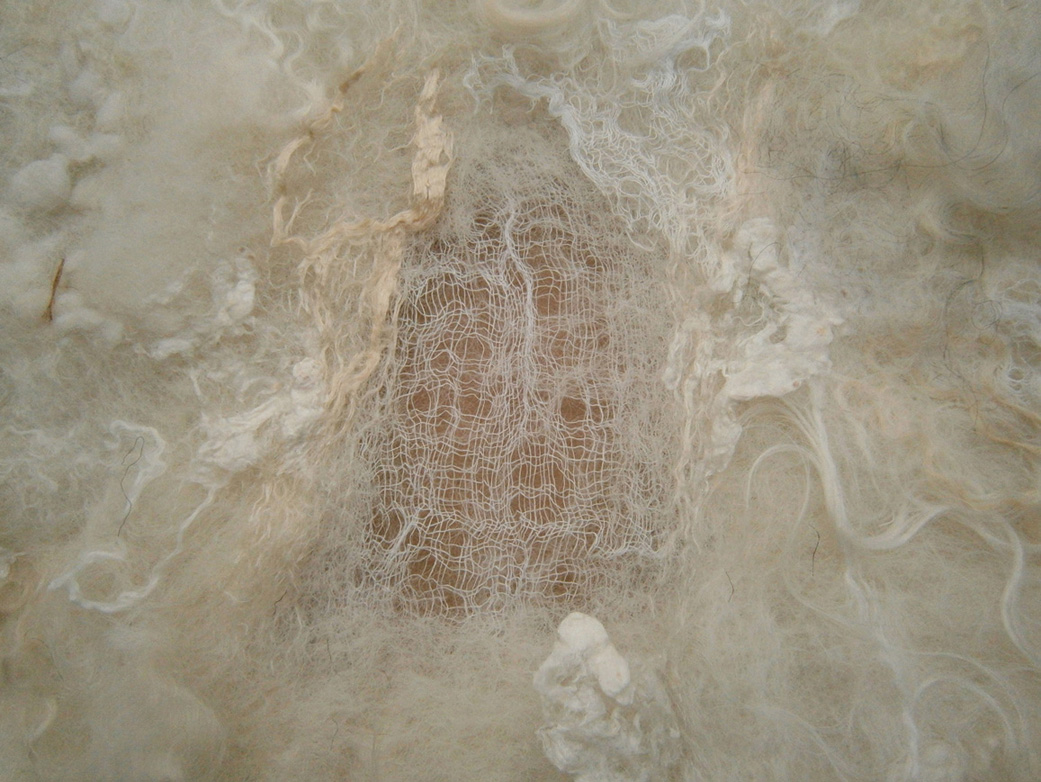
I can honestly say that if you want to become a good felter, you need tenacity as this is not a quick craft!  Not only was this fiber slippery and hairy, it was also squeaky!  You can see my lovely control Fiber B doing what merino is supposed to do.  Neither A, C or D is suitable to felt on its own.  D looked like a complete disaster!  Now, some people might think D was superwash, but superwash will not felt, at all, with anything.

So, I completely wasted my money right?  No!  You can stop right here, but if you know how to spin, you can spin with alpaca to make a lovely yarn.  I don’t know how to do that yet!  I was going to give some to a friend, but then we had lockdown, so I just labelled the bags as alpaca and put them away.  However, if you are like me, you will take it further, step 3.

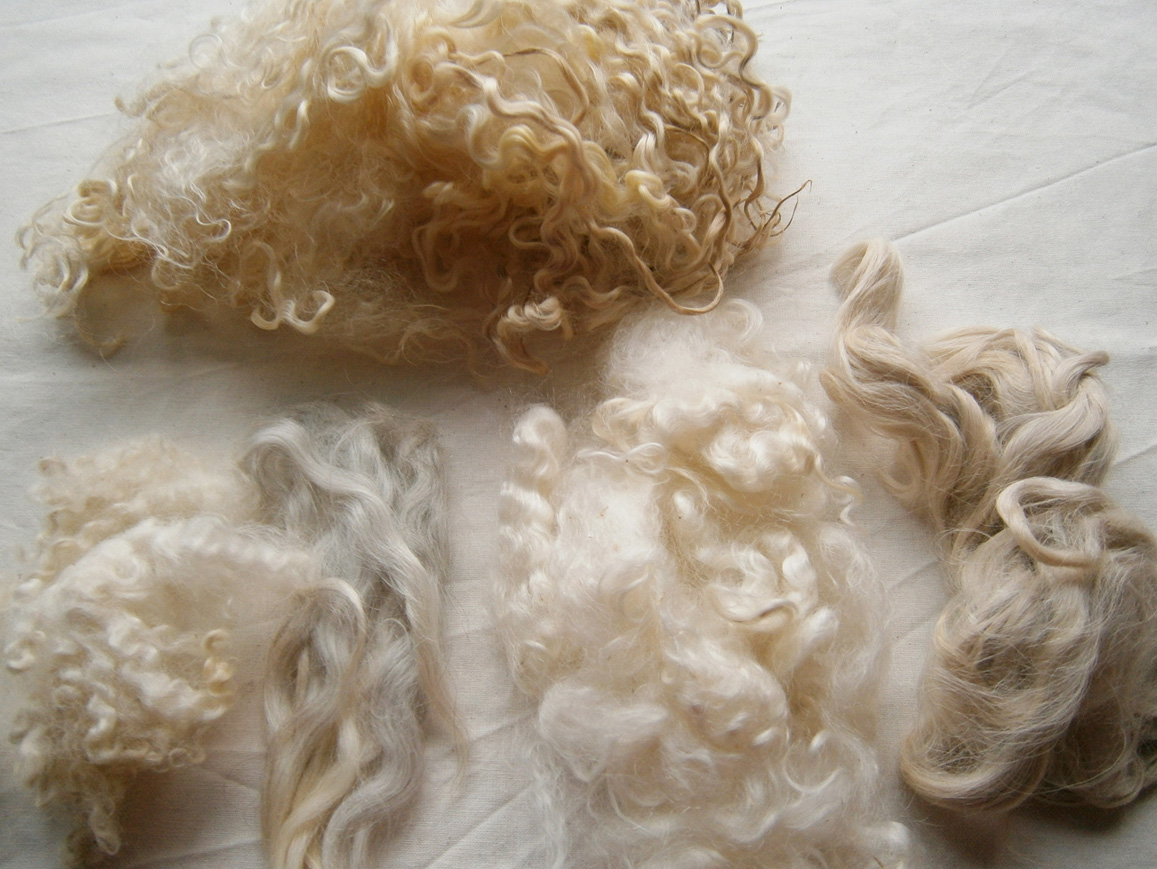
How do you take it further?  You add wool to it.  Something you actually know is wool that will felt. People in the feltosphere suggested that.  So I did.  I got out the blending board and blended the alpaca with merino.  I used the black merino for the dark alpaca and natural grey merino for the other two.  Here they are all laid out as before.

I then wet everything out and felted as before.  As you can see below, adding the wool made a huge difference and made for a better felting experience.

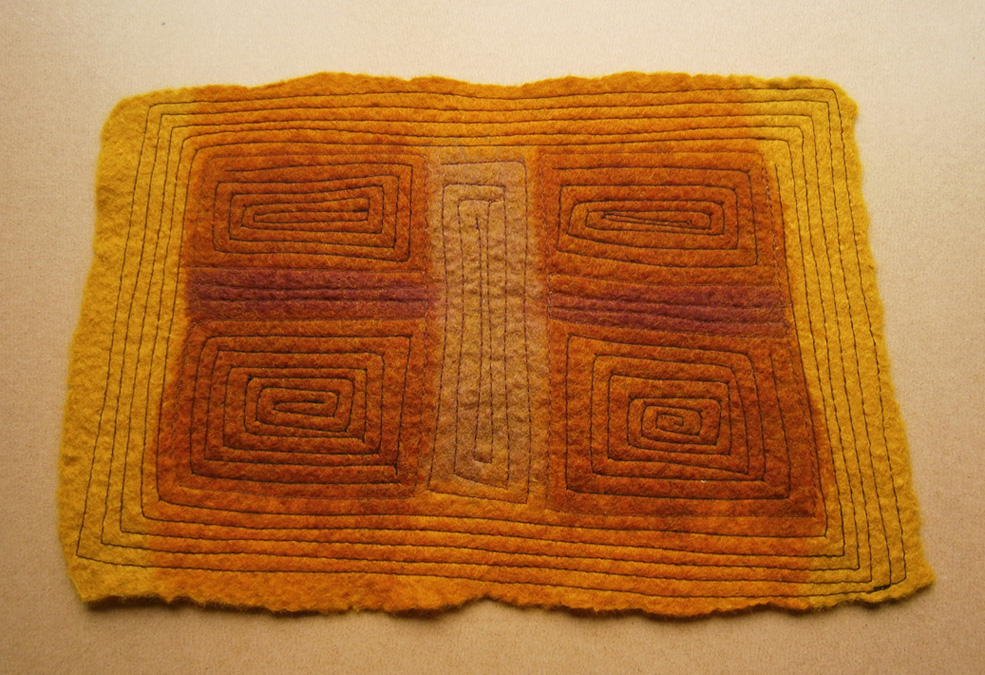
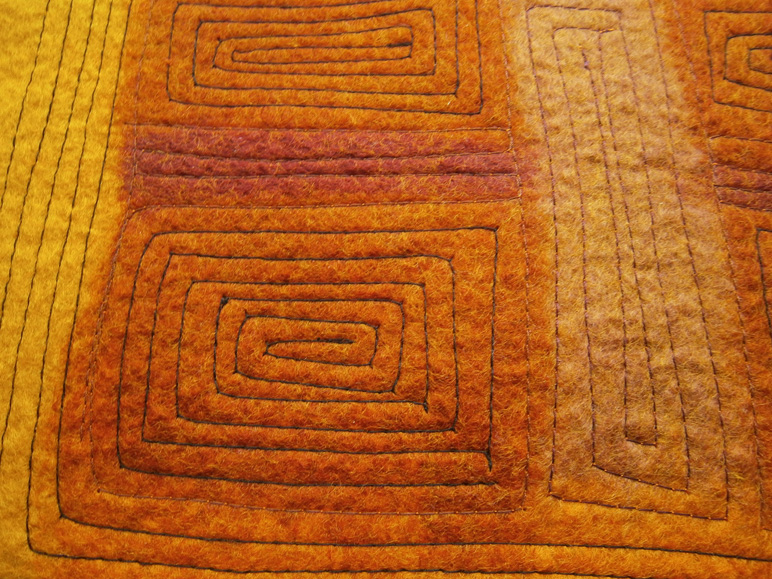
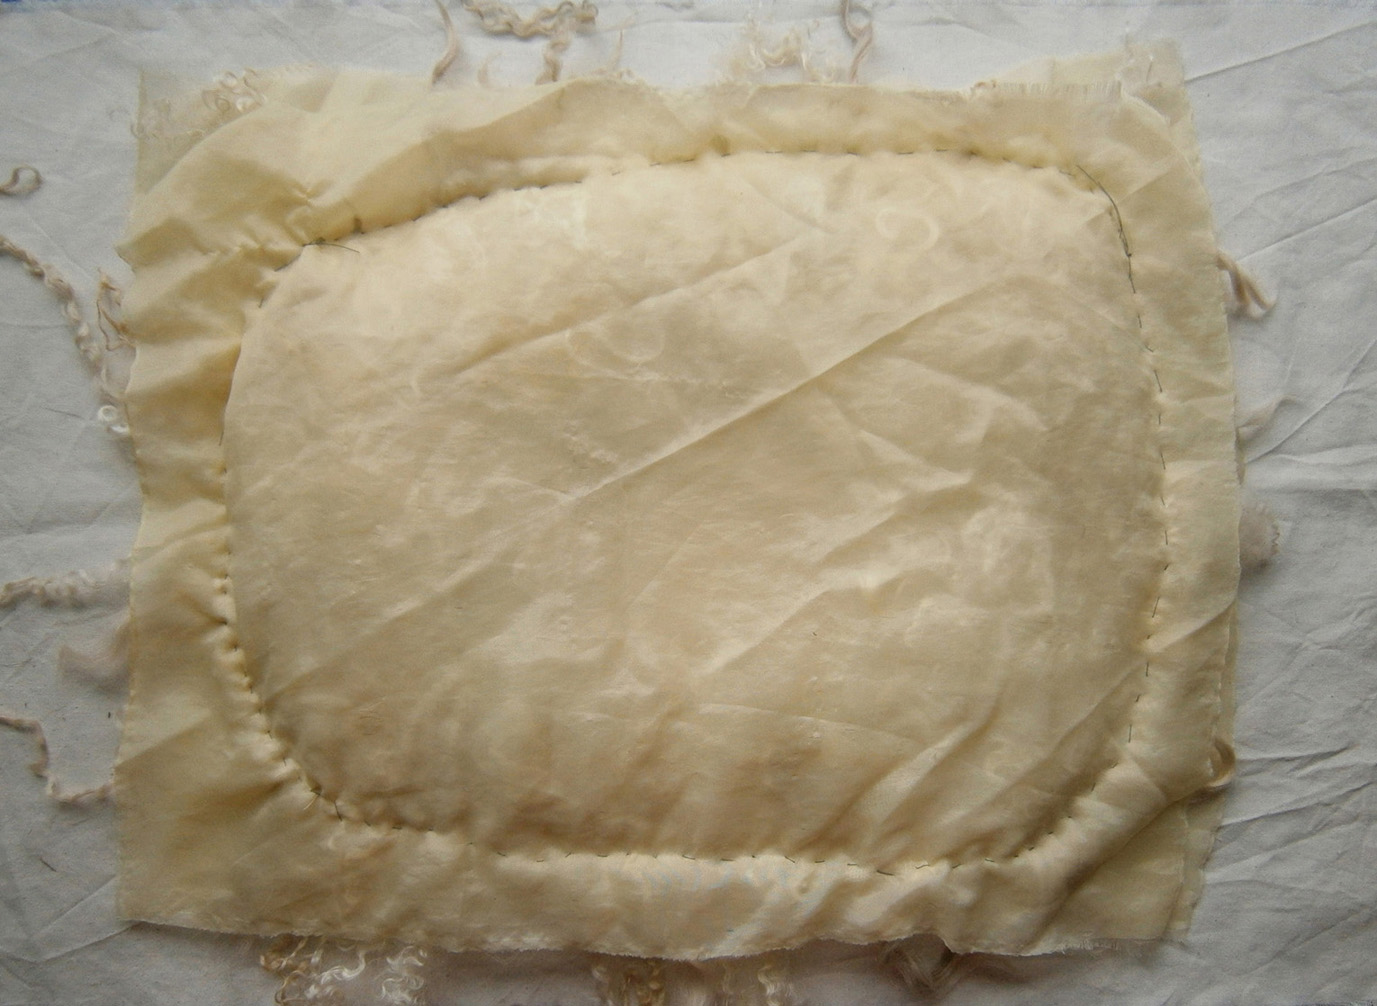
Here we are above drying out in the sun.  They felted better than expected, especially D.  Here is the final outcome below.

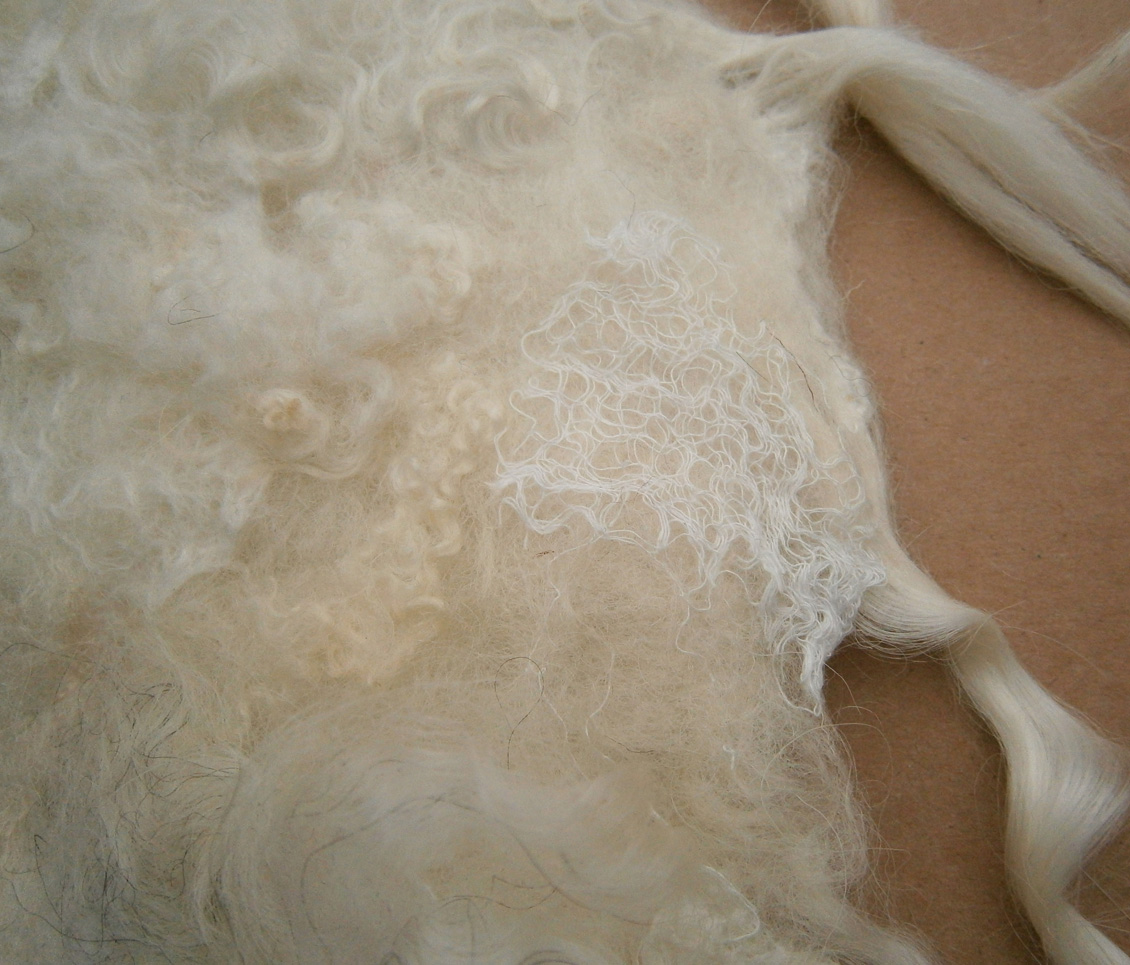
Sample A) From 9 squares to 6 squares square, took the longest to felt, hairy, and has some fine holes in it.

Sample B) From 9 squares to 6 squares square, was the quickest to felt.  Sturdiest and best felted of the three.

Sample D) From 9 squares to 7 x 6.5 squares.  I couldn’t get it down any more than that, but considering it was falling apart on its own, this is a good result.  Has some holes, but more like superfine cobweb.

This is the condensed version of 3 blog posts regarding this mystery fiber.  My conclusion is that I shall only keep sample C as it felted the best with the merino.  The other two will be used for spinning, once I learn how to do it!  So, if you get given some fiber that you are unfamiliar with, make a sample and see what happens!

Making Socks from Start to Finish

Making Socks from Start to Finish

Our guest artist is Leonor  from Felt Buddies who is sharing a special sock story and process.

Today I’m sharing with you some sock making, from the dye pot to the finished product.

A few months ago, I got a new tattoo from my husband’s co-worker Jim (if you’re guessing my other half tattoos for a living, you’re guessing right). In exchange for his work, Jim asked me to knit him a pair of socks – he’d seen me knit whilst in the studio and was fascinated by the concept of having a garment made especially for someone. I happily obliged!

Because I own my own fibre business, I have a lot of sock yarn available to dye at my pleasure. After talking to Jim about his colour preferences, I got to work. I loved that he asked me for three of my favourite things in socks:

  • Mismatched colours with contrasting heels and toes;
  • Bright colours (you can’t get brighter than magenta and purple!)
  • Socks that glow under UV light.

I had some yarn I was keeping for a special occasion and this was the perfect time to use it. It’s a very soft alpaca/merino/nylon blend.

For some reason, at the time I thought it was a good idea to break down the yarn into four pieces – two for the main body, two for the heels and toes. I’ve no idea why I did this, since I was only using two colours, but hey. I simply weighed the skein and took out 15 grams for each foot to make the smaller parts.

I then soaked the fibre in some water and synthrapol in preparation for dyeing. Synthrapol is a wetting agent and helps the wool absorb more dye. It’s also excellent to rinse out fibres.

After the yarn was thoroughly wet, I made my dye stock using professional-grade acid dyes and to the pots I went.

After adding the colour to the water, I placed one little skein and one big one in the pot and let the fibre sit for a few minutes without any heat. Because this yarn isn’t treated to be superwash (non-felting), the dye takes longer to penetrate the fibre, so I wanted to give it some time to get to every bit of wool.

I then turned the heat on and once the water started simmering, let it be for about 10 minutes, turned it off and let the wool cool completely in the pot. This allows for the remaining dye to be soaked up, and also makes for a brighter finished colour work.


In order to turn my skein of yarn into a ball, I used an umbrella swift (pictured above, on the left) to hold the fibre whilst I pulled it onto a skein winder (above right) to make a neat ball. I have all the cool gadgets!

Once the yarn was dyed, washed, rinsed and dry, it was time for knitting. I had made an impression of Jim’s foot beforehand and used it as my template to make sure they’d fit. If you’re curious, this is a technique taught in a pattern called Fish Lips Kiss Heel that makes for fail-safe sock fitting (and heel-making). It’s available on Ravelry at a very low price and I highly recommend it.

And here’s the finished socks! I still had to weave in the ends in this picture, but I’m happy to report that’s been done since and I have presented this squishy pair to a very enthusiastic Jim.

Now, for a fun little extra: I asked for a photo of him wearing the socks for my social media. Be careful what you wish for! Jim took the picture, alright – he got down to his underwear and struck a hilarious sexy pose for me. If a bit of skin doesn’t offend you and you like a good laugh, hop on to my Instagram @feltbuddies and look for yourself. There’s a black and white photo with a disclaimer about the partial nudity, and after you swipe there’s Jim happily wearing my socks… J


Thanks Leonor!  If you’d like to follow more of her fiber adventures,  you can see her work here:  https://www.feltbuddies.co.uk/


Creating Panels for a New Project

Creating Panels for a New Project

I had such a good time using my scraps and embellishments for my coupon case, I decided to do a larger project using panels.  And using up more of my scraps.

Here is the first large panel.  I started on white prefelt and added  bits of leftover batts creating a cloud effect for the background..

20161113_155937

Then I added silk selvage, pieces of cheesecloth, silk pieces,  scraps of scarves, metallic fabric, yarns and a little of this and that, topped with threads  and a bit of wool wisps to secure the threads.

20161114_140636

The next panel I forgot to take a pic of the cloud background.  But for this one I used silk selvedge, silk scraps, cheesecloth, boucle yarn bits, mohair, prefelt offcuts, and pieces of leftover roving amongst other things including threads.

20161114_140725

It was fun just picking out things from bags and literally throwing it on. The textures are great.

20161116_144454

Closeups:

20161116_144517 20161116_144529

I love the way the threads cross over and look like roadmaps.

Here is the first one finished with closeups.

20161116_144611 20161116_144649 20161116_144633

I was surprised the prefelt just grabbed everything.  I had to shave each panel to get some of the glittery stuff to shine again.

Three more panels to go, so stay tuned.

Have you done your 4th Quarter Challenge yet?


Natural Wools

Natural Wools

I think I might’ve mentioned a few times how much I love natural wool, animal fibres and embellishment fibres 🙂 I made a couple of natural felt pieces recently. This first one uses lots of different breeds of wool inlcuding Finnish wool, Gotland, Shetland, Merino, Chubut, Mongolian, Russian, French, Welsh, Irish wools and Portuguese Merino. Plus quite a variety of wool locks and embellishment fibres such as hemp, flax, ramie, bamboo, silk and cotton.

OLYMPUS DIGITAL CAMERAThis is a close up:

OLYMPUS DIGITAL CAMERAAnd this is even closer, the boucle yarn is mohair Marilyn sent me and she also sent me the thick and thin yarn. The gorgeous reddish brown wool was from wollknoll, listed as ‘Russian Camel‘. I think it’s camel coloured Romanov, nowhere near soft enough to be actual camel, and probably 8 times cheaper, thinking about it! The little nepps are cotton nepps.

OLYMPUS DIGITAL CAMERAI love the way the black Bamboo top has rippled on the Chubut here, near the top of the photo:

OLYMPUS DIGITAL CAMERAAnd this is a closer pic of the Bluefaced Leicester curls at the top of the Chubut in the previous photo:

OLYMPUS DIGITAL CAMERAFrom one extreme to the other, this next piece uses just Gotland, or Gotland cross wool. It’s about 1 foot by 2 feet (30cm x 60cm). For the bottom layer I used commercial Gotland tops, the second layer was commercially scoured Gotland fleece which I carded, and the top layer is all raw Gotland locks, most of which I got from Zara not so long ago, with the odd few from my old stash. I’m not going to cheat and enter this in the 4th quarter monochrome challenge 🙂

OLYMPUS DIGITAL CAMERAYou can never have enough different breeds of wool, I think, so when I saw some being offered in a UK spinners group on Facebook I just couldn’t resist. I told the seller, Wendy, that I loved locks and nice colours and let her choose what to send me, which is a good thing because I’d originally said I had enough alpaca. I didn’t have any like this though:

OLYMPUS DIGITAL CAMERAThey were all gorgeous, and I made an album on Flickr if you want to drool, this was another particularly nice one, Mule sheep:

OLYMPUS DIGITAL CAMERAI’m going to take some of the locks to the Well-being centre tomorrow, but I’m sure I’ll be using them myself soon, too 🙂

The Midwest Fiber and Folk Art Fair, August 1-3, 2014

The Midwest Fiber and Folk Art Fair, August 1-3, 2014

by Guest Artist/Author Cathy Wycliff (Luvswool)

We, Marilyn (Pandagirl) and I (Luvswool),  had never attended a “fiber fair,” so there were expectations and then the reality of the Fair.  We had planned for many months to attend the annual Fair and met there early Friday morning with great anticipation. The advance program showed photos of sheep, fiber, workshops, art exhibits, bags of fleece, etc., and the Fair delivered all of that except for the sheep. One of the organizers explained to me that August is too hot for sheep, and I guess that makes sense. So, the only live animals were a lonely llama and a couple of angora rabbits. Still, it was an enjoyable experience.

The Fair has been held for 8 years in Grayslake, IL, a far northwestern town in the extended Chicago metro area, and it’s a Fair that celebrates the work of many hands. We saw spinners, felters, and knitters demonstrating their crafts, and there were many workshops offered during the 3-day fair. There were a couple of folk singers and a few food vendors outdoors, but everything else was contained in an air-conditioned building. The majority of the indoor vendors were geared towards knitters, with many beautiful displays of hand-dyed, hand-spun yarns and goods. Neither Marilyn nor I are knitters, so we headed first for a walk around to scope out the lot.

IMG_5785

First stop was the Art Exhibit, which displayed fine fiber art–among them, my own display of five fiber wall-hangings. There were other fiber wall hangings, sculptures and “vintage” handbags (crafted from vintage patterns but otherwise entirely new).

IMG_5781
Cathy Wycliff’s Exhibit

(Cathy had a very prominent display!  It was the first thing to see on our way in.  Very exciting! — Marilyn)

Next up were the vendors, which included some crazy rag rugs, lots of beautiful yarn and bags of alpaca fleece. There were also felted hats  and you’ll notice I didn’t snap pics of the roving, since I was busy buying it. Marilyn and I purchased some fibers we have not previously felted with–including Navajo churro, 100% Organic Polwarth, white Falkland and I bought some black Blue Faced Leicester with silk. Since there was so much yarn, I did pick up some white wool boucle for embellishment, as well as silk hankies, which I have never used.

IMG_5786 IMG_5787IMG_5789

As we neared the end, we were able to view the judging of alpaca and llama fleece. Two judges followed a quality control checklist and had to concur on all points.

IMG_5788

Then it was goodbye to Princess Athena, the lonely llama,  and our day at the Fair came to an end. We would love to attend another fair, but next time would like to see sheep–sheep-shearing, sheep-judging, sheep fleeces, border collies herding sheep, etc.  Maybe there’s a trip to New Zealand in our future!

IMG_5790
Bye! Thanks for stopping by.
An Old Piece and a New Piece

An Old Piece and a New Piece

I only realised yesterday when I started to plan my blog post, that all my photos are still on my old hard drive. I was looking for another felt scrap piece that I recently started on when I came across a piece I made quite a while ago which I never posted about. If any of it looks familiar, it’s because I used it for the banners for the studio site and the forum 🙂
I wanted to make a piece with colours and textures inspired by the natural colours of the landscapes between Manchester and West Yorkshire. I used lots of different coloured natural wools and wool tops: Merino, Bluefaced Leicester, Manx Loaghtan, Zwartble, Black Welsh Mountain, Jacob, Gotland. I also used raw gotland locks and Lincoln locks.
OLYMPUS DIGITAL CAMERAI mostly used mid to dark shades of wool and animal fibre, there’s some sandy coloured Alpaca in here too.

OLYMPUS DIGITAL CAMERAFor texture I used some wool nepps.

OLYMPUS DIGITAL CAMERAAnd also some silk noil, I added a lot of this so it would look like a solid band.

OLYMPUS DIGITAL CAMERATo create a kind of mossy/spongey moorland type grass look, I blended some plastic fibre with some natural shades and  green shades of merino.

OLYMPUS DIGITAL CAMERAI was really pleased with the way it turned out, especially the shape, I wanted an organic shape because I thought this suited it better.
I did find the scrap piece that I was working on, I think this will be the outside of a notebook cover.

OLYMPUS DIGITAL CAMERA

Finished Texture Piece

Finished Texture Piece

I mentioned in my last post that I’d finished my white texture piece that I’ve talked about recentlyHere is the photo from the last post of it all sewn up.  I finally managed to get a bright enough day to take a photograph.  With all of the locks it’s really quite big, so I had to take it outside and photograph it on a large piece of cardboard.  It’s roughly 16 inches x 11 inches, but the locks at the bottom are almost 11 inches long.

OLYMPUS DIGITAL CAMERAI wanted to try something different, so when I laid it out I left a space in the centre without any wool then added a piece of cotton gauze after the second layer of wool.  It was here that I added the wool locks around the edges as well.  I then added another two layers of wool. The surface texture around the edge of the gauze is soybean top, a piece of cotton gauze and silk noil.

OLYMPUS DIGITAL CAMERAIn this close-up, you can see a few wisps of wool have crept behind the gauze.

OLYMPUS DIGITAL CAMERAThe wool locks all kept their shape really well and none of them tangled together.  The Angora, Wensleydale and Teeswater locks in this next photo show how nicely they turned out.

OLYMPUS DIGITAL CAMERAI kept the whole texture piece soft and spongey by using wools like English 56s, Swaledale, Texel and Cheviot.  For surface texture I used cotton gauze, scoured Bluefaced Leicester and Wensleydale as seen in this photo.

OLYMPUS DIGITAL CAMERAI also used Mohair, wool nepps, raw Gotland, Teeswater and Wensleydale locks, and embellishment fibres soybean top and silk noil.

OLYMPUS DIGITAL CAMERAI’m really pleased with the way it turned out, especially the gauze panel in the centre.  Doing this piece has given me some good ideas for future projects.

January Projects

January Projects

I’ve been trying to find ways of having a few projects on the go so I can work on them for a few minutes at a time where possible. A few months ago, I posted about a couple of felt pieces I’d made with the intention of practising stitches for the Take A Stitch Tuesday challenge. I didn’t keep up with the challenge, so had the pieces spare. I decided to add some stitching to the first piece. This is how it looked originally. I started by machine stitching around the patches of colour.

OLYMPUS DIGITAL CAMERAThis is a close up:

OLYMPUS DIGITAL CAMERAOver the next couple of days, I added some hand stitched straight stitches, first in in yellow and then added some in orange.

OLYMPUS DIGITAL CAMERAAnother project I got started on this week is a white texture felt piece. Liz from That Fuzzy Feeling blog, recently made a gorgeous piece of texture felt and it inspired me to make one. I decided to make a natural white one, so I got to play with (and smell!) my collection of wool, alpaca and mohair locks. They are mostly unwashed so my hands felt really nice afterwards.

OLYMPUS DIGITAL CAMERAThe first day I managed to get as far as laying it out and sewing up around the edges.

OLYMPUS DIGITAL CAMERAHere are some of the gorgeous locks I positioned around the edges:

OLYMPUS DIGITAL CAMERASo far, I’ve managed to add the stitches from the top to the bottom.

OLYMPUS DIGITAL CAMERAThanks to Ruth for encouraging us to find ways to fit in a few minutes of fibre time each day, I’ve managed to get a lot more done this week than I otherwise would have. It might not be much each day, but before long, it all adds up to finished projects I wouldn’t have had without the challenge 🙂

Hairy Alpaca Bag

Hairy Alpaca Bag

I thought I’d use my weird Hairy Alpaca bag for practising stitching. I’ve used some of the stitches from the first few weeks of TAST. First, I used Photoshop to work out the pattern I wanted to follow on the flap. I used a 6 point star and copied and pasted it, overlaying it to get the shapes I wanted. I scanned the bag so I could get the sizing right, then I printed the pattern out. I thought it’d be really fiddly, but I just held the pattern in place as I stitched around for the outline. I then filled in the shapes with very close blanket/buttonhole stitch and straight stitches for the tiny blocks.

For the front part, I used rows of chain stitch to make a border, then filled that it with herringbone stitch. Just for something extra, I added little straight stitches where the herringbones crossed.

It’s not very easy to sew on, it really does feel like hair! And the bag is so small, it’s easier to keep one hand inside and sew two handed 🙂 I’m not sure what I’ll add next, I might see what other stitches come up on TAST before deciding.

Hairy Alpaca and a Merino Vessel

Hairy Alpaca and a Merino Vessel

I love alpaca, so a few years ago when my mum was buying me fibres for Christmas, I asked for Alpaca tops. I’d only used raw alpaca before and hoped the tops would be more convenient. They couldn’t have been further from raw alpaca if they’d tried. I’m sure all alpaca tops aren’t like this, but it seems I got some made from guard hair or something! They were thick and wiry and kind of stiff. I hoped they’d be different after felting, so I made a sample square. It was the weirdest felt I’d ever made, hairy and although felted, didn’t really feel felted, and strangely, still quite soft. So, I put those bags at the bottom of a sack and forgot about them.

I recently did a ‘stock check’ to see what I needed to order more of and rediscovered the alpaca tops. I left them out hoping I’d get time to try them again. Last week I did. I decided to make a small bag with a flap. I thought that if it turned out strange I could always use it for sewing on. It turned out exactly as I’d remembered! Hairy, stiff, not feeling like it was felted, but oddly soft. I used a rusty colour for the inside layers and aptly, a grassy green colour for the top ones. I’ve already started to add the stitches, so I’ll post about that soon 🙂

I had more success with my merino vessel. I thought I’d try making a vessel starting with a flat resist. I thought it’d be less fiddly and messy than felting over a ball, but I didn’t think so. I think if I do it again I’ll use something a bit thicker than bubblewrap for the resist. It came out alright though, but it’s a bit thin because I only used a couple of layers of merino.

I’d be interested to know if anyone else has had similar problems with commercial alpaca tops or if you’ve actually had some nice ones.

%d bloggers like this: